Sign In
Upload
Manuals
Brands
Canon Manuals
Printer
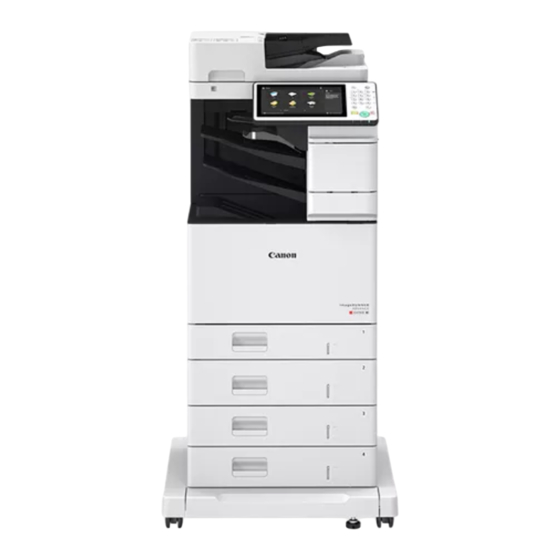
iR-ADV C475III Series
Canon iR-ADV C475III Series Manuals
Manuals and User Guides for Canon iR-ADV C475III Series. We have
1
Canon iR-ADV C475III Series manual available for free PDF download: Service Manual
Canon iR-ADV C475III Series Service Manual (768 pages)
Brand:
Canon
| Category:
Printer
| Size: 45 MB
Table of Contents
Important Notices
2
Table of Contents
4
Safety Precautions
12
Laser
13
Laser Safety
13
How to Handle the Laser Scanner Unit
13
Power Supply / Lithium Battery
13
Turn Power Switch on
13
Safety Precautions
14
Power Supply
14
Notes When Handling a Lithium Battery
14
Toner Safety
15
About Toner
15
Handling Adhered Toner
15
Notes on Works
15
Points to Note before Servicing
15
Points to Note at Cleaning
15
Notes on Assembly/Disassembly
15
Product Overview
17
Product Lineup
18
Host Machine
18
Model Type
18
Pickup/Delivery / Image Reading System Options
19
Function Expansion System Options
20
Product Features
21
Specifications
22
Host Machine
22
Product Overview
23
Fax Specifications
24
Weight and Size
24
Productivity
24
Paper Type
28
Pickup Specifications
28
Delivery Specifications
32
Parts Name
34
Cross Section View
34
Control Panel
37
Technology
38
Functional Configuration
39
Original Exposure System
40
Features
40
Specifications
40
Basic Configuration
42
List of Sensors
45
Dust Detection Control
45
Image Processing
46
Outline of Electric Circuits
49
ADF Scan Operation Sequence (Common to 2-Sided/1-Sided)
50
Scanner Unit
52
Pickup Feed System
53
Controller System
58
Overview
58
Startup Sequence
60
Shutdown Sequence
60
Motion Sensor
61
Laser Exposure System
62
Overview
62
Specifications
62
Scanner Motor Control
62
APC (Auto Power Control)
63
BD Detection Correction Control
64
Image Formation System
65
Overview
65
Cartridge
72
Transfer
78
Image Stabilization Control
81
Fixing System
83
Overview
83
Main Parts in the Fixing Assembly
83
Fixing Temperature Control
84
Fixing Temperature Control
85
Fixing Pressure/Disengagement Control
88
Pre-Fixing Arch Level Control
88
Protection Function
90
Pickup Feed System
92
Overview
92
Specification
93
Parts Configuration
93
Cassette Pickup Assembly
100
Multi-Purpose Tray Pickup Assembly
103
Registration Area
104
Process Tray Assembly (Built-In Finisher Machine Only)
105
Stack Tray Assembly (Model with Built-In Finisher Only)
108
Delivery Assembly
110
Reverse/Duplex Assembly
110
Jam Detection
110
External Auxiliary System
113
Software Counter
113
Fan
115
Power Supply
117
Power-Saving Function
117
Quick Startup
119
Periodical Service
121
Periodical Service
122
Periodically Replacement Parts
122
Consumable Parts
122
Parts Replacement and Cleaning
123
List of Parts
124
External / Internal Cover
124
Parts Replacement and Cleaning
126
Main Unit
130
Electrical Components List
134
External Cover System
144
Removing the Finisher Rear Cover
144
Removing the Staple Cover
145
Removing the Staple Inner Cover
145
Removing the Finisher Right Upper Cover
146
Removing the Finisher Right Rear Cover
146
Removing the Finisher Right Lower Cover
147
Removing the Finisher Right Door
147
Removing the Finisher Left Rear Cover
149
Removing the Jogger Cover
150
Removing the Finisher Inner Rear Cover
150
Removing the Finisher Delivery Tray
151
Removing the Cassette1
152
Removing the Front Cover
152
Removing the Left Door
153
Removing the Left Rear Cover
154
Removing the Left Lower Cover
155
Removing the Rear Cover
155
Removing the Right Rear Cover
158
Removing the Right Lower Cover
158
Removing the Right Door Unit
159
Removing the Control Panel Upper Cover
161
Removing the Front Upper Cover
161
Removing the Right Upper Cover
162
Removing the Inner Delivery Rear Cover
162
Removing the Front Cover Left
163
Removing the Inner Delivery Right Upper Cover
163
Removing the Waste Toner Container
165
Removing the Delivery Tray
165
Original Exposure/Feed System
169
Removing the ADF Unit
169
Removing the ADF Pickup Unit
175
Removing the ADF Separation Unit
176
Removing the Scanner Unit (Back)
177
Removing the Copyboard Glass Unit
184
Removing the Scanner Unit (Front)
185
Removing the Reader Motor
189
Removing the ADF Feed Frame
190
Removing the CIS Holder
209
Removing the ADF Unit/The Reader Unit
219
Controller System
222
Removing the Finisher Controller
222
Removing the Main Controller Sub Cover /Main Controller Cover
222
Removing the HDD
223
Removing the Fax Unit
224
Removing the Fax Speaker Unit
225
Removing the Main Controller Unit
225
Removing the DC Controller PCB
228
Removing the High-Voltage Power Supply1
229
Removing the Low-Voltage Power Supply PCB
230
Removing the Power Supply Cooling Fan
234
Removing the High-Voltage Power Supply2
235
Removing the Main Drive Unit
236
Removing the Control Panel Unit
239
Removing the Control Panel CPU PCB Unit/Lcd Unit
242
Removing the Environment Sensor
247
Removing the Rear Fan
248
Removing the Front Fan
249
Removing the Cartridege Fan
251
Removing the Left Upper Front Fan / Left Upper Rear Fan
252
Laser Exposure System
254
Removing the Laser Scanner Unit
254
Image Formation System
256
Removing the Secondary Transfer Outer Roller Guide Unit
256
Removing the Secondary Transfer Outer Roller Unit
257
Removing the ITB Unit
258
Removing the Developer Alienation Motor
259
Removing the Yellow Drum,Yellow Developer and Magenta Developer Motor
260
Removing the Magenta Drum,Cyan Drum and Cyan Developer Motor
261
Removing the Black Drum, Black Developer and ITB Motor
262
Removing the Registration Unit
264
Removing the Registration Patch Sensor Unit
266
Fixing System
268
Removing the Fixing Assembly
268
Removing the Fixing Drive Unit
268
Removing the Fixing Motor
275
Pickup/Feed System
277
Removing the Finisher Unit
277
Removing the Finisher Stapler Unit
281
Removing the Finisher Jogger Unit
282
Removing the Finisher Tray Unit
283
Removing the Finisher Upper Feed Unit
283
Removing the Finisher Lower Feed Unit
284
Removing the Finisher Lower Solenoid Unit
286
Removing the Finisher Fan
288
Removing the Finisher Motor
290
Removing the Delivery Unit
290
Removing the Lifter Drive Unit
293
Removing the Pick up Motor
294
Removing the Pickup Assembly
295
Removing the Cassette Pickup Roller
297
Removing the Cassette Separation Roller
299
Removing the Multi-Purpose Tray Pickup Roller
299
Removing the Multi-Purpose Tray Separation Roller
300
Adjustment
302
Pickup Feed System
303
Image Position Adjustment
303
Software Adjustment
303
Feed Direction
304
Original Exposure System
305
Right Angle Adjustment
305
Actions at Parts Replacement
306
Main Controller PCB
306
DC Controller PCB
306
Secondary Transfer Outer Roller Unit
307
ITB Unit
307
Waste Toner Container
307
Fixing Assembly
308
Hdd
308
Actions before Parts Replacement
310
Copyboard Glass
310
Scanner Unit (Paper Front)
311
Scanner Unit (Paper Back)
311
ADF Pickup Unit
312
ADF Separation Roller
312
Control Panel CPU PCB/LCD Unit
313
Cassette Feed Roller (Host Machine)
313
Cassette Feed Roller (Option)
314
Cassette Separation Roller (Host Machine)
314
Cassette Separation Roller (Option)
314
Multi-Purpose Tray Separation Roller
314
Multi-Purpose Tray Feed Roller
314
Troubleshooting
315
List of Initial Check Items
316
Test Print
317
Overview
317
Steps to Select a Test Print Type
317
How to Use the Test Print
318
Mcybk Horizontal Stripes (TYPE = 10)
320
Gradations (TYPE = 12)
320
Troubleshooting Items
321
Remedies to be Performed When E602-XXXX or E614-XXXX Error Is Displayed
321
Error/Jam/Alarm
325
Overview
326
Location Code
326
Pickup Position Code
326
Pickup Size
326
Points to Note When Clearing MN-CON
328
Points to Note When Clearing HDD
328
Error Code
329
Error Code Details
329
Error Code (FAX)
397
How to View Fax Error Codes
397
User Error Codes
397
Service Error Code
397
Jam Code
400
Jam Type
400
Jam Screen Display Specification
401
Host Machine
401
Adf_Reader
402
OP Cassette
404
Finisher
406
Alarm Code
408
Alarm Code Details
408
Service Mode
421
Overview
422
Basic Operations
422
Switching the Screen Display (Level 1 2)
423
SITUATION Mode
425
How to Use Parts Check
427
Security Support
430
Procedure for Enabling this Function
433
Procedure for Disabling this Function
433
Service Mode Backup
434
Output of Service Print Data
434
COPIER (Service Mode for Printer)
439
DISPLAY (State Display Mode)
439
I/O (I/O Display Mode)
455
ADJUST (Adjustment Mode)
455
FUNCTION (Operation / Inspection Mode)
514
OPTION (Specification Setting Mode)
534
TEST (Print Test Mode)
630
COUNTER (Counter Mode)
636
FEEDER (ADF Service Mode)
655
ADJUST (Adjustment Mode)
655
FUNCTION (Operation / Inspection Mode)
656
OPTION (Specification Setting Mode)
658
SORTER (Service Mode for Delivery Options)
659
ADJUST (Adjustment Mode)
659
FUNCTION (Operation / Inspection Mode)
659
OPTION (Specification Setting Mode)
659
MISC (Individual Setting Mode)
659
BOARD (Option Board Setting Mode)
660
OPTION (Specification Setting Mode)
660
FAX (FAX Service Mode)
661
Overview
661
Setting of Bit Switch (SSSW)
664
Setting of Menu Switch (MENU)
675
Setting of Numeric Parameter (NUMERIC Param.)
676
Setting of Destination (TYPE)
678
Setting of Printer Functions (PRINTER)
679
IPFAX Setting
681
Initialization of Set Value (CLEAR)
682
Test Mode (TEST)
682
Service Report (REPORT)
686
How to Utilize this Installation Procedure
691
Host Mashine Installation
692
Operation When Using Uniflow Online
692
Installation Outline Drawing
693
Installation Procedure
693
Points to Note at Installation
699
Checking the Contents
699
Essential Items to be Performed before Installation
699
Points to Note When Installing
713
Checking the Contents
713
Essential Items to be Performed before Installation
713
Installation Procedure
713
Installation Outline Drawing
713
Installing the NFC Kit
716
Installing the Control Panel
718
Setting after Installation
721
Points to Note at Installation
723
Removing the Covers
724
Checking after Installation
734
Copy Control Interface Kit-A1
735
Installing the Covers
739
Installing the Equipment
747
Procedure after Work
750
Checking the Operation
752
Basic Setting
752
FAX Communication Test
752
Service Tools
754
List of Special Tools
754
Solvents and Oils
754
Software Counter Specifications
761
Work Procedure
766
Advertisement
Advertisement
Related Products
Canon imageRUNNER ADVANCE DX C477iFZ
Canon imageRUNNER ADVANCE DX C478iFZ
Canon MultiPASS C545
Canon Laser Class 810
Canon Selphy CP520
Canon imageRUNNER ADVANCE C9000 Series
Canon C1533P
Canon ImageRUNNER C1538iF
Canon ImageRUNNER C1533iF
Canon MultiPASS C2500
Canon Categories
Printer
Digital Camera
All in One Printer
Camcorder
Scanner
More Canon Manuals
Login
Sign In
OR
Sign in with Facebook
Sign in with Google
Upload manual
Upload from disk
Upload from URL