Sign In
Upload
Manuals
Brands
Buchi Manuals
Laboratory Equipment
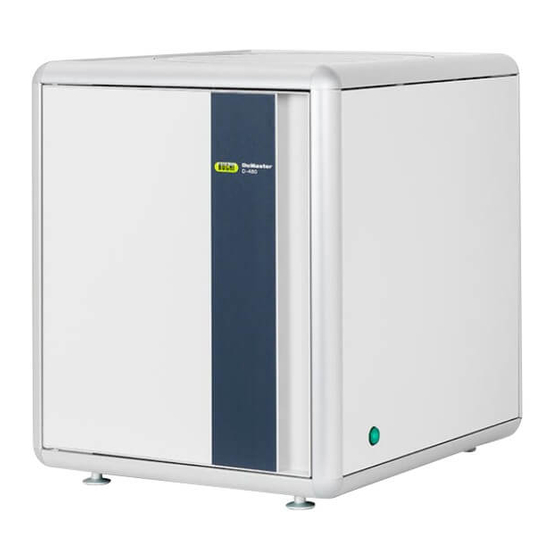
DuMaster D-480
Buchi DuMaster D-480 Manuals
Manuals and User Guides for Buchi DuMaster D-480. We have
1
Buchi DuMaster D-480 manual available for free PDF download: Operation Manual
Buchi DuMaster D-480 Operation Manual (354 pages)
Brand:
Buchi
| Category:
Laboratory Equipment
| Size: 4 MB
Table of Contents
Table of Contents
5
CHAPTER 1 General
13
In this Chapter
13
About this Document
14
Display Conventions
15
General Information on the Operating Instructions
15
CHAPTER 2 Basic Security Settings
17
Working with the Operating Instructions
18
Representation of Safety Instructions
18
Instructions for Disposal of Consumables
18
Intended Use of the Instrument
19
Warning: Residual Risks
19
Safety Devices in the Analyzer
20
Warning Signs on the Analyzer
22
Warning: Changes to the Instrument
23
Warning: Unsuitable Spare Parts and Consumables
23
Required User Knowledge and Skills
23
Required Personal Safety Equipment
24
Warning Notes During Operation
24
CHAPTER 3 Product Description
31
Analytical Characteristics and Technical Specifications
32
Analytical Characteristics
33
Technical Specifications
33
Instrument Design
35
Front View
36
Rear View
37
Right Side View
37
Left Side View
38
Top View
39
Peripherals and Their Function
40
CHAPTER 4 Understanding the Instrument and Planning Its Use
41
Layout and Mode of Functioning
42
Functional Units
43
The Thermal Conductivity Detector (TCD)
45
Processes in the Instrument During a Measurement
46
Sample Insertion and Initiation of Measurement
47
Substance Digestion and Preparation of the Reaction Gas Mixture
47
Detection of Measuring Components and Evaluation of the Measuring Signal
48
Formulas for Determining Element Concentration of Analysis Samples (Solids)
48
Basic Facts about Working with the Instrument
49
Instrument Equipment
50
Background Knowledge Required for Calibration
51
Calibration Curve Calculation Method Criteria
52
Calibration Formulae
54
Routine Measuring Work
55
Formulae for Blank Value Determination and Compensation
56
Formula for Determining the Daily Factor
57
Understanding the Operating Software
58
Basic Functions of the Operating Software
59
Software User Interface
60
Sample View
61
Combi View
63
Status View
66
Right Mouse Button Function
67
Data Administration and Data Security
69
Laboratory Information and Management System (LIMS)
70
Conditions for Operating the LIMS
70
21 CFR Part 11 Functionality
71
Versioning
72
Linking the Analyzer and Software
72
CHAPTER 5 Work Performed by the System Administrator
73
Installing and Updating the Software
74
Configure Analyzer
75
What Can You Modify in the Configuration
76
Defining Logon Timeout
76
Creating New Sections
77
Defining LIMS Export Settings
78
LIMS Export Settings
79
Setting up User Administration
80
User Administration
81
Recommendations for User Administration
81
Granting Authorizations
81
Defining Interfaces
83
Defining the Analyzer / PC Interface
84
Defining the LIMS / PC Interface
84
Defining the Balance / PC Interface
85
Editing Analysis Data
86
When Does It Make Sense to Edit Analysis Data
87
Limits for Modifying Analysis Data
87
Consequences of Modifying Analysis Data
87
Performing Checks
88
Checking Documents for Authenticity
89
Signing Documents
89
Viewing the Logbook
90
Working with the Database
91
Database
92
Administrative Work on the Database
92
Defining the Autoexport Directory
93
Database Backup
93
Starting the Database Backup
94
Reorganize Database
94
Reloading an Old Database File
95
Ways of Optimizing the Use of the Analyzer
96
Optimizing Basic Instrument Settings
97
Optimizing Sample Data Editing
97
Balance" Weighing Data Input Program
98
Optimizing Data Evaluation
99
Performing Other Administrator Tasks
100
Modifying the Registration
101
Printer Setup
101
CHAPTER 6 Starting up and Shutting down the Instrument
103
Setting up and Starting up the Instrument
104
Rules for First-Time Start-Up
105
Instructions for Operating the Furnace
105
Installation Site Requirements
105
Gases and Chemicals to be Provided
106
Start-Up
107
Connecting Peripherals
108
Connecting Supply Lines and Waste Gas Lines
109
Removing the Transport Protection
110
Switching on
112
Default Instrument Settings
112
Heating up the Furnace
113
Shutting down the Instrument
114
Shutting the Instrument down for Short Measuring Breaks (Standby)
115
Shutting the Instrument down for Long Measuring Breaks (Switching Off)
115
CHAPTER 7 Using the Instrument
117
Measurement Settings
118
Defining Keywords for Blank and Conditioning Samples
119
Viewing List of Defined Factor, Monitor and Standard Samples
119
Defining Custom Standard Substances
119
Defining Standard Substances as Factor and Monitor Samples
120
Defining Standard Substances as Calibration Samples
120
Specifying the Computation Method for Blank Value and Daily Factor
121
Enabling/Disabling Acoustic Signals
121
Configuring Error Handling
122
Preparing Samples
123
Sample Preparation Instructions
124
Determining Sample Weight
124
Showing or Hiding the Weight Window
125
Packing Samples
125
Preparing Measurement Work
127
Software Usage Rules
128
Starting the Operating Software
128
Showing or Hiding the Toolbar
128
Waking up the Instrument
128
Viewing Method Settings
129
Defining Custom Methods
129
Defining the Kjeldahl Factor
130
Copy Methods
130
Settings for Sample Input
131
Importing Weighing Data
131
Prioritizing Urgent Samples
132
Optimizing Sleep and Wake-Up Behavior
132
Performing Measurement Work
134
Values for Oxygen Dosing
135
Performing Measurements
136
Performing Routine Measuring Work
138
Checklist for Blank Value / Conditioning and Daily Factor Measurements
139
Checklist for Real Sample Measurement
140
Types of Blank Value Determination and Their Settings
141
Determining Blank Values
141
Determining the Daily Factor
142
Stopping Continuous Analysis
144
Preparing Measuring Data for Evaluation
146
Configuring the Sample View
147
Determine Measuring Units and Number of Decimal Places
147
Saving the Sample View
148
Loading a Sample View
148
Configure Statistics View
148
Generating Statistical Data
148
Formulae for Generating Statistical Data
149
Manual Peak Integration
150
Configuring the Graph View
154
Setting the Size of the Graph
154
Configure Report
155
Display Print Preview
155
Data Backup and Printing
156
Overview of Export and Import File Formats
157
Exporting Analysis Data to MS Excel and Viewing
157
Exporting LIMS Data
158
Working with Documents
159
Creating New Documents
160
Editing Documents
160
Deleting Documents
161
Finding Documents
161
Copying Documents Via the Clipboard
162
Importing Documents
163
Signing Documents
163
Checking Documents for Authenticity
164
CHAPTER 8 Maintaining the Instrument
165
Important Information about Maintenance
166
Maintenance Work to be Performed by the Customer
167
Viewing the Status of Maintenance Intervals
168
Defining Maintenance Intervals in the Software
168
Installing Used Tubes
169
Preparing and Following up Maintenance Work
169
Conditioning Newly Installed Tubes
170
Performing the Calibration
173
Viewing List of Defined Factor, Monitor and Standard Samples
174
Defining Standard Substances
174
Viewing Calibration Coefficients
175
Optimizing Instrument Condition for Calibration
175
Performing the Calibration
175
Assessing the Calibration Curves
179
Calibration Tables
182
Calibration Table for Nitrogen Calibration
183
Replacing the Ash Crucible
184
Purpose and Frequency of Crucible Replacement
185
Removing the Ash Crucible
185
Installing the Ash Crucible
188
Refill the Regainer
190
Purpose and Frequency of Refilling of the Regainer
191
Refill the Regainer
191
Replacing Sealing Elements
194
When to Replace Sealing Elements
195
Removing Sealing Elements from Grooves
196
Ball Valve Maintenance
197
Removing and Dismantling the Ball Valve
198
Cleaning, Assembling and Installing the Ball Valve
202
Maintaining the ni Flap and the O2 Lance
206
Purpose and Frequency of Maintaining the ni Flap and O2 Lance
207
Removing and Cleaning the ni Flap
207
Installing the ni Flap
209
Removing, Cleaning and Re-Installing the O2 Lance
211
Removing, Cleaning and Installing the Quartz Glass Bridge
213
Removing the Quartz Glass Bridge
214
Cleaning and Installing the Quartz Glass Bridge
214
Removing, Cleaning and Installing the Carousel
217
Removing, Cleaning and Installing the Carousel
218
Emptying and Filling Reaction Tubes
220
Emptying Reaction Tubes
221
Filling the Combustion Tube
221
Filling the Post Combustion Tube
223
Reductor Replacing
224
Removing/Installing and Conditioning the Reaction Tubes
225
Removing the Reaction Tubes from the Furnace
226
Installing Reaction Tubes in the Furnace and Conditioning
228
Filling, Removing and Installing the Absorption and Drying Tubes
232
Filling the Drying Tubes
233
Removing and Installing the Drying Tubes
235
CHAPTER 9 Repairing the Instrument
237
Interpreting PC Error Messages
238
Performing a System Test
239
Performing a Leak Test
240
Leak Test Procedure
241
Replacing Fuses
241
What to Do after a Computer Crash
245
Reacting to a Power Failure
245
Stopping Continuous Analysis
248
Re-Weighing after Sample Loss
248
Changing the Position of the Carousel
249
Export Analysis Data for Support
249
CHAPTER 10 Menu and Dialog Descriptions
251
Dialog Descriptions Key
252
File Menu
253
File > New (Command)
254
Select Document Name (Dialog)
254
Select Version (Dialog)
256
Save File as (Dialog)
257
File > Delete (Command)
258
Comment Modification (Dialog)
258
Sign (Dialog)
259
Verify Digital Signature (Dialog)
259
Export to LIMS (Dialog)
260
Export Peak Graphics (Dialog)
261
Configure Report (Dialog)
261
Print (Dialog)
263
Print Preview (Dialog)
264
Printer Setup (Dialog)
265
Open (Dialog)
266
Load Balance File (Dialog)
267
Configure Backup (Dialog)
267
Clean Database (Dialog)
269
Restore Database (Dialog)
269
Log in as (Dialog)
270
File > Logoff (Command)
271
File > Exit (Command)
271
File > Export/Import > Create Excel Sheet (Command)
271
Edit Menu
272
Edit > Undo (Command)
273
Edit > Redo (Command)
273
Edit > Cut (Command)
273
Edit > Copy (Command)
273
Edit > Paste (Command)
274
Edit > Insert Line (Command)
274
Edit > Delete Line (Command)
274
Swap Samples (Dialog)
275
Edit > Modify (Command)
275
Set Stop Tag (Dialog)
276
Select Current Sample (Dialog)
276
Set Current Weighed Sample (Dialog)
277
View Menu
278
View > Toggle (Command)
279
Zoom In/Out (Dialog)
279
Configure Sample View (Dialog)
279
Save Sample Pane (Dialog)
280
Load Sample Pane (Dialog)
281
Delete Sample Pane (Dialog)
281
View > Gridview > Auto Align (Command)
282
Configure Graph View (Dialog)
282
View > Graphic > Auto Align (Command)
283
Configure Statistics View (Dialog)
283
View > Statistic > Auto Align (Command)
284
Select Columns (Dialog)
284
Column Properties (Dialog)
284
Weighing Window (Dialog)
285
System Menu
287
System > Auto Run (Command)
288
System > Single Run (Command)
288
System > Stop (Command)
288
System > Auto Zero (Command)
289
Furnace Switch Off/On (Dialog)
289
Initialize the Instrument (Dialog)
289
System > Wake up (Command)
290
Feeding (Dialog)
290
Adjust Carousel Position (Dialog)
290
Math Menu
292
Math > Blank Values > Calculate (Command)
293
Blank Values (Dialog)
293
Math. > Factor (Command)
294
Define Type of Peak (Dialog)
294
Define Peak Start / End (Dialog)
294
Area Assignment (Dialog)
295
Standard Samples Display (Dialog)
296
Math. > Recalculate (Command)
297
Statistics Menu
298
Statistics > Via Names (Command)
299
Statistics > Group (Command)
299
Statistics > Sort Group (Command)
299
Statistics > Delete Group (Command)
299
Statistics > Clear Statistic (Command)
299
Statistics > Include/Exclude Sample (Command)
300
Statistics > Include/Exclude Value (Command)
300
Statistics > Create Excel Sheet (Command)
300
Calibration Menu
301
Calibration Coefficients (Dialog)
302
Configure Calibration (Dialog)
303
Specify Lower and Upper Calibration Range (Dialog)
304
Calibration > Next Sample (Command)
305
Calibration > Previous Sample (Command)
305
Calibration > Next (Command)
305
Calibration > Previous (Command)
305
Options Menu
306
Maintenance Intervals (Dialog)
307
Replace Part (Dialog)
308
Adjust Carousel (Dialog)
309
Leak Test (Dialog)
310
Leak Test: Test Phases (Dialog)
311
System Test (Dialog)
312
Error Buffer (Dialog)
314
Error Display (Dialog)
314
Options > Diagnostics > Baseline Recording (Command)
315
Input Options (Dialog)
315
Standard Samples (Dialog)
316
Keywords (Dialog)
317
Acoustic Signals (Dialog)
318
Configure Calculations (Dialog)
318
LIMS Settings (Dialog)
319
Method (Dialog)
322
Monthly Logbook (Dialog)
323
Select Period (Dialog)
324
Device Configuration (Dialog)
325
Error Handling (Dialog)
328
Sleep / Wake-Up Function (Dialog)
329
Configure Key Value (Dialog)
330
Windows Menu
332
Windows > Toolbar / Run-Bar (Command)
333
Toolbar
333
Windows > Recent Sample (Command)
334
Windows > Status View (Command)
334
Windows > Default Layout (Command)
334
Help Menu
335
Help > Content (Command)
336
Help > Find (Command)
336
Help > BÜCHI Labortechnik AG on the WEB (Command)
336
Product Registration (Dialog)
336
Help > about
337
CHAPTER 11 Appendix
339
Revision History
340
Warranty
341
Warranty of the Overall Instrument
342
Warranty on the Furnace
342
Accessories, Spare Parts and Consumables
343
Smallest Workable Unit
344
Required Accessories
345
Optional Accessories
346
Declaration of Conformity
347
Declaration of Conformity
348
Index
349
Advertisement
Advertisement
Related Products
Buchi 051999
Buchi 535
Buchi B-811
Buchi B-820
Buchi B-821
Buchi BasicKjel
Buchi C-660
Buchi EasyKjel
Buchi Categories
Laboratory Equipment
Dryer
Chiller
Water Pump
Industrial Equipment
More Buchi Manuals
Login
Sign In
OR
Sign in with Facebook
Sign in with Google
Upload manual
Upload from disk
Upload from URL