Sign In
Upload
Manuals
Brands
bioMerieux Manuals
Laboratory Equipment
TEMPO
bioMerieux TEMPO Automated Thermal Cycler Manuals
Manuals and User Guides for bioMerieux TEMPO Automated Thermal Cycler. We have
1
bioMerieux TEMPO Automated Thermal Cycler manual available for free PDF download: User Manual
bioMerieux TEMPO User Manual (258 pages)
Reading Station
Brand:
bioMerieux
| Category:
Laboratory Equipment
| Size: 9 MB
Table of Contents
Table of Contents
19
System
27
1 How to Use this Manual Finding Topics and Procedures
32
Typographic Conventions
33
Graphic Symbols
34
Warnings
37
Description
39
2 Description Functional Description / Aim
40
Functional Description / Aim
40
Composition of the TEMPO ® Reading Station
41
Figure 2-1: Composition of the Reading Station
41
Equipment
42
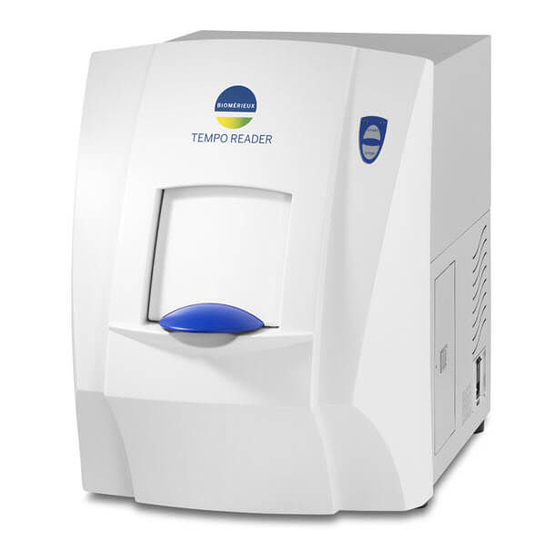
TEMPO ® Reader
42
Hardware Instruments
44
Accessories
45
Figure 2-4: Incubation/Reading Rack
45
Incubation/Reading Rack
45
Extension Potential
46
General Characteristics
47
Characteristics and Technical Specifications
47
Environmental Considerations
47
Power Requirements
47
Equipment
48
Hardware Instruments
48
TEMPO ® Reader
48
Accessories
49
Consumables
49
Incubation/Reading Rack
49
Installation Altitude
50
Performance
50
Performance and Limitations of Use
50
Operating Principles
51
3 Getting Started Storage Conditions
54
Precautions for Handling, Installation and Use
54
Unpacking
54
Assembly and Installation
54
Software Installation Procedure
55
Preparing for Installation
55
4 Starting and Shutting down the Configuration
57
Table of Contents
59
5 Using the TEMPO
60
Opening a Work Session on the Reading Station Computer
60
Figure 5-1: Login Window on the Reading Station Computer
61
Getting Started
63
Printing
63
Result Validation Modes
63
Filter Data on Date and Time
64
Filtering Data
64
Description of the Welcome Screen on the Reading Station
65
Figure 5-2: TEMPO ® Reading Station Welcome Screen
65
Alarm Field
66
Status of the Connection with the Laboratory Information System
66
Status of Cards During Incubation
67
Status of the TEMPO Reader and the Last Rack Read
67
Navigation Area
68
Figure 5-4: TEMPO ® Read Status Bar
69
Status Bar
69
Work Field
69
Figure 5-5: Logout Window
70
Managing Incubations in Progress
71
Figure 5-6: Manage Cards Being Incubated Window
71
Figure 5-7: Setting Incubated Card Filter Configuration Options
72
Setting Configuration Options for the Filter on Incubated Cards
72
Figure 5-8: Details on Incubated Card Window
73
Viewing Incubated Card Details
73
Searching for a Card
74
Figure 5-9: Example of a Printout for the List of Cards Being Incubated
75
Printing the List of Cards Being Incubated
75
Reading TEMPO ® Cards
76
Figure 5-10: Opening the TEMPO
77
Figure 5-11: Inserting the Rack in the TEMPO
78
Figure 5-12: Position of the Rack Inside the Reader
79
Figure 5-13: Closing the TEMPO ® Reader Door
80
Figure 5-14: Control Buttons and Lights on the TEMPO
80
Description of the TEMPO ® Reader Lights and Sound Signals
82
Managing Test Results
83
Figure 5-15: Test Results Management Window
83
Figure 5-16: Selecting the Filter for Displaying Samples, Tests and Cards
84
Setting Configuration Options for the Filter on Samples, Tests, and Cards
84
Figure 5-17: "Filter on Tests" Configuration Options Window
85
Filter on Tests
85
Figure 5-18: "Filter on Samples" Configuration Options Window
86
Filter on Samples
86
Figure 5-19: "Filter on Cards" Configuration Options Window
87
Filter on Cards
87
Figure 5-20: Select a Test
88
Figure 5-21: "Details about Test Results" Window
88
Figure 5-22: Adding Comments for a Test
89
Figure 5-23: Selecting a Test Result
90
Selecting a Test Result
90
Validating Test Results Manually
91
Deleting Tests
92
Figure 5-24: Selecting a Test to be Deleted
92
Figure 5-25: Test Deletion Confirmation Dialog Box
92
Figure 5-26: Example of a Test Results Report
93
Printing the List of Tests Displayed on the "Test Results Management" Screen
93
Managing Rack Readings and Viewing the Status of the TEMPO ® Reader
94
Viewing the Status of the TEMPO ® Reader
94
Figure 5-27: Managing Rack Readings and Viewing the Status of the TEMPO
95
Figure 5-28: Selecting a Rack
96
Figure 5-29: Selecting a Card
96
Figure 5-30: "Details on the Card Reading" Window
97
Figure 5-31: Selecting a Rack
98
Printing a Rack Reading Report (List of Cards)
98
Figure 5-32: Example of a Rack Reading Report
99
Figure 5-33: Rack Display Field
100
Preparing a Rack for Reading Using an Existing Rack
100
Validating Racks
100
Preparing a Rack for Reading
101
Figure 5-34: Preparing a Rack on the Screen Displaying the Last Racks that Were Read
101
Preparing a Rack for Reading Using an Existing Rack
101
Figure 5-35: Rack Reading Preparation Screen
102
Figure 5-36: Selecting or Deselecting Cards to Read on the Rack Reading Preparation Screen
102
Figure 5-37: Rack Reading Preparation Screen (Empty)
104
Preparing a Rack Using an Empty Rack
104
Figure 5-38: Selecting Slot Positions of Cards to be Read
105
Figure 5-39: Selecting the Slot Position for a Card
105
Figure 5-40: Inserting Cards in the Reading Rack
106
Figure 5-41: Example of a Rack Preparation Report (Information Entered During Preparation)
107
Printing a Rack Preparation Report (Information Entered at the Time of Preparation)
107
Validating Rack Preparation
108
Validation and Modification of a Prepared Rack
108
Modifying a Validated Rack
109
Reading a Prepared Rack
109
Table of Contents
111
6 Export, Backup, Archiving and Audit Trail Browsing Presentation
112
Presentation
112
Figure 6-1: Principle of Export, Backup and Archiving of the TEMPO
113
Exporting Test Data
114
Figure 6-2: Export Results Dialog Box
114
Figure 6-3: Selecting the Export Format
115
Backup
116
Automatic Backup
116
Figure 6-4: Automatic Backup Parameter Settings Window
117
Manual Backup
120
Archiving
121
Archiving Database Backups
121
Archiving Audit Trail Files
122
Copying
123
Copying Database Backups
123
Copying Audit Trail Files
124
Deleting
125
Deleting Database Backups
125
Deleting Audit Trail Files
126
Browsing Audit Trail Files Using the "Audit Browser" Application
127
Description of Displayed Data
128
Figure 6-5: Main "Audit Browser" Application Screen
128
Opening the "Audit Browser" Application
128
Figure 6-6: Example of the Main "Audit Browser" Application Screen with Displayed Operations
129
Figure 6-7: Audit Trail File Selection Window
130
Figure 6-8: Main "Audit Browser" Screen with Displayed Operations
133
Operation Types and Attributes
136
Figure 6-9: Edit Filter Window
151
Filtering Displayed Data
151
Edit Filter: Dates
152
Edit Filter: Types
155
Edit Filter: Users
155
Edit Filter: Ids
156
Exporting Displayed Data
157
Printing Displayed Data
158
Figure 6-11: Internet Explorer: Window Displaying Data to be Printed
159
Shutting down the "Audit Browser" Application
160
Table of Contents
161
7 User Management User Groups
162
User Groups
162
User Rights
163
Figure 2-2: TEMPO ® Reader
164
Attaching Users to User Groups
165
Creating a New User Account
166
Assigning User Permissions and Rights
169
Assigning User Permissions and Rights
170
Disabling a User Account
174
Unlocking a User Account
175
Changing of a Password by a User
176
Table of Contents
177
8 Configuring the TEMPO ® Software Opening TEMPO ® Admin
178
Figure 8-1: TEMPO ® Admin Start Window
178
Figure 8-2: TEMPO ® Admin Login Window
179
Figure 8-3: TEMPO ® Admin Welcome Screen
180
TEMPO ® Admin Welcome Screen
180
Navigation Area
181
System and the Laboratory Information System
181
Connection between the TEMPO ® System and the Laboratory Information System
182
Figure 8-4: Screen for Viewing and Setting Configuration Options for the Connection between
182
Configuration of the Connection between the TEMPO
183
Figure 8-5: Dialog Box for Configuring the Connection between the TEMPO System and the Laboratory Information System
183
System and the Laboratory Information System
183
Configuring the Preparation Station Software
184
Figure 8-6: Preparation Station Software Configuration Screen
184
Preparation Station Software
184
Figure 8-7: Preparation Station Software Configuration Dialog Box
185
Configuring the Reading Station Software
186
Figure 8-8: Reading Station Software Configuration Screen
186
Reading Station Software
186
Figure 8-9: Reading Station Software Configuration Dialog Box
187
Details on the TEMPO
188
Details on the TEMPO ® Reader
188
Figure 8-10: Screen for Displaying Details on the TEMPO
188
Reader
188
Displaying TEMPO
189
Reader Details
189
Figure 8-12: Screen for Displaying the Results of Import and Export Operations
190
Importing and Exporting Data
190
Figure 8-13: Import Data Dialog Box
191
Figure 8-14: Export Data Dialog Box
192
Table of Contents
193
9 Maintenance Safety Controls
194
Safety Controls
194
Systematic Preventive Maintenance
195
Cleaning and Decontamination
196
Monthly Maintenance
196
Check Software and the TEMPO
198
Checking the Measurement Performance of the TEMPO
198
QC Control Kits
198
Conditional Maintenance
199
Summary of Conditional Maintenance Operations
199
Unlocking the TEMPO ® Reader Door Manually
200
Replacing Fuses
201
Configuring the Reading Station Barcode Reader
203
Reader
206
Removing a Jammed Card from the TEMPO
206
Maintenance Log
207
Conditional Maintenance
207
Adjustment and Performance Verification
208
Maintenance Operations Performed by Biomérieux
209
Introduction
209
Summary of Maintenance Operations Performed by Biomérieux
209
Decontamination and Disinfection
210
Returning the Instrument to the Manufacturer
210
Sporadic
210
Removal and Disposal of Materials
210
Consumables
210
Contaminated Materials and Reagents
210
Spare Parts, Consumables, Tools and "Maintenance Products
211
" M a I N T E N a N C E P R O D U C T S
211
Consumables
211
Spare Parts
211
Tools and Laboratory Equipment
211
Table of Contents
213
10 TEMPO ® Check
214
Control Method for Checking the Measurement Performance of the TEMPO ® Reader
214
Opening the TEMPO ® Check Application
216
Figure 10-1: TEMPO ® Check Start Window
216
Description of the Main TEMPO ® Check Screen
218
Alarm Field and Navigation Area
219
Control of the Measurement Performance of the TEMPO ® Reader
220
Figure 10-4: Screen for Display and Management of the Results of the TEMPO Reader Measurement Performance Controls
220
Figure 10-5: Display of TEMPO ® QC Card Details
221
QC Card Details
221
Figure 10-6: Display of the Details of a TEMPO
222
Changing or Adding Comments
223
Figure 10-7: Change Comment Dialog Box
223
Printing a Control Report
223
Figure 10-8: Example of a Control Report
224
Exporting Control Data
225
Figure 10-9: Export Control Data Window
225
Figure 10-10: Validating a Control
226
Manual Entry of the Barcode of a TEMPO ® QC Card
227
Figure 10-11: Window for Manual Entry of Barcodes
227
11 Troubleshooting
230
List of Error Messages and Alarms
230
Instrument Errors
230
Software Messages
231
Failures
232
Equipment
232
Hardware Instruments
233
Advertisement
Advertisement
Related Products
bioMerieux TEMPO QC
bioMerieux Air IDEAL 3P
bioMerieux BACT/ALERT 3D 60
bioMerieux NucliSENS easyMAG
bioMerieux PREVI Color Gram
bioMerieux PREVI Isola
BioMerieux VITEK 2
bioMerieux VITEK 2 XL
bioMerieux Categories
Laboratory Equipment
Test Equipment
Medical Equipment
Accessories
Transmitter
More bioMerieux Manuals
Login
Sign In
OR
Sign in with Facebook
Sign in with Google
Upload manual
Upload from disk
Upload from URL