Sign In
Upload
Manuals
Brands
Allied Telesis Manuals
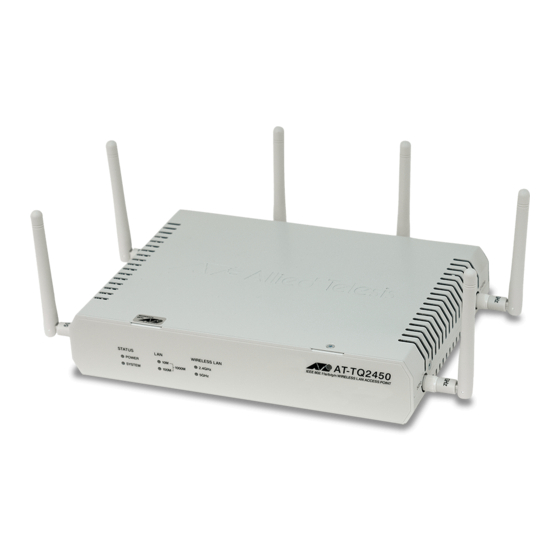
Wireless Access Point
AT-TQ Series
Allied Telesis AT-TQ Series Access Point Manuals
Manuals and User Guides for Allied Telesis AT-TQ Series Access Point. We have
2
Allied Telesis AT-TQ Series Access Point manuals available for free PDF download: User Manual
Allied Telesis AT-TQ Series User Manual (174 pages)
Enterprise-class Wireless Access Points with 2.4GHz and 5 GHz Dual-band Radios
Brand:
Allied Telesis
| Category:
Wireless Access Point
| Size: 6 MB
Table of Contents
Table of Contents
5
Preface
13
Safety Symbols Used in this Document
14
Contacting Allied Telesis
15
Chapter 1: Overview
17
AT-TQ Series of Wireless Access Points
18
Figure 1: AT-TQ2450, AT-TQ3600, and AT-TQ4600 Access Points
18
Features
19
Management Modes and Methods
21
Starting a Management Session on the Access Point
22
Figure 2: Log on Window
22
Starting the Initial Management Session on the Access Point
23
Starting the Initial Management Session with a Direct Connection
24
Starting the Initial Management Session Without a DHCP Server
24
Starting the Initial Management Session with a DHCP Server
25
Using the Management Menus and Windows
26
Web Browser Menus
26
Figure 3: Horizontal Menus
26
Figure 4: Vertical Menus
27
Figure 5: Dropdown Menus
27
Saving Your Changes
28
Logging off
28
Chapter 2: Basic Settings Menu
29
Displaying Basic Information
30
Figure 6: Provide Basic Settings Window
30
Table 1. Review Description of this Access Point
31
Changing the Manager's Login Name and Password
32
Changing the System Name, Contact, and Location
33
Chapter 3: Manage Menu
35
Assigning a Static IP Address to the Access Point
36
Figure 7: Modify Ethernet (Wired) Settings Window
36
Assigning a Dynamic IP Address from a DHCP Server to the Access Point
38
Setting VLAN Ids
39
Management VLAN ID
39
VLAN ID for Untagged Traffic
39
Enabling or Disabling Broadcast Ping Replies
40
Setting the Country Setting
41
Figure 8: Modify Wireless Settings Window
41
Configuring Basic Radio Settings
43
Table 2. Modify Wireless Settings Window
44
Configuring the Radio Settings
47
Figure 9: Modify Radio Settings Window
48
Table 3. Modify Radio Settings Window
49
Configuring Virtual Access Points
59
Figure 10: Modify Virtual Access Point Settings Window
61
Figure 11: 802.1X Authentication for Vaps
62
IEEE 802.1X Security
62
No Security
62
Table 4. IEEE 802.1X
62
Figure 12: Static WEP Encryption for Vaps
64
Static WEP
64
Table 5. Static WEP
64
Figure 13: WPA Enterprise for Vaps
67
WPA Enterprise
67
Table 6. WPA Enterprise
68
Figure 14: WPA Personal for Vaps
70
Table 7. WPA Personal
70
WPA Personal
70
Managing Wireless Distribution System Bridges
72
Configurations of WDS Bridges
72
Figure 15: WDS Bridge Used to Connect LAN Segments
72
Figure 16: WDS Bridge Used to Extend a Network
72
Figure 17: Valid Configurations of WDS Bridges
73
Figure 18: Invalid Loop Configuration of Access Points
73
Radio
74
Radio Mode
74
Radio Channel
74
Vap0
74
Figure 19: Invalid Loop Configuration of Access Points to a Wired Network Device
74
Figure 20: Invalid Configuration of Four Wireless Access Points
74
Encryption
75
Dynamic Frequency Selection
75
Table 8. Available Encryption Settings on WDS Bridges
75
Guidelines
76
Preparing the Access Point for the WDS Bridge
77
Configuring the WDS Bridge
78
Figure 21: Configure WDS Bridges to Other Access Points Window
78
Figure 22: Remote Address List
79
Static WEP
80
Figure 23: Static WEP on WDS Bridges
80
Table 9. Static WEP on WDS Links
80
WPA Personal
82
Figure 24: WPA Personal on WDS Bridges
82
Table 10. WPA Personal on WDS Links
82
Configuring the MAC Address Filter
83
Figure 25: Configure MAC Filtering of Client Stations Window
84
Generating Event Messages for Unknown Access Points
86
Enabling Event Messages for Unknown Access Points
86
Figure 26: Event Message for Unknown Access Points
86
Figure 27: Configure Pre-Configured Rogue AP Window
87
Disabling Event Messages for Unknown Access Points
88
Configuring the Access Point for the Optional AT-UWC Program
89
Enabling the Controller Client
89
Figure 28: Configure Managed Access Point Parameters Window
89
Disabling the Controller Client
92
Chapter 4: Cluster Menu
93
Overview
94
Table 11. Shared and Non-Shared Parameters on the Access Points in a Cluster
94
Planning a Cluster
101
Creating or Adding Access Points to a Cluster
102
Figure 29: Manage Access Points in the Cluster Window
102
Figure 30: Active Cluster in the Manage Access Points in the Cluster Window
104
Managing the Access Points of a Cluster
105
Removing an Access Point from a Cluster
106
Viewing the Wireless Clients of a Cluster
107
Figure 31: Manage Sessions Associated with the Cluster Window
107
Table 12. Manage Sessions Associated with the Cluster Window
107
Using Automatic Channel Assignments
109
Enabling Automatic Channel Assignments
109
Figure 32: Automatically Manage Channel Assignments Window
109
Figure 33: Automatically Manage Channel Assignments Window - Automatic Channel Assignment Enabled
110
Table 13. Current Channel Assignments
110
Table 14. Channel Reassignment Parameters
111
Disabling Automatic Channel Assignments
112
Viewing the Neighboring Access Points of the Cluster
113
Figure 34: View Neighboring Access Points Window
113
Figure 35: Neighbor Details
114
Table 15. View Neighboring Access Points Window
114
Table 16. Neighbor Details Window
115
Chapter 5: Status Menu
117
Viewing the Associated Clients of an Access Point
118
Figure 36: View List of Currently Associated Client Stations
118
Table 17. View List of Currently Associated Client Stations Window
118
Viewing Event Messages
120
Viewing System Event Messages
121
Figure 37: View Events Generated by this Access Point Window
122
Table 18. Event Messages Table
122
Configuring the Event Log
123
Configuring the Syslog Client
124
Disabling the Syslog Client
125
Viewing Neighboring Access Points
126
Figure 38: View Neighboring Access Points Window
126
Table 19. Neighboring Access Point Settings Window
126
Displaying the IP Addresses of AT-UWC Programs
129
Figure 39: Displaying View List of Managing Switch IP Addresses and Base IP Port Obtained Via DHCP
129
Displaying Statistics
130
Figure 40: Status Table in the View Transmit and Receive Statistics for this Access Point Window
130
Table 20. Status Table Information
131
Figure 41: Transmit Statistics Table of the View Transmit and Receive Statistics for this Access Point Window
132
Table 21. Transmit Statistics Table
132
Figure 42: Receive Statistics Table of the View Transmit and Receive Statistics for this Access Point Window
133
Table 22. Receive Statistics Table
133
Viewing Basic IP and Radio Information
134
Figure 43: View Settings for Network Interfaces Window
134
Chapter 6: Services Menu
135
Configuring Quality of Service
136
Figure 44: Modify Qos Queue Parameters
137
Table 23. Modify Qos Queue Parameters Window
138
Configuring Snmpv1 and V2C
143
Figure 45: SNMP Configuration Window
144
Table 24. SNMP
145
Enabling or Disabling the Leds
150
Figure 46: Control Leds Window
150
Configuring the HTTP Server
151
Enabling the HTTP Server
151
Figure 47: Configure Web Server Settings Window
151
Disabling the HTTP Server
152
Figure 48: Disable HTTP Server Prompt
152
Configuring the HTTPS Server
153
Enabling the HTTPS Server
153
Figure 49: Generate SSL Certificate Prompt
153
Disabling the HTTPS Server
154
Figure 50: Disable HTTPS Server Prompt
154
Configuring the Maximum Number of Active Management Sessions
155
Configuring the Management Session Timer
156
Configuring Link Layer Discovery Protocol
157
Figure 51: LLDP Configuration Window
157
Manually Setting the Date and Time
158
Figure 52: Modify How the Access Point Discovers the Time Window - Manually Setting the Date and Time
158
Figure 53: Daylight Savings Time Fields
159
Setting the Date and Time with the Network Time Protocol Client
160
Figure 54: Modify How the Access Point Discovers the Time Window - Configuring the NTP Client
160
Chapter 7: Maintenance Menu
163
Restoring the Default Settings to the Access Point
164
Figure 55: Manage this Access Point's Configuration Window
165
Downloading the Configuration from the Access Point to Your Computer
167
Restoring a Configuration to the Access Point
168
Rebooting the Access Point
169
Enabling or Disabling the Reset Button
170
Switching the Primary and Secondary Management Software Images
171
Figure 56: Manage Firmware Window
172
Uploading New Versions of the Management Software to the Access Point
173
Advertisement
Allied Telesis AT-TQ Series User Manual (168 pages)
AT-TQ Series Enterprise-class Wireless Access Points with IEEE802.11a/b/g/n Dual Radios
Brand:
Allied Telesis
| Category:
Wireless Access Point
| Size: 6 MB
Table of Contents
Table of Contents
5
Preface
11
Safety Symbols Used in this Document
12
Contacting Allied Telesis
13
Chapter 1: Overview
15
AT-TQ Series of Wireless Access Points
16
Figure 1: AT-TQ2450 and AT-TQ3600 Access Points
16
Features
17
Management Modes and Methods
19
Starting a Management Session on the Access Point
20
Figure 2: Log on Window
20
Starting the Initial Management Session on the Access Point
21
Starting the Initial Management Session with a Direct Connection
22
Starting the Initial Management Session Without a DHCP Server
22
Starting the Initial Management Session with a DHCP Server
23
Using the Management Menus and Windows
24
Web Browser Menus
24
Figure 3: Horizontal Menus
24
Figure 4: Vertical Menus
25
Figure 5: Dropdown Menus
25
Saving Your Changes
26
Logging off
26
Chapter 2: Basic Settings Menu
27
Displaying Basic Information
28
Figure 6: Provide Basic Settings Window
28
Table 1. Review Description of this Access Point
29
Changing the Manager's Login Name and Password
30
Changing the System Name, Contact, and Location
31
Chapter 3: Manage Menu
33
Assigning a Static IP Address to the Access Point
34
Figure 7: Modify Ethernet (Wired) Settings Window
34
Assigning a Dynamic IP Address from a DHCP Server to the Access Point
36
Setting VLAN Ids
37
Management VLAN ID
37
VLAN ID for Untagged Traffic
37
Enabling or Disabling Broadcast Ping Replies
38
Setting the Country Setting
39
Figure 8: Modify Wireless Settings Window
39
Configuring Basic Radio Settings
41
Table 2. Modify Wireless Settings Window
42
Configuring the Radio Settings
44
Figure 9: Modify Radio Settings Window
45
Table 3. Modify Radio Settings Window
46
Configuring Virtual Access Points
56
Figure 10: Modify Virtual Access Point Settings Window
58
Figure 11: 802.1X Authentication for Vaps
59
IEEE 802.1X Security
59
No Security
59
Table 4. IEEE 802.1X
59
Figure 12: Static WEP Encryption for Vaps
61
Static WEP
61
Table 5. Static WEP
61
Figure 13: WPA Enterprise for Vaps
64
WPA Enterprise
64
Table 6. WPA Enterprise
65
Figure 14: WPA Personal for Vaps
67
Table 7. WPA Personal
67
WPA Personal
67
Managing Wireless Distribution System Bridges
69
Configurations of WDS Bridges
69
Figure 15: WDS Bridge Used to Connect LAN Segments
69
Figure 16: WDS Bridge Used to Extend a Network
69
Figure 17: Valid Configurations of WDS Bridges
70
Figure 18: Invalid Loop Configuration of Access Points
70
Radio
71
Radio Mode
71
Radio Channel
71
Vap0
71
Figure 19: Invalid Loop Configuration of Access Points to a Wired Network Device
71
Figure 20: Invalid Configuration of Four Wireless Access Points
71
Encryption
72
Guidelines
72
Table 8. Available Encryption Settings on WDS Bridges
72
Preparing the Access Point for the WDS Bridge
73
Configuring the WDS Bridge
74
Figure 21: Configure WDS Bridges to Other Access Points Window
74
Figure 22: Remote Address List
75
Static WEP
76
Figure 23: Static WEP on WDS Bridges
76
Table 9. Static WEP on WDS Links
76
WPA Personal
77
Figure 24: WPA Personal on WDS Bridges
77
Table 10. WPA Personal on WDS Links
78
Configuring the MAC Address Filter
79
Figure 25: Configure MAC Filtering of Client Stations Window
80
Generating Event Messages for Unknown Access Points
82
Enabling Event Messages for Unknown Access Points
82
Figure 26: Event Message for Unknown Access Points
82
Figure 27: Configure Pre-Configured Rogue AP Window
83
Disabling Event Messages for Unknown Access Points
84
Configuring the Access Point for the Optional AT-UWC Program
85
Enabling the Controller Client
85
Figure 28: Configure Managed Access Point Parameters Window
85
Disabling the Controller Client
88
Chapter 4: Cluster Menu
89
Overview
90
Table 11. Shared and Non-Shared Parameters on the Access Points in a Cluster
90
Planning a Cluster
97
Creating or Adding Access Points to a Cluster
98
Figure 29: Manage Access Points in the Cluster Window
98
Figure 30: Active Cluster in the Manage Access Points in the Cluster Window
100
Managing the Access Points of a Cluster
101
Removing an Access Point from a Cluster
102
Viewing the Wireless Clients of a Cluster
103
Figure 31: Manage Sessions Associated with the Cluster Window
103
Table 12. Manage Sessions Associated with the Cluster Window
103
Using Automatic Channel Assignments
105
Enabling Automatic Channel Assignments
105
Figure 32: Automatically Manage Channel Assignments Window
105
Figure 33. Automatically Manage Channel Assignments Window - Automatic Channel Assignment Enabled
106
Table 13. Current Channel Assignments
106
Table 14. Channel Reassignment Parameters
107
Disabling Automatic Channel Assignments
108
Viewing the Neighboring Access Points of the Cluster
109
Figure 34: View Neighboring Access Points Window
109
Figure 35: Neighbor Details
110
Table 15. View Neighboring Access Points Window
110
Table 16. Neighbor Details Window
111
Chapter 5: Status Menu
113
Viewing the Associated Clients of an Access Point
114
Figure 36: View List of Currently Associated Client Stations
114
Table 17. View List of Currently Associated Client Stations Window
114
Viewing Event Messages
116
Viewing System Event Messages
117
Figure 37: View Events Generated by this Access Point Window
118
Table 18. Event Messages Table
118
Configuring the Event Log
119
Configuring the Syslog Client
120
Disabling the Syslog Client
121
Viewing Neighboring Access Points
122
Figure 38: View Neighboring Access Points Window
122
Table 19. Neighboring Access Point Settings Window
122
Displaying the IP Addresses of AT-UWC Programs
125
Figure 39: Displaying View List of Managing Switch IP Addresses and Base IP Port Obtained Via DHCP
125
Displaying Statistics
126
Figure 40: Status Table in the View Transmit and Receive Statistics for this Access Point Window
126
Figure 41: Transmit Statistics Table of the View Transmit and Receive Statistics for this Access Point
127
Window
127
Table 20. Status Table Information
127
Figure 42: Receive Statistics Table of the View Transmit and Receive Statistics for this Access Point
128
Table 21. Transmit Statistics Table
128
Window
128
Table 22. Receive Statistics Table
129
Viewing Basic IP and Radio Information
130
Figure 43: View Settings for Network Interfaces Window
130
Chapter 6: Services Menu
131
Configuring Quality of Service
132
Figure 44: Modify Qos Queue Parameters
133
Table 23. Modify Qos Queue Parameters Window
133
Configuring Snmpv1 and V2C
139
Figure 45: SNMP Configuration Window
140
Table 24. SNMP
141
Enabling or Disabling the Leds
146
Figure 46: Control Leds Window
146
Configuring the HTTP Server
147
Enabling the HTTP Server
147
Figure 47: Configure Web Server Settings Window
147
Disabling the HTTP Server
148
Figure 48: Disable HTTP Server Prompt
148
Configuring the HTTPS Server
149
Enabling the HTTPS Server
149
Figure 49: Generate SSL Certificate Prompt
149
Disabling the HTTPS Server
150
Figure 50: Disable HTTPS Server Prompt
150
Configuring the Maximum Number of Active Management Sessions
151
Configuring the Management Session Timer
152
Manually Setting the Date and Time
153
Figure 51. Modify How the Access Point Discovers the Time Window - Manually Setting the Date and Time
153
Figure 52: Daylight Savings Time Fields
154
Setting the Date and Time with the Network Time Protocol Client
155
Figure 53: Modify How the Access Point Discovers the Time Window - Configuring the NTP Client
155
Chapter 7: Maintenance Menu
157
Restoring the Default Settings to the Access Point
158
Figure 54: Manage this Access Point's Configuration Window
159
Downloading the Configuration from the Access Point to Your Computer
160
Restoring a Configuration to the Access Point
161
Rebooting the Access Point
162
Enabling or Disabling the Reset Button
163
Switching the Primary and Secondary Management Software Images
164
Figure 55: Manage Firmware Window
164
Uploading New Versions of the Management Software to the Access Point
166
Advertisement
Related Products
Allied Telesis AT-TQ2403
Allied Telesis AT-TQ4600
Allied Telesis AT-TQ5403e
Allied Telesis AT+TQm5403
Allied Telesis AT-TQ1402 Series
Allied Telesis AT-TQm1402
Allied Telesis AT-TQ6602
Allied Telesis AT-TQ5403e-00
Allied Telesis AT-TQ6702 GEN2
Allied Telesis AT-TQ6702 GEN2-R
Allied Telesis Categories
Switch
Network Router
Media Converter
Network Hardware
Wireless Access Point
More Allied Telesis Manuals
Login
Sign In
OR
Sign in with Facebook
Sign in with Google
Upload manual
Upload from disk
Upload from URL