Sign In
Upload
Manuals
Brands
Allied Telesis Manuals
Software
AT-9400
Allied Telesis AT-9400 Manuals
Manuals and User Guides for Allied Telesis AT-9400. We have
1
Allied Telesis AT-9400 manual available for free PDF download: User Manual
Allied Telesis AT-9400 User Manual (668 pages)
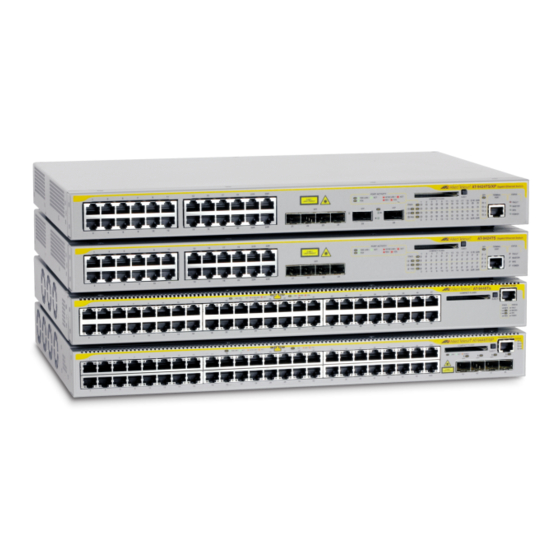
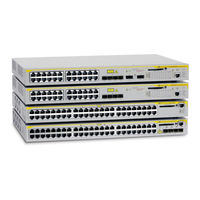
Menus User’s Guide For Stand-alone AT-9400 Switches Version 2.2.0 for AT-9400 Layer 2+ Switches Version 3.2.0 for AT-9400 Basic Layer 3 Switches
Brand:
Allied Telesis
| Category:
Software
| Size: 3 MB
Table of Contents
Table of Contents
3
Preface
19
How this Guide Is Organized
20
Product Documentation
22
Where to Go First
23
Starting a Management Session
24
Document Conventions
25
Where to Find Web-Based Guides
26
Contacting Allied Telesis
27
Online Support
27
Email and Telephone Support
27
Returning Products
27
Sales and Corporate Information
27
Management Software Updates
27
Section I: Basic Operations
30
Chapter 1: Basic Switch Parameters
31
Configuring the Switch's Name, Location, and Contact
32
Figure 1: System Administration Menu
32
Figure 2: System Configuration Menu
33
Changing the Manager and Operator Passwords
35
Changing the Manager or Operator Password
35
Figure 3: Authentication Configuration Menu
35
Figure 4: Passwords Configuration Menu
36
Resetting the Manager Password
37
Setting the System Time
38
Setting the System Time Manually
39
Figure 5: Configure System Time Menu
39
Setting the System Time from an SNTP or NTP Server
40
Rebooting the Switch
43
Figure 6: System Utilities Menu
43
Configuring the Console Startup Mode
45
Figure 7: Console (Serial/Telnet) Configuration Menu
45
Configuring the Console Timer
46
Configuring the Telnet Server
47
Setting the Baud Rate of the Serial Terminal Port
48
Pinging a Remote System
49
Returning the AT-S63 Management Software to the Factory Default Values
50
Displaying Hardware and Software Information
52
Figure 8: System Information Menu
52
Displaying System Hardware Information
55
Figure 9: System Hardware Information Menu
55
Displaying Uplink Port Information
57
Figure 10: Uplink Information Menu
57
Chapter 2: Port Parameters
61
Displaying Port Status
62
Figure 13: Port Configuration Menu
62
Figure 14: Port Status Menu
62
Port Type
64
Configuring Port Parameters
65
Figure 15: Port Configuration (Port) Menu
65
Configuring Head of Line Blocking
69
Figure 16: Head of Line Blocking
69
Configuring Flow Control and Back Pressure
71
Figure 17: Flow Control Menu
72
Configuring Port Filtering
73
Figure 18: Filtering Menu
73
Setting up Rate Limiting
75
Figure 19: Rate Limiting Menu
75
Resetting a Port
77
Forcing Port Renegotiation
78
Resetting the Port Configuration to the Default Settings
79
Displaying Port Statistics
80
Figure 20: Port Statistics Menu
80
Figure 21: Display Port Statistics Menu
81
Clearing Port Statistics
83
Chapter 3: Enhanced Stacking
85
Setting a Switch's Enhanced Stacking Status
86
Figure 22: Enhanced Stacking Menu
86
Selecting a Switch in an Enhanced Stack
88
Figure 23: Stacking Services Menu
88
Figure 24: Stacking Services Menu with List of Switches
89
Returning to the Master Switch
91
Displaying the Enhanced Stacking Status
92
Figure 25: Enhanced Stacking Menu
92
Chapter 4: Snmpv1 and Snmpv2C
93
Enabling or Disabling SNMP Management
94
Figure 26: SNMP Configuration Menu
94
Setting the Authentication Failure Trap
95
Creating an SNMP Community String
96
Figure 27: Configure Snmpv1 & Snmpv2C Community Menu
96
Modifying a Community String
99
Figure 28: Modify SNMP Community Menu
99
Deleting a Community String
103
Displaying the SNMP Community Strings
104
Figure 29: Display SNMP Community Menu
104
Chapter 5: MAC Address Table
105
Displaying the MAC Address Tables
106
Figure 31: Display Unicast MAC Addresses Menu
106
Figure 30: MAC Address Tables Menu
106
Figure 32: Display All Menu - Unicast MAC Addresses
107
Figure 33: Display All Menu - Multicast MAC Addresses
108
Adding Static Unicast and Multicast MAC Addresses
110
Figure 34: MAC Addresses Configuration Menu
110
Deleting Unicast and Multicast MAC Addresses
112
Deleting All Dynamic MAC Addresses
113
Changing the Aging Time
114
Chapter 6: Static Port Trunks
115
Creating a Static Port Trunk
116
Figure 35: Port Trunking and LACP Menu
116
Figure 36: Static Port Trunking Menu
117
Figure 37: Create Trunk Menu
118
Modifying a Static Port Trunk
120
Figure 38: Modify Trunk Menu
121
Deleting a Static Port Trunk
123
Chapter 7: LACP Port Trunks
125
Enabling or Disabling LACP
126
Figure 39: LACP (IEEE 8023Ad) Configuration Menu
126
Setting the LACP System Priority
128
Creating an Aggregator
129
Figure 40: Create LACP (IEEE 8023Ad) Aggregator Menu
130
Modifying an Aggregator
132
Figure 41: Modify LACP (IEEE 8023Ad) Aggregator Menu
132
Deleting an Aggregator
134
Displaying LACP Port and Aggregator Status
135
Figure 42: LACP (IEEE 802.3Ad Port Status Menu
135
Figure 43: LACP (IEEE 802.3Ad) Aggregator Status Menu
136
Chapter 8: Port Mirroring
137
Creating a Port Mirror
138
Figure 44: Port Mirroring Menu #1
138
Figure 45: Port Mirroring Menu #2
138
Disabling a Port Mirror
140
Modifying a Port Mirror
141
Displaying the Port Mirror
142
Figure 46: Port Mirroring Menu
142
Section II: Advanced Operations
144
Chapter 9: File System
145
Working with Boot Configuration Files
146
Creating a Boot Configuration File
146
Figure 47: File Operations Menu
147
Setting the Active Boot Configuration File
149
Viewing a Boot Configuration File
151
Editing a Boot Configuration File
152
Figure 48: View File Menu with Sample Boot Configuration File
152
Copying a System File
154
Examples
155
Renaming a System File
156
Examples
157
Deleting a System File
158
Displaying System Files
159
Listing All Files
159
Figure 49: List Files Menu for Flash Memory and a Compact Flash Card
160
Listing Files on the Compact Flash Card
161
Figure 50: List Files Menu for a Compact Flash Card
161
Working with Flash Memory
162
Displaying Information about the Flash Memory
162
Figure 51: Display Flash Information Menu
162
Formatting the Flash Memory
163
Working with the Compact Flash Card
164
Displaying Compact Flash Card Information
164
Figure 52: Display Compact Flash Information Menu
164
Changing the Current Flash Card Directory
166
Figure 53: Set/Change Compact Flash Directory Menu
166
Chapter 10: File Downloads and Uploads
167
Section II: Advanced Operations
167
Downloading the AT-S63 Image File Onto a Switch
168
Guidelines
168
Downloading the AT-S63 Image from a Local Management Session
170
Figure 54: Downloads and Uploads Menu
170
Figure 55: Hyperterminal Window
172
Figure 56: Send File Window
172
Figure 57: Xmodem File Send Window
173
Downloading the AT-S63 Image from a Remote Management Session
174
Uploading the AT-S63 Image File Switch to Switch
176
Guidelines
176
Uploading an AT-S63 Configuration File Switch to Switch
179
Guidelines
179
Downloading a System File
182
Guidelines
182
Downloading a System File from a Local Management Session
184
Figure 58: Hyperterminal Window
186
Figure 59: Send File Window
186
Downloading a System File from a Remote Management Session
187
Figure 60: Xmodem File Send Window
187
Uploading a System File
190
Guidelines
190
Uploading a System File from a Local Management Session
191
Figure 61: Hyperterminal Window
193
Uploading a System File from a Remote Management Session
194
Figure 62: Receive File Window
194
Chapter 11: Event Logs and the Syslog Client
197
Section II: Advanced Operations
197
Working with the Event Logs
198
Enabling or Disabling the Event Logs
198
Figure 63: Event Log Menu
198
Displaying an Event Log
199
Table 1: AT-S63 Modules
201
Figure 64: Event Log Example in Normal Mode
203
Table 2: Event Severity Levels
203
Figure 65: Event Log Example in Full Mode
204
Modifying the Event Log Full Action
205
Clearing an Event Log
206
Saving an Event Log to a File
206
Figure 66: Sample Log File View
207
Configuring Log Outputs
209
Creating a Log Output Definition
210
Figure 67: Configure Log Outputs Menu
210
Figure 68: Syslog Output Configuration Menu
211
Table 3: Applicable RFC 3164 Numerical Code and AT-S63 Module Mappings
212
Table 4: Numerical Code and Facility Level Mappings
213
Modifying a Log Output
215
Figure 69: Configure Log Outputs Menu with a Syslog Output Definition
215
Deleting a Log Output
216
Displaying the Log Output Definition Details
217
Figure 70: Syslog Output Configuration Menu for Selected Output ID
217
Section II: Advanced Operations
219
Chapter 12: Classifiers
219
Creating a Classifier
220
Figure 71: Security and Services Menu
220
Figure 72: Classifier Configuration Menu
221
Figure 73: Create Classifier Menu
221
Figure 74: Create Classifier Menu
222
Modifying a Classifier
224
Deleting a Classifier
226
Deleting All Classifiers
227
Displaying Classifiers
228
Figure 75: Show Classifiers Menu
228
Figure 76: Display Classifier Details Menu
229
Figure 77: Display Classifier Details Menu
230
Chapter 13: Access Control Lists
231
Creating an ACL
232
Figure 78: Access Control Lists (ACL) Menu
232
Figure 79: Create ACL Menu
233
Modifying an ACL
235
Figure 80: Modify ACL Menu
235
Deleting an ACL
237
Figure 81: Destroy ACL Menu
237
Deleting All Acls
239
Displaying Acls
240
Figure 82: Show Acls Menu
240
Figure 83: Display ACL Details Menu
241
Chapter 14: Class of Service
243
Configuring Cos
244
Figure 84: Class of Service (Cos) Menu
244
Figure 85: Configure Port COS Priorities Menu
245
Mapping Cos Priorities to Egress Queues
247
Figure 86: Map Cos Priority to Egress Queue Menu
247
Configuring Egress Scheduling
248
Figure 87: Configure Egress Scheduling Menu
248
Displaying Port Cos Priorities
250
Figure 88: Show Port Cos Priorities Menu
250
Chapter 15: Quality of Service
251
Managing Flow Groups
252
Creating a Flow Group
252
Figure 89: Quality of Service (Qos) Menu
252
Figure 90: Flow Group Configuration Menu
253
Figure 91: Create Flow Group Menu
253
Modifying a Flow Group
255
Deleting a Flow Group
256
Figure 92: Modify Flow Group Menu
256
Displaying Flow Groups
257
Figure 93: Destroy Flow Group Menu
257
Figure 94: Show Flow Groups Menu
258
Figure 95: Display Flow Group Detail Menu
259
Managing Traffic Classes
261
Creating a Traffic Class
261
Figure 96: Traffic Class Configuration Menu
261
Figure 97: Create Traffic Class Menu
262
Modifying a Traffic Class
265
Figure 98: Modify Traffic Class Menu
266
Deleting a Traffic Class
267
Figure 99: Destroy Traffic Class Menu
267
Displaying Traffic Classes
268
Figure 100: Show Traffic Classes Menu
268
Figure 101: Display Traffic Class Details Menu
269
Managing Policies
271
Creating a Policy
271
Figure 102: Policy Configuration Menu
271
Figure 103: Create Policy Menu
272
Modifying a Policy
274
Figure 104: Modify Policy Menu
274
Deleting a Policy
275
Displaying Policies
276
Figure 105: Show Policies Menu
276
Figure 106: Display Policy Details Menu
277
Chapter 16: Denial of Service Defenses
279
Section II: Advanced Operations
279
Configuring Denial of Service Defense
280
Figure 107: Denial of Service (Dos) Menu
280
Figure 108: LAN IP Subnet Menu
280
Figure 109: SYN Flood Configuration Menu
282
Chapter 17: Power over Ethernet
283
Setting the Poe Threshold
284
Figure 110: Power over Ethernet Configuration Menu
284
Figure 111: Poe Global Configuration Menu
284
Configuring Poe Port Settings
286
Figure 112: Poe Port Configuration Menu
286
Displaying Poe Status and Settings
288
Figure 113: Poe Status Menu
288
Figure 114: Poe Global Status Menu
289
Figure 115: Poe Summary Ports Status Menu
290
Figure 116: Poe Summary Ports Status Menu
291
Figure 117: Poe Device Information
292
Section III: IGMP Snooping, MLD Snooping, and RRP Snooping
294
Chapter 18: IGMP Snooping
295
Configuring IGMP Snooping
296
Figure 118: Advanced Configuration Menu
296
Figure 119: IGMP Snooping Configuration Menu
297
Enabling or Disabling IGMP Snooping
300
Displaying a List of Host Nodes
301
Figure 120: View IGMP Multicast Hosts List Menu
301
Displaying a List of Multicast Routers
303
Figure 121: View IGMP Multicast Routers List Menu
303
Chapter 19: MLD Snooping
305
Configuring MLD Snooping
306
Figure 122: MLD Snooping Configuration Menu
306
Enabling or Disabling MLD Snooping
309
Displaying a List of Host Nodes
310
Figure 123: View MLD Multicast Hosts List Menu
310
Displaying a List of Multicast Routers
312
Figure 124: View MLD Multicast Routers List Menu
312
Chapter 20: RRP Snooping
315
Enabling or Disabling RRP Snooping
316
Figure 125: RRP Snooping Menu
316
Section IV: Snmpv3
317
Chapter 21: Snmpv3
319
Configuring Snmpv3 Entities
320
Configuring the Snmpv3 User Table
321
Creating an Snmpv3 User Table Entry
321
Figure 126: Configure Snmpv3 Table Menu
322
Figure 127: Configure Snmpv3 User Table Menu
322
Deleting an Snmpv3 User Table Entry
325
Modifying an Snmpv3 User Table Entry
326
Figure 128: Modify Snmpv3 User Table Menu
326
Configuring the Snmpv3 View Table
331
Creating an Snmpv3 View Table Entry
331
Figure 129: Configure Snmpv3 View Table Menu
332
Deleting an Snmpv3 View Table Entry
334
Modifying an Snmpv3 View Table Entry
335
Figure 130: Modify Snmpv3 View Table Menu
336
Configuring the Snmpv3 Access Table
340
Creating an Snmpv3 Access Table Entry
340
Figure 131: Configure Snmpv3 Access Table Menu
341
Deleting an Snmpv3 Access Table Entry
344
Modifying an Snmpv3 Access Table Entry
346
Figure 132: Modify Snmpv3 Access Table Menu
347
Configuring the Snmpv3 Securitytogroup Table
356
Creating an Snmpv3 Securitytogroup Table Entry
356
Figure 133: Configure Snmpv3 Securitytogroup Table Menu
357
Deleting an Snmpv3 Securitytogroup Table Entry
359
Modifying an Snmpv3 Securitytogroup Table Entry
360
Figure 134: Modify Snmpv3 Securitytogroup Table Menu
361
Configuring the Snmpv3 Notify Table
364
Creating an Snmpv3 Notify Table Entry
364
Figure 135: Configure Snmpv3 Notify Table Menu
365
Deleting an Snmpv3 Notify Table Entry
366
Modifying an Snmpv3 Notify Table Entry
367
Figure 136: Modify Snmpv3 Notify Table Menu
368
Configuring the Snmpv3 Target Address Table
372
Creating an Snmpv3 Target Address Table Entry
372
Figure 137: Configure Snmpv3 Target Address Table Menu
373
Deleting an Snmpv3 Target Address Table Entry
375
Modifying an Snmpv3 Target Address Table Entry
376
Figure 138: Modify Snmpv3 Target Address Table Menu
377
Configuring the Snmpv3 Target Parameters Table
385
Creating an Snmpv3 Target Parameters Table Entry
386
Figure 139: Configure Snmpv3 Target Parameters Table Menu
386
Deleting an Snmpv3 Target Parameters Table Entry
389
Modifying an Snmpv3 Target Parameters Table Entry
390
Figure 140: Modify Snmpv3 Target Parameters Table Menu
391
Configuring the Snmpv3 Community Table
398
Creating an Snmpv3 Community Table Entry
399
Figure 141: Configure Snmpv3 Community Table Menu
400
Deleting an Snmpv3 Community Table Entry
402
Modifying an Snmpv3 Community Table Entry
403
Figure 142: Modify Snmpv3 Community Table Menu
404
Displaying Snmpv3 Table Menus
408
Displaying the Display Snmpv3 User Table Menu
408
Figure 143: Display Snmpv3 Table Menu
409
Figure 144: Display Snmpv3 User Table Menu
409
Displaying the Display Snmpv3 View Table Menu
410
Figure 145: Display Snmpv3 View Table Menu
410
Displaying the Display Snmpv3 Access Table Menu
411
Displaying the Display Snmpv3 Securitytogroup Table Menu
411
Figure 146: Display Snmpv3 Access Table Menu
411
Displaying the Display Snmpv3 Notify Table Menu
412
Figure 147: Display Snmpv3 Securitytogroup Table Menu
412
Figure 148: Display Snmpv3 Notify Table Menu
412
Displaying the Display Snmpv3 Target Address Table Menu
413
Displaying the Display Snmpv3 Target Parameters Table Menu
413
Figure 149: Display Snmpv3 Target Address Table Menu
413
Displaying the Display Snmpv3 Community Table Menu
414
Figure 150: Display Snmpv3 Target Parameters Table Menu
414
Figure 151: Display Snmpv3 Community Table Menu
415
Section V: Spanning Tree Protocols
417
Chapter 22: Spanning Tree and Rapid Spanning Tree Protocols
419
Enabling or Disabling a Spanning Tree Protocol
420
Figure 152: Spanning Tree Configuration Menu
420
Configuring STP
422
Configuring STP Bridge Settings
422
Figure 153: STP Menu
423
Table 5: Bridge Priority Value Increments
424
Configuring STP Port Settings
425
Figure 154: STP Port Parameters Menu
426
Figure 155: Configure STP Port Settings Menu
426
Table 6: Port Priority Value Increments
427
Table 7: STP Auto-Detect Port Costs
427
Table 8: STP Auto-Detect Port Trunk Costs
427
Displaying STP Port Settings
428
Figure 156: Display STP Port Configuration Menu
428
Resetting STP to the Default Settings
429
Configuring RSTP
430
Configuring RSTP Bridge Settings
430
Figure 157: RSTP Menu
431
Configuring RSTP Port Settings
433
Figure 158: RSTP Port Parameters Menu
433
Figure 159: Configure RSTP Port Settings Menu
434
Table 9: RSTP Auto-Detect Port Costs
434
Displaying the RSTP Port Configuration
435
Table 10: RSTP Auto-Detect Port Trunk Costs
435
Figure 160: Display RSTP Port Configuration Menu
436
Point-To-Point
436
Displaying the RSTP Port State
437
Figure 161: Display RSTP Port State Menu
437
Resetting RSTP to the Default Settings
438
Chapter 23: Multiple Spanning Tree Protocol
439
Selecting MSTP as the Active Spanning Tree Protocol
440
Configuring MSTP Bridge Settings
441
Figure 162: MSTP Configuration Menu
441
Configuring the CIST Priority
445
Figure 163: CIST Menu
445
Displaying the CIST Priority
447
Figure 164: MSTI Menu
447
Creating, Deleting, and Modifying MSTI Ids
449
Creating an MSTI ID
449
Deleting an MSTI ID
450
Modifying an MSTI ID
450
Adding, Removing, and Modifying VLAN Associations to MSTI Ids
452
Adding or Removing a VLAN from an MSTI ID
452
Associating a VLAN to an MSTI ID
453
Figure 165: VLAN-MSTI Association Menu
453
Removing a VLAN from an MSTI ID
454
Associating Vlans to an MSTI ID and Deleting All Associated Vlans
455
Clearing VLAN to MSTI Associations
456
Configuring MSTP Port Settings
457
Configuring Generic MSTP Port Settings
457
Figure 166: MSTP Port Parameters Menu
458
Figure 167: Configure MSTP Port Settings Menu
458
Table 11 Auto External Path Costs
459
Table 12: Auto External Path Trunk Costs
459
Configuring MSTI-Specific Port Parameters
460
Figure 168: Configure Per Spanning Tree Port Settings Menu
461
Table 13: RSTP Auto-Detect Port Costs
461
Table 14: RSTP Auto-Detect Port Trunk Costs
462
Displaying the MSTP Port Configuration
463
Figure 169: Display MSTP Port Configuration Menu
463
Displaying the MSTP Port State
465
Figure 170: Display MSTP Port State Menu
466
Resetting MSTP to the Defaults
468
Section VI: Virtual Lans
470
Chapter 24: Port-Based and Tagged Vlans
471
Creating a Port-Based or Tagged VLAN
472
Figure 171: VLAN Configuration Menu
472
Figure 172: Configure Vlans Menu
473
Figure 173: Create VLAN Menu
473
Example of Creating a Port-Based VLAN
477
Example of Creating a Tagged VLAN
479
Modifying a Port-Based or Tagged VLAN
481
Figure 174: Modify VLAN Menu
481
Figure 175: Expanded Modify VLAN Menu
482
Displaying Vlans
485
Figure 176: Show Vlans Menu
485
Deleting a Port-Based or Tagged VLAN
487
Figure 177: Delete VLAN Menu
487
Figure 178: Expanded Delete VLAN Menu
488
Deleting All Vlans
490
Displaying Pvids
492
Figure 179: Show Pvids Menu
492
Enabling or Disabling Ingress Filtering
493
Chapter 25: GARP VLAN Registration Protocol
495
Configuring GVRP
496
Figure 180: GARP-GVRP Menu
496
Enabling or Disabling GVRP on a Port
498
Figure 181: GVRP Port Parameters Menu
498
Figure 182: Configure GVRP Port Settings Menu
499
Converting a Dynamic GVRP VLAN
500
Displaying the GVRP Port Configuration
501
Figure 183: Display GVRP Port Configuration Menu
501
Displaying GVRP Counters
502
Figure 184: Other GVRP Parameters Menu
502
Figure 185: GVRP Counters Menu
503
Figure 186: GVRP Counters Menu
504
Table 15: GVRP Counters
504
Displaying the GVRP Database
507
Figure 187: GVRP Database Menu
507
Displaying the GIP Connected Ports Ring
509
Figure 188: GIP Connected Ports Ring Menu
509
Displaying the GVRP State Machine
511
Figure 189: GVRP State Machine Menu
511
Figure 190: Display GVRP State Machine Menu
512
Table 16: GVRP State Machine Parameters
512
Chapter 26: Multiple VLAN Modes
515
Selecting a VLAN Mode
516
Displaying VLAN Information
518
Figure 191: VLAN Configuration Menu (Multiple VLAN Mode)
518
Figure 192: Show Vlans Menu, Multiple VLANS
519
Chapter 27: Protected Ports Vlans
521
Creating a Protected Ports VLAN
522
Figure 193: Create VLAN Menu
522
Modifying a Protected Ports VLAN
525
Figure 194: Expanded Modify VLAN Menu
526
Displaying a Protected Ports VLAN
528
Figure 195: Show Vlans Menu
528
Figure 196: Show Vlans Menu
529
Deleting a Protected Ports VLAN
530
Figure 197: Delete VLAN Menu
530
Figure 198: Expanded Delete VLAN Menu
531
Chapter 28: MAC Address-Based Vlans
533
Creating a MAC Address-Based VLAN
534
Adding and Deleting MAC Addresses
536
Figure 199: MAC Based Vlans Menu
536
Adding and Deleting Egress Ports
538
Deleting a MAC Address-Based VLAN
540
Figure 200: Delete VLAN Menu
540
Figure 201: Expanded Delete VLAN Menu
541
Displaying MAC Address-Based Vlans
542
Figure 202: Show Vlans Menu with MAC Address-Based Vlans
542
Figure 203: Detail Information Display
543
Section VII: Internet Protocol Routing
545
Chapter 29: Internet Protocol Version 4 Routing Interfaces
548
Creating a New Routing Interface
548
Figure 204: Configure Interface Menu
548
Figure 205: Create Interface Menu
549
Modifying a Routing Interface
551
Figure 206: Modify Interface Menu
552
Deleting a Routing Interface
554
Displaying the IP Address of the Local Interface
555
Setting the Default Route or Default Gateway
556
Setting the Local Interface
557
Setting the ARP Cache Timeout
558
Section VIII
559
Section VIII: Port Security
559
Chapter 30: MAC Address-Based Port Security
561
Configuring MAC Address Port Security
562
Figure 207: Port Security Menu
562
Figure 208: Configure Port Security Menu #1
562
Figure 209: Configure Port Security Menu #2
564
Displaying Port Security Levels
566
Figure 210: Display Port Security Menu
566
Chapter 31: 802.1X Port-Based Network Access Control
569
Setting Port Roles
570
Figure 211: Port Access Control (802.1X) Menu
570
Figure 212: Configure Port Access Role Menu
571
Enabling or Disabling 802.1X Port-Based Network Access Control
572
Configuring Authenticator Port Parameters
573
Figure 213: Configure Authenticator Menu
573
Figure 214: Configure Authenticator Port Access Parameters Menu
574
Configuring Supplicant Port Parameters
579
Figure 215: Configure Supplicant Menu
579
Figure 216: Configure Supplicant Port Access Parameters Menu
580
Displaying the Port Access Parameters
582
Figure 217: Display Port Access Status Menu
582
Configuring RADIUS Accounting
584
Figure 218: Radius Accounting Menu
584
Section IX: Management Security
587
Chapter 32: Web Server
589
Configuring the Web Server
590
Figure 219: Web Server Configuration Menu
590
Figure 220: Web Server Configuration Menu Configured for HTTPS
591
General Steps for Configuring the Web Server for Encryption
593
General Steps for a Self-Signed Certificate
593
General Steps for a Public or Private CA Certificate
593
Chapter 33: Encryption Keys
595
Creating an Encryption Key
596
Figure 221: Keys/Certificate Configuration Menu
596
Figure 222: Key Management Menu
597
Figure 223: Create Key Menu
597
Deleting an Encryption Key
600
Modifying an Encryption Key
601
Exporting an Encryption Key
602
Figure 224: Export Key to File Menu
603
Importing an Encryption Key
605
Figure 225: Import Key from File Menu
606
Displaying the Encryption Keys
608
Figure 226: Key Management Menu
608
Chapter 34: PKI Certificates and SSL
611
Creating a Self-Signed Certificate
612
Figure 227: Public Key Infrastructure (PKI) Configuration Menu
613
Figure 228: X509 Certificate Management Menu
613
Figure 229: Create Self-Signed Certificate Menu
614
Adding a Certificate to the Database
616
Figure 230: Add Certificate Menu
616
Modifying a Certificate
619
Figure 231: Modify Certificate Menu
620
Deleting a Certificate
622
Viewing a Certificate
624
Figure 232: View Certificate Details Menu
625
Figure 233: View Certificate Details Menu
626
Generating an Enrollment Request
627
Figure 234: Generate Enrollment Request Menu
628
Installing CA Certificates Onto a Switch
630
Viewing and Configuring the Maximum Number of Certificates
631
Configuring SSL
632
Figure 235: Secure Socket Layer (SSL) Menu
632
Chapter 35: Secure Shell (SSH)
633
Configuring SSH
634
Figure 236: Secure Shell (SSH) Menu
634
Displaying SSH Information
637
Figure 237: Show Server Information Menu
637
Chapter 36: TACACS+ and RADIUS Protocols
639
Enabling or Disabling Server-Based Management Authentication
640
Figure 238: Authentication Configuration Menu
640
Configuring the TACACS+ Client
642
Figure 239: TACACS+ Client Configuration Menu
642
Displaying the TACACS+ Settings
644
Figure 240: TACACS+ Client Configuration Menu
644
Configuring the RADIUS Client
645
Figure 241: RADIUS Client Configuration
645
Figure 242: RADIUS Server Configuration
646
Displaying RADIUS Status and Settings
648
Figure 243: Show Status Menu
648
Chapter 37: Management Access Control List
651
Enabling or Disabling the Management ACL
652
Figure 244: Management ACL Configuration Menu
652
Creating an ACE
654
Modifying an ACE
656
Figure 245: Modify Management ACL Entry
656
Deleting an ACE
658
Displaying the Aces
659
Figure 246: Display All Management ACL Entries Menu
659
Index
661
Advertisement
Advertisement
Related Products
Allied Telesis AT-9000/24
Allied Telesis AT-9924T/4SP
Allied Telesis AT-8000S Series
Allied Telesis Converteon AT-CV1KSS
Allied Telesis Converteon AT-CV5000
Allied Telesis AT-XEM-12S
Allied Telesis AT-S41
Allied Telesis AT-S95
Allied Telesis AT-S82
Allied Telesis AT-S68
Allied Telesis Categories
Switch
Network Router
Media Converter
Network Hardware
Wireless Access Point
More Allied Telesis Manuals
Login
Sign In
OR
Sign in with Facebook
Sign in with Google
Upload manual
Upload from disk
Upload from URL