Sign In
Upload
Manuals
Brands
AL-KO Manuals
Lawn Mower
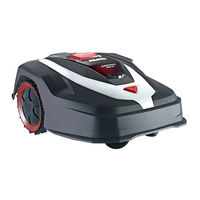
Robolinho 822 W
AL-KO Robolinho 822 W Robotic Lawnmower Manuals
Manuals and User Guides for AL-KO Robolinho 822 W Robotic Lawnmower. We have
2
AL-KO Robolinho 822 W Robotic Lawnmower manuals available for free PDF download: Translation Of The Original Instructions For Use
AL-KO Robolinho 822 W Translation Of The Original Instructions For Use (472 pages)
Brand:
AL-KO
| Category:
Lawn Mower
| Size: 11 MB
Table of Contents
Table of Contents
8
Zu dieser Betriebsanleitung
9
Symbole auf der Titelseite
9
Zeichenerklärungen und Signalwörter
9
Produktbeschreibung
9
Lieferumfang
9
Roboter-Rasenmäher (02)
10
Symbole am Gerät
10
Bedienfeld (03)
10
Display
11
Menüstruktur
11
Basisstation (04)
12
Akku
12
Funktionsbeschreibung
12
WLAN (Wi-Fi)-Funkmodul und AL-KO Intouch Smart Garden App
13
Sicherheit
13
Bestimmungsgemäße Verwendung
13
Möglicher Fehlgebrauch
14
Sicherheits- und Schutzeinrichtungen
14
PIN- und PUK-Eingabe
14
Sensoren
14
Sicherheitshinweise
14
Bediener
14
Persönliche Schutzausrüstung
15
Sicherheit von Personen und Tieren
15
Gerätesicherheit
15
Elektrische Sicherheit
15
Montage
15
Gerät Auspacken
15
Mähbereiche Planen (05)
15
Mähbereiche Vorbereiten
16
Basisstation Aufbauen (07/A, 17)
16
Begrenzungskabel Installieren
16
Begrenzungskabel an Basisstation Anschließen (07/B)
16
Begrenzungskabel Verlegen (05)
16
Hindernisse Ausgrenzen
17
Korridore Eingrenzen (05/H)
17
Gefälle Ausgrenzen (15)
17
Kabelreserven Anlegen (11)
18
Typische Fehler bei der Kabel- Verlegung (06)
18
Basisstation an Stromversorgung An- Schließen (08)
18
Verbindungen an der Basisstation Prüfen (08)
18
Quick Homing Kit Installieren
18
Inbetriebnahme
18
Akku Laden (12)
18
Grundeinstellungen Vornehmen
19
Schnitthöhe Einstellen (14)
19
Automatische Kalibrierfahrt Durchführen
19
Startpunkte Einstellen
20
Bedienung
20
Gerät Manuell Starten
20
Mähbetrieb Abbrechen
20
Nebenfläche Mähen (05/NF)
21
Einstellungen
21
Einstellung Aufrufen - Allgemein
21
Tastentöne Aktivieren/Deaktivieren
21
Eco-Mode Aktivieren/Deaktivieren
21
Regensensor Einstellen
21
Mähprogramm Einstellen
22
Mähprogramm Einstellen - Allgemein
22
Mähzeiten Einstellen
22
Passagenmodus
22
Intouch
22
Randmähen bei Manuellem Start
23
Nebenflächenmähen Einstellen
23
Displaykontrast Einstellen
23
Einstellungsschutz
23
Neu Kalibrieren
23
Auf Werkseinstellungen Zurücksetzen
23
Informationen Anzeigen
23
Wartung und Pflege
24
Reinigung
24
Regelmäßige Prüfung
24
Schneidmesser Wechseln
25
Hilfe bei Störungen
25
Geräte- und Handhabungsfehler Korrigieren
25
Fehlercodes und -Beseitigung
26
Transport
29
Lagerung
29
Roboter-Rasenmäher Einlagern
29
Ladesäule Abbauen und Einlagern (18, 19)
29
Begrenzungskabel Überwintern
30
Entsorgung
30
Kundendienst/Service
31
Information zur Konformitätserklärung
31
Garantie
31
About These Operating Instructions
33
Symbols on the Title Page
33
Legends and Signal Words
33
Product Description
33
Scope of Supply (01)
33
Automatic Lawn Mower (02)
34
Symbols on the Appliance
34
Control Panel (03)
34
Display
35
Menu Structure
35
Base Station (04)
36
Rechargeable Battery
36
Functional Description
37
Wifi Radio Module and AL-KO Intouch Smart Garden App
37
Safety
38
Intended Use
38
Possible Misuse
38
Safety and Protective Devices
38
PIN and PUK Input
38
Sensors
38
Safety Instructions
38
Operator
38
Personal Protective Equipment
39
Safety of Persons and Animals
39
Appliance Safety
39
Electrical Safety
39
Assembly
39
Unpacking the Machine
39
Planning the Mowing Areas (05)
39
Preparing the Mowing Areas
40
Setting up the Base Station (07/A, 17)
40
Installing the Boundary Cable
40
Connecting the Boundary Cable to the Base Station (07/B)
40
Routing the Boundary Cable (05)
40
Excluding Obstacles
41
Enclosing Corridors (05/H)
41
Excluding Downward Slopes (15)
41
Creating Loops of Cable (11)
41
Typical Faults in Cable Routing (06)
42
Connecting the Base Station to the Power Source (08)
42
Base Station (08)
42
Installing the Quick Homing Kit
42
Start-Up
42
Making the Basic Settings
43
Setting the Cutting Height (14)
43
Carrying out an Automatic Calibration Movement
43
Setting the Start Points
44
Operation
44
Starting the Appliance Manually
44
Cancelling Mowing
44
Mowing the Secondary Area (05/NF)
44
Settings
45
Calling up the Setting - General
45
Activating/Deactivating the Button Tones
45
Activating/Deactivating Eco Mode
45
Setting the Rain Sensor
45
Setting the Mowing Program
45
Setting the Mowing Program - General
45
Setting the Mowing Times
45
Passage Mode
46
Intouch
46
Edge Mowing with a Manual Start
46
Setting the Secondary Area Mowing
46
Setting the Display Contrast
47
Setting Lock
47
Recalibrating
47
Restoring Factory Settings
47
Displaying Information
47
Maintenance and Care
47
Cleaning
47
Regular Checks
48
Replacing the Cutting Blades
48
Help in Case of Malfunction
49
Correcting Appliance and Handling Faults
49
Fault Codes and Troubleshooting
50
Transport
53
Storage
53
Storing the Automatic Lawn Mower
53
Dismantling and Storing the Charging Pole (18, 19)
53
Winter Storage of the Boundary Cable
53
Disposal
53
After-Sales/Service
54
Information on the Declaration of Conformity
55
Warranty
55
Over Deze Gebruiksaanwijzing
57
Symbolen Op de Titelpagina
57
Verklaring Van Pictogrammen en Signaalwoorden
57
Productomschrijving
57
Leveringsomvang (01)
57
Robot-Grasmaaier (02)
58
Symbolen Op Het Apparaat
58
Bedieningspaneel (03)
58
Display
59
Menustructuur
59
Basisstation (04)
60
Accu
60
Beschrijving Van de Werking
61
Wifimodule en AL-KO Intouch Smart Garden App
61
Veiligheid
62
Beoogd Gebruik
62
Mogelijk Foutief Gebruik
62
Veiligheids- en Beveiligingsvoorzieningen
62
PIN- en PUK-Invoer
62
Sensoren
62
Veiligheidsinstructies
63
Gebruiker
63
Persoonlijke Beschermingsmiddelen
63
Veiligheid Van Personen en Dieren
63
Veiligheid Van Het Apparaat
63
Elektrische Veiligheid
63
Montage
63
Apparaat Uitpakken
63
Maaigebieden Plannen (05)
64
Maaigebieden Voorbereiden
64
Basisstation Opbouwen (07/A, 17)
64
Begrenzingskabel Installeren
64
Begrenzingskabel Op Het Basisstation Aansluiten (07/B)
64
Begrenzingskabel Leggen (05)
65
Obstakels Afzetten
65
Doorgangen Afzetten (05/H)
66
Hellingen Afzetten (15)
66
Kabelreserves Aanleggen (11)
66
Typische Fouten Bij Het Leggen Van de Kabel (06)
66
Basisstation Op Voeding Aansluiten
66
Verbindingen Aan Het Basisstation Controleren (08)
66
Quick Homing Kit Installeren
66
Inbedrijfstelling
67
Accu Opladen (12)
67
Basisinstellingen Uitvoeren
67
Maaihoogte Instellen (14)
67
Automatische Kalibratierit Uitvoeren
67
Startpunten Instellen
68
Bediening
68
Apparaat Met de Hand Starten
68
Maaiwerking Staken
68
Nevenoppervlak Maaien (05/NF)
69
Instellingen
69
Instelling Oproepen - Algemeen
69
Geluidssignaal Knopbediening Activeren/Deactiveren
69
Eco-Modus Activeren/Deactiveren
69
Regensensor Instellen
69
Maaiprogramma Instellen
70
Maaiprogramma Instellen - Algemeen
70
Maaitijden Instellen
70
Passagemodus
70
Intouch
71
Randen Maaien Bij Handmatige Start
71
Maaien Van Nevenoppervlakken Instellen
71
Displaycontrast Instellen
71
Instellingsbescherming
71
Opnieuw Kalibreren
71
Terugzetten Op Fabrieksinstellingen
71
Informatie Weergeven
71
Onderhoud en Verzorging
72
Reiniging
72
Regelmatige Controle
72
Messen Vervangen
73
Hulp Bij Storingen
73
Apparaat- en Bedieningsfouten Verhelpen
73
Foutcodes en -Oplossing
75
Transport
78
Opslag
78
Robot-Grasmaaier Opbergen
78
Laadpaal Demonteren en Opbergen (18, 19)
78
Begrenzingskabel Overwinteren
78
Verwijderen
78
Klantenservice/Service Centre
79
Informatie Bij de Conformiteitsverklaring
79
Garantie
79
À Propos de Cette Notice
82
Symboles Sur la Page de Titre
82
Explications des Symboles et des Termes D'avertissement
82
Description du Produit
82
Contenu de la Livraison (01)
82
Robot de Tonte (02)
83
Symboles Sur L'appareil
83
Panneau de Commande (03)
83
Écran
84
Structure de Menu
84
Station de Base (04)
85
Batterie
85
Description des Fonctions
86
Module Radio Wifi et Appli AL-KO Intouch Smart Garden
86
Sécurité
87
Utilisation Conforme
87
Éventuelles Utilisations Erronées
87
Dispositifs de Sécurité et de Protection
87
Entrée des Codes PIN et PUK
87
Capteurs
87
Consignes de Sécurité
88
Opérateurs
88
Équipement de Protection Individuel
88
Sécurité des Personnes et des Animaux
88
Sécurité de L'appareil
88
Sécurité Électrique
89
Montage
89
Déballage de L'appareil
89
Planifier les Zones de Tonte (05)
89
Préparer les Zones de Tonte
89
Mise en Place de la Station de Base (07/A, 17)
90
Installer le Câble Périphérique
90
Raccordement du Câble Périphérique à la Station de Base (07/B)
90
Pose du Câble Périphérique (05)
90
Délimiter les Obstacles
91
Délimiter des Corridors (05/H)
91
Délimiter les Pentes (15)
91
Établir des Réserves de Câble (11)
91
Erreurs Typiques Lors de la Pose de Câble (06)
91
Brancher la Station de Base à L'ali
92
Mentation Électrique (08)
92
Contrôler les Connexions à la Station de Base (08)
92
Installer le Kit Quick Homing
92
Mise en Service
92
Charger la Batterie (12)
92
Effectuer les Réglages de Base
92
Régler la Hauteur de Coupe (14)
93
Effectuer une Course D'étalonnage Automatique
93
Régler les Points de Départ
93
Utilisation
94
Démarrer Manuellement L'appareil
94
Interrompre le Mode Tonte
94
Tondre la Surface Secondaire (05/NF)
94
Réglages
95
Accéder au Réglage - Généralités
95
Activer/Désactiver les Sons des Touches
95
Activer/Désactiver le Mode Éco
95
Réglage du Capteur de Pluie
95
Régler le Programme de Tonte
95
Régler le Programme de Tonte - Généralités
95
Régler les Temps de Tonte
96
Mode Passage
96
Intouch
96
Tonte des Bordures en cas de Démarrage Manuel
96
Régler la Tonte des Surfaces Secondaires
97
Réglage du Contraste de L'écran
97
Protection du Réglage
97
Nouvel Étalonnage
97
Retour aux Paramètres D'usine
97
Afficher les Informations
97
Maintenance et Entretien
98
Nettoyage
98
Contrôle Régulier
98
Remplacer les Lames de Coupe
99
Aide en cas de Pannes
99
Corriger les Défauts D'appareil et de Manipulation
99
Codes D'erreur et Leur Élimination
101
Transport
104
Stockage
104
Ranger le Robot de Tonte
104
Démonter la Borne de Chargement et la Remiser (18, 19)
104
Hibernation du Câble Périphérique
104
Élimination
105
Service Clients/Après-Vente
106
Informations Relatives à la Déclaration de Conformité
106
Garantie
106
Istruzioni Per L'uso
108
Simboli Sulla Copertina
108
Descrizione Dei Simboli E Parole Segnaletiche
108
Descrizione del Prodotto
108
Dotazione DI Serie (01)
109
Tosaerba Robot (02)
109
Simboli Sull'apparecchio
109
Pannello DI Comando (03)
109
Display
110
Struttura del Menu
110
Stazione Base (04)
111
Batteria
111
Descrizione del Funzionamento
112
Modulo Radio WLAN (Wi-Fi) E App AL-KO Intouch Smart Garden
112
Sicurezza
113
Utilizzo Conforme Alla Destinazione
113
Possibile Uso Errato
113
Dispositivi DI Sicurezza E DI Protezione
113
Inserimento DI PIN E PUK
113
Sensori
113
Indicazioni DI Sicurezza
114
Operatore
114
Dispositivi DI Protezione Personale
114
Sicurezza Delle Persone E Degli Animali
114
Sicurezza Dell'apparecchio
114
Sicurezza Elettrica
115
Montaggio
115
Disimballo Dell'apparecchio
115
Pianificare le Aree DI Taglio (05)
115
Preparare le Aree DI Taglio
115
Montaggio Della Stazione Base (07/A, 17)
116
Posa del Cavo Perimetrale
116
Allacciamento del Cavo Perimetrale Alla Stazione Base (07/B)
116
Posa del Cavo Perimetrale (05)
116
Escludere Gli Ostacoli
116
Delimitare I Corridoi (05/H)
117
Escludere le Pendenze (15)
117
Creare Cavi DI Riserva (11)
117
Errori Tipici Nella Posa Dei Cavi (06)
117
Allacciamento Della Stazione Base All'alimentazione (08)
117
Verificare Gli Allacciamenti Alla Stazio- Ne Base (08)
118
Installazione del Kit DI Ritorno Rapido
118
Messa in Funzione
118
Caricare la Batteria (12)
118
Eseguire le Impostazioni
118
Impostare L'altezza DI Taglio (14)
118
Eseguire la Corsa DI Calibratura Automatica
119
Impostazione Dei Punti DI Inizio
119
Utilizzo
120
Avviare L'apparecchio a Mano
120
Interrompere la Funzionalità Taglio
120
Tagliare le Aree Secondarie (05/NF)
120
Impostazioni
120
Richiamare le Impostazioni - Generale
120
Attivare/Disattivare I Toni Dei Tasti
120
Attivazione/Disattivazione Della Modalità Eco
120
Impostazione del Sensore DI Pioggia
121
Impostare Il Programma DI Taglio
121
Impostare Il Programma DI Taglio - Generale
121
Impostazione Delle Ore DI Taglio
121
Modalità Passaggio
122
Intouch
122
Taglio Perimetrale con Avviamento Manuale
122
Impostare Il Taglio Delle Superfici Secondarie
122
Impostazione del Contrasto Display
122
Protezione Delle Impostazioni
123
Ricalibratura
123
Ripristino Delle Impostazioni DI Fabbrica
123
Visualizzare le Informazioni
123
Manutenzione E Cura
123
Pulizia
123
Controlli Regolari
124
Cambio Delle Lame DI Taglio
124
Supporto in Caso DI Anomalie
125
Correggere Gli Errori Dell'apparecchio E DI Gestione
125
Codici DI Errore Ed Eliminazione
126
Trasporto
129
Conservazione
129
Conservare Il Tosaerba Robot
129
Smontaggio E Conservazione Della
130
Colonnina DI Ricarica (18, 19)
130
Conservazione Invernale del Cavo Perimetrale
130
Smaltimento
130
Servizio Clienti/Assistenza
131
Informazioni Sulla Dichiarazione DI Conformità
131
Garanzia
131
K Tem Navodilom Za Uporabo
133
Simboli Na Naslovnici
133
Razlaga Oznak in Opozorilnih Besed
133
Opis Izdelka
133
Obseg Dobave (01)
133
Robotska Kosilnica (02)
134
Simboli Na Napravi
134
Upravljalno Območje (03)
134
Prikazovalnik
135
Zgradba Menija
135
Osnovna Postaja (04)
136
Akumulatorska Baterija
136
Opis Funkcij
137
BrezžIčni Modul WLAN (Wi-Fi) in Aplikacija AL-KO Intouch Smart Garden
137
Varnost
138
Namenska Uporaba
138
Možna Napačna Raba
138
Varnostne Naprave in Zaščita
138
Vnos Kode PIN in PUK
138
Tipala
138
Varnostni Napotki
139
Upravljavec
139
Osebna Zaščitna Oprema
139
Varnost Oseb in Živali
139
Varnost Naprave
139
Električna Varnost
139
Montaža
139
Razpakiranje Naprave
139
Advertisement
AL-KO Robolinho 822 W Translation Of The Original Instructions For Use (452 pages)
Brand:
AL-KO
| Category:
Lawn Mower
| Size: 17 MB
Table of Contents
Deutsch
10
Table of Contents
10
Produktbeschreibung
11
Lieferumfang (01)
11
Zu dieser Betriebsanleitung
11
Zeichenerklärungen und Signalwörter
11
Symbole auf der Titelseite
11
Roboter-Rasenmäher (02)
12
Symbole am Gerät
12
Bedienfeld (03)
12
Menüstruktur
13
Display
13
Basisstation (04)
14
Akku
14
Funktionsbeschreibung
14
WLAN Funkmodul und AL-KO Intouch Smart Garden App
15
Sensoren
16
Bediener
16
Sicherheitshinweise
16
Bestimmungsgemäße Verwendung
16
PIN- und PUK-Eingabe
16
Sicherheits- und Schutzeinrichtungen
16
Möglicher Fehlgebrauch
16
Sicherheit
16
Elektrische Sicherheit
17
Montage
17
Mähbereiche Planen (05)
17
Gerätesicherheit
17
Sicherheit von Personen und Tieren
17
Gerät Auspacken
17
Persönliche Schutzausrüstung
17
Basisstation Aufbauen (07/A, 17)
18
Begrenzungskabel Installieren
18
Begrenzungskabel an Basisstation Anschließen (07/B)
18
Begrenzungskabel Verlegen (05)
18
Mähbereiche Vorbereiten
18
Hindernisse Ausgrenzen
19
Korridore Eingrenzen (05/H)
19
Gefälle Ausgrenzen (15)
19
Quick Homing Kit Installieren
20
Akku Laden (12)
20
Inbetriebnahme
20
Basisstation an Stromversorgung An- Schließen (08)
20
Verbindungen an der Basisstation Prüfen (08)
20
Typische Fehler bei der Kabel- Verlegung (06)
20
Kabelreserven Anlegen (11)
20
Grundeinstellungen Vornehmen
21
Schnitthöhe Einstellen (14)
21
Automatische Kalibrierfahrt Durchführen
21
Einstellungen
22
Tastentöne Aktivieren/Deaktivieren
22
Einstellung Aufrufen - Allgemein
22
Mähbetrieb Abbrechen
22
Nebenfläche Mähen (05/NF)
22
Gerät Manuell Starten
22
Bedienung
22
Regensensor Einstellen
23
Mähprogramm Einstellen
23
Mähprogramm Einstellen - Allgemein
23
Startpunkte Einstellen
23
Eco-Mode Aktivieren/Deaktivieren
23
Mähzeiten Einstellen
24
Passagenmodus
24
Intouch
24
Neu Kalibrieren
25
Informationen Anzeigen
25
Auf Werkseinstellungen Zurücksetzen
25
Nebenflächenmähen Einstellen
25
Einstellungsschutz
25
Displaykontrast Einstellen
25
Randmähen bei Manuellem Start
25
Wartung und Pflege
26
Reinigung
26
Regelmäßige Prüfung
26
Geräte- und Handhabungsfehler Korrigieren
27
Schneidmesser Wechseln
27
Hilfe bei Störungen
27
Fehlercodes und -Beseitigung
29
Transport
31
Lagerung
31
Roboter-Rasenmäher Einlagern
31
Ladesäule Abbauen und Einlagern (18, 19)
32
Begrenzungskabel Überwintern
32
Entsorgung
32
Garantie
33
Information zur Konformitätserklärung
33
Kundendienst/Service
33
English
34
About These Operating Instructions
35
Legends and Signal Words
35
Product Description
35
Scope of Supply (01)
35
Symbols on the Title Page
35
Automatic Lawn Mower (02)
36
Control Panel (03)
36
Symbols on the Appliance
36
Display
37
Menu Structure
37
Base Station (04)
38
Rechargeable Battery
38
Functional Description
39
Wifi Radio Module and AL-KO Intouch Smart Garden App
39
Intended Use
40
Operator
40
PIN and PUK Input
40
Possible Misuse
40
Safety
40
Safety and Protective Devices
40
Safety Instructions
40
Sensors
40
Appliance Safety
41
Assembly
41
Electrical Safety
41
Personal Protective Equipment
41
Planning the Mowing Areas (05)
41
Safety of Persons and Animals
41
Unpacking the Machine
41
Connecting the Boundary Cable to the Base Station (07/B)
42
Installing the Boundary Cable
42
Preparing the Mowing Areas
42
Routing the Boundary Cable (05)
42
Setting up the Base Station (07/A, 17)
42
Creating Loops of Cable (11)
43
Enclosing Corridors (05/H)
43
Excluding Downward Slopes (15)
43
Excluding Obstacles
43
Base Station (08)
44
Charging the Rechargeable Battery
44
Connecting the Base Station to the Power Source (08)
44
Installing the Quick Homing Kit
44
Making the Basic Settings
44
Start-Up
44
Typical Faults in Cable Routing (06)
44
Carrying out an Automatic Calibration Movement
45
Setting the Cutting Height (14)
45
Activating/Deactivating Eco Mode
46
Activating/Deactivating the Button Tones
46
Calling up the Setting - General
46
Cancelling Mowing
46
Mowing the Secondary Area (05/NF)
46
Operation
46
Setting the Rain Sensor
46
Settings
46
Starting the Appliance Manually
46
Setting the Mowing Program
47
Setting the Mowing Program - General
47
Setting the Mowing Times
47
Setting the Start Points
47
Edge Mowing with a Manual Start
48
Intouch
48
Passage Mode
48
Recalibrating
48
Setting Lock
48
Setting the Display Contrast
48
Setting the Secondary Area Mowing
48
Cleaning
49
Displaying Information
49
Maintenance and Care
49
Regular Checks
49
Restoring Factory Settings
49
Correcting Appliance and Handling Faults
50
Help in Case of Malfunction
50
Replacing the Cutting Blades
50
Fault Codes and Troubleshooting
52
Dismantling and Storing the Charging Pole (18, 19)
55
Disposal
55
Storage
55
Storing the Automatic Lawn Mower
55
Transport
55
Winter Storage of the Boundary Cable
55
After-Sales/Service
56
Information on the Declaration of Conformity
56
Warranty
56
Dutch
58
Leveringsomvang (01)
59
Over Deze Gebruiksaanwijzing
59
Productomschrijving
59
Symbolen Op de Titelpagina
59
Verklaring Van Pictogrammen en Signaalwoorden
59
Bedieningspaneel (03)
60
Robot-Grasmaaier (02)
60
Symbolen Op Het Apparaat
60
Display
61
Menustructuur
61
Accu
62
Basisstation (04)
62
Beschrijving Van de Werking
63
Wifimodule en AL-KO Intouch Smart Garden App
63
Beoogd Gebruik
64
Mogelijk Foutief Gebruik
64
PIN- en PUK-Invoer
64
Sensoren
64
Veiligheid
64
Veiligheids- en Beveiligingsvoorzieningen
64
Elektrische Veiligheid
65
Gebruiker
65
Persoonlijke Beschermingsmiddelen
65
Veiligheid Van Het Apparaat
65
Veiligheid Van Personen en Dieren
65
Veiligheidsinstructies
65
Apparaat Uitpakken
66
Basisstation Opbouwen (07/A, 17)
66
Maaigebieden Plannen (05)
66
Maaigebieden Voorbereiden
66
Montage
66
Begrenzingskabel Installeren
67
Begrenzingskabel Leggen (05)
67
Begrenzingskabel Op Het Basisstation Aansluiten (07/B)
67
Obstakels Afzetten
67
Basisstation Op Voeding Aansluiten
68
Doorgangen Afzetten (05/H)
68
Hellingen Afzetten (15)
68
Kabelreserves Aanleggen (11)
68
Typische Fouten Bij Het Leggen Van de Kabel (06)
68
Accu Opladen (12)
69
Basisinstellingen Uitvoeren
69
Inbedrijfstelling
69
Maaihoogte Instellen (14)
69
Quick Homing Kit Installeren
69
Verbindingen Aan Het Basisstation Controleren (08)
69
Apparaat Met de Hand Starten
70
Automatische Kalibratierit Uitvoeren
70
Bediening
70
Maaiwerking Staken
70
Nevenoppervlak Maaien (05/NF)
70
Eco-Modus Activeren/Deactiveren
71
Geluidssignaal Knopbediening Activeren/Deactiveren
71
Instelling Oproepen - Algemeen
71
Instellingen
71
Regensensor Instellen
71
Maaiprogramma Instellen
72
Maaiprogramma Instellen - Algemeen
72
Maaitijden Instellen
72
Startpunten Instellen
72
Displaycontrast Instellen
73
Instellingsbescherming
73
Intouch
73
Maaien Van Nevenoppervlakken Instellen
73
Passagemodus
73
Randen Maaien Bij Handmatige Start
73
Informatie Weergeven
74
Onderhoud en Verzorging
74
Opnieuw Kalibreren
74
Reiniging
74
Terugzetten Op Fabrieksinstellingen
74
Messen Vervangen
75
Regelmatige Controle
75
Apparaat- en Bedieningsfouten Verhelpen
76
Hulp Bij Storingen
76
Foutcodes en -Oplossing
77
Begrenzingskabel Overwinteren
80
Laadpaal Demonteren en Opbergen (18, 19)
80
Opslag
80
Robot-Grasmaaier Opbergen
80
Transport
80
Verwijderen
80
Klantenservice/Service Centre
81
Garantie
82
Informatie Bij de Conformiteitsverklaring
82
Français
83
Description du Produit
84
Explications des Symboles et des Termes D'avertissement
84
Symboles Sur la Page de Titre
84
À Propos de Cette Notice
84
Contenu de la Livraison (01)
85
Panneau de Commande (03)
85
Robot de Tonte (02)
85
Symboles Sur L'appareil
85
Structure de Menu
86
Écran
86
Batterie
87
Station de Base (04)
87
Description des Fonctions
88
Module Radio Wifi et Appli AL-KO Intouch Smart Garden
88
Capteurs
89
Dispositifs de Sécurité et de Protection
89
Entrée des Codes PIN et PUK
89
Sécurité
89
Utilisation Conforme
89
Éventuelles Utilisations Erronées
89
Consignes de Sécurité
90
Opérateurs
90
Sécurité de L'appareil
90
Sécurité des Personnes et des
90
Sécurité des Personnes et des Animaux
90
Équipement de Protection Individuel
90
Déballage de L'appareil
91
Montage
91
Planifier les Zones de Tonte (05)
91
Préparer les Zones de Tonte
91
Sécurité Électrique
91
Délimiter les Obstacles
92
Installer le Câble Périphérique
92
Mise en Place de la Station de Base (07/A, 17)
92
Pose du Câble Périphérique (05)
92
Raccordement du Câble Périphérique à la Station de Base (07/B)
92
Délimiter des Corridors (05/H)
93
Délimiter les Pentes (15)
93
Erreurs Typiques Lors de la Pose de Câble (06)
93
Établir des Réserves de Câble (11)
93
Brancher la Station de Base à L'ali
94
Charger la Batterie (12)
94
Contrôler les Connexions à la Station de Base (08)
94
Effectuer les Réglages de Base
94
Installer le Kit Quick Homing
94
Mentation Électrique (08)
94
Mise en Service
94
Effectuer une Course D'étalonnage Automatique
95
Régler la Hauteur de Coupe (14)
95
Accéder au Réglage - Généralités
96
Activer/Désactiver le Mode Éco
96
Activer/Désactiver les Sons des Touches
96
Démarrer Manuellement L'appareil
96
Interrompre le Mode Tonte
96
Réglages
96
Tondre la Surface Secondaire (05/NF)
96
Utilisation
96
Réglage du Capteur de Pluie
97
Régler le Programme de Tonte
97
Régler le Programme de Tonte - Généralités
97
Régler les Points de Départ
97
Intouch
98
Mode Passage
98
Régler les Temps de Tonte
98
Afficher les Informations
99
Nouvel Étalonnage
99
Protection du Réglage
99
Retour aux Paramètres D'usine
99
Réglage du Contraste de L'écran
99
Régler la Tonte des Surfaces Secondaires
99
Tonte des Bordures en cas de Démarrage Manuel
99
Contrôle Régulier
100
Maintenance et Entretien
100
Nettoyage
100
Aide en cas de Pannes
101
Corriger les Défauts D'appareil et de Manipulation
101
Remplacer les Lames de Coupe
101
Codes D'erreur et Leur Élimination
103
Démonter la Borne de Chargement et la Remiser (18, 19)
106
Hibernation du Câble Périphérique
106
Ranger le Robot de Tonte
106
Stockage
106
Transport
106
Élimination
106
Service Clients/Après-Vente
107
Garantie
108
Informations Relatives à la Déclaration de Conformité
108
Italiano
109
Descrizione Dei Simboli E Parole Segnaletiche
110
Descrizione del Prodotto
110
Istruzioni Per L'uso
110
Simboli Sulla Copertina
110
Dotazione DI Serie (01)
111
Pannello DI Comando (03)
111
Simboli Sull'apparecchio
111
Tosaerba Robot (02)
111
Display
112
Struttura del Menu
112
Batteria
113
Stazione Base (04)
113
Descrizione del Funzionamento
114
Modulo Radio WLAN E App AL-KO Intouch Smart Garden
114
Dispositivi DI Sicurezza E DI Protezione
115
Inserimento DI PIN E PUK
115
Possibile Uso Errato
115
Sensori
115
Sicurezza
115
Utilizzo Conforme Alla Destinazione
115
Dispositivi DI Protezione Personale
116
Indicazioni DI Sicurezza
116
Operatore
116
Sicurezza Dell'apparecchio
116
Sicurezza Delle Persone E Degli Animali
116
Disimballo Dell'apparecchio
117
Montaggio
117
Montaggio Della Stazione Base (07/A, 17)
117
Pianificare le Aree DI Taglio (05)
117
Preparare le Aree DI Taglio
117
Sicurezza Elettrica
117
Allacciamento del Cavo Perimetrale Alla Stazione Base (07/B)
118
Escludere Gli Ostacoli
118
Posa del Cavo Perimetrale
118
Posa del Cavo Perimetrale (05)
118
Allacciamento Della Stazione Base All'alimentazione (08)
119
Creare Cavi DI Riserva (11)
119
Delimitare I Corridoi (05/H)
119
Errori Tipici Nella Posa Dei Cavi (06)
119
Escludere le Pendenze (15)
119
Caricare la Batteria (12)
120
Eseguire le Impostazioni
120
Impostare L'altezza DI Taglio (14)
120
Installazione del Kit DI Ritorno Rapido
120
Messa in Funzione
120
Verificare Gli Allacciamenti Alla Stazio- Ne Base (08)
120
Avviare L'apparecchio a Mano
121
Eseguire la Corsa DI Calibratura Automatica
121
Interrompere la Funzionalità Taglio
121
Tagliare le Aree Secondarie (05/NF)
121
Utilizzo
121
Attivare/Disattivare I Toni Dei Tasti
122
Attivazione/Disattivazione Della Modalità Eco
122
Impostare Il Programma DI Taglio
122
Impostare Il Programma DI Taglio - Generale
122
Impostazione del Sensore DI Pioggia
122
Impostazioni
122
Richiamare le Impostazioni - Generale
122
Impostazione Dei Punti DI Inizio
123
Impostazione Delle Ore DI Taglio
123
Impostare Il Taglio Delle Superfici Secondarie
124
Impostazione del Contrasto Display
124
Intouch
124
Modalità Passaggio
124
Protezione Delle Impostazioni
124
Taglio Perimetrale con Avviamento Manuale
124
Manutenzione E Cura
125
Pulizia
125
Ricalibratura
125
Ripristino Delle Impostazioni DI Fabbrica
125
Visualizzare le Informazioni
125
Cambio Delle Lame DI Taglio
126
Controlli Regolari
126
Correggere Gli Errori Dell'apparecchio E DI Gestione
127
Supporto in Caso DI Anomalie
127
Codici DI Errore Ed Eliminazione
128
Conservare Il Tosaerba Robot
131
Conservazione
131
Smontaggio E Conservazione Della Colonnina DI Ricarica (18, 19)
131
Trasporto
131
Conservazione Invernale del Cavo Perimetrale
132
Smaltimento
132
Garanzia
133
Informazioni Sulla Dichiarazione DI Conformità
133
Servizio Clienti/Assistenza
133
Advertisement
Related Products
AL-KO 870
AL-KO 875
AL-KO 870III
AL-KO 875III
AL-KO Robolinho 800
AL-KO ROBOLINHO 3000
AL-KO Robolinho 500
AL-KO robolinho 700
AL-KO Robolinho 500E
AL-KO Robolinho 500I
AL-KO Categories
Lawn Mower
Water Pump
Trimmer
Automobile Accessories
Lawn and Garden Equipment
More AL-KO Manuals
Login
Sign In
OR
Sign in with Facebook
Sign in with Google
Upload manual
Upload from disk
Upload from URL