Sign In
Upload
Manuals
Brands
ACTi Manuals
Security System
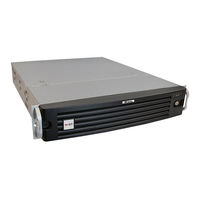
INR-420
ACTi INR-420 Manuals
Manuals and User Guides for ACTi INR-420. We have
2
ACTi INR-420 manuals available for free PDF download: System Administrator Manual, Quick Installation Manual
ACTi INR-420 System Administrator Manual (141 pages)
Surveillance system
Brand:
ACTi
| Category:
Security System
| Size: 11 MB
Table of Contents
About this Manual
2
Target Audience
2
Content Overview
2
Related Documentation
3
Technical Support
3
Conventions Used in this Manual
3
Legal Notice
4
Disclaimer
4
Copyright
4
Trademarks
4
Regulatory Compliance Information
5
Table of Contents
6
Overview
12
Product Overview
12
Server / Client Architecture
13
Getting Started
14
What's in the Box
14
At a Glance
15
Rackmount the Unit
17
Hard Disk Installation
17
Step 1: Remove the Tray
17
Step 2: Mount the Disk
18
Step 3: Install the Tray
18
Step 4: Attach the Front Cover
19
Connect the Devices
20
Start the Unit
21
Enter Windows
22
Definitions of Led Indicators
23
Turn off the Unit
23
Get the Hard Disks Ready for Recording
24
Observe Disk Status
33
License and Activation
36
Online Activation
37
Offline Activation
37
Step-By-Step Activation Process
38
Access the Nvr Server Via Nvr3 Workstation
41
Local Workstation Client Login
42
Remote Workstation Client Login
43
Log in Failure Troubleshooting
46
Condition 1: Why Can't I Access NVR Server Via Web Browser
46
Access the Nvr Server Via Internet Explorer
46
Condition 2: Why Can't I Install Active X Controls after Logging in
48
Login
50
Enter Account & Password
50
Change UI Language
50
Remember Account/Password
50
Retrieve the Forgotten Password
50
Set up the System
51
Setup Wizard
51
System Settings
52
Storage
52
NVR Main Screen
54
Live View
54
Playback
54
Setup
54
Add Devices
55
Search Devices Within Local Area Network
56
Search Devices Within Local Area Network with ONVIF
57
Add Devices on WAN or Other Local Area Networks
58
Basic Settings Attributes
59
Device Status
60
Status Icon Description
61
Add Non-Acti Cameras
62
Manage Multiple Devices
64
Modify Basic Connection Settings
64
Delete Devices
64
Copy Settings Across Devices
65
Add Video Streams from a Multi-Channel Device
66
Configure Device Settings
67
Configure Video Format
67
Video Settings Attributes
67
Save Storage by Setting Event Recording Frame Rate
68
Schedule Recording
68
Event Recording
68
Event Recording with Frame Rate Adjustment
69
How to Make Use of Event Recording with Frame Rate Adjustment
69
Fine-Tune the Image
70
Video Adjustment Attributes
71
Configure Motion Settings
73
Adjustment Attributes
74
Configure PTZ Device
75
Adjustment Attributes
76
How to Do Live PTZ Operation
77
Set PTZ Preset Points
79
Set PTZ Preset Tour
80
Configure Fisheye Cameras
81
Schedule Recordings
85
Configure the Recording File Properties
85
Attributes Explanation
85
Set the Schedule
86
Use Time Setting Quick Buttons to Set the Time in One Click
87
Lock Specific Days
88
Copy an Existing Schedule to Others
89
View the Entire Recording Schedule
90
Event Management
91
How Does NVR Handle Events
91
How to Edit an Event Rule
92
Manage the Event Rules
96
View the Event Rules
96
Delete the Event Rules
97
How to Setup SMTP Settings for Event Rules
97
How to Setup FTP Settings for Event Rules
98
System Log
99
Define Search Time
100
Choose Log Type
100
Read the Log
101
Export the Log
102
Storage Management
103
Change Recordings Folder Name
103
Set System Log Lifecycle
103
Set Hard Drives for the Recorded Files Deletion Rule
104
Manage User Groups/ Users
105
Overview
105
User Groups
106
Add Users
108
Domain Users Management
110
Customize Views
111
Step 1: Create a New View
113
Step 2: Enter Edit Mode
113
Step 3: Select a Layout
113
Step 4: Add Video Source
114
Step 5: Add a Map
114
Step 6: Add Devices to the Map
116
Step 7: Adjust the Channel Size & Layout
117
Step 8: Save the View
118
Step 9: Set Default View
118
Step 10: Set Default Hotspot Channel (Optional)
118
Step 11: Set Fisheye Camera Mode
118
Manage the Views
120
Set View Link
121
Set View Patrol
121
Tips to Enhance Live View Performance
123
Customize System Language
125
System Languages List
125
Display Configurations
128
Video & Snapshot Export Configurations
129
Joystick
130
Joystick Configurations
130
NVR System Upgrade
131
Install the Software
131
Workstation Installation and Upgrade
135
Install or Upgrade the Software
135
Back up System Data
137
Step 1: Back up System Settings
137
Step 2: Back up Recording Files Folder (Optional)
138
Step 3: Back up Recording Files Index Folder (Optional)
138
Step 4: System Log (Optional)
138
Restore System Data
139
Advanced Administrative Tasks
140
NVR Server Status
140
Change Server Port
140
Change Authentication Method
141
Advertisement
ACTi INR-420 Quick Installation Manual (13 pages)
200-Channel 8-Bay Rackmount Standalone NVR
Brand:
ACTi
| Category:
DVR
| Size: 3 MB
Table of Contents
Before You Start
2
Hardware Installation
3
Front Panel
3
Rear Panel
3
Hard Disk Installation
4
Connect the Devices
5
Software Configuration
7
Create Disk Volumes
7
Create Users
8
Select Storage Drives
9
Search Cameras
9
Add Camera Manually
9
Configure Camera Settings
10
Set Recording Schedule
10
Customize Views
11
Advertisement
Related Products
ACTi INR-410
ACTi Zoom Bullet I44
ACTi Zoom Bullet I45
ACTi I47
ACTi INR-440
ACTi INR-406
ACTi INR-407
ACTi INR-430
ACTi INR-460
ACTi INR-415
ACTi Categories
Security Camera
IP Camera
DVR
Server
Network Hardware
More ACTi Manuals
Login
Sign In
OR
Sign in with Facebook
Sign in with Google
Upload manual
Upload from disk
Upload from URL