Table of Contents
Advertisement
Advertisement
Table of Contents

Related Manuals for Rachael Ray RRFP1A/T


Summary of Contents for Rachael Ray RRFP1A/T
-
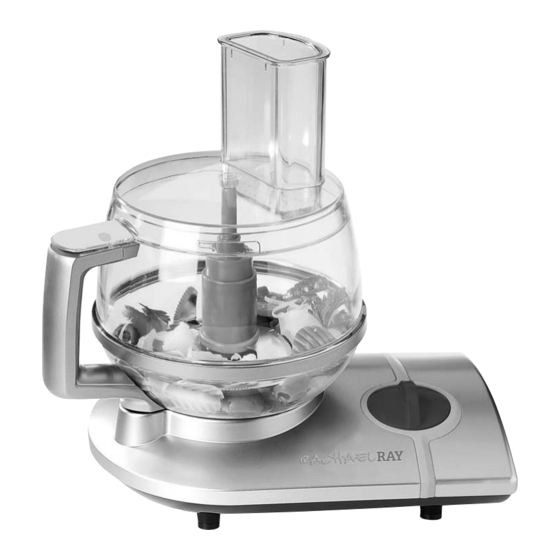
Page 1: Food Processor
FOOD PROCESSOR OWNER'S MANUAL Model RRFP1A/T... -
Page 2: Important Safeguards
IMPORTANT SAFEGUARDS When using electrical appliances, basic safety precautions should always be followed, including the following: 1. Read all instructions. 2. To protect against risk of electrical shock, do not put cord, plug, or appliance in water or other liquid. 3. -
Page 3: Additional Important Safeguards
Additional Important Safeguards 1. All users of this appliance must read and understand this Owner's Manual before operating or cleaning this appliance. 2. The cord to this appliance should be plugged into a 120V AC electri- cal outlet only. 3. Do not leave this appliance unattended during use. 4. - Page 4 Getting to Know Your Rachael Ray RRFP1A/T Food Processor 1. Food Processor Power Base 2. Interlock Mechanism, Lower 3. Handle 4. Interlock Mechanism, Upper 5. Locking Extension 6. Food Pusher (P/N 71163) 7. Cover with Feed Chute (P/N 71162) 8. Rubber Seal Ring (P/N 71201) 9.
- Page 5 Getting to Know Your RRFP1A/T Attachments P - Pulse 1 - Low Speed 2 - High Speed CONTROL DIAL with Indicator Light 1. Chopping Blade (P/N 71165) Stainless steel blade designed for cutting and kneading. 2. COARSE Shredding Blade 'C' (P/N 71167) Stainless steel shredding blade.
-
Page 6: Before First Use
WARNING: Blade Attachments are very sharp. Use extreme care when handling Blades. Failure to do so can result in personal injury. 1. Carefully unpack the Food Processor. The Storage Tray is packed with 4 Blades and the Blade Holder Stem. Wash the Processing Bowl, Cover with Feed Chute, Food Pusher, Spatula and all Attachments in warm soapy water. -
Page 7: Assembly Instructions
Assembly Instructions Note: If the Processing Bowl and the Cover are not correct- ly assembled, the Upper and Lower Safety Interlock Mechanism will not be closed and the Food Processor will not function. 9. Insert the Food Pusher in the Feed Tube on the Cover. -
Page 8: Instructions For Use
Instructions for Use Slicing, Shredding and Grating CAUTION: Always unplug Food Processor from outlet before installing or removing attachments. CAUTION: Use extreme care when handling the Slicing, Shredding or Grating Blades. Do not touch the cutting edges with your fingers. The cutting edges are very sharp and can cause injury if touched. - Page 9 Slicing, Shredding and Grating Continued 7. When finished processing, move the Speed Control Dial to OFF, the Indicator Light will go off, and unplug the unit. Note: This Food Processor is equipped with an automatic brake that will stop the rotation of the Blade within seconds. Although this automatic brake provides an additional measure of safety, make sure that the Blade has completely stopped before you remove the Cover or unplug the unit.
- Page 10 Instructions for Use Chopping Continued 5. Make sure unit is in the OFF position; then plug the Food Processor into a 120V AC electrical outlet. 6. Turn the Speed Control Dial to the desired speed setting.The Indicator Light will come on. If processing slows or seems labored, increase the Speed Control Dial from 1 to 2 or turn to OFF and select the Pulse setting.
- Page 11 Slicing, Shredding and Chopping Guide SLICING BLADE - Cut food to fit Chute, use Speed 1 FOOD Apple Cabbage/Lettuce Carrots Celery Cucumber Mushrooms Onions Peppers Potatoes Summer Squash SHREDDING/GRATING BLADES - Cut food to fit Chute, use Speed 1 FOOD Apple Carrots Cheese, hard...
-
Page 12: Food Processing Hints
Food Processing Hints • Chopping - For best results, cut or tear food into pieces approxi- mately equal in size before processing. The finished results will be more uniform. Consistent processing results are achieved if the con- tainer has 2 to 7 1/2 cups of fruits or vegetables. •... -
Page 13: User Maintenance Instructions
User Maintenance Instructions This appliance requires little maintenance. It contains no user-serviceable parts. Any servicing requiring disassembly must be performed by a quali- fied appliance repair technician. Cleaning Instructions CAUTION: The Blades are sharp! Handle with care! Use extreme care when handling the Blades. Do not touch the Blades with your fingers. - Page 14 BASIL-TARRAGON PESTO For 2 pounds of pasta, such as fettuccine 2 bunches, about 2 cups, fresh basil leaves 1/2 cup tarragon leaves stripped from stems, about 5 - 6 sprigs 4 small cloves of garlic, popped from skins 6 tablespoons pine nuts, a handful 1/4 pound, about 1 cup, grated Parmigiano Reggiano cheese, a couple handfuls The zest of 2 lemons...
- Page 15 CLASSIC BASIL, PARSLEY AND SPINACH-WALNUT PESTOS Each pesto recipe will provide enough sauce for 2 pounds of pasta, or freeze some and have it next week. Method for each recipe: • Toast pine nuts (pignoli), walnuts or sesame seeds until golden brown before using them.
- Page 16 TEX-MEX WHITE BEAN DIP 3 cans (14 ounces) white kidney or cannelloni beans, drained 3 cloves garlic, popped away from skin 6-9 tablespoons fresh cilantro, a couple of handfuls of leaves 4 1/2 teaspoons ground cumin, a palm full 2 tablespoons hot sauce, such as Tabasco 3 splashes of water, about 3 tablespoons Coarse salt and fresh black pepper, to your taste Corn tortilla chips, yellow or blue, any variety and salsa of your choice...
- Page 17 ITALIAN ROASTED RED PEPPER HUMMUS 2 (14 ounces) cans chick peas (garbanzo beans), drained 4 roasted red peppers, or 1 (15 ounce) jar roasted bell peppers, drain and pat dry 2 sprigs fresh rosemary leaves stripped from stems 2 cloves garlic, cracked away from skin 4 pinches of crushed red pepper flakes 2 splashes of water, about 2 tablespoons 4-6 tablespoons EVOO - extra virgin olive oil, eyeball it...
- Page 18 GREEN WRAPS WITH WHITE BEAN HUMMUS 2 (15 ounce) cans cannelloni beans, drained and rinsed 4 stems fresh rosemary, leaves stripped from stem 2 cloves garlic, popped from skin 3-4 tablespoons EVOO - extra virgin olive oil, eyeball it Black pepper, to your taste 4 firm vine-ripened tomatoes, thinly sliced 1/2 seedless cucumber, thinly sliced 1/2 red onion, thinly sliced...
- Page 19 SPINACH DIP 1 (10 ounce) package, defrosted frozen chopped spinach 1 (8-ounce) can sliced water chestnuts, drained 2 cloves garlic 1 cup plain yogurt 2 bunches green onions, cut in 1-inch pieces 1 cup sour cream 2 teaspoons salt 1 teaspoon dried tarragon leaves 1/2 teaspoon dry mustard 1/2 teaspoon pepper Place all of the ingredients into the Food Processor with the Chopping...
-
Page 20: Peanut Butter
Recipes (Cont.) FRESH SALSA 10 Roma tomatoes, quartered and seeds removed 1 medium jalapeno pepper, halved and seeds removed 1 large onion, cut into 1-inch cubes 1/2 cup packed fresh cilantro leaves stripped from the stems 1 teaspoon cider vinegar 1 teaspoon salt 1/2 teaspoon black pepper Place all of the ingredients into the Food Processor with the Chopping... - Page 21 BRUSCHETTA Topping: 8 Roma tomatoes, quartered and seeds removed 1/4 cup packed fresh basil leaves, about 15 1/2 medium onion, cut into 1 inch cubes 3 cloves garlic 2 tablespoons olive oil 1 teaspoon red wine vinegar 1/2 teaspoon salt 1/4 teaspoon black pepper Bread: 1 loaf French Baguette or crusty Italian bread cut diagonally in 1/2 inch...
- Page 22 Recipes (Cont.) MEATBALLS 1 pound tenderized stew meat 1 slice bread, tear in 1-inch pieces 1 small onion, cut in 1-inch pieces 1 clove garlic 1 egg 1/2 teaspoon dried thyme Salt and pepper to taste 1/2 cup all-purpose flour Place all of the ingredients, except flour, into the Food Processor with the Chopping Blade.
-
Page 23: Limited One-Year Warranty
This warranty gives you specific legal rights and you may have other rights under the laws of your jurisdic- tion. For more information on our products, visit our website: www.maxim-toastmaster.com To contact us, please write to, call, or email: Consumer Relations Department... - Page 24 If I can do it, you can too! Go for it! Rachael Ray All recipes (so indicated) Copyright © 2006, by Rachael Ray. All Rights Reserved. Used by Permission. Printed in China 5/06 © 2006 Maxim ® /Toastmaster ® Inc.
Need help?
Do you have a question about the RRFP1A/T and is the answer not in the manual?
Questions and answers