Table of Contents
Advertisement
Quick Links
DIGITAL DOOR VIEWER
●
The following rights are reserved: to improve the product
without previous notice, on exterior looking, functional
parameter, usage, etc.
●
Use of the product on special purposes, we do not provide
any guarantee, statement or commitment.
●
The parameter of the product may change under different
environment. Any usage under unverified environment will
not be guaranteed.
USER MANUAL
Advertisement
Table of Contents

Summary of Contents for Henis Hardware JY7001
- Page 1 DIGITAL DOOR VIEWER USER MANUAL ● The following rights are reserved: to improve the product without previous notice, on exterior looking, functional parameter, usage, etc. ● Use of the product on special purposes, we do not provide any guarantee, statement or commitment. ●...
-
Page 2: Package List
Attention: 1.Please read this user manual carefully before using our product. 2.Never attempt to repair or modify this product or its accessories by yourself, to avoid injury and invalid guarantee! 3.Any accidental factor like being striked by thunder or any incorrect operation could cause a memory loss on the SD card. -
Page 3: Installation
Installation: 1.Replace the existing door viewer or drill a 14mm hole in the door at the required height, insert the camera from the outside . Making sure the washer is fitted between. The camera and the door. Ensure the bell push is at the bottom and adjust so that the camera is perpendicular to the horizon. -
Page 4: Installation And Replacement Of Batteries
Installation and replacement of batteries: Installation: 1.Slide the lid according to the pointing and open it upwards. 2.Put in the batteries according to the “+” “-” sign on the lid. 3.Take the reverse steps to close the lid. Attentions: 1.DO NOT overexert when open and close the lid to avoid any damage to the lid. -
Page 5: Button Functions
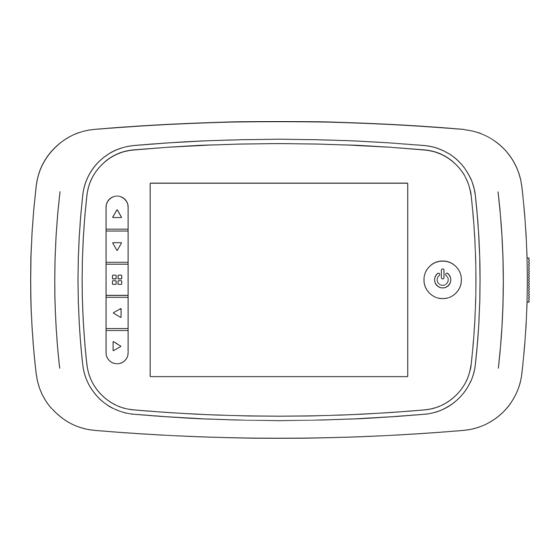
Operation instruction: Parts specifications: The front part of the screen case: Button functions: : multi function basic function Upward shift Downward shift Menu Left shift only in menu setting selection key to replay mode in normal use. Right shift only in menu setting start shooting key in normal use Power button Back side of screen case 7.TF card socket... - Page 6 Operation instructions: Parts specification: Camera front looking : camera side looking 1.Camera 2. Door bell button 3. Data wire Menu interface instruction: 00000 2011-01-01 21 05 08...
- Page 7 No : Icon Function photo shooting mode Mode directing icons Video shooting mode Playback mode for photos or videos This icon shows the TF card is TF card plugged-in icon plugged in and is recognized by the system. This icon shows the normal door bell mode Door bell state icon This icon shows the DND(do not...
- Page 8 Before plug the card into the product, please make sure the side with marks face to the front. And when plug in the card, only after hearing a “click” means the card is locked. this product can hold a max. 8GB Micro SD memory card. to take out the memory card, please press the card and the card will pop out 1/3.
-
Page 9: Operation
All videos taken are soundless. Operation: Replay and edit of the stored photos/videos The stored photos and videos can be played on this product, also can be deleted or be edited. " " When the screen is on, press the till the xx icon appears, which indicates the replay mode is on. -
Page 10: Specifications
Specifications: Model: JY7001 Door thickness: 40-70mm Door barrel diameter: 14-26mm Camera: 0.3 mega pixels LCD Screen: 3.5”TFT Power: 4 AA batteries Memory card: Micro SD card (TF), max 8GB Photo volume for 1GB: 15000pc (lab condition, the actual volume could differ under different circumstances...
Need help?
Do you have a question about the JY7001 and is the answer not in the manual?
Questions and answers