Table of Contents
Advertisement
Quick Links
funkwerk W-Client USB .11abg
Copyright
©
03/04/2007 Funkwerk Enterprise Communications GmbH
User Manual
Table of Contents
PRODUCT OVERVIEW ........................................................................1
1.1
Introduction...................................................................................................1
1.2
Features and Benefits ..................................................................................2
GETTING STARTED.............................................................................3
2.1
Overall Setup Procedures.............................................................................3
WIRELESS ADAPTER INSTALLATION ..............................................4
3.1
Hardware Installation ....................................................................................4
3.2
Drivers & Utility Installation ...........................................................................4
USING THE SYSTEM TRAY UTILITY ................................................11
WIRELESS ADAPTER UTILITY FEATURES.....................................15
5.1
Current Status Tab .....................................................................................15
5.2
Profile Management Tab ............................................................................16
5.2.1
Security Tab................................................................................................26
5.3
Diagnostics Tab..........................................................................................29
WIRELESS ADAPTER UTILITY CONFIGURATION..........................32
6.1
Ad-hoc Mode ..............................................................................................32
6.1.1
When to set up Ad-hoc Mode .....................................................................32
6.2
Infrastructure Mode ....................................................................................42
6.2.1
Configuration on Infrastructure Mode .........................................................43
TYPES OF AUTHENTICATION AND ENCRYPTION MODE .............48
7.1
Ad-hoc Network Security ............................................................................48
7.2
Infrastructure Network Security ..................................................................49
7.2.1
EAP-TLS.....................................................................................................50
7.2.2
EAP-TTLS ..................................................................................................51
7.2.3
PEAP (EAP-GTC).......................................................................................54
7.2.4
PEAP (EAP-MSCHAP V2)..........................................................................56
7.2.5
LEAP ..........................................................................................................58
7.2.6
WPA Passphrase .......................................................................................61
7.2.7
Pre-shared Key (Static WEP) .....................................................................62
REMOVE USB ADAPTER FROM THE SYSTEM ...........................64
UN-INSTALL WIRELESS ADAPTER ............................................66
CERTIFICATE APPLICATION FOR WPA MODE ..........................68
Installing certificate on your server ...........................................................69
Applying for Client Certifications................................................................71
ii
Advertisement
Table of Contents

Related Manuals for Funkwerk W-Client

Summary of Contents for Funkwerk W-Client
-
Page 1: Table Of Contents
APPENDIX I REMOVE USB ADAPTER FROM THE SYSTEM ......64 APPENDIX II UN-INSTALL WIRELESS ADAPTER ..........66 funkwerk W-Client USB .11abg APPENDIX III CERTIFICATE APPLICATION FOR WPA MODE ......68 AIII.I Installing Window XP Service Pack Patch File (For Windows XP users) ...69 AIII.2... -
Page 2: Chapter 1 Product Overview
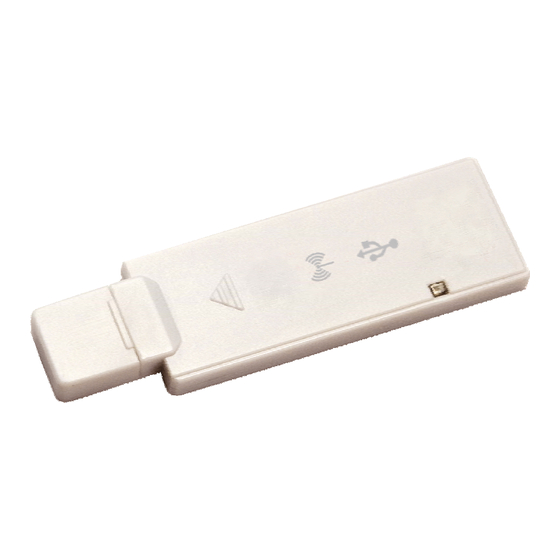
Disable Wireless Zero Configuration Utility..........78 APPENDIX V PANEL VIEWS AND DESCRIPTIONS..........79 The W-Client delivers the performance and capabilities that every mobile user is looking for. Embedded with Atheros chipset, it boasts network robustness, stability and APPENDIX VI TECHNICAL SPECIFICATIONS .............80 wider coverage for long-range connectivity. -
Page 3: Features And Benefits
Chapter 1 Product Overview Chapter 2 Getting Started Chapter 2 Getting Started Features and Benefits This chapter outlines the basic requirement for any installation and configuration on the USB adapter. • Compact and Mobile The USB adapter is designed especially for the mobile generation. The casing is compact and sleek, and the antenna is built-in to further preserve the miniature footprint. -
Page 4: Chapter 3 Wireless Adapter Installation
Chapter 3 Wireless Adapter Installation Chapter 3 Wireless Adapter Installation Chapter 3 Wireless Adapter Installation When the License Agreement screen appears, you are required to read and accept the agreement to continue. Click on the Next> button to The USB adapter is a plug-and-play device. You can plug it into the USB slot of your proceed. - Page 5 Chapter 3 Wireless Adapter Installation Chapter 3 Wireless Adapter Installation For Windows XP users Atheros Client Utility (ACU) and Supplicant option Select this option to install your USB adapter’s utility. (Recommended) If you are using Windows XP as operating system, the following screen will appear.
- Page 6 Chapter 3 Wireless Adapter Installation Chapter 3 Wireless Adapter Installation Cancel the Found New Hardware Wizard if it appears and click on the The folder name, Atheros USB 2.0 Wireless Network Adapter will appear in the OK button to begin the installation. Network Adapters section.
-
Page 7: Chapter 4 Using The System Tray Utility
Chapter 3 Wireless Adapter Installation Chapter 4 Using the System Tray Utility To use the Atheros Client Utility, go to the Start Menu followed by Programs. Chapter 4 Using the System Tray Utility Then select Atheros. From Atheros, select Atheros Client Utility. You may now start to configure your USB adapter. - Page 8 Chapter 4 Using the System Tray Utility Chapter 4 Using the System Tray Utility Preferences Manual LEAP Login This option allows you to set the startup and If you select this option, you will have to manually start the LEAP authentication menu options for the utility.
-
Page 9: Chapter 5 Wireless Adapter Utility Features
Chapter 4 Using the System Tray Utility Chapter 5 Wireless Adapter Utility Features Chapter 5 Wireless Adapter Utility Features Connection Status To view the connection status of your wireless USB adapter. This chapter shows you how to make use of the utility to view the status of your wireless connection;... -
Page 10: Profile Management Tab
Chapter 5 Wireless Adapter Utility Features Chapter 5 Wireless Adapter Utility Features Profile Management Tab This option allows you to manage your profile, set your security options, and Click on New button to create a new profile. Enter the profile name (a unique scan for other wireless networks. - Page 11 Chapter 5 Wireless Adapter Utility Features Chapter 5 Wireless Adapter Utility Features To modify an existing profile, select the profile that you wish to modify and click To activate a profile, select the profile and click on this button. We are using on this button.
- Page 12 Chapter 5 Wireless Adapter Utility Features Chapter 5 Wireless Adapter Utility Features This function allows you to save the settings of your profile onto disk. Select the This function allows you to retrieve a saved profile from disk. We are using profile that you wish to save and click on this button.
- Page 13 Chapter 5 Wireless Adapter Utility Features Chapter 5 Wireless Adapter Utility Features The icons shown beside the Network Name (SSID) indicate the type of WLAN detected. This function allows you to scan for wireless networks detected by the adapter. Infrastructure (AP) Network Connected to Infrastructure (AP) Network Ad-hoc Network...
- Page 14 Chapter 5 Wireless Adapter Utility Features Chapter 5 Wireless Adapter Utility Features If you have created several profiles, this function allows you to establish the priority order in which the USB adapter should try to connect to a WLAN. If the USB adapter is unable to connect to the 1 profile, it will then try to connect to the 2...
-
Page 15: Security Tab
Chapter 5 Wireless Adapter Utility Features Chapter 5 Wireless Adapter Utility Features Transmit Power Level Specifies the wireless transmit power to be used. Reducing the power level 5.2.1 Security Tab lowers the risk of interference with other nearby wireless devices and conserves battery power but decreases radio range. -
Page 16: Diagnostics Tab
Chapter 5 Wireless Adapter Utility Features Chapter 5 Wireless Adapter Utility Features This option allows communication with other 802.11b devices that support Enables an adapter to attempt authentication regardless of its WEP short preamble to boost the throughput. settings. It will only associate with the access point if the WEP key of the adapter matches that of the access point. - Page 17 Chapter 5 Wireless Adapter Utility Features Chapter 5 Wireless Adapter Utility Features This button contains general information about the network interface card (the wireless USB adapter) and the network driver interface specification (NDIS). This button shows more detailed statistical information on frames that are either received by or transmitted to the USB adapter.
-
Page 18: Chapter 6 Wireless Adapter Utility Configuration
Chapter 6 Wireless Adapter Utility Configuration Chapter 6 Wireless Adapter Utility Configuration Chapter 6 Wireless Adapter Utility Configuration Ad-hoc mode is also referred to as peer-to-peer mode or as Independent Basic Service Set (IBSS). Ad-hoc mode is useful when wireless devices are within range of each other and can discover and communicate among themselves without an AP. - Page 19 Chapter 6 Wireless Adapter Utility Configuration Chapter 6 Wireless Adapter Utility Configuration Once you have installed the utility, the system will automatically create a default profile. If you wish to create a new profile, click on New button. If not, simply click on Modify button to change the default settings.
- Page 20 Chapter 6 Wireless Adapter Utility Configuration Chapter 6 Wireless Adapter Utility Configuration For 128-bit WEP: 26 hexadecimal or 13 ASCII Text For 152-bit WEP: 13 hexadecimal or 16 ASCII Text Proceed to the Security tab. Select Pre-Shared Key (Static WEP) option and click on the Configure…...
- Page 21 Chapter 6 Wireless Adapter Utility Configuration Chapter 6 Wireless Adapter Utility Configuration For PC2 Set your PC’s IP address to 192.168.168.12; subnet mask to 255.255.255.0. Go to the Profile Management tab and click on the Scan button to look for USB-CLIENT (the SSID that you had previously created in PC1). Once detected, highlight this profile and click on the Activate button.
- Page 22 Chapter 6 Wireless Adapter Utility Configuration Chapter 6 Wireless Adapter Utility Configuration Alternatively, you may also go to the MS-DOS Prompt window of each PC to ping the other PC. From the Start menu, go to Run… Type in cmd and click on the OK button. From the MS-DOS Prompt window of PC2, type ping 192.168.168.11 –t, to ping PC1.
-
Page 23: Infrastructure Mode
Chapter 6 Wireless Adapter Utility Configuration Chapter 6 Wireless Adapter Utility Configuration 6.2.1 Configuration on Infrastructure Mode Infrastructure Mode In this example, two notebooks and PC2 act as wireless clients to communicate with the wireless AP. Once all configuration has been done, wireless clients with In infrastructure architecture, the wireless clients communicate through access the same SSID as the AP will be able to access wirelessly to PC1 via the points that are devices that act as base station for all wireless communication. - Page 24 Chapter 6 Wireless Adapter Utility Configuration Chapter 6 Wireless Adapter Utility Configuration For PC 2 Notice that the SSID has already been pre-configured in this profile. The SSID of both the wireless AP and the wireless client must be the same for Activate your USB adapter’s utility.
- Page 25 Chapter 6 Wireless Adapter Utility Configuration Chapter 6 Wireless Adapter Utility Configuration In the MS-DOS Prompt window, type ping 192.168.168.1 –t, whereby this IP address belongs to your access point. Enter the encryption key in the field provided. Please note that this key must be the same as the one that you had configured for your access point.
-
Page 26: Chapter 7 Types Of Authentication And Encryption Mode
Chapter 7 Types of Authentication and Encryption mode Chapter 7 Types of Authentication and Encryption mode Key Entry Method Chapter 7 Types of Authentication and Encryption mode There are 2 types of key entries: • Hexadecimal: Enter only digits 0 ~ 9 and letters a ~ f/A ~ F. •... -
Page 27: Eap-Tls
Chapter 7 Types of Authentication and Encryption mode Chapter 7 Types of Authentication and Encryption mode Choose EAP-TLS from the drop-down menu and click on the 7.2.1 EAP-TLS Configure… button. Extensible Authentication Protocol-Transport Layer Security (EAP-TLS) NOTE makes use of client-side and server-side certificates for mutual To enable this security, you must ensure that your PC/notebook has authentication. - Page 28 Chapter 7 Types of Authentication and Encryption mode Chapter 7 Types of Authentication and Encryption mode To use EAP-TTLS security, access the Security tab in the Profile Click on the Advanced… button. Management window. You can select WPA radio button 802.1x radio button Leave the specification server/domain field blank to allow the client to accept a certificate from any server that supplies a certificate...
-
Page 29: Peap (Eap-Gtc)
Chapter 7 Types of Authentication and Encryption mode Chapter 7 Types of Authentication and Encryption mode Enter your PEAP username (which is registered with the server) in the User Name field. 7.2.3 PEAP (EAP-GTC) Specify whether you are using a Token or a Static Password. The PEAP (EAP-Generic Token Card) method is intended for use with Click on the Advanced button. -
Page 30: Peap (Eap-Mschap V2)
Chapter 7 Types of Authentication and Encryption mode Chapter 7 Types of Authentication and Encryption mode 7.2.4 PEAP (EAP-MSCHAP V2) Microsoft-Challenge Handshake Authentication Protocol V2 (MS-CHAP V2) is a mutual authentication protocol that requires both the client and server’s identities to be proven. If your connection is configured to use MS-CHAP V2 as its only authentication method, and the server that you are connecting to does not provide proof of its identity, your connection disconnects. -
Page 31: Leap
Chapter 7 Types of Authentication and Encryption mode Chapter 7 Types of Authentication and Encryption mode The login page will pop up as shown below. Fill up the respective 7.2.5 LEAP fields and click on the OK button twice. Lightweight Extensible Authentication Protocol (LEAP) security requires all infrastructure devices (e.g. -
Page 32: Wpa Passphrase
Chapter 7 Types of Authentication and Encryption mode Chapter 7 Types of Authentication and Encryption mode 7.2.6 WPA Passphrase Saved User Name and Password WPA Passphrase is also known as WPA-PSK (Pre-shared Key). It Enter the username, password and re-enter password in Confirm provides strong encryption protection for home/SOHO users who do Password field. -
Page 33: Pre-Shared Key (Static Wep)
Chapter 7 Types of Authentication and Encryption mode Chapter 7 Types of Authentication and Encryption mode 7.2.7 Pre-shared Key (Static WEP) Enter your WEP key and click on the OK button. Wired Equivalent Privacy is a security protocol that allows the wireless client adapter to communicate ONLY with access points or other wireless clients that have the same WEP key. -
Page 34: Appendix Iremove Usb Adapter From The System
Appendix I Remove USB Adapter from the System Appendix I Remove USB Adapter from the System Appendix I Remove USB Adapter from the System Next, select Atheros USB 2.0 Wireless Network Adapter to confirm you will be removing it from the USB port and click on the OK button. To safely remove your USB adapter from your system, From the system tray, go to Safely Remove Hardware icon and click Safely Remove Hardware. -
Page 35: Appendix Ii Un-Install Wireless Adapter
Appendix II Un-install Wireless Adapter Appendix II Un-install Wireless Adapter Appendix II Un-install Wireless Adapter The prompt screen appears to notify you that the uninstall option requires the system to be rebooted at the end of the uninstall process. Click on the Yes button Please note that in case there is a software upgrade for the wireless adapter, you will to proceed. -
Page 36: Appendix Iii Certificate Application For Wpa Mode
Appendix III Certificate Application for WPA mode Appendix III Certificate Application for WPA mode Appendix III Certificate Application for WPA mode AIII.I Installing Window XP Service Pack Patch File (For Windows XP The USB adapter supports Wi-Fi Protected Access (WPA) and Wi-Fi Protected users) Access-Pre Shared Key (WPA-PSK) mode in Windows 2000/XP. -
Page 37: Aiii.3 Applying For Client Certifications
Appendix III Certificate Application for WPA mode Appendix III Certificate Application for WPA mode server The following window will appear showing that the certificate has been successfully installed into your PC. If you are using Microsoft Certificates services, Click on the Install this certificate link in the window to start the installation. -
Page 38: Aiii.4 Becoming A Domain Member
Appendix III Certificate Application for WPA mode Appendix III Certificate Application for WPA mode The screen below will appear to indicate that a certificate has been successfully issued to your PC. AIII.4 Becoming a domain member Next, you need to add your username in the domain so that you can communicate with the access point connected to your server. - Page 39 Appendix III Certificate Application for WPA mode Appendix III Certificate Application for WPA mode Next, you need to enter your username and password again for verification. Please note that your system administrator provides this information. Click on the OK button to proceed. When done, a message will appear as shown below.
-
Page 40: Appendix Iv Wireless Zero Configuration Utility
Appendix IV Wireless Zero Configuration Utility Appendix IV Wireless Zero Configuration Utility Appendix IV Wireless Zero Configuration Utility If your computer is running under the Windows XP operating system, you can opt to configure the Wireless Network Connection from your Windows XP operating system, instead of the Atheros Utility. -
Page 41: Aiv.2 Disable Wireless Zero Configuration Utility
Appendix IV Wireless Zero Configuration Utility Appendix V Panel Views and Descriptions Appendix V Panel Views and Descriptions When the Wireless Zero Configuration Utility is in use, a pop-up message is displayed on the Utility when you attempt to create or edit a configuration profile from the Profile Management tab of the utility. -
Page 42: Appendix Vi Technical Specifications
Appendix VI Technical Specifications Appendix VI Technical Specifications Appendix VI Technical Specifications Operating Channels • IEEE 802.11b/g: 11 Channels (North America) • 13 Channels (Most European countries) • 14 Channels (Japan) Network Protocol, Standards and Electrical Emissions IEEE 802.11a: • •... - Page 43 Appendix VI Technical Specifications Physical and Environment Environmental Requirements 0 °C to 55 °C Operating temperature: -20 °C to 70 °C Storage temperature: 10 % to 70 % RH Operating humidity: 5 % to 90 % RH Non-operating humidity: Power Consumption 5 V DC, 500 mA max Physical Dimensions 87 mm x 26.6 mm x 7.7 mm...
Need help?
Do you have a question about the W-Client and is the answer not in the manual?
Questions and answers