Table of Contents
Advertisement
Advertisement
Table of Contents

Related Manuals for Bush CDVD12SWM


Summary of Contents for Bush CDVD12SWM
- Page 1 Instruction Manual CDVD12SWM...
-
Page 2: Table Of Contents
Quick search FWD & RWD . . . . . . . . . . . . . . . . . . . . . 7 CDVD12SWM Stopping playback . -
Page 3: Safety Information
Safety information Important – Please read these instructions fully before using CAUTION: TO REDUCE THE RISK OF ELECTRIC SHOCK, DO NOT REMOVE ANY COVER . NO USER-SERVICEABLE PARTS INSIDE, REFER ANY SERVICING TO QUALIFIED SERVICE PERSONNEL . • Please read this owner’s guide This symbol means that this unit is double •... -
Page 4: Disc Handling
Safety information Important – Please read these instructions fully before using Disc handling Copyright information Do not touch the playback side of the disc . This product incorporates copyright protection Do not attach paper or tape to disc . technology that is protected by U . S . patents and other intellectual property rights . -
Page 5: Accessories Included
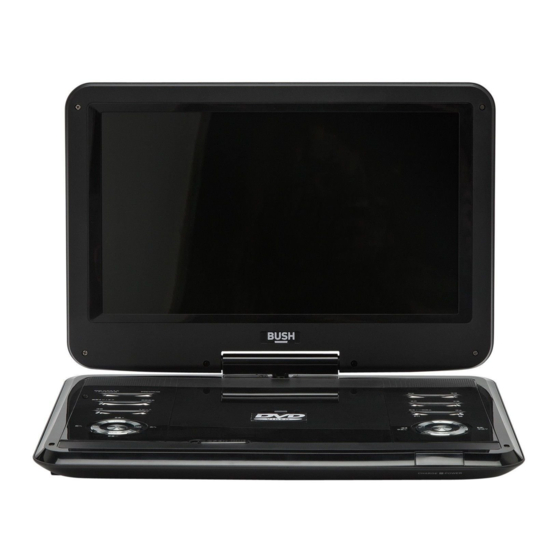
Functions & controls Please familiarize yourself with the parts and accessories listed below Accessories included • 1 X CDVD12SWM • 1 X remote control • 1 x Earphones • 1 x Mains adapter 19 20 21 • 1 X Instruction Manual •... -
Page 6: Overview Of Remote Control
If you have damaged or missing parts, Functions & controls call the Customer Helpline: 0870 600 3030 Making the connections Overview of remote control STANDBY: STANDBY mode ON/OFF TFT: Press to disable the built-in TFT screen. Press again to enable MENU: Press to display the DVD SUBTITLE: Press repeatedly to menu (if available) -
Page 7: Remote Control Battery Installation
Installation Remote control battery installation 1: Remove the battery cover (as shown) . NOTE: before attempting to connect this unit to 2: Insert 2 x AAA batteries, taking note that the polarities a TV, ensure that the CDVD12SW and TV are both match up . -
Page 8: Supported Formats
User instructions Supported formats Setting the volume level 1: Use the VOLUME - / + buttons (6) on either the main • Full compatibility with DVD, CD, Kodak picture CD, CD-R & CD-RW unit or remote to increase or decrease the listening •... -
Page 9: Search Function
User instructions SEARCH function Change viewing angle 1:Press the ANGLE button to select the desired angle The SEARCH function allows you to enter a specific chapter, title, audio track, subtitle track, angle and you wish to view the scene in . specific time codes. -
Page 10: Picture Disc / Jpg Image Viewer (Cont)
User instructions Picture disc / JPG image viewer (cont) Input mode switching 3: If you wish to view a specific image then press the 1: Insert the memory device into the required slot . SD/ STOP button to return to a thumbnail list of the MMC goes into (18) and USB goes into (17) . -
Page 11: Setup Menu
User instructions Setup menu The below diagram shows the complete set of options and where to locate them. SETUP GENERAL AUDIO DOLBY DIGITAL VIDEO PREFERENCE Normal / PS Stereo TV DISPLAY Normal / LB SPEAKER SETUP DUAL MONO L-Mono PANEL QUALITY TV TYPE AUTO Wide... -
Page 12: Audio Menu
User instructions AUDIO MENU PREFERENCE MENU (cont) DOWNMIX AUDIO LANG This option allows you to change the way the audio is Choose the default audio setting . This means the DVD assigned to each speaker . Choose from : player will automatically select this language as the LT/RT - Left / Right mixed mode audio track ( if available ) . -
Page 13: Care & Maintenance
User instructions Care & maintenance Important: Always unplug the appliance from the power socket during cleaning and maintenance . Never use any sharp instruments or abrasive substances, soap, household cleaner, detergent or wax polish for cleaning . Clean the external surfaces with a damp soft cloth only . Never use abrasive products or solvents as it may damage the appliance . -
Page 14: Technical Specifications
User instructions Technical specifications Power Supply • Output - DC 12V 1500mA • Input - AC 100~240V 50/60Hz 0 . 6 5A Input voltage • DC 9-12V 1 . 5 A Battery • Lithium battery Battery capacity • 2400mAH/7 . 4 V •... - Page 15 Guarantee PRODUCT GUARANTEE This product is guaranteed against manufacturing defects for a period of Year This product is guaranteed for twelve months from the date of original purchase. Any defect that arises due to faulty materials or workmanship will either be replaced, refunded or repaired free of charge where possible during this period by the dealer from whom you purchased the unit.