
Subscribe to Our Youtube Channel
Related Manuals for Samsung DV48J7700E(G) series


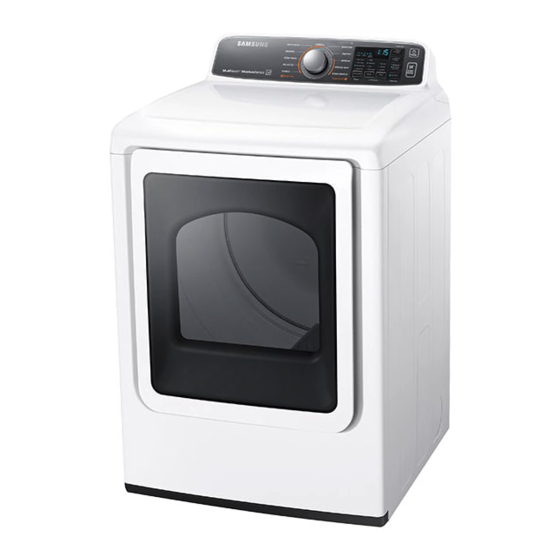
Summary of Contents for Samsung DV48J7700E(G) series
-
Page 1: User Manual
Dryer User manual DV48J7700E(G)*/DV48J7770E(G)* DV7700J-03170Q-01_EN-US.indd 1 2015/4/9 16:22:30... -
Page 2: Table Of Contents
Contents Safety information What you need to know about the safety instructions Important safety symbols Important safety precautions Installation What’s included Before installation Basic requirements Location considerations Ducting requirements Exhausting Gas requirements Electrical requirements Grounding Electrical connections Step-by-step installation Connecting the inlet hose Final installation check list Vent blockage test (DV48J7700E(G)*) Dryer exhaust tips... - Page 3 Troubleshooting Checkpoints Information codes Specifications Protecting the environment Specification sheet Cycle chart SAVE THESE INSTRUCTIONS English 3 DV7700J-03170Q-01_EN-US.indd 3 2015/4/9 16:22:31...
-
Page 4: Safety Information
Safety information Congratulations on your new Samsung dryer. This manual contains important information on the installation, use and care of your appliance. Please take some time to read this manual to take full advantage of your dryer’s many benefits and features. -
Page 5: Important Safety Precautions
These warning signs are here to prevent injury to yourself and others. Please follow them explicitly. After reading this manual, store it in a safe place for future reference. Read all instructions before using the appliance. As with any equipment that uses electricity and moving parts, potential hazards exist. To safely operate this appliance, familiarize yourself with its operation and exercise care when using it. - Page 6 Safety information 4. Do not store or use gasoline or other flammable vapors and liquids near this or any other appliance. 5. Do not allow children to play on or in the appliance. Close supervision of children is necessary when the appliance is used near children. 6.
- Page 7 WARNING - To reduce the risk of fire or explosion: • Do not dry items that have been previously cleaned, washed, soaked, or spotted with gasoline, dry cleaning solvents, or other flammable or explosive substances. They emit vapors that could ignite or explode. Any material that has been in contact with a cleaning solvent or flammable liquids or solids should not be placed in the dryer until all traces of these flammable liquids or solids and their fumes have been removed.
- Page 8 Safety information Warnings WARNING Ensure pockets are free from small, irregularly shaped hard objects, foreign material, etc. ie. coins, knives, pins, etc. These objects could damage your dryer. Gas leaks may occur in your system, resulting in a dangerous situation. Cautions CAUTION Do not allow children or pets to play on, in, or in front of the appliance.
- Page 9 This appliance must be properly grounded. Never plug the power cord into a receptacle that is not grounded adequately or not in accordance with local and national codes. See installation instructions for information about grounding this appliance. Do not sit on top of the dryer. Do not wash clothing with large buckles, buttons, or other heavy metal or solid objects.
-
Page 10: Installation
What’s included Make sure all the parts are included in the product package. If you have a problem with the dryer or the parts, contact a local Samsung customer center or the retailer. 01 Control panel 02 Work top... - Page 11 Y-connector Rubber washer Water hose Short water hose (Canada model only supplied) WARNING Packing materials can be dangerous to children. Keep all packing material (plastic bags, polystyrene, etc.) well out of children’s reach. CAUTION • Do not move the product while holding the front part of the top cover of the dryer. This may cause the cover to separate from the dryer and result in injury.
-
Page 12: Before Installation
Installation Before installation Please read the following instructions carefully before installing the dryer. These instructions should be kept for future reference. WARNING Remove the door from all discarded appliances to avoid the danger of a child suffocating. Control board and inlet valve are intentionally not grounded and may present a risk of electric shock only during servicing. -
Page 13: Location Considerations
Location considerations Locate the dryer where there is enough space at the front for loading the dryer, and enough space behind for the exhaust system. This dryer is factory-ready for rear exhaust. To exhaust out the bottom or the right or the left (electric model only), use the accessory exhaust kit (sold separately). -
Page 14: Ducting Requirements
Installation Ducting requirements Weather hood type Recommended Use only for short-run installation 4” (10.2 cm) 2.5” (6.4 cm) No. of 90° Metallic Metallic Rigid Rigid elbows flexible* flexible* 80 ft. (24.4 m) 41 ft. (12.4 m) 74 ft. (22.6 m) 33 ft. - Page 15 • The hood should have at least 12 inches (30.5 cm) of clearance between the bottom of the hood and the ground or other obstruction. The hood opening should point down. • Never install a screen over the exhaust outlet. • To avoid lint buildup, do not exhaust the dryer directly into a window well.
-
Page 16: Exhausting
Installation Exhausting The dryer must not be exhausted into a chimney, a wall, a ceiling, an attic, a crawl space, or a concealed space of a building. Exhausting the dryer to the outside will prevent large amount of lint and moisture from being blown into the room. -
Page 17: Gas Requirements
Gas requirements WARNING • Use only natural or LP (liquid propane) gases. • THE INSTALLATION MUST CONFORM WITH LOCAL CODES, OR IN THE ABSENCE OF LOCAL CODES, WITH THE NATIONAL FUEL GAS CODE ANSI/Z223.1, LATEST REVISION (FOR THE UNITED STATES), OR WITH THE CAN /CGA-B149 INSTALLATION CODES (FOR CANADA). • Gas dryers are equipped with a burner vent for use with natural gas. -
Page 18: Electrical Requirements
Installation Commonwealth of Massachusetts installation instructions Your dryer must be installed by a licensed plumber or gas fitter. A “T” handle manual gas valve must be installed in the gas supply line to your dryer. If a flexible gas connector is used to install your dryer, the connector can be no longer than 3’... -
Page 19: Grounding
Grounding This dryer must be grounded. In the event of malfunction or breakdown, the ground will reduce the risk of electrical shock by providing a path of least resistance for the electrical current. WARNING Improper connection of the equipment-grounding conductor can result in a risk of electric shock. -
Page 20: Electrical Connections
Installation Electrical connections Before operating or testing, follow all grounding instructions in the "Grounding" section. An individual branch (or separate) circuit serving only your dryer is recommended. DO NOT USE AN EXTENSION CORD. Gas models – U.S. and Canada A 120 volt, 60 Hz AC approved electrical service, with a 15-ampere fuse or circuit breaker is required. -
Page 21: Step-By-Step Installation
Step-by-step installation For proper installation, we recommend that you hire a qualified installer. Read these instructions completely before you begin the installation. To install the dryer, follow these steps: 1. Move your dryer to an appropriate location for installation. Consider installing the dryer and washer sideby- side so you have easy access to both appliances. - Page 22 Installation 6. Review the "Electrical requirements" section, then follow the 3 Wire system connection instructions (Step 7) or 4 Wire system instructions (Step 8) below. 7. Three Wire system instructions: A. External ground connector B. Neutral grounding wire (white) C. Center silver-colored terminal block screw D.
- Page 23 8. Four Wire System instructions: A. External ground connector B. Green or bare copper wire of power cord C. ¾” (1.9 cm) UL-listed strain relief D. Center silver-colored terminal block screw E. Neutral grounding wire (white) F. Neutral wire (white or center wire) a.
- Page 24 Installation WARNING For U.S. models: Risk of electrical shock • All U.S.models are designed for a 3-WIRE SYSTEM CONNECTION. The dryer frame is grounded to the neutral conductor at the terminal block. A 4-WIRE SYSTEM CONNECTION is required for new or remodeled construction, mobile homes, or if local codes do not permit grounding through neutral.
- Page 25 NOTE If you have a dryer and dryer: • To set the dryer to the same height as the washer, fully retract (A) the leveling feet by turning them counterclockwise, then loosen (B) the feet by turning them clockwise. Once the dryer is the same height as the washer, follow the directions above to level the dryer.
-
Page 26: Connecting The Inlet Hose
Installation Connecting the inlet hose Method1 The dryer must be connected to the cold water faucet using the new inlet hoses. Do not use old hoses. (long hose : Canada model only supplied) 1. If space permits, attach the brass female end of the “Y”... - Page 27 Method2 The dryer must be connected to the cold water faucet using the new inlet hoses. Do not use old hoses. (long hose : Canada model only supplied) 1. If the “Y” connector (A) cannot be attached directly to the cold water faucet, the short hose must be used.
-
Page 28: Final Installation Check List
Installation 5. Attach the ‘Y” connector to the brass male end of the small hose. Screw on the coupling by hand until it is seated on the connector. 6. Using pliers, tighten the coupling with an additional two-thirds turn. NOTE Do not overtighten, as it may damage the coupling. -
Page 29: Vent Blockage Test (Dv48J7700E(G)*)
Vent blockage test (DV48J7700E(G)*) After the dryer is installed, start the Test to check if the exhaust system is applicable for the dryer. Vent Blockage Test detects duct state of the dryer automatically and report blockage state of the duct to the user. Proper duct state can help users to reduce drying time and save energy. -
Page 30: Dryer Exhaust Tips
Installation • If diagnosis is suspended, it could result in the wrong results. It must be tested according to diagnosis procedures. • Even if the diagnosis result is normal (“End”), the exhaust system may also be interrupted or blocked slightly. Set properly according to Installation process of this manual. - Page 31 3. Keep ducts as straight as possible. 4. Clean all old ducts before installing your new dryer. Be sure the vent flap opens and closes freely. Inspect and clean the exhaust system annually. Don’t let a poor exhaust system slow drying by: 1.
- Page 32 Installation 2. Using a plastic, thin foil, or non-metal flexible duct. 3. Using unnecessarily long ducts that have many elbows. 4. Using crushed or clogged venting or ducts. 32 English DV7700J-03170Q-01_EN-US.indd 32 2015/4/9 16:22:38...
-
Page 33: Door Reversal
Door reversal If you want to reverse the direction of the door, we recommend you call a qualified service technician. 1. Unplug the power cord. 2. Remove the four hinge screws from the door. 3. Remove the door by lifting it. 4. - Page 34 Installation 9. Remove the 14 screws. NOTE Two screws (B) are longer than the other screws. 10. Remove the holder-glass. 11. Exchange the positions of: A. The cover-hinge and handle door B. The holder-hinge and guiderholder glass 12. Remove the door-lever, and then install it on the opposite side.
- Page 35 16. Install the door on the frame-front and then fasten the 4 screws that you removed in step 2. NOTE Check the positions of the screws you installed in the hinge door. English 35 DV7700J-03170Q-01_EN-US.indd 35 2015/4/9 16:22:40...
-
Page 36: Before You Start
Before you start Guideline Sorting and loading • Place only one wash load in the dryer at a time. • Avoid mixing heavy and lightweight items together. • To increase drying efficiency when drying one or two items, add a dry towel to the load. • For best results, untangle items before inserting into the dryer. -
Page 37: Operations
Operations WARNING To reduce the risk of fire, electric shock, or injury to persons, read the IMPORTANT SAFETY INSTRUCTIONS before operating this appliance. Control panel DV48J7700E(G)* DV48J7770E(G)* Turn the Cycle Selector to select the desired cycle. The indicator by 01 Cycle Selector the cycle name lights up. - Page 38 Operations Press to change the temperature for the current cycle. • High: For sturdy cottons or those labeled Tumble Dry. • Medium: For permanent press, synthetics, lightweight cottons, or items labeled Tumble Dry Medium. 03 Temp. • Low: For heat sensitive items labeled Tumble Dry Low or Tumble Dry Warm.
- Page 39 This function is available in the NORMAL and TIME DRY. When the Eco Dry function is activated, drying takes longer, but the power consumption is reduced. 08 Eco Dry (When the Eco Dry function is enabled, the drying time can be extended up to 3 times depending on the specified temperature and the amount of laundry to be dried.
-
Page 40: Simple Steps To Start
Operations Simple steps to start 1. Press Power to turn on the dryer. 2. Turn the Cycle Selector to select a cycle. 3. Change the cycle settings (Dry Level and Time) as necessary. 5. The dryer provides the additional options: Wrinkle Prevent, and Eco Dry. Press to activate/deactivate the options. -
Page 41: Cycle Overview
Cycle overview Sensor Dry cycles Sensor Dry cycles automatically senses the moisture in the load and shuts the dryer off when the load reaches the dryness level you have selected with Dry Level. Cycle Description • For most fabrics including cotton, linens, and normally soiled garments. - Page 42 Operations Manual Dry cycles Cycle Description QUICK DRY • Provides a 30 minute drying cycle. • Allows you to select a cycle time in minutes. (If this cycle is selected, the Eco Dry function is enabled by TIME DRY default. For more information, refer to the description of the “Eco Dry”...
-
Page 43: Cycle Guide
Cycle guide Always follow the care label when drying. If care label instructions are not available, use the following chart. • Follow the care label instructions or dry using the BEDDING. Bedspreads & • Make sure the item is thoroughly dry before using or storing. Comforters • May require repositioning to ensure even drying. - Page 44 : Galaxy & iPhone series (cannot be turned off and then on again, Child Lock supported for some models). remains activated. Download the Samsung Smart Care app into your smart phone from the Android market Drum Light or Apple App store. (Search word: "Samsung Lights the dryer drum while the dryer is Smart Washer/Dryer")
- Page 45 6. If the smart phone fails to recognize the information code more than twice, enter the information code displayed on the display panel of the dryer manually into the Smart Care app. NOTE Precautions when using Smart Care • If light from a light bulb, fluorescent bulb, or lamp is reflected on the display panel of the dryer, the smart phone may not be able to recognize the panel or...
-
Page 46: Maintenance
Keep the dryer clean to prevent deteriorated performance and to preserve its life cycle. Vent Sensor (DV48J7770E(G)*) Your Samsung dryer is equipped with a Vent Sensor, which detects and notifies you when it is time to clean the ductwork. Keep your dryer safe and efficient by cleaning the ducts when prompted. -
Page 47: Cleaning
Maintenance WARNING Control board and inlet valve are intentionally not grounded and may present a risk of electric shock only during servicing. Service personnel - Do not contact this part while appliance is energized. Cleaning Control Panel Dryer Exterior Clean with a soft, damp cloth. Do not use Clean with a soft, damp cloth. - Page 48 Maintenance Troubleshooting Checkpoints If you encounter a problem with the dryer, first check the table below and try the suggestions. Problem Action • Make sure the door is latched shut. • Make sure the power cord is plugged into a live electrical outlet.
- Page 49 Problem Action • Check the load for objects such as coins, loose buttons, nails, etc. Remove promptly. • It is normal to hear the dryer gas valve or heating element cycle on and off during the drying cycle. Is noisy. • Make sure the dryer is levelled properly as outlined in the installation instructions.
- Page 50 Extended time. reached. The drying time can change according to the type and amount of laundry. See the cycle chart for reference. If a problem persists, contact a local Samsung service center. 50 English DV7700J-03170Q-01_EN-US.indd 50 2015/4/9 16:22:43...
-
Page 51: Information Codes
Information codes If the dryer fails to operate, you may see an information code on the screen. Check the table below and try the suggestions. Code Action Operating the dryer with the door open. • Make sure the door is properly closed. • Make sure laundry is not caught in the door. Invalid power source frequency • Check if you are using regular power source frequencies. - Page 52 Maintenance Code Action Incorrect door switch. • Check if the door sensor unit is loose or short. If any information code keeps appearing on the screen, contact a local Samsung service center. 52 English DV7700J-03170Q-01_EN-US.indd 52 2015/4/9 16:22:43...
-
Page 53: Specifications
Specifications Protecting the environment This appliance is manufactured from recyclable materials. If you decide to dispose of this appliance, please observe local waste disposal regulations. Cut off the power cord so that the appliance cannot be connected to a power source. Remove the door so that animals and small children cannot get trapped inside the appliance. -
Page 54: Specification Sheet
Specifications Specification sheet NOTE "A. Height" Spec range through the leveling feet adjustment : 111.8 ~ 112.3 cm. Type Front loading dryer DV48J7700G* DV48J7700E* Model name DV48J7770G* DV48J7770E* Product 44.2 (112.3) A. Height Install 46.2 Product 27.0 (68.6) B. Width Install 29.0 Product... - Page 55 Type Front loading dryer Electric (W) 5300 Heater rating Gas (BTU/hr) 22000 English 55 DV7700J-03170Q-01_EN-US.indd 55 2015/4/9 16:22:44...
-
Page 56: Cycle Chart
Specifications Cycle chart NOTE For best results, follow the load size recommendations for each dry cycle. • Large load: Fill the drum to about ¾ full. Do not add items over this level as they need to tumble freely. • Medium load : Fill the drum to about ½... - Page 57 NOTE • : factory setting, : can be selected Temperature setting Cycle Time setting High Medium Extra Low NORMAL HEAVY DUTY BEDDING Sensor Dry PERM PRESS DELICATES TOWELS QUICK DRY Manual Dry TIME DRY ...
- Page 58 If service is not available, SAMSUNG may elect to provide transportation of the product to and from an authorized service center. SAMSUNG will repair, replace, or refund this product at our option and at no charge as stipulated herein, with new or reconditioned parts or products if found to be defective during the limited warranty period specified above.
- Page 59 SAVINGS OR OTHER BENEFITS, OR ANY OTHER SPECIAL, INCIDENTAL OR CONSEQUENTIAL DAMAGES CAUSED BY THE USE, MISUSE, OR INABILITY TO USE THIS PRODUCT, REGARDLESS OF THE LEGAL THEORY ON WHICH THE CLAIM IS BASED, AND EVEN IF SAMSUNG HAS BEEN ADVISED OF THE POSSIBILITY OF SUCH DAMAGES.
- Page 60 Ridgefield Park, NJ 07660 1-800-SAMSUNG (726-7864) www.samsung.com/us/support Visits by a Service Engineer to explain functions, maintenance or installation is not covered by warranty. Please contact your Samsung call agent for help with any of these issues. 60 English DV7700J-03170Q-01_EN-US.indd 60 2015/4/9 16:22:45...
- Page 61 If service is not available, SAMSUNG may elect to provide transportation of the product to and from an authorized service center. SAMSUNG will repair, replace, or refund this product at our option and at no charge as stipulated herein, with new or reconditioned parts or products if found to be defective during the limited warranty period specified above.
- Page 62 SAVINGS OR OTHER BENEFITS, OR ANY OTHER SPECIAL, INCIDENTAL OR CONSEQUENTIAL DAMAGES CAUSED BY THE USE, MISUSE, OR INABILITY TO USE THIS PRODUCT, REGARDLESS OF THE LEGAL THEORY ON WHICH THE CLAIM IS BASED, AND EVEN IF SAMSUNG HAS BEEN ADVISED OF THE POSSIBILITY OF SUCH DAMAGES.
- Page 63 1-800-SAMSUNG (726-7864) www.samsung.com/ca/support (English) www.samsung.com/ca_fr/support (French) Visits by a Service Engineer to explain functions, maintenance or installation is not covered by warranty. Please contact your Samsung call agent for help with any of these issues. English 63 DV7700J-03170Q-01_EN-US.indd 63 2015/4/9 16:22:45...
- Page 64 Scan this with your smartphone QUESTIONS OR COMMENTS? COUNTRY CALL OR VISIT US ONLINE AT U.S.A 1-800-SAMSUNG (726-7864) www.samsung.com/us/support www.samsung.com/ca/support (English) CANADA 1-800-SAMSUNG (726-7864) www.samsung.com/ca_fr/support (French) MEXICO 01-800-SAMSUNG (726-7864) www.samsung.com/mx/support DC68-03170Q-01 DV7700J-03170Q-01_EN-US.indd 64 2015/4/9 16:22:45...
Need help?
Do you have a question about the DV48J7700E(G) series and is the answer not in the manual?
Questions and answers