Table of Contents
Advertisement
Advertisement
Table of Contents

Summary of Contents for Fairhaven RD500
-
Page 2: Table Of Contents
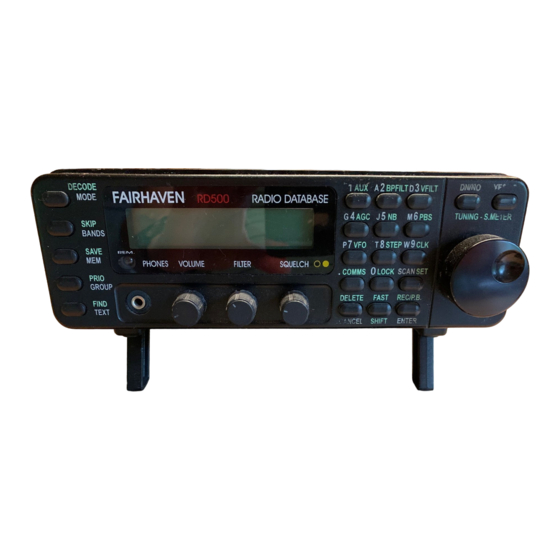
RD500 Radio Database User manual Version 1.12 Table of contents 1. Introduction 2. Connecting the RD500 a. Power supply b. Antennas c. Cassette – see appendix 6 d. PC – see appendix 6 3. Getting started 4. Using the receivers controls 4.1 Auxiliary menu. - Page 3 4.9 Time clock. b. Display mode. a. Setting the clock. c. Setting the timers. d. Time zones. 4.10 Connection to a computer and the p.c. software. 4.11 Key lock. 4.12 Scan setup menu. a. Stop. b. Continuous. c. Hold. d. Pause. e.
-
Page 4: Introduction
This manual attempts to show the user how easy it can be to use the RD500 and make the most of this exiting new radio. We recommend that you read section 3 “Getting started”... -
Page 5: Connecting The Rd500
For long, medium and shortwave use, almost any length of wire or whip aerial can be used with the RD500. Short aerials (less than 5 metres) can be connected to the whip antenna input and an aerial tuner unit may be useful to get the most out of a random... -
Page 6: Getting Started
meter band whips for example, can work well across most of the VHF and UHF spectrum, but for best results a specific aerial should be used for each band, especially at higher frequencies. Antennas should be suspended outside of buildings, as high as possible (unless a specific aerial to ground distance is specified), and away from power lines. - Page 7 <MODE> key (top left) followed by one or more numerical key presses on the main keypad area. The S-meter can be switched on and off with the <SHIFT> button (at bottom of keypad) then <S.METER> (top right), the angled brackets used in this manual refer to buttons on the radio.
-
Page 8: Using The Receivers Controls
Using the receiver’s controls. The design of the receiver allows easy access to most functions without having to use a lot of menus. There now follows a more detailed description of all the facilities, starting with key 1. Auxiliary menu <SHIFT><1>... - Page 9 LPF is a steep, low pass filter circuit which can improve signals that are subject to a high degree of noise. AVC (automatic volume control) Aux Key 5. This facility acts as an audio compressor, which can reduce audio level variations when listening to signals that are subject to fading.
-
Page 10: Variable Notch And Peak Filter
Noise blanker <SHIFT><Key 5> The RD500 noise blanker has a separate 455KHz I.F. which amplifies wideband impulse noise and provides blanking pulses. This system is very effective at reducing car ignition noise and electrical switching noise. Press SHIFT - Key 5 to see the status of the noise blanker, pressing Key 5 again will switch the Noise blanker on and off. -
Page 11: Pass Band Shifting
Pass band shifting. <SHIFT><Key 6> Pass band tuning allows reduction in the receiver’s I.F. bandwidth for reducing adjacent channel interference such as overlapping ssb signals. It will also work in SYNC-AM or CW modes. Control is provided by selecting <SHIFT> Key 6. (PBS) and pressing the up and down keys. -
Page 12: Time Clock
the receiver to automatically set a step size that is appropriate to the mode that is being used, for example: SSB Modes – Step size = 5Hz NBFM - Step size = 12.5kHz - Step size = 100Hz If a band is programmed (see 4.17), any step size can be set for each individual band. Step size menu Step Size = Normal Time clock. -
Page 13: Setting The Timers
Set time menu UTC 10 : 59 : 30 AM 12 / 6 c. Setting the timers. Key 3 on the main menu gives access to the five timers. Timers 1 to 4 can be set to switch the receiver on and off at any time up to one year ahead. Select the first timer by pressing 1 and then set up the time and date in the same way that the clock is set. -
Page 14: Key Lock
If you wish to download from the PC to the RD500, Select “file” and choose a database file. The CD contains a demonstration file with a ‘.mdb’ file extension, and it’s locking file labelled ‘.ldb’, these will first have to be copied from the CD to the hard drive on the PC and the files should have their “read only”... -
Page 15: Scan Setup Menu
4.12 Scan setup menu. <SHIFT><SCAN> <SHIFT><SCAN> (SET) allows the scan settings to be chosen for each of the VFO, bands, and groups by means of this menu. 1. Mode = Stop 2 Skip 3 Prio 4 more Pressing Key 1 steps through the scan modes in the following sequence:- Stop Stops the scan when a signal is encountered. -
Page 16: Autotune
select a new group unless you need to add to an existing one. A scan can now be made using the VFO frequency as a start point, or alternatively a band can be used, where the start and stop frequencies are specified. Up to 999 entries will be added to the current group, the records can then be renamed or deleted if not required. -
Page 17: Audio Recording And Playback
tens of Hz position on the display. Turning the tuning wheel quickly will give a further ten fold increase in tuning speed. Press <SHIFT> again to return to the normal tuning speed. 4.14 Audio recording and playback a. Reserving memory for recording. The receiver’s memory can be formatted to allow part of the memory to be used for station memory storage and part of the memory for audio recording. - Page 18 Pressing mode brings up the mode menu, and pressing the associated key e.g. 1. For LSB allows access to that mode, a second key press will give its counterpart, for example- 1. LSB-USB, 2. CWL- CWU. Option 4. gives ASD (AM synchronous double sideband), and further key presses gives selection of the upper or lower sidebands whilst in sync mode.
-
Page 19: Bands (Scanning Between Frequency Limits)
4.16 Decoding <SHIFT><DECODE> This key sequence gives access to decoding facilities. A full explanation will be given in the associated handbook which will be provided with the firmware upgrade. A data slicer interface is provided in the receiver which converts the audio into a bi- polar square wave output on the din connector. -
Page 20: The On-Board Database System
When “Prio” is activated in the <SCAN><SET> menu (option 3), the receiver alternates between its normal scanning routine and the priority channel in order to switch the receiver to the priority frequency as soon as the it becomes active. This avoids having to wait for the frequency to occur in the scan sequence, which may take some time to cycle through. -
Page 21: Deleting Records
Tuning through these memories is more preferable to using band mode because you will be constantly shown what each channel is allocated to and the RD500 can recall record names as fast as you can tune. Band mode is more useful for frequency searching, to find new signals . -
Page 22: Moving Groups
station can be 20 letters in the group title plus 20 letters in the record text field. For example, one single entry might be:- Worldwide broadcast - - Voice of America #1. The same search can be applied to VFO names while in VFO mode, or band names when in band mode, just press <SHIFT><TEXT>, enter the search word and press <ENTER>... -
Page 23: Remote Control Handset
RD500. The maximum current available to power the keyboard is 100mA and this should not be exceeded unless the receiver is powered from a larger power supply unit. - Page 24 Appendix. Cassette and audio din socket Pin Lead Purpose Socket diagrams are as viewed looking into socket. white Cassette switch +ve into switch yellow Audio Ground Aerial changeover o/p grey Audio right green Audio left Blue 12V output Black Cassette switched o/p Ground Black.
-
Page 25: Receiver System Description
If the cassette has a jack socket (sometimes labled ‘mic’), pins 4 and 5 of the receiver should be connected to the centre of the jack and a ground connection should be made between pin 2 of the RD500 and the body of the jack. - Page 26 comparators, pretuning and 3 individual FET VCO’s at HF and 3 VCO’s at VHF and UHF. Filters In ssb mode it uses a narrow 2.4 kHz Murata CFJ455K5 filter with a CFW455IT tail filter. The ssb filter is also used in AM narrow, and in AM wide, a 6kHz CFW455IT is used.
-
Page 27: Specifications
This graph shows the response curves for the CW filter selections. SPECIFICATIONS... -
Page 28: Performance
Frequency coverage 0 to 1750 MHz Reception modes LSB,USB,AM, CW, Stereo-CW Synchronous AM, NBFM, WBFM, Stereo WBFM, TV Sound and video. Tuning steps 5Hz in SSB,CW and AMS modes, 100Hz in AM mode, 20KHz in WBFM and TV modes. Step size increases with spin-wheel rotation. - Page 29 Frequency range 10kHz to 40 MHz (32 to 46 MHz with reduced sensitivity) VHF/UHF Greater than 48 to 1750MHz WBFM 88 to 175MHz Sensitivity SSB MDS <0.08μV 500kHz to 500MHz AM: 1μV for 10dB S/N NBFM: better than 0.3μV (48 - 860MHz) better than 0.5μV (860-1300MHz) 50 ohm aerial input, for 12dB SINAD.
-
Page 30: Guarantee
Owners name Address Post code Country Telephone Number Area code Number Model type e.g RD500VX, AV10 etc Purchase Serial Date Number Place of Purchase Signature FAIRHAVEN ELECTRONICS LTD. 47 DALE RD SPONDON DERBY DE21 7DG 01332 670707...
Need help?
Do you have a question about the RD500 and is the answer not in the manual?
Questions and answers