Table of Contents
Advertisement
User- Manual
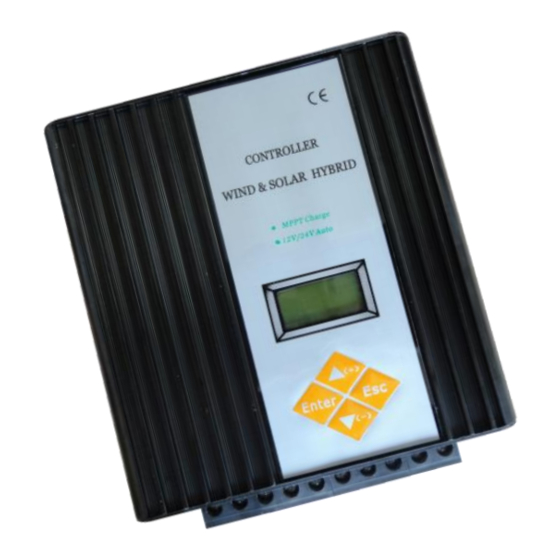
wind/solar hybrid Controller
Model No.: SSWC-06-1224-TA
Version: 5.0
Thank you very much for selecting our product!
This manual offers important information and suggestions with
respect to installation, use and troubleshooting, etc. Please read this
manual carefully before using the product and pay attention to the
safety recommendations in it
Specification of excellent controller
200W-600 W series
Page - 1 -
Advertisement
Table of Contents

Summary of Contents for Sunway SSWC-06-1224-TA
- Page 1 Specification of excellent controller 200W-600 W series User- Manual wind/solar hybrid Controller Model No.: SSWC-06-1224-TA Version: 5.0 Thank you very much for selecting our product! This manual offers important information and suggestions with respect to installation, use and troubleshooting, etc. Please read this...
-
Page 2: Table Of Contents
Specification of excellent controller Contents Important Safety Operation Information…………………………..2 2. General Safety Information……………….………….………………..2 3. General Description……………………….……………………….….2 Product features……………………..……………………………...3 Protection Functions………………..………………………………3 Controller application mode illumination……….…………………3 Instruction for panel of controller………….………………………3 ………………………………………4 Installation Instructions 8.1 General Installation Notes ………………………………………4 8.2 Mounting ………………………….……………………………4 8.3 System connection with controller………………………………5 Step 1: Battery Wiring….……………...……………….…..………5... -
Page 3: Important Safety Operation Information
Specification of excellent controller 1. Important Safety Operation Information This manual contains important safety, installation and operating instructions for controller. WARNING: Reverse connection of positive (+) and negative (-) is prohibited ! Short-circuit of positive (+) and negative (-) is prohibited ! ... -
Page 4: Product Features
Specification of excellent controller 4. Product features MPPT technology to optimize using the wind energy. (Optional) Boost circuit designed. User can set this voltage parameter. (Optional) 12V/24V System automatic recognition function. (Optional) Be able to use for 200W-600W wind turbine with high compatibility. ... -
Page 5: Installation Instructions
Specification of excellent controller ①--- Wiring connection with system terminals ②--- LCD with green backlight ③--- ▲(+) setting key to increase value of parameters. ④--- ―Esc‖ key for existing system without save setting. ⑤--- ▼(-) setting key to reduce value of parameters. ⑥--- ―Enter‖... -
Page 6: System Connection With Controller
Specification of excellent controller Step 1: Choose Mounting Location: Locate the controller on a vertical surface protected from direct sun, high temperature, and water. Step 2: Check for Clearance: Place the controller in the location where it will be mounted. Verify that there is sufficient room to run wires and that there is sufficient room above and below the controller for air flow Step 3: Mark Holes: Use a pencil or pen to mark the four (4) mounting hole ... -
Page 7: Step 2: Loading Wiring
Specification of excellent controller Figure 8 - 2 Wire an in-line fuse holder no more than 150mm from the battery positive terminal. Confirm the connection are correct. Step 2: Loading Wiring The controller load output can connect DC electronic devices of which rated ... -
Page 8: Step 3: Solar Module Wiring
Specification of excellent controller Confirm the connections are correct. If wiring the load connection to a load distribution panel, each load circuit should be fused separately. The total load draw current should not exceed the 10A load rating. Step 3: Solar Module Wiring WARNING Risk of electric shock! Exercise caution when handling solar wiring. -
Page 9: Step 5: Switch Power Wiring
Specification of excellent controller NOTE: The wind-turbine rated voltage (@ rated wind-speed level) should be equal to voltage of battery bank If your wind-turbine output is DC power, +/- polarity wire can connect to 2 of whereby 3 terminals be optional. Please connect wind-turbine to controller related terminals . -
Page 10: Step 7: Confirmation For Wiring
Specification of excellent controller Figure 8 - 7 Step 7: Confirmation for Wiring Double-check the wiring in step1 through 5. Confirm correct polarity at each connection. Verify that all 10 power terminals are tightened. Figure 8 - 8 Step 8: Power-up sequence after confirmation of connection Turn-on battery firstly ! Turn-on solar panel Turn-on wind-turbine... -
Page 11: Lcd Browsing Instructions
Specification of excellent controller Remove solar panel wiring Remove DC load wiring 4. Remove batteries wiring lastly When battery power is applied and the controller powers up, the LCD will showing message as ― system initial, please wait…‖. Meantime, backlight is lighting in green approximate 5 seconds, then backlight would turn-off. - Page 12 Specification of excellent controller System is initial … Please wait… 9.2.2 Then, LCD screen will show 1st page content of screen. Ub: voltage of batteries Ub : xx.x V Eb: mean power volume of battery with Eb : xxx% percent format Press▼(-) key to browse 2nd page content of screen.
-
Page 13: Lcd Display When System Abnormal Situation
Specification of excellent controller 10. LCD display when system abnormal situation If the battery is overcharge, the LCD display Uplink displays the current battery voltage Ub : xx.x V Downlink display ―over_v‖ characters, over_v which be flashing Tip: Once the battery voltage drops to the overcharge recovery value, the LCD is automatically back to first browsing page content. -
Page 14: System Setting Instructions
Specification of excellent controller 11. System setting Instructions “ENTER” key:symbolizes set or confirm: press this key to access setting window. In setting window, press this key to choice each parameter and go to next page. “Esc” key: cancel or manual switch. In setting window, press this key to return to browsing window and do not save the modified parameters. - Page 15 Specification of excellent controller 11.5 Press ―ENTER‖ key to next page: T2-1: Line2 whole power output time T2-1 : xxh T2-2: Line2 half power output time T2-2 : xxh Press ▲(+) key or ▼(-) key to adjust the number, each press means increase or reduce 1 hour.
-
Page 16: Controller Working Mode Instruction
Specification of excellent controller 11.8 Press ―ENTER‖ key to next page: Save ? Y / N If you have selected ‗Y‘ and press ‗Enter‘ key, controller will save value which you modified. If you have selected ‗N‘, controller wouldn‘t save what your adjustment. -
Page 17: About Time-Delay Illumination
Specification of excellent controller NOTE: 1. When solar module voltage goes below the point of NTTV (Night Time Threshold Voltage) at sunset, the solar controller will recognize the starting voltage and turn on the load after 1 minutes delay. 2. When solar module voltage goes above point of DTTV (Day Time Threshold Voltage), the solar controller will recognize the starting voltage and turn off the load after 1 minutes delay. -
Page 18: Performance Parameters
Specification of excellent controller 14. Performance Parameters 14.1 Wind generator control set-up definition: 200W – 600W Rated Wind Turbine Power 15VAC / 25VAC Wind Turbine brake voltage (12v/24v) 10A / 20A Wind Turbine brake current (12v/24v) 14.2 Solar panel set-up definition PV max power (12v/24v) 150W / 300W PV max open circuit voltage (12v/24v) -
Page 19: Model Description
Specification of excellent controller 15. Model Description 16. Maintenance The following inspections and maintenance tasks are recommended at least two times per year for best controller performance. Check that the controller is securely mounted in a clean and dry environment. ... -
Page 20: Troubleshooting Guide
Specification of excellent controller 17. Troubleshooting Guide: Fault Phenomenon Reason Solution Connected to the The battery voltage is too Charger to charge battery, the controller the battery or does not work replace the battery Normal, wait for the The battery voltage is below system to charge to the release point the recovery point... -
Page 21: Declare
Specification of excellent controller returned products must include the model, serial number and detailed reason for the failure, the module type and size, type of batteries and system loads. This information is critical to a rapid disposition of your warranty claim. ...
Need help?
Do you have a question about the SSWC-06-1224-TA and is the answer not in the manual?
Questions and answers