Table of Contents
Advertisement
Advertisement
Table of Contents

Subscribe to Our Youtube Channel
Summary of Contents for iBall Take Note
- Page 3 Federal Communications Commission (FCC) Radio Frequency Interference Statement This equipment has been tested and found to comply with the limits for a Class B digital device, pursuant to Part 15 of the FCC Rules. These limits are designed to provide reasonable protection against harmful interference in a residential installation.
-
Page 4: Table Of Contents
GETTING STARTED....................1 ....................1 QUIPMENT HECKLIST ..................2 ARTS OF THE IGITAL ............3 NSTALLING THE ATTERIES INTO THE IGITAL ...........3 NSTALLING THE ATTERY INTO THE IGITAL NKING ...........4 UTTING A OTEPAD OR APER ON THE IGITAL ................4 RITING REA AND HICKNESS ................5 TORAGE EVICE IN THE IGITAL... - Page 5 General Problems ....................35 Problems in the DigiMemo Manager Software............ 37 Problems When Connecting the Digital Pad to your Computer ......38 ......................39 PECIFICATIONS Digital Pad Specifications of iBall Take Note - A414 .......... 39 Digital Pen Specifications..................39...
- Page 6 File Formats......................40 System Requirements ....................40 Environment ......................40...
-
Page 7: Getting Started
Then you can easily view, edit, organize and share your handwritten notes in Windows. When connected to a PC, Take Note offers an on-line writing function which can instantly synchronize your writing on the paper with the digital page in its software in Windows. -
Page 8: The Parts Of The Digital Pad
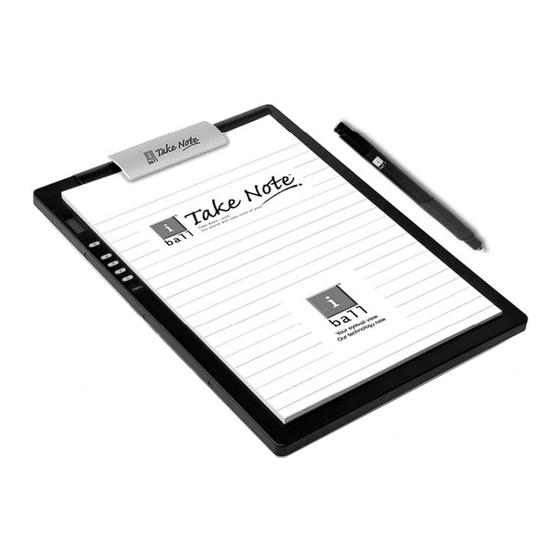
The Parts of the Digital Pad Pen Holder USB Connector SD Card Display Insertion Slot Power Button Notepad Clip Four Function Buttons Notepad Holder Battery Compartment Cover Battery Compartment Cartridge Compartment Two Replacement Cartridge Ink Cartridges and Compartment Cover One Plastic Pen Tip... -
Page 9: Installing The Batteries Into The Digital Pad
(+) Can (SR626SW, 377 or IEC-SR66) that is included in the (-) Cap package of Take Note. Insert the battery into the battery compartment with the negative (-) cap facing the battery compartment. Screw the barrel cover clockwise onto the barrel until tight. -
Page 10: Putting A Notepad Or Paper On The Digital Pad
Note! You can clip the pen to the pad by using the pen clip to clip to the right or left pen holder on the notepad clip. Two Holes Note! You can attach some cord or accessory such as the pen to the pad through the two holes on the upper-right corner of the pad. -
Page 11: Storage Device In The Digital Pad
Storage Device in the Digital Pad The digital pad is equipped with a built-in 32 MB storage device to store your handwritten notes. You also can load an optional Secure Digital (SD) memory card into the pad to expand the storage capacity of the pad. To load an optional Secure Digital (SD) memory card, insert the memory card all the way into insertion slot until it clicks by holding the memory card with the terminal side facing upward. -
Page 12: Writing And Recording Your Handwritten Notes
Using the digital inking pen on the digital pad produces both familiar ink notes on ordinary paper and digital pages in the storage device of the pad. Note! iBall Take Note is a stand-alone device. You do not need to connect the digital pad to your computer for this function. -
Page 13: Changing The Current Digital Page
Battery Icon The Battery icon indicates the battery strength in the digital pad. Changing the Current Digital Page You can use the following function buttons on the pad to change the current digital page in the current storage device. Page Backward Button Press the Page Backward button to move to the previous digital page. -
Page 14: Writing Your Notes On A Page Already With Contents
immediately captured and stored in the current digital page file of the current storage device. The file name of this digital page is PGA4_XXX.DHW (the XXX is the Digital Page Number such as 001). While the Storage Device icon is displayed, the digital page file is stored in the DMEMO-M folder in the built-in 32 MB storage device. -
Page 15: Turning Off The Digital Pad
cancelled if you write or press any button to execute other functions. All contents remain intact in the digital page. Note! Once a digital page is erased, its original contents can not be recovered. Turning off the Digital Pad Press the Power button to turn off the digital pad. The display will be blank. If you have not written or pressed any function button within the previous 30 minutes, the digital pad sounds a beep and automatically shuts down. -
Page 16: Low Battery Indication On The Digital Pad
Low Battery Indication on the Digital Pad When the batteries remain too low power and are in need of replacement, the Low Battery icon will appear on the display. Please replace the batteries in the pad. When the batteries are exhausted, the pad sounds 3 beeps. Then the pad is turned off immediately. -
Page 17: Organizing Your Notes In Windows
Installing the Take Note Manager software 1. Turn on your computer and start Windows. 2. Insert the iBall Take Note Manager software CD into the CD-ROM drive. The software installer will automatically launch. If the CD auto-run feature is not enabled, double-click the Setup icon on the iBall Take Note Manager software CD. - Page 18 4. Click Next in the dialog box. 5. In the dialog box, click Next to start the installation. 6. The DigiMemo Manager software has been successfully installed. Click Close in the dialog box. Please restart your Windows.
-
Page 19: Connecting The Digital Pad To Your Computer
Connecting the Digital Pad to Your Computer Turn on your computer. Take out the USB cable included in the package. Plug the wide connector of the cable into an available USB port on your Connector computer. Connect the other end of the cable to the USB connector of the digital pad. -
Page 20: Importing Your Digital Pages
Tools Toolbar Color Toolbar Width Toolbar To move a toolbar to the new location, drag the move handle on a docked toolbar or the title bar on a floating toolbar. Move Handle Move Docked Toolbar Handle Title Bar Docked Toolbar Floating Toolbar Importing Your Digital Pages 1. - Page 21 that contains digital pages. 3. Click OK. The Import Digital Pages dialog box will appear. 4. To select nonadjacent digital pages, click one digital page, and then hold down the CTRL key and click each additional digital page. To select adjacent digital pages, click the first digital page in the sequence, and then hold down the SHIFT key and click the last digital page.
-
Page 22: Saving An E-Book File
page. Note! You can import and insert any digital pages after the current page. Note! The current page number indicates the current page of this book file (e-Book). Note! As importing, the original digital page remains intact. Saving an e-Book File Click the Save button on the Standard toolbar. -
Page 23: Printing An E-Book File
In the folder of a digital page file, double-click the digital page file. The digital page will be imported to a new e-Book file in a new software window. Note! By this way, you can open various e-Book files in different software windows. -
Page 24: Drawing A Freeform Line And Writing
Drawing a Freeform Line and Writing 1. Click the Pen button on the Tools toolbar. 2. You can switch the color by clicking a color button on the Color toolbar. You can change the width by clicking a width button on the Width toolbar. -
Page 25: Selecting Objects
Selecting Objects You can use the following methods to select objects: To select only one object, click the Select button and then one digital ink stroke or line. A Selection box will appear around the selected object. To select one or several digital ink strokes, lines or text boxes, click the Select button . -
Page 26: Copying Or Moving Objects
Copying or Moving Objects 1. Select one or several digital ink strokes, lines or text boxes. 2. Do one of the following: To move the selected objects, click the Cut button on the Standard toolbar. To copy the selected objects, click the Copy button on the Standard toolbar. -
Page 27: Adding A New Page
To set it, click Page Setup on the File menu. The Default New Page Size dialog box will appear. We recommend that you select the option button in accordance with your Take Note model. Moving the Current Page 1. On the Page menu, click Move to. The Move to dialog box will appear. -
Page 28: Showing The Background Of Pages
Showing the Background of Pages 1. On the Edit menu, click Option. A dialog box will appear. 2. Choose or clear the following check boxes to show the background on: Current page Page thumbnails 3. If necessary, select the following one option button: Default background (Lines) Import image as background Click the Browse button to find the image file such as BMP, JPG, GIF... -
Page 29: Sample Of An Edited E-Book File
1. Click the Save as Image button on the Standard toolbar. 2. In the dialog box, select a file type and enter a file name. Click Save. Sample of an Edited e-Book File On-line Writing Your Notes When the digital pad is connected to you r computer through a USB port, you can use the On-line Writing function in the DigiMe mo Manager software. - Page 30 recommend that you already switch to the right paper page on the pad and switch the right current page in the software window. To use the On-line Writing function, execute the following steps: 1. Make sure that the digital pad is connected to your compu ter through a USB port.
-
Page 31: Causes Of The On-Line Writing Function Disabled Or Closed
Writing function will be disabled or closed: The page size of the current page in the software window must be in accordance with your Take Note Model. The page size in accordance with the Take Note Model is shown below. Take Note Model Page Size... - Page 32 Note! You can not use this copy or move technique in an Outlook Express e-mail message. In an e-mail me ssage, insert your e-Book file as an attachment. Note! To view and edit your e-Book file, the recipient must have the DigiMemo Manager softwa Open your e-Book file in the DigiMemo Manager software.
-
Page 33: Converting Your Handwritten Notes In Your E-Book File
Converting Your Handwritten Notes in Your e-Book File 1. If you have installed the optional Handwriting Recognition software, click the Conversion button on the Standard toolbar in the software window of DigiMemo Manager. 2. In the dialog box, select the following one option button: Current Page In this option, you can choose the Selected area on... -
Page 34: Deleting The Digital Pages In The Digimemo Manager
of the pad, is accessed to your computer. The foll owing procedures can be easily executed in your Windows. Delete the digital page files in the built-in 32 MB storage device or the optional memory card of the digital pad. Here is a brief recommendation : you may want to tear off the paper page or simply cross out the page number you wrote on the paper page. - Page 35 4. To select nonadjacent digital pages, click one digital page, and then hold down the CTRL key and click each additional digital page. To select adjacent digital pages, click the first digital page in the sequence, and then hold down the SHIFT key and click the last digital page. To preview a digital page, select the digital page and click Preview.
-
Page 36: Tablet Device In Windows
Tablet Device in Windows When the digital pad is connected to your computer through a USB port, the Connection icon will appear on the display of the pad and the LED on the pad will light. The digital pad is a tablet device in Windows and for all Windows applications. -
Page 37: Appendixes
Appendixes Replacing the Cartridge of the Digital Pen Open the cartridge compartment cover on the back of the digital pad. Two replacement ink cartridges and one plastic pen tip are stored in the cartridge compartment of the digital pad. Clip Hole To replace the cartridge of the pen, you may use a small clip to gently pull the old one out. -
Page 38: Replacing The Battery In The Digital Pen
Windows Open Add or Remove Programs icon in the Control Panel window. Remove the DigiMemo Manager software. Caring for the Take Note To assure proper functioning of the digital pen and pad, please observe the following precautions: Remove the batteries from the digital pad if it is not expected to be used for long periods. -
Page 39: Error Codes On The Display Of The Digital Pad
Clean the pen and pad with a soft cloth lightly dampened with water or a neutral detergent. Never drop the pen or pad. The pen or pad may malfunction if subjected to strong shocks or vibration. Avoid cutting or scratching the pad surface. Never immerse the pen and pad in liquid. -
Page 40: The File System Incompatibility Of An Optional Sd Memory Card - The Error Code E02
in the built-in 32 MB storage device if no SD memory card is loaded in the pad. Note! Do not format the built-in 32 MB storage device through the format function in Windows. Or it will cause the incompatibility problem with the pad. -
Page 41: The Damage Of The Digital Pad - The Error Code E03 Or E05
The Damage of the Digital Pad — the Error Code E03 or E05 If the error code E03 or E05 appears on the display of the digital pad, it indicates that the digital pad may be damaged. It needs to be repaired. Please contact the iBall service center. Troubleshooting General Problems Problem: A superimposed digital page is created. - Page 42 Solution: Do not try to trace or write through any conductive material (for example: steel ruler). Problem: When you are writing or drawing on paper by using the digital pen on the digital pad, the Pen icon does not appear on the display. Solution: Try to alter the pressure you apply on the pen tip.
-
Page 43: Problems In The Digimemo Manager Software
On-line Writing function is closed. Solution: The page size of the new current page should be not in accordance with your Take Note model. Please refer to the section — Causes of the On-line Writing Function Disabled or Closed. -
Page 44: Problems When Connecting The Digital Pad To Your Computer
Problems When Connecting the Digital Pad to your Computer Problem: When connecting the digital pad to your computer through a USB port, your Windows can not recognize the built-in 32 MB storage device and an optional memory card in the pad as removable storage devices. -
Page 45: Specifications
Specifications Digital Pad Specifications of iBall Take Note - A414 245 mm (width) x 336 mm (length) Size 9.63" (width) x 13.22" (length) Thickness 12 mm (0.47") Approx. 615 g (1.35 lbs) without batteries Weight Approx. 660 g (1.45 lbs) with batteries Writing Area 210 mm x279 mm (8.27"... -
Page 46: System Requirements
0 °C to 40 °C (32 °F to 104 °F) Operating Humidity Less than 85% (no condensation) Storage Temperature -20 °C to 60 °C (-4 °F to 140 °F) Note! These specifications are subject to change without notice. For any technical help on iBall products please write to support@bestitworld.com... - Page 48 Part Number: 91100-40740 Printed in China 2007.04 www.iball.co.in...
Need help?
Do you have a question about the Take Note and is the answer not in the manual?
Questions and answers