Table of Contents
Advertisement
Advertisement
Table of Contents

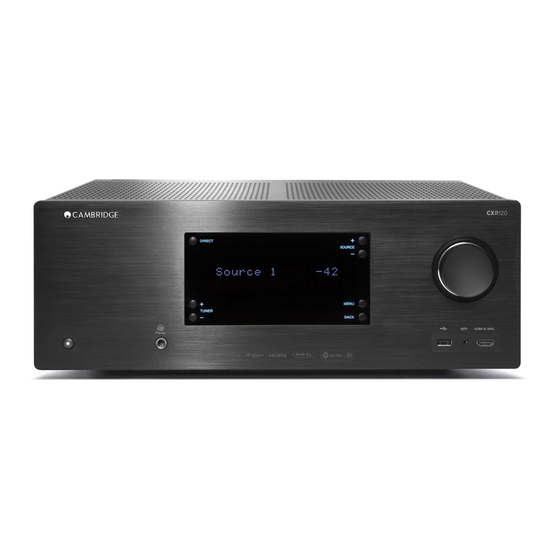
Summary of Contents for CAMBRIDGE CXR120
- Page 1 CXR120/200 AV RECEIVER...
-
Page 2: Table Of Contents
This guide is designed to make installing and using this product as easy as possible. Information in this document has been carefully checked for accuracy at the time of printing; however, Cambridge Audio’s policy is one of continuous improvement, therefore design and specifications are subject to change without prior notice. -
Page 3: Important Safety Instructions
11. Only use attachments/accessories specified by the manufacturer. Directives when used and installed according to this instruction manual. For continued compliance only Cambridge Audio accessories should be 12. Unplug this apparatus during lightning storms or when unused for long used with this product and servicing must be referred to qualified service periods of time. -
Page 4: Limited Warranty
If your dealer is not equipped contact your dealer for advice. to perform the repair of your Cambridge Audio product, it can be returned by your dealer to Cambridge Audio or an authorised Cambridge Audio service Please ensure there is ample ventilation (at least 20cm clearance on the top, agent. -
Page 5: Front Panel Controls
1. FM / AM aerials 8. Vent grille 13. HDMI 2.0 outputs 17. Emitter in DO NOT OBSTRUCT! CXR120 – Outputs mirrored. 2. Analogue inputs 18. IR out CXR200 – Output 2 can display a 9. Digital in (CXR120 3 inputs only) 19. -
Page 6: Main Remote Control
Main remote control 1. Backlight button Illuminates the buttons. 2. Standby/On 3. Source buttons Pressing the FM/AM button a second time toggles between FM and AM. The TV button selects TV-ARC (Audio Return Channel). Sources Sources The SM button selects the StreamMagic module. 4. -
Page 7: Loudspeaker Connections
CXR120/200 Loudspeaker connections Switch the power off before making connections. Ensure that correct polarity Use 4mm plugs for direct insertion into the speaker terminals. is maintained. Surround back/height, Bi-amp and Zone 2 speaker connections can all be connected to speakers, but only one will be active. This can be set in the Speaker Configuration menu. -
Page 8: Digital Audio Connections
Digital audio connections BD/DVD player CD player iD100 Digital iPod Dock Audio player/recorder (Tape/MD/CD-R) 5.1/7.1 direct in DVD-A SACD player Phono cables (2RCA-2RCA) -
Page 9: Hdmi Connections
CXR120/200 HDMI connections 4K video resolution The source resolution cannot be greater than that of the TV you are using - The CXR supports 4K video resolution. Use a high speed HDMI cable when consult your HDMI source and TV manual and adjust accordingly. -
Page 10: Aerial Connections
Aerial connections Operating instructions To activate the CXR, switch the Power switch on the rear panel to On then Examples FM aerial press the Standby/On button on the front panel. Selecting the source FM external Select the source by using the Source +/- buttons on the front panel. After aerial 4 to 5 seconds the CXR will select the new source, or it can be selected (recommended) -
Page 11: Dsp Modes
CXR120/200 Note: Dolby Digital and DTS formats can sometimes carry less channels than their maximum such as Dolby Digital (2/0) which means a Dolby Digital encoded signal which is actually only carrying a two channel stereo signal A new Dolby matrix technology that delivers additional height channels (other channels inactive). -
Page 12: Setup Menu
Setup menu Speaker setup Speaker configuration Refer to the following diagrams for typical examples of loudspeaker setups. CXR Setup Menu Speaker Setup Speaker Configuration ► Input Setup Auto Setup ► Zone 2 Settings Unit Metres Network Setup SW Selection Subwoofer1+Subwoofer2 Enter General Settings Back Amp Configuration... -
Page 13: Manual Setup
CXR120/200 Level Once finished press the Enter button on the remote to accept the setup. Highlight 'Test Tone' and press Enter. Use the navigation button on the CXR Speaker Configuration remote to move from speaker to speaker and adjust the level until all are at the same volume using either the Front Left or Right as a reference. -
Page 14: Lip Sync
Choose preferred stereo processing mode for the current source. You can use the main remote handset, the buttons on the front of the unit itself or the Cambridge 'Connect' App to control Volume, source and mute. Multichannel processing From the remote press and hold the Zone 2 button followed by the feature Choose preferred multichannel processing mode for the current source. -
Page 15: General Settings
CXR120/200 TV ARC (HDMI out 1) Select 'Scan for Networks', select your wifi network and then enter your password. ARC allows a TV to send audio back down its incoming HDMI so that you can play back the audio from a TV source whilst you watch its picture. -
Page 16: Dts-Hd Speaker Re-Map
This interface allows the user to: Configuration 1 – 7.1 channel: L, C, R, LFE, Ls, Rs, Lsr, Rsr - Customise the name displayed in the Players list in the Cambridge Connect app and in the Spotify Connect device list. - Page 17 Cambridge Audio is a brand of Audio Partnership Plc Registered Office: Gallery Court, Hankey Place London SE1 4BB, United Kingdom Registered in England No. 2953313 www.cambridge-audio.com © 2015 Cambridge Audio Ltd...


Need help?
Do you have a question about the CXR120 and is the answer not in the manual?
Questions and answers