Table of Contents
Advertisement
Advertisement
Table of Contents

Related Manuals for TP-Link TX-VG1530


Summary of Contents for TP-Link TX-VG1530
- Page 1 TX-VG1530 N300 Wireless VoIP GPON Router Rev: 1.0.0 1910010904...
- Page 2 Specifications are subject to change without notice. is a registered trademark of TP-LINK TECHNOLOGIES CO., LTD. Other brands and product names are trademarks or registered trademarks of their respective holders. No part of the specifications may be reproduced in any form or by any means or used to make any derivative such as translation, transformation, or adaptation without permission from TP-LINK TECHNOLOGIES CO., LTD.
-
Page 3: Fcc Statement
FCC STATEMENT This equipment has been tested and found to comply with the limits for a Class B digital device, pursuant to part 15 of the FCC Rules. These limits are designed to provide reasonable protection against harmful interference in a residential installation. This equipment generates, uses and can radiate radio frequency energy and, if not installed and used in accordance with the instructions, may cause harmful interference to radio communications. -
Page 4: Canadian Compliance Statement
Canadian Compliance Statement This device complies with Industry Canada license-exempt RSS standard(s). Operation is subject to the following two conditions: (1)This device may not cause interference, and (2)This device must accept any interference, including interference that may cause undesired operation of the device. Cet appareil est conforme aux norms CNR exemptes de licence d’Industrie Canada. -
Page 5: Safety Information
Продукт сертифіковано згідно с правилами системи УкрСЕПРО на відповідність вимогам нормативних документів та вимогам, що передбачені чинними законодавчими актами України. Safety Information ● When product has power button, the power button is one of the way to shut off the product; when there is no power button, the only way to completely shut off power is to disconnect the product or the power adapter from the power source. -
Page 6: Declaration Of Conformity
TP-LINK TECHNOLOGIES CO., LTD DECLARATION OF CONFORMITY For the following equipment: Product Description: N300 Wireless VoIP GPON Router Model No.: TX-VG1530 Trademark: TP-LINK We declare under our own responsibility that the above products satisfy all the technical regulations applicable to the product within the scope of Council Directives:... -
Page 7: Table Of Contents
CONTENTS Package Contents ....................1 Chapter 1. Product Overview ................... 2 1.1 Overview of the GPON router ..................2 1.2 Main Features ....................... 3 1.3 Panel Layout ......................... 4 1.3.1 The Front Panel ........................4 1.3.2 The Back Panel ........................5 Chapter 2. - Page 8 4.4.9 IPSec VPN ......................... 35 4.5 DHCP Server ......................38 4.5.1 DHCP Settings ........................38 4.5.2 Clients List .......................... 39 4.5.3 Address Reservation ......................40 4.5.4 Conditional Pool ......................... 41 4.6 Wireless ........................42 4.6.1 Basic Settings ........................42 4.6.2 WPS Settings ........................44 4.6.3 Wireless Security .......................
- Page 9 4.10.2 Static Route ........................77 4.10.3 RIP Settings ........................78 4.11 IPv6 Route Settings ....................79 4.11.1 IPv6 Default Gateway ....................... 79 4.11.2 IPv6 Static Route ......................79 4.12 Forwarding ........................80 4.12.1 Virtual Servers ........................81 4.12.2 Port Triggering ........................82 4.12.3 DMZ ..........................
- Page 10 4.21.5 SNMP Settings ....................... 110 4.21.6 Backup & Restore ......................111 4.21.7 Factory Defaults......................112 4.21.8 Firmware Upgrade ......................112 4.21.9 Reboot ..........................113 4.21.10 Statistics ........................114 4.22 Logout ........................115 Appendix A: Specifications ................. 116 Appendix B: Troubleshooting ................117 Appendix C: Telephony Features ................
-
Page 11: Package Contents
One Power Adapter for TX-VG1530 N300 Wireless VoIP GPON Router Quick Installation Guide One RJ45 cable One Resource CD for TX-VG1530 N300 Wireless VoIP GPON Router, including: This User Guide • Other Helpful Information • ... -
Page 12: Chapter 1. Product Overview
Thank you for choosing the TX-VG1530 N300 Wireless VoIP GPON Router. 1.1 Overview of the GPON router TP-LINK’s N300 Wireless VoIP GPON Router TX-VG1530 is a next-generation Gigabit Passive Optical Network (GPON) integrated access device (IAD), ideal for Fiber to The Home solution. It’s an incredibly robust all-in-one device allowing users to access high-speed internet connection via GPON port and share it wirelessly at 300Mbps wireless 802.11n speeds. -
Page 13: Main Features
TX-VG1530 N300 Wireless VoIP GPON Router User Guide 1.2 Main Features All-in-One: High speed GPON ONT, NAT Router, 4-port Switch, Wireless N Access Point and VoIP Gateway in one device provides a one-stop networking solution. Complies with ITU G.984.1, ITU G.984.2, ITU G.984.3 and ITU G.984.4, providing you ... -
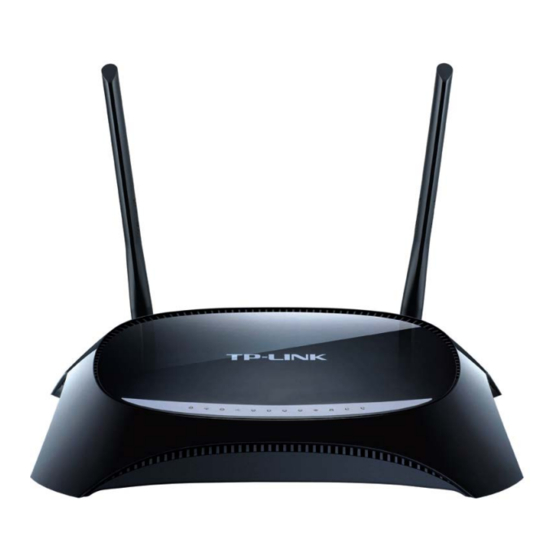
Page 14: Panel Layout
TX-VG1530 N300 Wireless VoIP GPON Router User Guide 1.3 Panel Layout 1.3.1 The Front Panel Figure 1-1 The router’s LEDs are located on the front panel (View from left to right). They indicate the device’s working status. For details, please refer to LED Explanation. -
Page 15: The Back Panel
TX-VG1530 N300 Wireless VoIP GPON Router User Guide A wireless device has been successfully added to the network by WPS function. WPS handshaking is in process and will continue for about 2 minutes. Please press the Flash WPS button on other wireless devices that you... - Page 16 TX-VG1530 N300 Wireless VoIP GPON Router User Guide USB: The USB port connects to a USB storage device or a USB printer. LAN1, LAN2, LAN3, LAN4: Through these ports, you can connect the Router to your PC or ...
-
Page 17: Chapter 2. Connecting The Gpon Router
Keep away from the strong electromagnetic radiation and the device of electromagnetic sensitive. Generally, TX-VG1530 is placed on a horizontal surface. The device also can be mounted on the wall as shown in Figure 2-1. Figure 2-1 Wall-mount Install... -
Page 18: Connecting The Gpon Router
You can follow the steps below to install it. Step 1: Connect the Fiber to the optical port of the GPON router TX-VG1530. Step 2: Connect the Ethernet cable. Attach one end of a network cable to your computer’s Ethernet port or a regular hub/switch port, and the other end to the LAN port on the GPON routerTX-VG1530. - Page 19 TX-VG1530 N300 Wireless VoIP GPON Router User Guide Figure 2-2 Note: Only green SC/APC interface suits the OPTICAL port.
-
Page 20: Chapter 3. Quick Installation Guide
N300 Wireless VoIP GPON Router User Guide Chapter 3. Quick Installation Guide This chapter will show you how to configure the basic functions of your TX-VG1530 N300 Wireless VoIP GPON Router using Quick Setup Wizard within minutes. 3.1 TCP/IP Configuration The default IP address of the TX-VG1530 N300 Wireless VoIP GPON Router is 192.168.1.1. -
Page 21: Quick Installation Guide
192.168.1.2 ~ 192.168.1.254. 3.2 Quick Installation Guide With a Web-based utility, it is easy to configure and manage the TX-VG1530 N300 Wireless VoIP GPON Router. The Web-based utility can be used on any Windows, Macintosh or UNIX OS with a Web browser, such as Microsoft Internet Explorer, Mozilla Firefox or Apple Safari. - Page 22 TX-VG1530 N300 Wireless VoIP GPON Router User Guide After your successful login, you will see the Login screen as shown in Figure 3-5. Figure 3-5 The GPON router supports SN authentication and CTC authentication, you can select one of them according to your ISP requirement.
- Page 23 TX-VG1530 N300 Wireless VoIP GPON Router User Guide Figure 3-6 If CTC authentication Network→ GPON CTC Settings in the main menu, the is required choose GPON Configuration screen will appear, enter the GPON Username and GPON Password provided by your ISP and then click Save.
- Page 24 TX-VG1530 N300 Wireless VoIP GPON Router User Guide Figure 3-8 Note: Once the ONU State in not registered, please the GPON information and try again with the correct settings. Network→ WAN Settings in the main menu, the WAN Interface screen will appear, then Choose click Add to add a new entry.
- Page 25 TX-VG1530 N300 Wireless VoIP GPON Router User Guide Figure 3-9 The basic settings for your GPON router are completed. Please try to log on to website to test your Internet connection.
-
Page 26: Chapter 4. Configuring The Gpon Router
TX-VG1530 N300 Wireless VoIP GPON Router User Guide Chapter 4. Configuring the GPON Router This chapter will show each Web page's key function and the configuration way. 4.1 Login After your successful login, you will see the twenty one main menus on the left of the Web-based utility. -
Page 27: Pon
TX-VG1530 N300 Wireless VoIP GPON Router User Guide Figure 4-1 4.3 PON Choose “PON”, there are four submenus under the main menu: Connect Status, Optical Status, Statistics and Advance. The detailed explanations for each submenu are provided below. -
Page 28: Connect Status
TX-VG1530 N300 Wireless VoIP GPON Router User Guide 4.3.1 Connect Status Choose “PON”“Connect Status”, the GPON Status screen will appear, click Refresh to update this page, which shows you the current GPON Status. Here we use CTC authentication as an example (shown in Figure 4-2). -
Page 29: Statistics
TX-VG1530 N300 Wireless VoIP GPON Router User Guide Figure 4-3 Click Refresh to update this page. 4.3.3 Statistics Choose “PON”“Statistics”, the traffic statistics screen will appear (shown in Figure 4-4), click Refresh to update this page, and then you can view the statistics of the GPON router, including GPON traffic and OMCI traffic of the current Packets Statistic. -
Page 30: Network
TX-VG1530 N300 Wireless VoIP GPON Router User Guide 4.3.4.1 Forwarding Rules Choose “PON” “Advance”“Forwarding Rules”, and you will see the GPON Forwarding Rules Table in the screen similar to Figure 4-5. Figure 4-5 4.3.4.2 IOT Log Choose “PON” “Advance”“IOT Log”, and you will see the GPON OMCI Debug screen (shown in Figure 4-6). -
Page 31: Wan Settings
TX-VG1530 N300 Wireless VoIP GPON Router User Guide 4.4.1 WAN Settings Choose “Network”“WAN Settings”, and you will see the WAN Port Information Table in the screen similar to Figure 4-7, which describes the WAN port settings and the relevant manipulation to each interface. - Page 32 TX-VG1530 N300 Wireless VoIP GPON Router User Guide Figure 4-8 4.4.1.1 Static IP Select this option if your ISP provides static IP information to you. You should set static IP address, IP subnet mask, and gateway address in the screen below.
- Page 33 TX-VG1530 N300 Wireless VoIP GPON Router User Guide Figure 4-9 VLAN Configuration: Enable VLAN: Enable or disable this function. Virtual LAN (VLAN) is a group of devices on one or more LANs that are configured so that they can communicate as if they were attached to the same LAN, when in fact they are located on a number of different LAN segments.
- Page 34 TX-VG1530 N300 Wireless VoIP GPON Router User Guide Default Gateway: select a WAN Interface from the drop-down list as the IPv4 default gateway. Enable IPv6: Check the box to enable IPv6. IPv6 Address: Enter the IPv6 address in dotted-decimal notation provided by your ISP.
- Page 35 TX-VG1530 N300 Wireless VoIP GPON Router User Guide Figure 4-10 Click the Save button to save the settings. 4.4.1.2 Dynamic IP Select this option, the GPON router will be able to obtain IP network information dynamically from a DHCP server provided by your ISP.
- Page 36 TX-VG1530 N300 Wireless VoIP GPON Router User Guide Figure 4-11 Click Advanced, advanced selections for WAN Service Setup can be shown. MTU (bytes): Maximum Transmission Unit Size. Check this box then you can change the MTU size. The default MTU value is 1500 Bytes. It is not recommended that you change the default value unless required by your ISP.
- Page 37 TX-VG1530 N300 Wireless VoIP GPON Router User Guide Get IP Unicast: This is disabled by default. The minority of DHCP Server of ISP will not support to enable this. When the route is connected right but IP cannot get, you can select this box.
- Page 38 TX-VG1530 N300 Wireless VoIP GPON Router User Guide Choose the right connection type according to your needs: For PPPoE connection, you can select Connect on demand or Connect automatically or Connect manually. Connect on demand is dependent on the traffic. If there is no traffic (or Idle) for a pre-specified period of time), the connection will tear down automatically.
-
Page 39: Lan Settings
TX-VG1530 N300 Wireless VoIP GPON Router User Guide Figure 4-13 Note: After you finish the Internet configuration, please click Save to make the settings take effect. 4.4.2 LAN Settings Choose “Network”“LAN Settings” menu, and you will see the LAN screen (shown in Figure 4-14). -
Page 40: Ipv6 Lan Settings
TX-VG1530 N300 Wireless VoIP GPON Router User Guide Enable IGMP Snooping: If you select the option, please choose the IGMP Mode: Standard Mode or Blocking Mode. Enable Second IP: You can configure the GPON router’s second IP Address and Subnet ... - Page 41 TX-VG1530 N300 Wireless VoIP GPON Router User Guide If DHCPv6 Server is selected, please complete the following parameters. Figure 4-16 • Start IPv6 Address: Enter a value for the DHCPv6 server to start with when issuing IPv6 addresses. • End IPv6 Address: Enter a value for the DHCPv6 server to end with when issuing IPv6 addresses.
-
Page 42: Mac Clone
TX-VG1530 N300 Wireless VoIP GPON Router User Guide 4.4.4 MAC Clone Choose menu “Network”“MAC Clone”, you can configure the MAC address of the WAN Interface as shown below. The WAN Interface List displays the WAN Interfaces you have configured on the section 4.4.1... -
Page 43: Auto Vlan
TX-VG1530 N300 Wireless VoIP GPON Router User Guide • L2TP Passthrough: Layer Two Tunneling Protocol (L2TP) is the method used to enable Point-to-Point sessions via the Internet on the Layer Two level. To allow L2TP tunnels to pass through the GPON router, click Enable. -
Page 44: Gpon Ctc Settings
TX-VG1530 N300 Wireless VoIP GPON Router User Guide Figure 4-22 GPON Password GPON Password: Displays the factory default password. New Password: Enter the password provided by your ISP. Click Save to make the settings take effect. GPON SN GPON SN: Displays the factory default SN. -
Page 45: Ipsec Vpn
Note: You could also use other VPN Routers to set VPN tunnels with TX-VG1530. TX-VG1530 supports up to 10 VPN tunnels simultaneously. Click Add New Connection in Figure 4-24 and then you will enter the screen shown in Figure... - Page 46 TX-VG1530 N300 Wireless VoIP GPON Router User Guide Figure 4-25 IPSec Connection Name: Enter a name for your VPN. Remote IPSec Gateway Address (URL): Enter the destination gateway IP address in the box which is the public WAN IP or Domain Name of the remote VPN server endpoint. (For example: Input 219.134.112.247 in Device1, Input 219.134.112.246 in Device 2)
- Page 47 TX-VG1530 N300 Wireless VoIP GPON Router User Guide After complete the basic settings and click Save/Apply in both Device1 and Device2, PCs in LAN1 could communicate with PCs in remote LAN2. (For example: You can ping the IP address of PC2 which is 192.168.2.100 in PC1)
-
Page 48: Dhcp Server
TX-VG1530 N300 Wireless VoIP GPON Router User Guide Note: If you want to change the default settings of Advanced Settings, please make sure that both VPN server endpoints use the same Encryption Algorithm, Integrity Algorithm, Diffie-Hellman Group and Key Life time in both phase1 and phase2. -
Page 49: Clients List
TX-VG1530 N300 Wireless VoIP GPON Router User Guide address has expired, the user will be automatically assigned a new dynamic IP address. The default is 24 hours. Default Gateway - (Optional): It is suggested to input the IP address of the LAN port of the ... -
Page 50: Address Reservation
TX-VG1530 N300 Wireless VoIP GPON Router User Guide Valid Time: The time of the DHCP client leased. After the dynamic IP address has expired, a new dynamic IP address will be automatically assigned to the user. You cannot change any of the values on this page. To update this page and to show the current attached devices, click the Refresh button. -
Page 51: Conditional Pool
TX-VG1530 N300 Wireless VoIP GPON Router User Guide Modify the information. Click the Save button. Click the Enable/Disable Selected button to make selected entries enabled/disabled. Click the Delete Selected button to selected entries. 4.5.4 Conditional Pool Choose menu “DHCP Server”“Conditional Pool”, you can see the next screen (shown in Figure 4-31). -
Page 52: Wireless
TX-VG1530 N300 Wireless VoIP GPON Router User Guide Click the Enable/Disable Selected button to make selected entries enabled/disabled. Click the Delete Selected button to selected entries. 4.6 Wireless Choose “Wireless”, there are seven submenus to configure Wireless LAN settings. Click any of them, and you will be able to configure the corresponding function. - Page 53 TX-VG1530 N300 Wireless VoIP GPON Router User Guide SSID. The wireless stations connected to different SSIDs can not communicate with each other. Mode: Select the desired mode. 11b only: Select if all of your wireless clients are 802.11b. 11g only: Select if all of your wireless clients are 802.11g.
-
Page 54: Wps Settings
TX-VG1530 N300 Wireless VoIP GPON Router User Guide SSID (to be bridged): The SSID of the AP your GPON router is going to connect to as a client. You can also use the search function to select the SSID to join. - Page 55 TX-VG1530 N300 Wireless VoIP GPON Router User Guide WPS: Enable or disable the WPS function here. Current PIN: The current value of the GPON router's PIN is displayed here. The default PIN of the GPON router can be found in the label or User Guide.
-
Page 56: Wireless Security
TX-VG1530 N300 Wireless VoIP GPON Router User Guide Refer back to your client device or its documentation for further instructions. II. Enter the client device’s PIN on the GPON router Use this method if your client device has a Wi-Fi Protected Setup PIN number. - Page 57 TX-VG1530 N300 Wireless VoIP GPON Router User Guide Figure 4-37 SSID: Select the SSID from the drop-down list. Disable Wireless Security: If you do not want to use wireless security, check this radio button. But it’s strongly recommended to choose one of the following modes to enable security.
- Page 58 TX-VG1530 N300 Wireless VoIP GPON Router User Guide Wireless Password - You can enter ASCII characters between 8 and 63 characters or 8 to • 64 Hexadecimal characters. Group Key Update Period - Specify the group key update interval in seconds. The value •...
-
Page 59: Wireless Schedule
TX-VG1530 N300 Wireless VoIP GPON Router User Guide Key Type: You can select the WEP key length (64-bit, or 128-bit, or 152-bit.) for encryption. • "Disabled" means this WEP key entry is invalid. 64-bit: You can enter 10 hexadecimal digits (any combination of 0-9, a-f, A-F, zero key is •... -
Page 60: Wireless Mac Filtering
TX-VG1530 N300 Wireless VoIP GPON Router User Guide Start Time, End Time: You can select all day-24 hours or you may enter the Start Time and End Time in the corresponding field. Add: Click this button to add your selected time to the below table. -
Page 61: Wireless Advanced
TX-VG1530 N300 Wireless VoIP GPON Router User Guide Give a simple description for the wireless station in the Description field. For example: Wireless station A. Select Enabled or Disabled for this entry on the Status drop-down list. Click the Save button to save this entry. - Page 62 TX-VG1530 N300 Wireless VoIP GPON Router User Guide Figure 4-42 Transmit Power: Here you can specify the transmit power of GPON router. You can select High, Middle or Low which you would like. High is the default setting and is recommended.
-
Page 63: Wireless Status
TX-VG1530 N300 Wireless VoIP GPON Router User Guide 4.6.7 Wireless Status Choose menu “Wireless””Wireless Status”, you can see the MAC Address, Current Status, Received Packets and Sent Packets for each connected wireless station. Figure 4-43 MAC Address: The connected wireless station's MAC address. - Page 64 TX-VG1530 N300 Wireless VoIP GPON Router User Guide Figure 4-44 You can enable or disable Guest Network. When you enable this function, you could set wireless parameters for Guest Network. SSID: The guest network name. When setting up a Guest network, it is strongly ...
-
Page 65: Guest Network Status
TX-VG1530 N300 Wireless VoIP GPON Router User Guide 4.7.2 Guest Network Status Choose menu “Guest Network”“Guest Network Status”, you can see the MAC Address, Current Status, Received Packets and Sent Packets for each connected wireless station. Figure 4-45 MAC Address: The connected wireless station's MAC address. - Page 66 TX-VG1530 N300 Wireless VoIP GPON Router User Guide Figure 4-46 Profile Name: Displays the profile name of the account. Registrar Address: Displays the IP address or domain name of the SIP Registrar server. Phone Number: Displays the phone number of the account.
-
Page 67: Dial Map
TX-VG1530 N300 Wireless VoIP GPON Router User Guide SIP Account Advanced Profile Name: Assign a name to identify the profile. Please note that special characters are not allowed. Display Name: Assign a name for your account. This name is the Caller-ID you want to be ... -
Page 68: Dial Plan
TX-VG1530 N300 Wireless VoIP GPON Router User Guide Figure 4-48 Configure the current DigitMap settings, and click the Save button to make the configuration take effect. 4.8.3 Dial Plan Choose “Voice”“Dial Plan”, you can see the next submenus: This section includes Dial Plan List and Forbidden Call. The function allows users to set rules for outgoing calls. - Page 69 TX-VG1530 N300 Wireless VoIP GPON Router User Guide Enable: Displays the interface(s) enabled in this plan. Remove: Check the box and then click the Remove button below so that the very plan will be deleted. Edit: Click the Edit button to modify the very plan.
- Page 70 TX-VG1530 N300 Wireless VoIP GPON Router User Guide • Add Number: If it is selected, the original phone number will be sent out with what you set in “Add Number” field added ahead. Take the 3 dial plan in Figure 4-50 as an example. If you dial 018655556666, number 1795101865555666 will be dialed out to make a call.
-
Page 71: Phone Setup
TX-VG1530 N300 Wireless VoIP GPON Router User Guide 4.8.4 Phone Setup Choose “Voice”“Phone Setup”, you will see the screen similar to Figure 4-53. This section allows you to configure phone settings for phone 1 and phone 2. Figure 4-53 Phone Enable: Check the box behind to enable the function. - Page 72 TX-VG1530 N300 Wireless VoIP GPON Router User Guide Dial Restriction: Choose the pull-down menu to set restriction for outgoing calls. • None: Allow all numbers to be dialed out. • All: Forbid all numbers to be dialed out. •...
-
Page 73: Advanced Setup
TX-VG1530 N300 Wireless VoIP GPON Router User Guide 4.8.5 Advanced Setup Choose “Voice”“Advanced Setup”, you will see the next screen in Figure 4-54. Figure 4-54 SIP Advanced Setup: Bound Interface Name: Bound Interface decides where to send/receive the VOIP traffic. -
Page 74: Speed Dial
TX-VG1530 N300 Wireless VoIP GPON Router User Guide Registration Retry Interval(s): Set the time duration for your SIP Registrar server to keep your registration record. Before the time expires, the GPON router will send another register request to SIP Registrar again. If you are unsure of it, please always keep the default value. -
Page 75: Call Log
TX-VG1530 N300 Wireless VoIP GPON Router User Guide Click the Save button to make the configuration take effect. If you want to delete the entry, check the Remove box first, and then click the Remove button. 4.8.7 Call Log Choose “Voice”“Call Log”, you will see the screen as shown in Figure 4-58. This function allows you to view call logs and configure call log options. -
Page 76: Call Firewall
TX-VG1530 N300 Wireless VoIP GPON Router User Guide 4.8.8 Call Firewall Choose “Voice”“Call Firewall“, you can see the next submenus: Call Firewall can be used to control incoming calls. This section introduces how to configure the Call Firewall. Choose “Voice”“Call Firewall““Mode Setting“, you will see the screen as shown in Figure 4-60. - Page 77 TX-VG1530 N300 Wireless VoIP GPON Router User Guide To add a new entry, click the Add button and you will see the screen as shown in Figure 4-62. Figure 4-62 Enter a number with the length in the range of [3, 16]in the field of Black List Number and Click the Save button to make the configuration take effect, then you will go back to the previous page and see the following list as shown in Figure 4-61.
-
Page 78: Usb Voice Mail
TX-VG1530 N300 Wireless VoIP GPON Router User Guide 4.8.9 USB Voice Mail Choose “Voice”“USB Voice Mail“, you will see the screen as shown in Figure 4-65. USB Voice mail is used to record voice messages when the call is not answered. To use this function, please make sure an external USB hard drive/USB flash disk with configure files has been plugged into the USB port on the GPON router. - Page 79 TX-VG1530 N300 Wireless VoIP GPON Router User Guide Figure 4-66 Enable Local Play Operation Notify: Check this box so there will be sound indication for operation when you listen to the voice messages. This is enabled by default. If you are very familiar with the operations, you can disable it.
-
Page 80: Usb Settings
TX-VG1530 N300 Wireless VoIP GPON Router User Guide Input the PIN code according to the notification. You can listen to all the new messages after the PIN code is validated. Click Save to save your configurations. Click Back to go back to the previous page, i.e. Figure 4-65. -
Page 81: User Accounts
TX-VG1530 N300 Wireless VoIP GPON Router User Guide Capacity: The storage capacity of the USB driver. Status: Indicates the shared or non-shared status of the volume. Active means volume can be shared, while Inactive means volume can not be shared. If Deactivate in Action field is enabled, Inactive will be displayed in the Status field, which means volume can not be shared. -
Page 82: Storage Sharing
TX-VG1530 N300 Wireless VoIP GPON Router User Guide Re-enter the password in the Confirm Password field. Click the Set button, and then a new entry will be added in the table. Click the Apply button to apply your settings. Click the Refresh button to refresh this page immediately. -
Page 83: Ftp Server
TX-VG1530 N300 Wireless VoIP GPON Router User Guide Figure 4-70 Click the Browse button, and then select the Select Volume from the drop-down list. Enter display name of the share folder in Share Name filed. Click the Apply button to apply the settings. - Page 84 TX-VG1530 N300 Wireless VoIP GPON Router User Guide Figure 4-71 Server Status: Indicates the FTP Server's current status. Internet Access: Enable or disable this function. Internet Address: If Internet Access is enabled, WAN IP will be displayed here.
-
Page 85: Media Server
TX-VG1530 N300 Wireless VoIP GPON Router User Guide Figure 4-72 Click the Browse button, and then select the Select Volume from the drop-down list. Enter display name of the share folder in Share Name filed. Click the Apply button to apply the settings. -
Page 86: Print Server
TX-VG1530 N300 Wireless VoIP GPON Router User Guide Server Enable: Select this box to enable this function. Server Name: The name of this Media Server. To add a new share folder for your media server, please follow the instructions below: Click Add New Folder button, and you will see the screen as shown in Figure 4-91. -
Page 87: Route Settings
TX-VG1530 N300 Wireless VoIP GPON Router User Guide 4.10 Route Settings Choose “Route Settings”, it includes three menus: Default Gateway, Static Route and RIP Settings. The detailed descriptions are provided below. 4.10.1 Default Gateway Choose “Route Settings”“Default Gateway”, you can see the Default Gateway screen. You can select a WAN Interface from the drop-down list as the system default gateway. -
Page 88: Rip Settings
TX-VG1530 N300 Wireless VoIP GPON Router User Guide Figure 4-78 Enter the following data: Destination IP Address: The Destination IP Address is the address of the network or host that you want to assign to a static route. Subnet Mask: The Subnet Mask determines which portion of an IP Address is the network ... -
Page 89: Ipv6 Route Settings
TX-VG1530 N300 Wireless VoIP GPON Router User Guide Note: RIP cannot be configured on the WAN Interface which has NAT enabled (such as PPPoE). 4.11 IPv6 Route Settings Choose “IPV6 Route Settings”, it includes three menus: IPv6 Default Gateway, IPv6 Static Route. -
Page 90: Forwarding
TX-VG1530 N300 Wireless VoIP GPON Router User Guide Click the Add New button in Figure 4-81, and you will see the screen as shown in Figure 4-82. Figure 4-82 Enter the following data: Destination IP Address: The Destination IP Address is the address of the network or host ... -
Page 91: Virtual Servers
TX-VG1530 N300 Wireless VoIP GPON Router User Guide 4.12.1 Virtual Servers Choose menu “Forwarding” → “Virtual Servers”, and then you can view and add virtual servers in the next screen (shown in Figure 4-83). Virtual servers can be used for setting up public services on your LAN. -
Page 92: Port Triggering
TX-VG1530 N300 Wireless VoIP GPON Router User Guide Figure 4-84 Note: It is possible that you have a computer or server that has more than one type of available service. If so, select another service, and type the same IP address for that computer or server. - Page 93 TX-VG1530 N300 Wireless VoIP GPON Router User Guide Click the Add New button, the next screen will pop-up as shown in Figure 4-86. Select a common application from the Common Service Port drop-down list, then the Trigger Port field and the Open Ports field will be automatically filled. If the Common Service Port do not have the application you need, enter the Trigger Port and the Open Ports manually.
-
Page 94: Dmz
TX-VG1530 N300 Wireless VoIP GPON Router User Guide Click Edit as desired on the Edit column. Click the Enable/ Disabled Selected button to make selected entries enabled/ disabled. Click the Delete Selected button to delete selected entries. Once the GPON router is configured, the operation is as follows: A local host makes an outgoing connection to an external host using a destination port number defined in the Trigger Port field. -
Page 95: Upnp
TX-VG1530 N300 Wireless VoIP GPON Router User Guide 4.12.4 UPnP Choose menu “Forwarding→UPnP”, and then you can view the information about UPnP in the screen (shown in Figure 4-88). The Universal Plug and Play (UPnP) feature allows the devices, such as Internet computers, to access the local host resources or devices as needed. UPnP devices can be automatically discovered by the UPnP service application on the LAN. - Page 96 TX-VG1530 N300 Wireless VoIP GPON Router User Guide Figure 4-89 Enable Parental Control: Check the box if you want this function to take effect. This function is disabled by default. MAC Address of Parental PC: In this field, enter the MAC address of the controlling PC, or ...
-
Page 97: Firewall
TX-VG1530 N300 Wireless VoIP GPON Router User Guide 4.14 Firewall There are four submenus under the Firewall menu: Rule, LAN Host, WAN Host and Schedule. Click any of them, and you will be able to configure the corresponding function. 4.14.1 Rule Choose menu “Firewall”... -
Page 98: Lan Host
TX-VG1530 N300 Wireless VoIP GPON Router User Guide The methods to add a new rule: Click the Add New button and the next screen will pop up as shown in Figure 4-91. Give a name (e.g. Rule_1) for the rule in the Description field. -
Page 99: Wan Host
TX-VG1530 N300 Wireless VoIP GPON Router User Guide To add a new entry, please follow the steps below. Click the Add New button. In the Mode field, select IP Address or MAC Address. If you select IP Address, please follow the steps below: ... -
Page 100: Schedule
TX-VG1530 N300 Wireless VoIP GPON Router User Guide In IP Address field, enter the IP address. If you select MAC Address, the screen shown is Figure 4-95. Figure 4-95 In Description field, create a unique description for the host (e.g. Host_1). -
Page 101: Ipv6 Firewall
TX-VG1530 N300 Wireless VoIP GPON Router User Guide Edit: Here you can modify an existing schedule. To add a new schedule, follow the steps below: 1. Click Add New button and the next screen will pop-up as shown in Figure 4-98. -
Page 102: Ipv6 Rule
TX-VG1530 N300 Wireless VoIP GPON Router User Guide 4.15.1 IPv6 Rule Choose menu “IPv6 Firewall” → “IPv6 Rule”, and then you can view and set Access Control rules in the screen as shown in Figure 4-99. Figure 4-99 Enable IPv6 Firewall: Select the check box to enable the IPv6 Firewall function, so the Default Filtering Rules can take effect. -
Page 103: Ipv6 Lan Host
TX-VG1530 N300 Wireless VoIP GPON Router User Guide Select a host from the IPv6 LAN Host drop-down list or choose “Add IPv6 LAN Host”. Select a target from the IPv6 WAN Host drop-sown list or choose “Add IPv6 WAN Host”. -
Page 104: Ipv6 Wan Host
TX-VG1530 N300 Wireless VoIP GPON Router User Guide Enter the prefix length of the IPv6 address in the Prefix Length field. Click the Save button to save the settings. Click the Delete Selected button to delete selected entries. 4.15.3 IPv6 WAN Host Choose menu “IPv6 Firewall”... -
Page 105: Ipv6 Tunnel
TX-VG1530 N300 Wireless VoIP GPON Router User Guide Figure 4-105 Description: Here displays the description of the schedule and this description is unique. Edit: Here you can modify an existing schedule. To add a new schedule, follow the steps below: Click Add New button and you will see the screen as shown in Figure 4-106. - Page 106 TX-VG1530 N300 Wireless VoIP GPON Router User Guide IPv6 completely supplants IPv4. It is a temporary solution for networks that do not support native dual-stack, where both IPv6 and IPv4 run independently. Choose menu “IPv6 Tunnel”, and you will see the screen as shown in Figure 4-107.
- Page 107 TX-VG1530 N300 Wireless VoIP GPON Router User Guide Figure 4-109 WAN Connection: Select a WAN connection from the drop-down list. Only the connected WAN connections can be shown in the drop-down list. Configuration Type: Select a configuration type for this tunnel. Auto means to obtain the ...
-
Page 108: Quality Of Service
TX-VG1530 N300 Wireless VoIP GPON Router User Guide 4.17 Quality of Service QoS (Quality of Service) helps to prioritize data as it enters your router. By attaching special identification marks or headers to incoming packets, QoS determines which queue the packets enter, based priority. -
Page 109: Sp/Wrr Settings
TX-VG1530 N300 Wireless VoIP GPON Router User Guide SP-Mode: Strict-Priority Mode. In this mode, the queue with higher priority will occupy • the whole bandwidth. Packets in the queue with lower priority are sent only when the queue with higher priority is empty. The disadvantage of SP queue is that: if there are packets in the queues with higher priority for a long time in congestion, the packets in the queues with lower priority will be “starved to death”... - Page 110 TX-VG1530 N300 Wireless VoIP GPON Router User Guide Figure 4-112 Queue: Click Add New button shown in queue part in Figure 4-112, you can add a new queue in Figure 4-113. Figure 4-113 Direction: Select the direction. Scheduler Algorithm: Displays the Scheduler Algorithm you have chosen in Figure 4-111 ...
- Page 111 TX-VG1530 N300 Wireless VoIP GPON Router User Guide Note: 1) Only enable the QoS function of the relevant direction, the queue configuration in SP or WRR mode could take effect. 2) At most you could establish 8 upstream queues and 8 upstream queues.
- Page 112 TX-VG1530 N300 Wireless VoIP GPON Router User Guide Mark Differentiated Service Code Point (DSCP): Enter the number to remark the DSCP priority. To make this function take effect, make sure you have enabled DSCP mark in Figure 4-111. Mark 802.1P Priority: Select the type to remark the 802.1p priority. To make this function ...
-
Page 113: Bandwidth Control
TX-VG1530 N300 Wireless VoIP GPON Router User Guide 4.17.3 Bandwidth Control Choose menu “Quality of Service” → “Bandwidth Control”, and then you can view and configure the Bandwidth Control rules in the screen below. Figure 4-116 Description: This is the information about the rules such as address range. -
Page 114: Ip&Mac Binding
TX-VG1530 N300 Wireless VoIP GPON Router User Guide 4.18 IP&MAC Binding There are two submenus under the IP &MAC Binding menu: Binding Settings and ARP List. Click any of them, and you will be able to scan or configure the corresponding function. The detailed explanations for each submenu are provided below. -
Page 115: Arp List
TX-VG1530 N300 Wireless VoIP GPON Router User Guide Enter the MAC Address and IP Address. Select the Bind checkbox. Click the Save button to save it. To modify or delete an existing entry, follow the steps below. Find the desired entry in the table. -
Page 116: Diagnostic
TX-VG1530 N300 Wireless VoIP GPON Router User Guide Figure 4-121 Service Provider: This field displays the service provider of DDNS. Domain Name: Enter the Domain name you received from dynamic DNS service provider. Username & Password: Type the “User Name” and “Password” for your DDNS account. -
Page 117: System Tools
TX-VG1530 N300 Wireless VoIP GPON Router User Guide 4.21 System Tools Choose menu “System Tools”, and you can see the submenus under the main menu: System Log, Time Settings, Manage Control, CWMP Settings, SNMP Settings, Backup & Restore, Factory Defaults, Firmware Upgrade, Reboot and Statistics. Click any of them, and you will be able to configure the corresponding function. -
Page 118: Time Settings
TX-VG1530 N300 Wireless VoIP GPON Router User Guide Figure 4-124 Save Locally: If Save Locally is selected, events will be recorded in the local memory. Minimum Level: Select the Minimum level in the drop-down list, for the Minimum Level, all ... -
Page 119: Manage Control
TX-VG1530 N300 Wireless VoIP GPON Router User Guide Enter the Date in Year/Month/Day format. Enter the Time in Hour/Minute/Second format. Click Save. To set time automatically: Select your local time zone. Enter the address or domain of the NTP Server 1 or NTP Server 2. -
Page 120: Cwmp Settings
TX-VG1530 N300 Wireless VoIP GPON Router User Guide 4.21.4 CWMP Settings Choose “System Tools” → “CWMP Settings”, you can configure the CWMP function in the screen. The GPON router offers CWMP feature. The function supports TR-069 protocol which collects information, diagnoses the devices and configures the devices automatically via ACS (Auto-Configuration Server). -
Page 121: Backup & Restore
TX-VG1530 N300 Wireless VoIP GPON Router User Guide SNMP (Simple Network Management Protocol) has been widely applied in the computer networks currently, which is used for ensuring the transmission of the management information between any two nodes. In this way, network administrators can easily search and modify the information on any node on the network. -
Page 122: Factory Defaults
TX-VG1530 N300 Wireless VoIP GPON Router User Guide restart automatically then. Keep the power of the GPON router on during the process, in case of any damage. 4.21.7 Factory Defaults Choose menu “System Tools → Factory Defaults”, and then and you can restore the... -
Page 123: Reboot
Note: New firmware versions are posted at http://www.tp-link.com and can be downloaded for free. There is no need to upgrade the firmware unless the new firmware has a new feature you want to use. However, when experiencing problems caused by the GPON router rather than the configuration, you can try to upgrade the firmware. -
Page 124: Statistics
TX-VG1530 N300 Wireless VoIP GPON Router User Guide • Update the configuration with the file (system will reboot automatically. 4.21.10 Statistics Choose menu “System Tools” → “Statistics”, and then you can view the statistics of the GPON router, including total traffic and current traffic of the last Packets Statistic Interval. -
Page 125: Logout
TX-VG1530 N300 Wireless VoIP GPON Router User Guide IP/MAC Address The IP and MAC address are displayed with related statistics. Packets The total number of packets received and transmitted by the GPON router. Total Bytes The total number of bytes received and transmitted by the GPON router. -
Page 126: Appendix A: Specifications
TX-VG1530 N300 Wireless VoIP GPON Router User Guide Appendix A: Specifications General ITU 984.1,ITU 984.2,ITU 984.3, ITU 984.4, IEEE802.1p, IEEE Standards and Protocols 802.11b,IEEE802.11e, IEEE 802.11g, IEEE 802.11n, IEEE 802.3, IEEE 802.3u, TCP/IP, PPPoE, SNTP, HTTP, DHCP, ICMP, NAT Safety & Emission... -
Page 127: Appendix B: Troubleshooting
TX-VG1530 N300 Wireless VoIP GPON Router User Guide Appendix B: Troubleshooting T1. How do I restore my GPON router’s configuration to its factory default settings? With the GPON router powered on, press and hold the RESET button on the front panel for at least 6 seconds before releasing it. - Page 128 TX-VG1530 N300 Wireless VoIP GPON Router User Guide Select Obtain an IP address automatically and Obtain DNS server address automatically. Then click OK. For Windows 8 Move your mouse to the lower right corner and you will see Search icon in the Popups.
- Page 129 TX-VG1530 N300 Wireless VoIP GPON Router User Guide 4) Now, try to log on to the Web-based configuration page again after the above settings have been configured. If you still cannot access the configuration page, please restore your GPON router’s factory default settings and reconfigure your GPON router following the instructions in 3.2 Quick Installation...
-
Page 130: Appendix C: Telephony Features
TX-VG1530 N300 Wireless VoIP GPON Router User Guide Appendix C: Telephony Features This section introduces what the following features are used for. Call Holding This feature allows you to put a call on hold, in which case the call is not ended but no verbal communication is available. - Page 131 TX-VG1530 N300 Wireless VoIP GPON Router User Guide Anonymous Call Blocking With this feature enabled, all anonymous calls will be blocked. Speed Dial This feature allows you to create short numbers for your frequently used telephone numbers to make your dialing more convenient. You just need to press one or two digits and the key # instead of the original phone number to make a call.
-
Page 132: Appendix D: Telephone Operation
TX-VG1530 N300 Wireless VoIP GPON Router User Guide Appendix D: Telephone Operation The table below guides you to configure some frequently used call features using keypads on your telephone. For the features mentioned in this table, please refer to Telephony Features in Appendix C. - Page 133 TX-VG1530 N300 Wireless VoIP GPON Router User Guide Pick up the phone to dial this code. After hearing the Enable Call Forwarding confirmation tone, hang up to make the configuration take on No Answer. effect. Pick up the phone to dial this code. After hearing the...
- Page 134 TX-VG1530 N300 Wireless VoIP GPON Router User Guide Pick up the phone to dial this code. After hearing the Disable Anonymous confirmation tone, hang up to make the configuration take Calling. effect. Pick up the phone to dial this code. After hearing the...
-
Page 135: Appendix E: Technical Support
Service time: 24hrs, 7 days a week USA/Canada Toll Free: +1 866 225 8139 Tel: +44 (0) 845 147 0017 E-mail: support.usa@tp-link.com (USA) Fee: Landline: 1p-10.5p/min, depending on the time of day. Mobile: 15p-40p/min, depending on your support.ca@tp-link.com (Canada) mobile network.