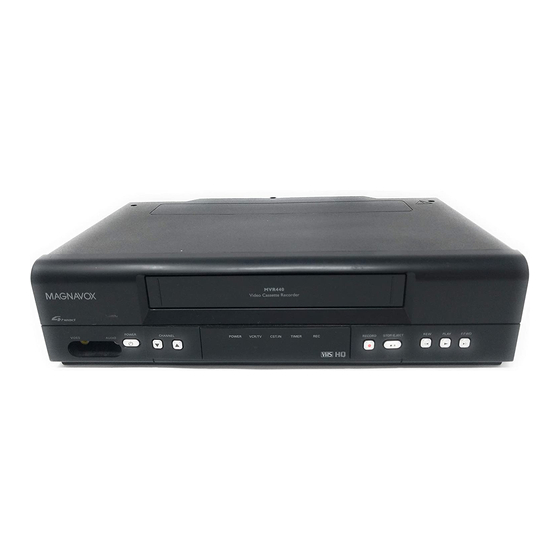
Magnavox MVR440MG/17 Owner's Manual
Magnavox video cassette recorder owner's manual
Hide thumbs
Also See for MVR440MG/17:
- Specifications (1 page) ,
- Quick use manual (2 pages) ,
- Quick use manual (2 pages)
Table of Contents
Advertisement
O
'
M
WNER
S
ANUAL
MVR440MG/17
MVR450MG/17
MVR650MG/17
Video Cassette Recorder
R
EAD YOUR
QUICK TIPS THAT MAKE USING YOUR
I
F YOU HAVE READ YOUR INSTRUCTIONS AND STILL NEED ASSISTANCE
YOU MAY ACCESS OUR ONLINE HELP AT WWW
OR CALL
T
HANK YOU FOR CHOOSING
N
EED HELP FAST
Q
-U
G
UICK
SE
UIDE AND
M
AGNAVOX PRODUCT MORE ENJOYABLE
1-800-705-2000
WHILE WITH YOUR PRODUCT
R
ETURN YOUR
M
.
AGNAVOX
?
/
O
'
M
OR
WNER
S
ANUAL FIRST FOR
.
MAGNAVOX
I
MPORTANT
W
R
ARRANTY
EGISTRATION
S
EE WHY INSIDE
.
,
.
COM
.
!
C
10
ARD WITHIN
DAYS
.
.
Advertisement
Table of Contents

Subscribe to Our Youtube Channel
Related Manuals for Magnavox MVR440MG/17


Summary of Contents for Magnavox MVR440MG/17
- Page 1 ’ WNER ANUAL MVR440MG/17 MVR450MG/17 MVR650MG/17 Video Cassette Recorder HANK YOU FOR CHOOSING EAD YOUR UICK QUICK TIPS THAT MAKE USING YOUR F YOU HAVE READ YOUR INSTRUCTIONS AND STILL NEED ASSISTANCE YOU MAY ACCESS OUR ONLINE HELP AT WWW...
-
Page 2: Warranty
Return your Warranty Registration card today to ensure you receive all the benefits you’re entitled to. Once your MAGNAVOX purchase is registered, you’re eligible to receive all the privileges of own- ing a MAGNAVOX product. So complete and return the Warranty Registration Card enclosed with your purchase at once. -
Page 3: Introduction 3
This VCR has a High Quality (HQ) system and is compatible with existing Video Home System (VHS) equipment. Magnavox recommends you use only video cassettes that have the mark. Using other tapes may result in poor picture quality and excessive deposits on the video heads, which may not be cov- ered by the warranty if damage occurs. -
Page 4: Table Of Contents
Before Using Your VCR ........ -
Page 5: Before Using Your Vcr 5
+ and – ends aligned as indicated. Replace the battery compartment lid. Using the Remote Control Point the remote at the VCR’s remote sensor (see page 21) when using the remote to operate the VCR. Do not put objects between the remote and the VCR. -
Page 6: Hookups: No Cable Box/Satellite
6 Hookups: No Cable Box/Satellite The basic VCR/TV connection – antenna/Cable TV signal to VCR to TV – is shown below. If you have a Cable Box or Satellite Receiver, see pages eight-nine. If you have a Stereo TV, see page 10. -
Page 7: Hookups: No Cable Box/Satellite
4, press and hold PLAY on the VCR for three seconds during tape play. The VCR’s RF output channel will alternate between 3 and 4 each time you do this. There is not a channel 3/4 switch on the VCR. -
Page 8: Hookups With Cable Box/Satellite
Program a timer recording for one channel at a time. Set the TV and the VCR to the Cable Box/Satellite output channel (03 or 04); set the RF output channel of the VCR to the same channel (see page seven). Set your Cable Box/Satellite to the channel you want to record.When you enter the channel you want to... -
Page 9: Hookups With Cable Box/Satellite
ANT(enna) IN Jack. Use an RF coaxial cable (supplied) to connect the OUT Jack on the VCR to the IN Jack on the Cable Box/Satellite. Use a second RF coaxial cable to connect the OUT Jack on the Cable Box/Satellite to the ANTENNA IN Jack on the TV. -
Page 10: Hookups With A Stereo Tv
Connect a video cable to the VCR’s yellow VIDEO OUT Jack and to the TV’s VIDEO IN Jack. MVR650MG/17 Connect a stereo audio cable to the VCR’s red and white AUDIO OUT Jacks and to the TV’s AUDIO IN Jacks. Match cable colors to jack colors. -
Page 11: Turning On Your Vcr 11
You cannot set up channels if you are using a Cable Box/Satellite. The instructions on this page only work when you turn on the VCR for the first time. If there is a power failure or if the VCR is unplugged for more than 30 seconds, repeat this procedure. -
Page 12: Automatic Channel Setup
12 Automatic Channel Setup Although your VCR may set channels when you turn it on the first time, you may set up channels again. Make sure: The VCR is on and is in VCR position. (The VCR/TV light will appear on the display panel. If it does not, press VCR/TV once.) Your antenna or Cable TV signal is connected to the VCR. -
Page 13: Automatic Channel Setup
Delete channels you no longer receive or seldom watch from the memory. Or, add new channels. Make sure: The VCR is on and in VCR position. (The VCR/TV light will appear. If it does not, press VCR/TV once.) Press MENU until MENU appears. -
Page 14: Setting The Clock
14 Setting the Clock Follow the steps below to set your VCR’s clock. Make sure: The VCR is on and in VCR position. (The VCR/TV light will appear. If it does not, press VCR/TV once.) Press MENU until MENU appears. - Page 15 14. Select information to change using F.FWD or REW. When the desired information is flashing, use PLAY or STOP to enter the correct information. Press CLEAR to remove the menu. POWER VCR/TV EJECT PLAY F.FWD STOP STATUS SPEED...
-
Page 16: Language Selection
Follow the steps below to change the language of the on-screen menus and displays. Make sure: The VCR is on and in VCR position. (The VCR/TV light will appear. If it does not, press VCR/TV once.) Press MENU until MENU appears. -
Page 17: On-Screen Status Displays 17
STOP This indicates HIFI has been selected for AUDIO OUT (see page 41). If you play non-Hi-Fi tapes while the VCR is set to HIFI, or if MONO has been selected for AUDIO OUT, HIFI will not appear on the status display. -
Page 18: Remote Control
18 Remote Control Select the signal your TV receives from the VCR. Watch a tape, watch a program while recording it, or watch TV using CH or the Number buttons to change channels at the VCR.The VCR/TV light appears when in VCR position. - Page 19 Press to go back one menu step. STATUS Button SPEED Button See pages 24 and 44. SEARCH MODE Button STILL/PAUSE Button CLEAR Button Press to remove menus. POWER VCR/TV EJECT PLAY F.FWD STOP STATUS SPEED SEARCH MODE STILL/PAUSE MEMORY SLOW...
-
Page 20: Display Panel
One- Touch Recording or timer recording. It flashes if the power is off for a timer recording, but there is no tape in the VCR. It flashes when all timer recordings are finished. CST.IN Light This green light appears when a tape is in the VCR. -
Page 21: Front Panel 21
Connect video and audio cables coming from the video and audio out jacks of a camcorder, another VCR, or other audio/video equipment here. See page 32.The MVR650MG/17 is shown here.The MVR440MG/17 and MVR450MG/17 have only one AUDIO IN Jack. RECORD Button Press once to start a recording. -
Page 22: Rear Panel
Connect the audio cables coming from the audio out jacks of a cam- corder, another VCR, or an audio source here. See page 32. The MVR650MG/17 is shown here.The MVR440MG/17 and MVR450MG/17 have only one AUDIO IN Jack. AUDIO OUT Jacks Connect the audio cables going to the audio in jacks of a camcorder, another VCR, a stereo amplifier, a TV, or an audio system here. -
Page 23: Playing 23
Turn on the TV and set it to channel 3 or 4 (the VCR’s RF output channel). (Press and hold PLAY during tape play for three seconds to switch the VCR’s RF output channel to 3 or 4. Channel 3 is the default setting.) Insert a tape in the VCR. -
Page 24: Recording
24 Recording Read and follow the steps below to record a television program. Turn on the TV; set it to channel 3 or 4 (the VCR’s RF output channel). (Press and hold PLAY during tape play for three seconds to switch the VCR’s RF output channel to 3 or 4. -
Page 25: One-Touch Recording 25
The desired recording speed (SP, SLP) has been selected with SPEED. There is a tape in the VCR. Make sure the tape’s record tab is intact and the tape is long enough to record the program(s). The VCR is in VCR position. (The VCR/TV light will appear. If it does not, press VCR/TV once.) -
Page 26: Timer Recording
Channels are set. The clock is set. There is a tape in the VCR. Make sure the tape’s record tab is intact and the tape is long enough to record the program(s). The VCR is in VCR position.The VCR/TV light will appear. If it does not, press VCR/TV once. -
Page 27: Helpful Hints
Press F.FWD. Next, press PLAY or STOP repeatedly until the desired day appears. Press F.FWD. The day of the week will appear. You cannot program the VCR to record more than one year in advance. ONE TIME PROGRAM PROGRAM NUMBER... - Page 28 VCR.) If the recording is several hours or days away, you may use the VCR until time for the recording. Just turn off the VCR about five minutes before the scheduled start time. The VCR will not remind you of upcoming recordings.
- Page 29 END TIME 08:30 CHANNEL 16 REC SPEED SP While the program number is flashing, press REW to cancel the timer recording. Press CLEAR to remove the menu. Timer Recording (cont’d) 29 POWER VCR/TV EJECT PLAY F.FWD STOP STATUS SPEED SEARCH MODE STILL/PAUSE...
- Page 30 Correcting a Timer Recording You can correct a timer recording after you have finished setting it. Make sure the VCR is on and in VCR position. (The VCR/TV light will appear. If it does not, press VCR/TV once.) First, press MENU until MENU appears. Press PLAY or STOP repeatedly to select TIMER PROGRAM- MING.
-
Page 31: Recording One Channel/Watching Another 31
To return to the channel being recorded, use the TV remote control to select channel 3 or 4, whichever channel the RF output channel of the VCR is set to. Choose the channel it was on before you changed it at step 3. -
Page 32: Playing
Turn on the TV and set it to channel 3 or 4 (the RF output channel of VCR 2). See page seven. Point the remote at VCR 2. Press 0, 0, 1 or 0, 0, 2. (See Helpful Hints at right.) Point the remote at VCR 2. -
Page 33: Repeat Play 33
Follow the steps below to program the VCR to play a tape over and over. Make sure: The VCR is on and is in VCR position.The VCR/TV light will appear on the front panel. If it does not, press VCR/TV once. -
Page 34: Special Effects Playback
During tape play, press and release F.FWD or REW. A fast forward or reverse picture search will begin. Press F.FWD or REW again. The VCR will search in super high speed. (This is possible only for tapes recorded in LP or SLP speeds.) Each press of F.FWD or REW alternates the search speed. -
Page 35: Real-Time Counter Memory 35
You can reset the real-time counter to zero at a tape location you want to refer to later. Make sure: The VCR is on and is in VCR position.The VCR/TV light will appear. If it does not, press VCR/TV once. -
Page 36: Time Search
Make sure: The VCR is on and is in VCR position. (The VCR/TV light will appear. If it does not, press VCR/TV once.) There is a tape in the VCR. -
Page 37: Index Search 37
When you make a recording, the VCR places an index mark at the beginning of the recording. Essentially, an index mark is a type of “bookmark” for your tape.This feature is useful if you have several different programs recorded on a single tape. Skip over programs by following the steps below. -
Page 38: Automatic Playback Features
VCR will not eject the tape or shut itself off. Tape Eject A tape can be ejected with the VCR power on or off (but the VCR must be plugged in). If a Timer Recording is programmed, a tape can only be ejected with the power on. Be sure to insert a tape for the Timer Recording, then turn off the VCR power. -
Page 39: Mts Broadcast Stereo (Mvr650Mg/17) 39
Of course, your VCR will play tapes recorded in monaural (single- source) sound as well. Your VCR also will record in Hi-Fi stereo or in second audio, so when you play back that tape on the VCR, it will be in stereo or second audio. - Page 40 40 MTS Broadcast Stereo (MVR650MG/17) (cont’d) Make sure: The VCR is on and is in VCR position.The VCR/TV light will appear. If it does not, press VCR/TV once. Press MENU until MENU appears. - M E N U - B TIMER PROGRAMMING...
-
Page 41: Hi-Fi Stereo (Mvr650Mg/17) 41
Multi-Channel Television Sound records in Hi-Fi stereo. To play tapes in Hi-Fi stereo, follow these steps. Make sure: The VCR is on and is in VCR position.The VCR/TV light will appear. If it does not, press VCR/TV once. Press MENU until MENU appears. -
Page 42: Helpful Hints
• Make sure the power plug is connected to an AC (alternating current) outlet. • If a timer recording is set, turn on the VCR and eject the tape. Insert a tape and turn off the VCR again for your timer recording. - Page 43 • Gently push on the center of the tape when putting it in the VCR. Never force the tape into the VCR. • If a timer recording is set and the VCR power is off, the VCR will not accept a tape that does not have a record tab.You may only insert a tape with the record tab intact.
-
Page 44: Glossary
(IN) or send audio to another system (OUT). The MVR440MG/17 and MVR450MG/17 have a single AUDIO IN jack on the front and back of the VCR and a single AUDIO OUT jack on the back of the VCR.The MVR650MG/17 has Right and Left AUDIO IN jacks on the front and back of the VCR and Right and Left AUDIO OUT jacks on the back of the VCR. -
Page 45: Specifications 45
Specifications 45 Video Heads Four heads – Hi-Fi (MVR650MG/17) Four heads (MVR440MG/17 and MVR450MG/17) Video Signal EIA standards; NTSC color Antenna VHF/UHF – 75 ohm external antenna terminal VHF Output Signal Channel 3 or 4 (switchable) 75 ohms unbalanced Power Requirement 120V AC;... -
Page 46: Limited Warranty
When it is necessary for you to ship the product to Magnavox for exchange, you will pay the shipping cost for shipment to Magnavox. Magnavox will pay the shipping costs when returning a product to you. -
Page 47: Index
...30 setting...26-28 tracking...38 hookups...6-10, 32, 39 position...18, 31, 43 vcr position...18, 20, 31 vcr/tv button ...18 vcr/tv light...20 video in/out jacks ...10, 21, 22, 32, 39, 44 warranty ...46 IB8465E002 Printed In China 0VMN04005/ HF3P0UD, HF3P1UD, HF4P0UD * * * * *...
Need help?
Do you have a question about the MVR440MG/17 and is the answer not in the manual?
Questions and answers