
Subscribe to Our Youtube Channel
Related Manuals for Y-cam HomeMonitor HD Pro

Summary of Contents for Y-cam HomeMonitor HD Pro
- Page 1 Quick Start Guide HomeMonitor HD Pro Your unique camera ID is: Sign up at http://www.homemonitor.me...
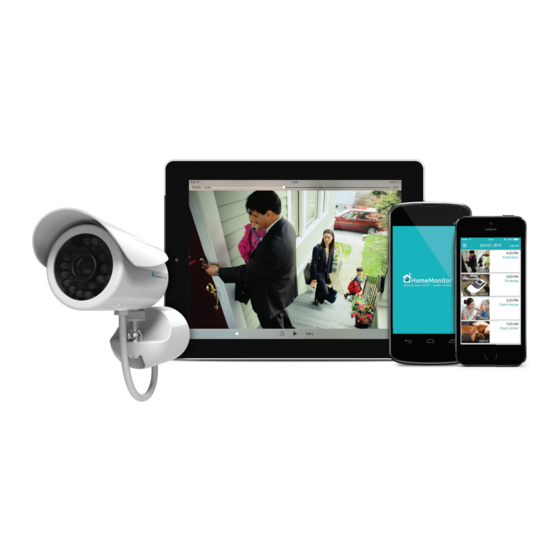
- Page 2 Welcome to HomeMonitor™ Combining professional wireless internet cameras and a secure online account, HomeMonitor™ allows you to tap in to your home life from anywhere. Watch live or see recorded events, from an internet- enabled computer or smartphone, keeps you in touch with what matters most.
-
Page 3: Key Features
UK/ anchors for fixing and Allan key for with wall mount and US/EU plugs wall mount cable management Missing something? Contact us on monitor@y-cam.com * Features may change occasionally as service improves, visit http://www.homemonitor.me for up-to-date account features... - Page 4 Exploring your HomeMonitor HD Pro 24 Infrared LEDs Wi-Fi antenna Status LED Light sensor Protective boot Stand Cable Lens Ball joint Stand Stand cap screw Top of camera Bottom of camera Sunshield Sunshield adjusters Cable Screw mount Microphone Weatherproof reset button Status LED indications: HomeMonitor™...
- Page 5 Setting up your HomeMonitor™ HD Pro Setup shouldn’t take long & we’ll walk you through every step. Before installing your camera where you need it, this setup process should be done close to your router. Access the cables Twist the stand cap to remove the cables (anti-clockwise)
- Page 6 Connect the camera to your router and power Use the network (Ethernet) cable supplied to connect your HomeMonitor camera to a spare network port on the back of your router. Connect the power. The Status LED on the front of the HomeMonitor HD Pro will start fl ashing. Wait for it to start talking to our servers and go green (can take up to 10 minutes).
- Page 7 Installation & placement tips Connected on Wi-Fi or using extender Connected by network cable or PoE Wi-Fi connection for our camera is most Ethernet or Power over Ethernet popular, but thick or insulated external walls (PoE) connections are the most reliable. can greatly reduce the signal.
- Page 8 Installing your HomeMonitor™ HD Pro How to install your HD Pro on a wall using our cable- managed mount. Tip: If using Wi-Fi, before mounting, ensure your camera is in a position where Wi-Fi is accessible Work out where you want the camera to be placed, and drill two holes for the stand cap.
- Page 9 Connect the cable from the camera to the cabling (See picture 4) in step 2 Please make sure the power connector is pushed in securely Position the cable from the base of the camera through the base of the stand and insert any extra cable in to the stand (See picture 5) Turn the camera and stand anti-clockwise and...
- Page 10 Getting the best from your HomeMonitor™ It’s important your HomeMonitor™ is configured according to your individual requirements. Once you have completed the set up process it is advisable to test it so you are satisfied it will do what you need. Questions you may want to consider: What do I want to see in the field of view? What kind of scenarios do I want to trigger a motion recording?
- Page 11 Motion alert & notification tips HomeMonitor™ is equipped with a sophisticated motion sensor which detects when motion is happening and can alert you to it by email. If you want to receive email alerts every time motion is detected, you may want to take in to consideration the following tips so that you achieve the best results and reduce the number of worthless alerts: Active pets (or children!) may activate the motion...
- Page 12 Day to day usage Using HomeMonitor™ on your computer or tablet • Visit http://www.homemonitor.me and log in to see your dashboard. Dedicated app for your smart TV ® Search for HomeMonitor channel in the Channel Store on your Roku. Roku channel may not be available in all regions.
- Page 13 Android 2.3.1+ required Visit App Store from Visit Google Play from your iOS device & your Android device search for “Y-cam & search for “Y-cam HomeMonitor” HomeMonitor” or scan QR code. or scan QR code. http://www.homemonitor.me/apps We add more apps all the time - visit...
- Page 14 Take the next steps Now you have your HomeMonitor installed, why not try one of the following: Add more cameras Use multiple cameras, even at multiple locations, all under one account. Upgrade to Plus Package Get 30 days of online storage for your camera for one small annual fee.
-
Page 15: Safety Information
Keep the power supply dry and avoid contact with liquid. • Small parts may cause a choking hazard, keep away from children. • Only use approved Y-cam accessories and power supplies. • Do not cover the HomeMonitor™. Infrared Lights produce heat which may create a fire hazard. - Page 16 Packaging made from recyclable materials. Product RoHS compliant. All compliance certification and safety requirements have been met by the developer and manufacturer, Y-cam Solutions Ltd.
- Page 17 Suite 101 Richmond, Surrey Clearwater TW9 2JN FL 33762 United Kingdom United States Tel: +44 (0)20 8334 7373 Tel: +1 727 233 8225 For more information or support on HomeMonitor, visit: http://www.homemonitor.me or contact monitor@y-cam.com Designed in Britain. Made in China.
Need help?
Do you have a question about the HomeMonitor HD Pro and is the answer not in the manual?
Questions and answers