Advertisement
Quick Links
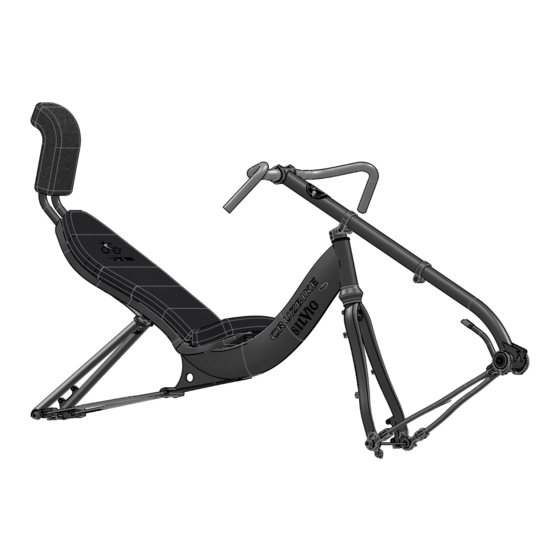
Silvio V2.0 Assembly Instructions
support@cruzbike.com
SilvioAssemblyNotesV5.0
1. General Safety Information
WARNING – to avoid serious injuries:
1. If you are unsure about fitting, testing and adjusting
brakes or gearing on a bicycle, you should take
your bicycle to a professional bicycle mechanic for
adjustment. Improperly adjusted brakes or drivetrain
components could cause severe injury or death.
2. If you are unsure of the frame assembly instructions,
you should take your bicycle to a professional bicycle
mechanic for assembly. An improperly assembled
frame could cause severe injury or death.
3. After adjusting the position of the crank to fit the
rider, ensure the front (flexible) chainstay is straight,
not held in a curved position. An improperly adjusted
frame could be damaged by riding and cause severe
injury or death.
Assembly
This instruction set describes the assembly sequence
but there may be minor differences in specification of
your model.
Adjust to the rider
Adjust to the rider, before fitting brake and gear cables.
Sight along the Front Chainstay to verify that it is
straight, not held in a curved position. Important!
Adding components
Adding components is done to component
manufacturer's instructions. This document does not
describe how to fit components, however the Silvio
frame provides standard mounting points for standard
road bike components. Adding components can be
easier if you have a bike workstand and the best place
to clamp the frame is on the slider tube.
Silvio Assembly Manual
Page 1
Advertisement

Summary of Contents for Silvio cruzbike
-
Page 1: General Safety Information
Adding components Adding components is done to component manufacturer’s instructions. This document does not describe how to fit components, however the Silvio frame provides standard mounting points for standard road bike components. Adding components can be easier if you have a bike workstand and the best place to clamp the frame is on the slider tube. - Page 2 Note: If any of the diagrams here are too small, download the manual from cruzbike. com, and zoom in. Go to cruzbike.com/ SilvioAssemblyManual.pdf. 1 If the details of aheadsets are new to you, two of many useful links explaining them are Sheldon Brown’s authoritative glossary and this...
- Page 3 Screw the suspension Preload Adjustor into the suspension tube on the underside of the mainframe. Insert the Suspension Block into the suspension tube ITEM NO. PART NUMBER QTY. ISO 7380 - M5 x 35 Barrel Nut SECTION H-H Wing Silvio Assembly Manual Page 3...
-
Page 4: Fit The Seat
Insert the Suspension Block into the suspension tube ITEM PART NUMBER QTY. Elastomer part2 Elastomer HR Clamp ISO 7380 - M5 x 25 --- 25C Hexagon Nut ISO - 4036 - M5 - N 54 Bearing cups Silvio Assembly Manual Page 4... - Page 5 ITEM NO. PART NUMBER QTY. Rear Stay Seat Stay Ti Link Seat Stay Link Plate Frame Link Plate ISO 7380 - M5 x 12 --- 12C CS Washer CS Bolt Male CS Bolt Female Link Buffer Silvio Assembly Manual Page 5...
- Page 6 Link in a shop rag to protect the frame paint. 2. Fit the Suspension Link Place Link Buffer between the Suspension Link and the Frame. Bolt the Suspension Link to the Frame with the Frame Link Plate and four bolts. Silvio Assembly Manual Page 6...
-
Page 7: Front Suspension Adjustment
PART NUMBER QTY. Note • Thin washer Pivot clamp Instead of a stem, Silvio uses its Pivot Clamp • Gold split ring socket head cap screw to clamp the headstack. Note that a surplus • Upper bearing star nut may be included in the headset... - Page 8 Fit Dropouts to Chainstay Fit the dropouts over the ends of the Chainstay and fit the CS Bolts. The RD hanger sits on the inside of the right Chainstay dropout, optionally fix with glue . Silvio Assembly Manual Page 8...
- Page 9 NO. PART NUMBER QTY. Important: Tighten the two Pivot Clamp Slider clamp bolts after the front triangle is added. TL-301 Screw Finishing touch Rear Stay Apply the headbadge to the slider. Silvio Assembly Manual Page 9...
- Page 10 Important! Slider, between the Slider Clamp and Boom clearance. Clamp, with the front of the bike up so that the back of the bike hangs down and does not swing. Silvio Assembly Manual Page 10...
Need help?
Do you have a question about the cruzbike and is the answer not in the manual?
Questions and answers