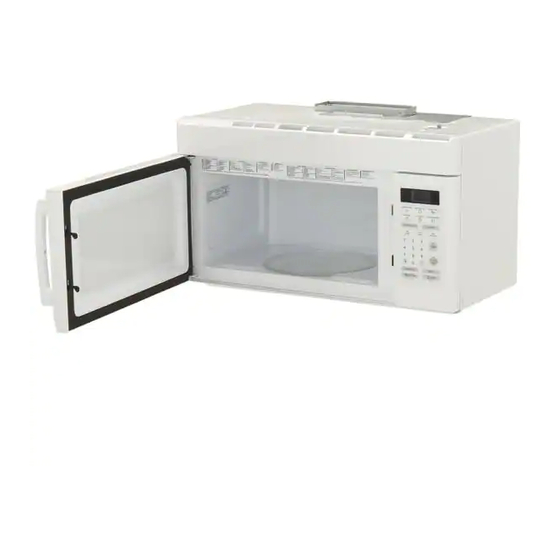
Microwave Oven Use and Care Manual MCO160UW / MCO160UB / MCO160UQ / MCO160S Table of Contents Introduction... 1 Precautions to Avoid Possible Exposure to Excessire Microwave Energy... 1 Important Safety Instructions ... 2~3 Installation Recommendations... 4 Control Panel ... 5~6 Oven Features at a Glance ...
I n t r o d u c t i o n Congratulations on your purchase of an over-the range microwave oven. For best results, we suggest reading this guide carefully. You will find instructions on the proper operation and maintenance of your microwave.
14. Install or locate this appliance in accordance with the provided installation instructions. Do not mount over a sink 15. This microwave oven is UL listed for installation over electric and gas ranges. This over-the-range oven was designed for use over ranges no wider than 30 inches.
27. Microwave oven manufacturers do not recommend deep fat frying or frying in a microwave oven. Hot oil can damage oven parts and utensils and even result in skin burns.
The fan may stay on for up to an hour after the range and microwave oven controls have been turned off. Microwave 1 minute at high. If the dish heats, it should not be used for microwaving.
To u c h C o n t r o l P a n e l The Touch Control Panel allows you to set the oven controls with the touch of a finger. It’s designed to be easy to use and understand. 11.
Page 7
< MCO160UW / MCO160UB / MCO160UQ / MCO160S > Each time a pad is touched, a BEEP will sound. When CANCEL/OFF Pad is touched during oven operation, the oven will stop, however, all programmed information is retained. To clear all information, touch the CANCEL/OFF Pad again.
The roller guide is placed first in the bottom of the microwave and supports the glass tray. Both parts must be in place when using the microwave oven. 19. DATA PLATE - Located on the inside wall of the microwave oven.
O p e r a t i n g B a s i c s Time-of-Day Clock Basic Instructions 1. Touch the CLOCK Pad. 2. Set the time of day by touching the appropriate numbers. 3. Touch the CLOCK PAD. After plugging in the oven or after a power outage, “88:88”...
O p e r a t i n g B a s i c s Power Level Cooking Guide The power levels on your microwave oven can be compared to the surface units on a range. High (power level 10) or full power is the fastest way to cook and gives you 100% power.
Auto Defrost Use the defrost setting for defrosting meats, poultry and fish from 0.1 pounds to 6.0 pounds. Basic Instructions Touch the AUTO DEFROST Pad once for meat. “dF-1” Will be displayed. Touch the AUTO DEFROST Pad twice for poultry. “dF-2” will be displayed. Touch the AUTO DEFROST Pad three times for fish.
Page 12
O p e r a t i n g B a s i c s Defrost by Time Guide (Power Level 3) Items and Weight Defrosting Time Time Beef Ground Beef/1 lb. 10-12 min. Ground Beef/2 lbs. 18-20 min. Beef Roast, boneless/3 lbs. 26-28 min.
Two Stage Cooking This feature lets you program two sequential operations such as defrosting and cooking or cooking Basic Instructions 1. Touch the TIME COOK Pad. 2. Touch the appropriate number pads to enter the cooking time. The selected time will be displayed.
1. Touch the WARM Pad. The Display will show “HEAt”. 2. Touch the START Pad. The microwave oven will safety keep cooked foods warm for up to 30 minutes. Opening the door or touching the CANCEL/ OFF Pad cancels the WARM setting.
To Program Favorite Choice Signal Sound, and Clock Display: Touch FAVORITE CHOICE Pad four times “OPt” will be displayed. To Change Signal Sound: Touch number pad 1. Beep will sound. Touch number pad 2. “MUTE” indicator will be lighted. The buzzer will not be operated. To Turn Clock Display On/Off: Touch number pad 3.
S p e c i a l F e a t u r e s Auto Start The AUTO START feature allows you to program your oven to begin cooking at a preset time of day - up to a delay of 11 hours and 59 minutes.
Control Lockout The oven operation can be locked to prevent the microwave from accidentally being turned on. All oven functions can be locked. To Set: Touch and hold the CANCEL/OFF Pad for three seconds. The Display shows “Loc” and the oven beeps.
They may scratch the surface. Light Compartment Clean off the grease and dust on the light compartment cover on the bottom side of the microwave oven often with warm water and detergent. Control Panel Wipe with a damp cloth. Dry. Do not spray cleaners directly on panel.
The Exhaust Feature The exhaust hood feature on your microwave oven is equipped with two metal filters which collect grease. When the fan is operationg, air is drawn up through the filters and is then discharged through the venting to the outside or through the charcoal filters if not vented to the outside.
30-watt bulb(s) which are available in supermarkets and hardware stores, may also be used for replacements. 5. Raise light compartment cover and replace screw. 6. Connect electrical power to microwave oven. FIGURE 1 FIGURE 2 Oven Light To replace oven light: 1.
A. This in normal occurrence - as food cooks, steam is given off. All these things are normal with your microwave oven. Steam or vapor escaping from around the door. Light reflection around the door or outer case.
Power Level is programmed properly. check instructions on food density, etc. verify that voltage to the microwave oven is not low. If the time-of-day clock does not always keep correct time: check that the power cord is fully inserted into the outlet receptacle.
Microwave Oven Warranty MC Appliance corp. warrants each new Microwave Oven to be free from defects in material and workmanship and agrees to remedy any such defect or to furnish a new part(s) (at the company’s option) for any part(s) of the unit that has failed during the warranty period.
Need help?
Do you have a question about the MCO160S and is the answer not in the manual?
Questions and answers