Magellan Maestro 4350 User Manual
Magellan (thales navigation) magellan maestro user manual
Hide thumbs
Also See for Magellan Maestro 4350:
- Manual del usuario (85 pages) ,
- Installation manual (23 pages) ,
- User manual (9 pages)

Related Manuals for Magellan Magellan Maestro 4350


Summary of Contents for Magellan Magellan Maestro 4350
- Page 1 ® Magellan ™ Maestro 4350/4370 Magellan Navigation Inc. 960 Overland Court, San Dimas, CA 91773...
-
Page 2: Important Safety Warnings
Laws in some states prohibit wearing stereo headphones while operating a motor vehicle. Please contact your local Motor Vehicle Authority for information. • The battery in the Magellan Maestro is rechargeable and should not be removed. In the event that it should need to be replaced, please contact Magellan Technical Support. •... - Page 3 TV reception. The user is cautioned that changes and modifications made to the equipment without the approval of manufacturer could void the user's authority to operate this equipment. The Magellan Maestro must be installed and operated at a distance no closer then 8 inches (20 cm) from the user.
- Page 4 © 2008 Magellan Navigation Inc. All rights reserved. The Magellan Logo, Magellan, Magellan Maestro and OneTouch are trademarks of Magellan Navigation Inc. No part of this user manual may be reproduced or transmitted in any form or by any means, electronic or mechanical, including photocopying and recording, for any purpose other than the purchaser’s personal use, without the prior written...
-
Page 5: Table Of Contents
Attaching the Cradle to the Swivel Mount ... 3 Securing the Swivel Mount to the Windshield ... 3 Securing the Swivel Mount to the Dashboard ... 4 Attaching the Magellan Maestro to the Cradle ... 4 Adjusting the Mount for Optimum Viewing ... 4 Connecting Power ... 4 ... - Page 6 Manipulating the Map ... 11 Rotating the Map ... 12 Tilting the Map ... 12 Setting Zoom Levels ... 12 Panning on the Map ... 12 Saving a Position While Panning ... 13 Routing to a Panned Position ... 14 Current Location Screen ...
- Page 7 Creating a Route to a POI by Category... 31 Creating a Route to a special POI (AAA data) ... 32 Creating a Route to a POI by Name... 34 Creating a Route to a Freeway Exit POI ... 34 Home Address ...36 Saving the Home Address...
- Page 8 Checking Battery Life ... 51 Checking GPS Reception Quality ... 51 Adjusting the Volume ... 51 Using the speakers of the car for your Magellan Maestro ... 52 Adjusting the Display Brightness ... 52 Setting Time Zone ... 53 Selecting Units of Measure ... 53 ...
- Page 9 Calling a Number from Your Address Book ... 62 Calling the Last Called Number ... 62 Handling SMS messages ... 63 Receiving an SMS message ... 63 Sending an SMS message ... 63 Media Center ...64 Audio Player ... 64 Starting the Audio Player ...
-
Page 10: Magellan Maestro 4350/4370
The Magellan Maestro has a built-in battery so, in most cases, you will be able to follow these instructions while reading them on your computer screen without plugging the Maestro to the AC power using an AC power adapter. -
Page 11: Magellan Maestro 4350/4370
Magellan Maestro 4350/4370 (A) Power Button (B) Microphone (C) Traffic Antenna Connector (D) USB connector. Power input from vehicle power adapter cable or AC power adapter (+5 VDC / 2A). (E) SD/MMC card slot (F) Reset Button... -
Page 12: Installation Instructions
Selecting the Location A few tips on selecting the proper location. • Mount the Magellan Maestro in a place where it can be easily seen and will not interfere with your view of the road. • The Magellan Maestro should be mounted in such a way that the antenna, (located in the top of the receiver), has an unobstructed view of the sky through the windshield. -
Page 13: Securing The Swivel Mount To The Dashboard
Attaching the Magellan Maestro to the Cradle Align the tabs on the cradle to the indents on the bottom of the Magellan Maestro. Swivel the cradle up so that it is flush against the back of the receiver and snap it into place. -
Page 14: Checking Connection And Final Adjustments
Checking Connection and Final Adjustments If the power indicator light on the vehicle power adaptor is on, power is being supplied to the Magellan Maestro. If it is not on, check the cable connection to the vehicle power receptacle. If the light is still not on, turn the vehicle’s ignition on. -
Page 15: Fundamentals
Access the Main Menu. Tap Settings. Tap Sound. Tap inside the Master volume adjust bar to change the volume level of the Magellan Maestro or tap inside the Navigation volume adjust bar to change the volume level of the voice guidance only. -
Page 16: Main Menu
This prolongs the battery life between charges. It can be turned off by switching to Backlight Always On. Main Menu The Main Menu screen is the center for all available functions of the Magellan Maestro. The Main Menu contains large, easy to access icons. Accessing the Main Menu When you switch on the Magellan Maestro, the Main Menu is displayed. -
Page 17: Keypad
Keypad Understanding the keypad while entering an address is an important part of using your Magellan Maestro. The keypad is the most common method for entering data into the Magellan Maestro. Keypad Overview Special Keys Alphabetic Keypad Numeric Keypad Symbols Keypad... -
Page 18: Notes On Entering Data
Notes on Entering Data If you are having trouble getting the results you expected, here are a few useful tips. • Make sure that you have entered the name correctly. If you are unsure of the spelling, just enter a few characters and tap Done. -
Page 19: Map Screen
Map Screen The most commonly used screen is the Map screen. Whether you are following a route or just traveling around city, the chances are that the Map screen will be displayed. The Map screen can be displayed in two unique modes: normal and routing. In normal mode, your position is shown on the map along with the time. -
Page 20: Accessing The Map Screen
Accessing the Map Screen On the Main Menu screen, tap View Map. Setting the Map Modes (2D or 3D) The map is normally displayed in 3D mode (perspective view) but you can set the map to 2D mode (top down view) if so desired. Choose the mode that suits you best. From the Map screen, tap anywhere on the map. -
Page 21: Rotating The Map
Rotating the Map During navigation, your Magellan Maestro automatically rotates the map to always face your direction of travel. You can stop and rotate the map to any desired direction. While viewing the Map screen, tap anywhere on the map. Additional controls appear. -
Page 22: Saving A Position While Panning
Saving a Position While Panning Pan the map until the location icon book or in the OneTouch Menu. Tap the button in the top left corner. On the newly opened screen, tap Save. (optional) If you want to save this location to the OneTouch Menu, select Add to OneTouch. Tap OK. -
Page 23: Routing To A Panned Position
If you have selected to save this point to the OneTouch Menu, you need to select a button for the entry. Routing to a Panned Position Pan the map until the location icon Tap the button in the top left corner. If an active route already exists, first you need to define what to do with this new route point: •... -
Page 24: Accessing The Current Location Screen
• Tap the AAA button below to call the toll free assistance number of the AAA. (available only when a cell phone is connected to the Magellan Maestro) • Tap the Enroll button to call the enrollment number of the AAA. (available only when a cell... -
Page 25: Maneuver List (Itinerary)
Select whether to avoid only the maneuver or a part of the route after it. Confirm the exclusion by tapping Avoid. (Or tap the Back arrow The Magellan Maestro recalculates the route and the Map screen returns. (Note: entering a Name is... -
Page 26: Volume
Volume The volume can be adjusted or muted from the Map screen. (The volume can also be adjusted from User Options > Sound.) Changing the Volume from the Map Screen Tap the speaker/magnifier icon Tap on the Mute button Mute button to change the volume levels. . -
Page 27: Enter Address
If you know at least a part of the address, it is the quickest way to select the destination of the route. This function is used to create a route from: • an exact address, including street number • the midpoint of a street •... - Page 28 Tap to select the city from the list. You can enter a full address only if you select a city that is detailed on the map: a city with Enter Street name: With the city selected, the keypad will be displayed prompting you for the street name. You have the following options: •...
-
Page 29: Entering An Address If House Numbering Is Restarted
(optional) Tap Options if you want to change the routing method or the vehicle type. Tap the large GO Tip: If you know that you will use a destination later, before tapping the orange button tap Save to save it in your Address Book or in the OneTouch Menu. -
Page 30: Entering A Street Midpoint
Enter Street name: With the city selected, the keypad will be displayed prompting you for the street name. You have the following options: • Tap the • Use the keypad to enter the street name. It is not necessary to enter accented characters, for ease of use you need to use only the basic keyboard. -
Page 31: Entering An Intersection
• To enter a ZIP code: if needed, tap the Enter the first few characters of the ZIP code. Tap Done characters until the list of cities found is displayed. Tap to select the city from the list. You can enter a full address only if you select a city that is detailed on the map: a city with Enter Street name: With the city selected, the keypad will be displayed prompting you for the street name. -
Page 32: Entering A City Center
is displayed. It is not necessary to enter accented characters, for ease of use you need to use only the basic keyboard. • To enter a ZIP code: if needed, tap the Enter the first few characters of the ZIP code. Tap Done characters until the list of cities found is displayed. -
Page 33: Tips On Entering Addresses Quickly
Tap the large GO Tips on Entering Addresses Quickly • When you are entering the name of a city or a street, Magellan software only displays those characters that appear in possible search results. The other characters are grayed out. •... -
Page 34: Previous Destinations
Previous Destinations Routing to a Previous Destination (Method 1) From the Main Menu, tap the Go To icon. Tap the Previous icon. Select the destination from the list of previous destinations. A screen appears with the address of the selected location, the estimated time of arrival (ETA), the distance to travel, and the routing method (e.g. -
Page 35: Clearing The List Of Previous Destinations
Routing with the 'Plan On Map' Feature With the Magellan Maestro you can route to freely selected map points. This option is particularly useful when your destination is not on a road or in a street that is stored in the map database. -
Page 36: Address Book
A special map screen appears with controls for route creation. You have the following options: Button Address Book Accessing an Address in Your Address Book From the Main Menu, tap the Go To icon. Tap the Address Book icon. To easily find the desired address you can: •... -
Page 37: Creating A New Entry In Your Address Book By Selecting It On The Map
(optional) Tap Options if you want to change the routing method or the vehicle type. Tap the large GO Creating a New Entry in Your Address Book by Selecting it on the Map Pan the map until the location icon book. -
Page 38: Creating A New Entry In Your Address Book From A Poi
When the details for this address are acceptable, tap Done. If you have selected to save this point to the OneTouch Menu, you need to select a button for the entry. Creating a New Entry in Your Address Book from a POI From the Main Menu, tap the Go To icon. - Page 39 • (optional) Tap Assign to correct the location or to add text information to the address book entry. When the details for this address are acceptable, tap Done. If you have selected to save this point to the OneTouch Menu, you need to select a button for the entry.
-
Page 40: Points Of Interest (Poi)
The Magellan Maestro has preloaded POIs that can be used as a destination for a route. Selecting a restaurant or finding a gas station nearby is at your fingertips. Creating a Route to a POI by Category POIs are categorized into unique categories from gas stations to tourist attractions. Most, but not all categories are further organized into subcategories. -
Page 41: Creating A Route To A Special Poi (Aaa Data)
11. Tap the large GO Creating a Route to a special POI (AAA data) Your Magellan Maestro is shipped with a built-in database of POIs provided by AAA. Some of these POIs are even rated by AAA. From the Main Menu, tap the Go To icon. - Page 42 POI category search criteria (and not the list of search results) later. (optional) If your cell phone is connected to your Magellan Maestro and you want to call the selected POI, tap Phone, and then tap the phone icon that appears instead of the rating.
-
Page 43: Creating A Route To A Poi By Name
Creating a Route to a POI by Name From the Main Menu, tap the Go To icon. Tap the POI icon. Tap Search By Name. Spell the name of the POI to be used as the destination. You need not enter the full name, but the more characters you enter, the easier it will be to find the exact POI you are searching for. - Page 44 Small symbols represent the following service POIs near the exits: • Restaurants • Gas Stations • Car Repair • Accommodation Tap any of the symbols to get a list of related POIs near the exits. Select one POI from the list, and tap OK. A screen appears with the address of the selected POI, the estimated time of arrival (ETA), the distance to travel, and the routing method (e.g.
-
Page 45: Home Address
Your most frequent destination can be entered and saved in the Magellan Maestro as the Home Address for quick and easy access when you need to navigate there. This does not need to be your real home address. Choose any address you visit frequently. You can access it at any time with the first button of the OneTouch Menu (Shortcuts/Favorites). -
Page 46: Onetouch™ Menu (Shortcuts/Favorites)
OneTouch™ Menu (Shortcuts/Favorites) In addition to Home Address, there are other icons in the OneTouch Menu, the set of shortcuts and favorite destinations. They can be used for easy access of frequent destinations and to get local information when needed. Furthermore, you can assign POI search criteria to OneTouch buttons. Saving an Address to a OneTouch Button These instructions only apply if you have not yet assigned a function to a OneTouch button. -
Page 47: Creating A Route To A Onetouch Destination
Creating a Route to a OneTouch Destination Tap the button in the top right corner. The OneTouch Menu appears. Tap one of the OneTouch buttons with an assigned address. A screen appears with the address of the selected location, the estimated time of arrival (ETA), the distance to travel, and the routing method (e.g. -
Page 48: Multi-Destination Routes
With the Magellan Maestro you can create routes with more than one destinations. Select one destination and create a single route first. Then turn it to a multi-destination route by selecting additional destinations. Creating Multi-Destination Routes with Plan On Map With the Plan On Map feature you can quickly create a multi-destination route. -
Page 49: Creating Additional Destinations With Add Destination
(optional) Tap Add Destination Tap the large GO Creating Additional Destinations with Add Destination The search functions of the Magellan Maestro are also accessible from the Map screen. From the Map screen, tap Options. Tap Add Destination. Tap Address, POI, Previous, Address Book, Intersection, City Center or Coordinate. -
Page 50: Editing The Destination List
Editing the Destination List You can also edit a multi-destination route without adding new destinations. From the Map screen, tap Options. Tap Edit Destination. The Edit Route screen is displayed. Tap the destination you want to modify. With the highlighted destination, you have the following options: •... - Page 51 The list of saved routes is displayed. Tap on one of the routes in the list. You need to define the starting point of the route: • Tap No to navigate from the current GPS position. • Tap Yes to keep the original starting point of the saved route. If you choose this option, the automatic off-route recalculation will be turned off.
-
Page 52: Traveling On A Route
A route to an address in your Address Book • A route to a previous destination • A route to a POI preloaded in the Magellan Maestro • A route to a city center • A route to a location defined by its coordinates (latitude and longitude) •... -
Page 53: Routing Method
Routing Method Regardless of which route type has been created, the Magellan Maestro needs to know how the route is to be calculated. Routes can be calculated by the following methods: • Fastest Time (Fast): the fastest possible route provided the vehicle is able to travel at or near the speed limit. -
Page 54: Special Routing Functions
Select one routing method from the list. Tap Done. • To change the road types used in route calculation: Tap All Options. Tap Road Types. Select and deselect road types according to your needs. Tap the Back arrow. • To watch the simulation of the recommended route: Tap All Options. -
Page 55: Canceling A Route
Smart Detour on Freeways When you slow down under 20% of the speed limit on a freeway, after a few seconds the Magellan software assumes you are in a traffic jam and displays the Detour button on the Map screen. -
Page 56: Traffic
Maestro receives TMC services only after you have subscribed to the service and entered your subscription code in your Magellan Maestro. Traffic Message: A message received by the Magellan Maestro that contains the description of a Traffic event. Traffic Event: An event liable to disturb the flow of traffic. The list of possible Traffic events that can be... -
Page 57: Subscribing To Traffic Services
Subscribing to Traffic Services In order to receive Traffic messages, you need to subscribe to the service first. Visit www.magellanGPS.com and follow the instructions to receive the subscription co From the Main Menu screen, tap Settings. Tap Traffic. Tap Enter Subscription Code. Using the keypad, enter the subscription code you have received on www.magellanGPS.com. -
Page 58: Traffic Events In Route Calculation
Traffic events that impact yo into account in the new route. Displaying and Suppressing Traffic Events The Magellan Maestro display Traffic events in a events, do the following: From the Main Menu screen, tap Settings Tap Traffic. -
Page 59: Faqs
Traffic data. If none of the 5 frequencies can be used, the Magellan Maestro will start scanning the entire FM band. It will search for the best five frequencies on which Traffic data is available and will tune in to t he strongest station. -
Page 60: Settings
From the Main Menu screen, tap Settings. Tap Sound. Tap inside the Master volume adjust bar to change the volume level of the Magellan Maestro or tap inside the Navigation volume adjust bar to change the volume level of the voice guidance only. -
Page 61: Using The Speakers Of The Car For Your Magellan Maestro
Using the speakers of the car for y The sounds of the Magellan Maestro can be transmitted to the car stereo with the built-in FM modulator. From the Main Menu screen, tap Settings Tap Sound. Tap FM Modulator to turn on the radio transmitter. -
Page 62: Setting Time Zone
Done. Speed Warning If the map database contains the speed limit of the road segments, the Magellan Maestro can warn you when you exceed the speed limit. Speed limit information may not be correct for all road segments. Magellan cannot be held responsible for the accuracy of speed limit information. -
Page 63: Setting The 2D Map Display To Heading Up Or North Up
Auto Night Map Display Normally the map is displayed in vivid colors select whether to always use daytime colors, night color or let the Magellan Maestro switch between them automatically a few minutes before sunrise and a few minutes after sunset. -
Page 64: Changing The Route Calculation Parameters
Setting the GPS Position It is useful to set a GPS position if you are not receiving satellite i 500 mi/800 km with the Magellan Maestro turned o Maestro to compute which satellites are available and calculate the position more quickly. -
Page 65: Backing Up And Restoring Data
Magellan Maestr Tap SWID (SoftWare IDentifier) to get the software identifier of your Magellan Maestro and/or the inserted SD card. k and other data will be repla ata to your existing data. -
Page 66: Hands-Free Phone
Main Menu or on the Map screen. Tap Settings. (optional) The default Bluetooth name of your Magellan Maestro is 'PNA'. To rename it, tap Device Name and modify the name with the keypad. Check Bluetooth Enabled to turn on the Bluetooth radio in your Magellan Maestro. - Page 67 Tap Add. The Magellan Maestro is now searching for available Bluetooth devices. This can take a few minutes. Be sure the phone is discovered by your Magellan Maestro. Refer to the phone manual if not. 10. When finished, tap the appropriate phone name in the list.
-
Page 68: Incoming Phone Calls
Incoming Phone Calls Accepting an Incoming Call When a call is received, the Magellan Maestro pauses the Audio Player and pops up a window with options. Tap Accept Call. You can talk with the caller through the microphone and speaker of the Magellan Maestro. -
Page 69: Rejecting An Incoming Call
Rejecting an Incoming Call When a call is received, the Magellan Maestro pauses the Audio Player and pops up a window with options. Tap Reject Ca The call is rejected, the window disappears and the Audio Player resumes. Rejecting an Incoming Call with an SMS First, you need to set your decline SMS: Tap the phone icon in the Main Menu or on the Map screen. -
Page 70: Initiating Phone Calls
tiating Phone Calls Entering the Home Number Tap the phon e icon in the Main Menu or on the Map screen. Tap Call Home. If you have not entered the Home number yet, the phone keypad is displayed a your Home number. When finished, tap Done. -
Page 71: Calling A Speed Dial Number
The Address Book is displayed. Select one Address Book entry to assign its phone number to the selected Speed Dial b utton: • To use the Home number of the contact, tap • To use the Office number of the contact, tap •... -
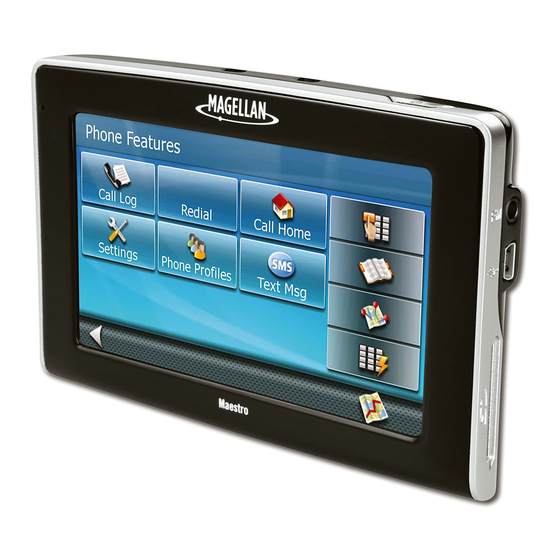
Page 72: Handling Sms Messages
Handling SMS messages Receiving an SMS message When an SMS is received by the cell phone connected to the Ma envelope icon on the Main Menu screen and the phone icon on the Map screen changes. A small SMS symbol is displayed with those icons. It only disappears afte Enter the Text Message subsystem: •... -
Page 73: Media Center
You can watch movies, view photos contains an Audio Player, a Video Player and a Picture Viewer application. Insert an SD card into your Magellan Maestro with audio, video and picture files. You can access the Media Center from the... - Page 74 Albums: opens the list of all album names found in the identification tag of audio files stored in your Magellan Maestro. • Folders: lets you browse the storage locations of your Magellan Maestro for audio files. All these options lead to a list. You have the following options: •...
-
Page 75: Playlist Files
Tap Shuffle Off to adjust the volume or to mute the Magellan Maestro. ack stops. to merge all their content in the current to resume. -
Page 76: Listening To Music During Navigation
Audio Player. • Keep playing: playback continues after you return to navigation. • Ask: every time you exit the Audio Player, the Magellan Maestro asks you whe continue or stop the music. Back to return to the Audio Player. -
Page 77: Picture Viewer
Fast Forward as an alternative to the above. to adjust the volume or to mute the Magellan Maestro. to exit the Video Player. , and then tap Pictures. repeatedly to exit the Picture Viewer.
Need help?
Do you have a question about the Magellan Maestro 4350 and is the answer not in the manual?
Questions and answers