Samsung ES15 User Manual
Hide thumbs
Also See for ES15:
- User manual (98 pages) ,
- Quick start manual (82 pages) ,
- Service manual (2 pages)
Table of Contents
Advertisement
Quick Links
Advertisement
Table of Contents

Related Manuals for Samsung ES15


Summary of Contents for Samsung ES15
- Page 1 Downloaded From camera-usermanual.com Samsung Manuals...
-
Page 2: Getting To Know Your Camera
Please check that the camera is operating properly prior to when by an image editing program. (p.84) you intend to use it (e.g. for a trip or an important event) to avoid disappointment. Samsung takes no responsibility for any loss or Take a picture. (p.19) Take a picture damage that may result from camera malfunction. - Page 3 Positioning the fl ash too close to your subject’s eyes may cause your camera. internal inspection, maintenance and repairs should eyesight damage. only be carried out by your dealer or Samsung Camera Service For safety reasons keep this product and accessories out of centre.
- Page 4 - It takes longer to turn on the LCD monitor and the colour may differ from the subject. - When changing the composition, there may be an after image on the LCD monitor. Downloaded From camera-usermanual.com Samsung Manuals...
-
Page 5: Table Of Contents
How to use the Auto mode Exposure compensation How to use the Program mode White balance How to use the DIS mode Using the Photo Help Guide mode Face Detection How to use the Scene modes Face Tone Downloaded From camera-usermanual.com Samsung Manuals... - Page 6 Movie clip capture function Setup menu Playing back a recorded voice Display Playing back a voice memo Language LCD monitor Indicator Function Description Using the camera buttons to set the camera Start up image Play mode button Downloaded From camera-usermanual.com Samsung Manuals...
- Page 7 Confi gure Multi Slide Show effects Setting up the USB Driver for MAC Setting play interval Using the USB Driver for MAC Setting Background Music File Options Deleting images Protecting images Voice memo DPOF Copy To Card PictBridge Downloaded From camera-usermanual.com Samsung Manuals...
-
Page 8: Package Contents
Please check that you have the correct contents before using this product. The contents can vary depending on the sales region. To buy the optional equipment, contact your nearest Samsung dealer or Samsung service centre. Parts and accessories illustrated below may differ from exact appearance. -
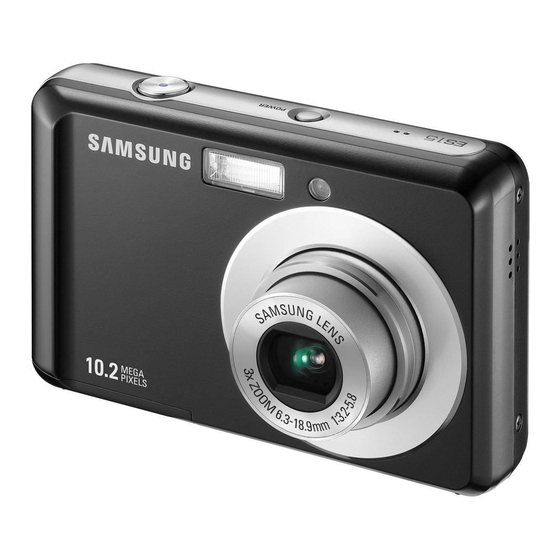
Page 9: Identifi Cation Of Features
Identifi cation of features Front & Top Shutter button Power button Microphone Flash Self-timer lamp / AF sensor Speaker Lens/ Lens cover Downloaded From camera-usermanual.com Samsung Manuals... -
Page 10: Back
Back Camera status lamp Zoom Wide(W) button (Thumbnail) Zoom Tele(T) button (Digital zoom) Strap eyelet LCD monitor USB / AV / DC terminal Fn / Delete button MENU button 5 function button Play mode button Downloaded From camera-usermanual.com Samsung Manuals... -
Page 11: Bottom
OK / Play & Pause button Self-timer / Flash / Right button Left button Battery chamber cover Battery chamber Macro / Down button Tripod socket To open the battery chamber cover, slide it in the direction shown above. Downloaded From camera-usermanual.com Samsung Manuals... -
Page 12: Self-Timer Lamp
ICON When the printer is printing The lamp is off The lamp turns on (The camera focus on the subject) When the AF activates The lamp blinks Downloaded From camera-usermanual.com Samsung Manuals (The camera doesn’t focus on the subject) -
Page 13: Connecting To A Power Source
Included battery may vary depending on sales region. cannot deliver suffi cient power. For this camera, it recommended that a high-capacity battery (alkaline, nickel-hydride) is used. If another battery is used, the camera’s usage time may be lowered. Downloaded From camera-usermanual.com Samsung Manuals... -
Page 14: Inserting The Memory Card
When using the camera and the battery in a place that is excessively cold or hot, the battery status on the LCD may be different from the actual battery status. Downloaded From camera-usermanual.com Samsung Manuals... -
Page 15: Instructions On How To Use The Memory Card
Wear and tear on the If there is insuffi cient memory available : memory card is not covered by the Samsung warranty. A [Memory Full] message will appear and the camera will not The memory card is an electronic precision device. - Page 16 The recording times can be changed by the zoom operation. Slide the switch to the top of the SD/SDHC memory card before You can record videos of up to 4GB or 2hours each. taking a picture. Downloaded From camera-usermanual.com Samsung Manuals...
-
Page 17: When Using The Camera For The Fi Rst Time
- If a battery type is selected, the camera will be optimized according to the selected battery type. [Battery Type] sub Menu : [Alkaline] / [Ni-MH] For more information about the battery type, refer to the page 52. Downloaded From camera-usermanual.com Samsung Manuals... -
Page 18: Lcd Monitor Indicator
Optical / Digital Zoom bar / p.25 Image Size p.38 Digital Zoom rate p.36 Voice Memo p.43 Number of available shots p.35 White Balance 00001 p.15 remaining 23 Exposure compensation p.34 Remaining time 00:00:00 p.15 Downloaded From camera-usermanual.com Samsung Manuals... -
Page 19: How To Use The Menu
Beep Sound AF Sound AF Sound AF Sound Display Self-Portrait Self-Portrait Self-Portrait Settings Exit Change Exit Back Back 4. Select a submenu and click the OK button to save settings and return to the previous window. Downloaded From camera-usermanual.com Samsung Manuals... -
Page 20: Starting The Recording Mode
Photo Help Guide Sound Scene Scene Avoid obstructing the lens or the fl ash when you capture an image. Display Movie Movie Settings Exit Change Exit Back Auto Program Photo Help Guide Scene Movie Downloaded From camera-usermanual.com Samsung Manuals Exit Back... -
Page 21: How To Use The Program Mode
Image Adjust p.42 5. As the DIS uses the camera's digital signal processor, it may Quality / Frame Rate p.39 Voice p.43 take a little longer for the camera to process and save the images. Downloaded From camera-usermanual.com Samsung Manuals... -
Page 22: Using The Photo Help Guide Mode
Pressing the OK button focus, try half-pressing the shutter Press the shutter button button again. to practice using this feature. Guide list Guide list Back Practice [Function that can be used when focusing is diffi cult] Downloaded From camera-usermanual.com Samsung Manuals... - Page 23 ) : For taking pictures of sunsets. [Dawn] ) : Daybreak scenes. [Backlight] ) : Portrait without shadows caused by backlight. [Firework] ) : Firework scenes. [Beach&Snow] ( ) : For ocean, lake, beach and snowscape scenes. Downloaded From camera-usermanual.com Samsung Manuals...
-
Page 24: How To Use The Movie Clip Mode
MOVIE mode. 6. If you wish to stop recording, press the shutter button again. 4. Press the Menu button. 5. Press the Up / Down button to select the [Functions] menu and press the Right button. Downloaded From camera-usermanual.com Samsung Manuals... -
Page 25: Things To Watch Out For When Taking Pictures
(see page 22), fi ll-in fl ash (see page 30), spot metering (see page 39) or exposure compensation (see page 34). Avoid obstructing the lens or the fl ash when you capture an image. Compose the image by using the LCD monitor. Downloaded From camera-usermanual.com Samsung Manuals... -
Page 26: Using The Camera Buttons To Set The Camera
fl ash. Pressing the shutter button down fully takes and stores the image. If you select voice memo recording, the recording will start after the camera has fi nished storing the image data. Downloaded From camera-usermanual.com Samsung Manuals... - Page 27 Pressing Pressing the ZOOM the ZOOM W button W button [Digital zoom 3.0X] [TELE zoom] [WIDE zoom] Downloaded From camera-usermanual.com Samsung Manuals...
-
Page 28: Info (Disp) / Up Button
The distance ranges are shown below. Press the Macro button until the desired macro mode indicator appears on the LCD monitor. Show all photographic information. Show only basic information. [Filming screen] [Information screen] [Auto Focus] [Macro ( [Auto Macro ( Downloaded From camera-usermanual.com Samsung Manuals... - Page 29 When the macro mode is selected, be particularly careful to avoid camera shake. When you take a picture within 40cm (Wide zoom) or 50cm (Tele zoom) in the Macro mode, select the FLASH OFF mode. Downloaded From camera-usermanual.com Samsung Manuals...
-
Page 30: Focus Lock
TELE 1. The image to be 2. Press the SHUTTER 3. Recompose the picture captured. button halfway and and fully depress the AUTO 0.8~3.8 0.8~2.1 0.4~0.8 0.5~0.8 0.4~3.8 0.5~2.1 focus on the subject. SHUTTER button. Downloaded From camera-usermanual.com Samsung Manuals... - Page 31 Select this mode when capturing images in a place or situation where fl ash photography is prohibited. When you capture an image Flash off in poorly lit conditions, the camera shake warning indicator ( ) will appear on the LCD monitor. Downloaded From camera-usermanual.com Samsung Manuals...
-
Page 32: Self-Timer / Right Button
If you operate the Self-timer button during the self-timer operation, the self-timer function is cancelled. Use a tripod to prevent the camera from shaking. SCENE In Movie Clip mode, only the 10SEC self-timer will work. Mode Downloaded From camera-usermanual.com Samsung Manuals... - Page 33 The camera detects the subject's movement 6 Motion movement for 30 seconds, or the seconds after pressing the Shutter button, and the Timer camera doesn’t sense stillness picture is taken when the movement is stopped. after sensing movement Downloaded From camera-usermanual.com Samsung Manuals...
-
Page 34: Menu Button
Auto Photo Style Selector p.41 Mode [Pressing the Program Program OK button] Functions Image Adjust p.42 Sound Photo Help Guide Photo Help Guide Scene Scene Display Movie Movie Settings Voice p.43 Exit Change Exit Back Downloaded From camera-usermanual.com Samsung Manuals... -
Page 35: How To Enable Functions Using The Menu Button
LCD monitor will appear white or you may not get good pictures. White Balance Daylight Adjust the white balance according to the light source. Appropriate for outdoor photography on a clear day. Left / Right button Back Move Back Move Downloaded From camera-usermanual.com Samsung Manuals... -
Page 36: White Balance
For shooting under tungsten (standard light Tungsten bulb) lighting. Allows the user to set the white balance Custom Set according to the shooting condition. Different lighting conditions may cause a colour cast on your images. Downloaded From camera-usermanual.com Samsung Manuals... -
Page 37: Iso
3. Press the shutter button fully to take of the face is also adjusted. You can also Face Detection a picture. capture natural facial expressions by using Adjust face detection settings. self portrait. Back Move Downloaded From camera-usermanual.com Samsung Manuals... - Page 38 The maximum available Face Detection range is 2.5m (Wide). menu. (See p.46) The nearer the subject, the faster the camera can recognize the subject. In [Beauty Shot], [Portrait], and [Children] mode, the [Face Detection] function setting is set to its default value. Downloaded From camera-usermanual.com Samsung Manuals...
-
Page 39: Face Tone
Set the level of face retouching. available because high resolution images require more memory. pressing the Left / Right button and then press the OK button. 3. Press the Shutter button to take an Back Move image. Downloaded From camera-usermanual.com Samsung Manuals... -
Page 40: Quality / Frame Rate
JPEG is the image compression standard developed by the circumstance, it is better to use exposure compensation. Joint Photographic Experts Group. This type of compression is most commonly used for compressing photos and graphics because it can compress the fi les effi ciently. Downloaded From camera-usermanual.com Samsung Manuals... -
Page 41: Drive Mode
If less than 30 pictures are available in the memory, the motion capture is not available. It is best to use a tripod for the AEB shooting as the time to save each image fi le is longer and blurring caused by camera shake may occur. Downloaded From camera-usermanual.com Samsung Manuals... -
Page 42: Photo Style Selector
Cool Cool style is applied. Calm Calm style is applied. Classic Black & white effect is applied. Negative Negative effect is applied. Custom RGB Defi ne an RGB tone to create your own photo style. Downloaded From camera-usermanual.com Samsung Manuals... -
Page 43: Image Adjust
Back Move on the memory. 1. Select [Sharpness] by pressing the Up/Down button. 2. Change the Sharpness by pressing the Left/Right button. 3. Press the Shutter button to take an image. Downloaded From camera-usermanual.com Samsung Manuals... -
Page 44: Voice Memo
- Voice memo will be recorded for ten shutter button again. seconds from the moment the picture is stored. In the middle of the sound - File type : *.wav recording, pressing the shutter button will stop the voice memo. Stop Downloaded From camera-usermanual.com Samsung Manuals... -
Page 45: Recording The Movie Clip Without Voice
A distance of 40cm between you and the camera (microphone) is the best distance to record sound. If the camera power is turned off while the voice recording is paused, the voice recording is cancelled. Downloaded From camera-usermanual.com Samsung Manuals... -
Page 46: Sound
You can select the sound that is activated Self-Portrait Volume :Medium whenever the camera is turned on. Start Sound :Off Back Shutter Sound - Start up sound : [Off]*, [1], [2], [3] Beep Sound AF Sound Self-Portrait Back Downloaded From camera-usermanual.com Samsung Manuals... -
Page 47: Af Sound
[Off] : The function description Function Description Start Image :Off function can’t be activated. Display Brightness :Auto [On]* : The name and description of the Quick View :0.5sec option is displayed. Power Save :Off Back Downloaded From camera-usermanual.com Samsung Manuals... -
Page 48: Start Up Image
(about Back Display Brightness :Auto 30 SEC.), the camera power will Quick View :0.5sec be idle (Camera status lamp: Power Save :Off Blinking) automatically. Back You can’t set the [Power Save] menu of Playback Mode. Downloaded From camera-usermanual.com Samsung Manuals... -
Page 49: Settings
- Always format the memory card using this camera. If you insert a memory card that has been formatted using other cameras, memory card readers, or PCs, you will get a [Card Error] message. Downloaded From camera-usermanual.com Samsung Manuals... -
Page 50: Setting Up The Date / Time / Date Type
fi le name, the image may not play back. Guam, Sydney, Darwin Adelaide, Seoul, Tokyo, Beijing, Hong Kong, Bankok, Jakarta, Yangon, Almaty, Kathmandu, Mumbai, New Delhi, Tashkent, Kabul, Abu Dhabi, Teheran, Moscow, Athens, Helsinki, Rome, Paris, Berlin DST : Daylight Saving Time Downloaded From camera-usermanual.com Samsung Manuals... -
Page 51: Imprinting The Recording Date
PC / Printer mode, slide show, playing back a Depending on the manufacturer and print mode, the date printed voice recording and playing back a movie clip. on an image may not be printed correctly. Downloaded From camera-usermanual.com Samsung Manuals... -
Page 52: Selecting Video Out Type
- When the camera is connected to an external monitor, the menu Back will be visible on the external monitor and the menu functions are the same as those indicated on the LCD monitor. Yellow - Video White - Sound Downloaded From camera-usermanual.com Samsung Manuals... -
Page 53: Auto Focus Lamp
If a battery type is selected, the camera will be optimized according to the selected battery type. [Battery Type] sub Menu : [Alkaline]* / [Ni-MH] Video Out :NTSC AF Lamp :Auto Battery Type :Alkaline Alkaline Ni-MH Back Downloaded From camera-usermanual.com Samsung Manuals... -
Page 54: Starting Play Mode
LCD monitor. 3. Select an image that you want to view by pressing the Left/ Right button. Press and hold the Left or Right button to play back the images quickly. Downloaded From camera-usermanual.com Samsung Manuals... -
Page 55: Movie Clip Capture Function
- To stop playback of the voice memo, press the Down button. When you press the down button at the beginning of the movie clip, the first frame of the movie clip will be saved as a still image. [Press the down button] Downloaded From camera-usermanual.com Samsung Manuals... -
Page 56: Playing Back A Voice Memo
Folder name & File name 100-0010 p.49 Memory card indicator Battery p.13 80~1600 p.36 Aperture value F3.2 ~ F15.2 Shutter speed 8 ~ 1/1,500 Flash On/Off p.29 Image size 3648X2736 ~ 320x240 p.38 Recording date 2009/01/01 p.49 Downloaded From camera-usermanual.com Samsung Manuals... -
Page 57: Using The Camera Buttons To Set The Camera
Operating sound, Effect sound, Start-up Highlighted image sound and Shutter sound will not be generated. To cancel the Manner mode, turn on the camera by Select Move [Highlighted image] [ Thumbnail display mode ] pressing the POWER button. Downloaded From camera-usermanual.com Samsung Manuals... - Page 58 - If an image is enlarged, a loss of quality may occur. and appear on the LCD monitor. - [No] : The trimming menu will disappear. If there is not enough memory space to save the trimmed image, the image can’t be trimmed. Downloaded From camera-usermanual.com Samsung Manuals...
-
Page 59: Info (Disp) / Up Button
·In Pause mode : Resumes playback Info (DISP) button Info (DISP) button Play Pause Stop Play Stop [ Voice recording is stopped ] [ Voice recording is playing ] [ Voice recording is paused ] Downloaded From camera-usermanual.com Samsung Manuals... -
Page 60: Left / Right / Down / Menu Button
3. Select the submenu values by pressing the Up / Down button and then press the OK button. - If [Yes] is selected : deletes the selected images. - If [No] is selected : cancels "Delete Image". Downloaded From camera-usermanual.com Samsung Manuals... -
Page 61: Setting Up The Play Back Function Using The Lcd Monitor
Image Adjust Brightness Contrast p.64 DPOF Index Yes / No Saturation p.70 Select / All / Size Start Play / Repeat p.65 Multi Slide Reset Show Date Images p.66 Copy To Card p.71 Select Downloaded From camera-usermanual.com Samsung Manuals... -
Page 62: Setting Up The Play Back Function Using The Lcd Monitor
FastPhoto All Photos Auto Auto Draft PostCard Quality Normal Card p.73 Fine Auto Size Date Letter Auto File Name p.73 Auto Full Reset p.74 Menus are subject to change without prior notice. Layout Index Downloaded From camera-usermanual.com Samsung Manuals... - Page 63 Left / Right button and Back Move a [Memory Full] message will appear on the LCD monitor and press the OK button. the resized image can't be stored. Image Resize Types ( o : Selectable) Downloaded From camera-usermanual.com Samsung Manuals...
- Page 64 Defi ne an RGB tone to create your own photo style. If you display the rotated image on the LCD monitor, empty spaces may appear to the left and right of the image. 4. The changed image is saved as a new file name. Downloaded From camera-usermanual.com Samsung Manuals...
-
Page 65: Image Adjust
3. Press the OK button and the image will Back Move 2. The [Making New Image] message is be saved as a new file name. displayed and the image is saved as a Red-eye Fix new file name. Back Move Downloaded From camera-usermanual.com Samsung Manuals... -
Page 66: Starting The Multi Slide Show
- Pressing the OK button again will cause the Multi Slide Show saved as a new file name. restart. - To stop playback of the Multi Slide Show, press the OK button, and then press the Left or Right button. Downloaded From camera-usermanual.com Samsung Manuals... -
Page 67: Selecting Images
[Select1], [Select2] and [Select3]. Press the Fn button to save the configuration. 3. Select [Play] or [Repeat] in the [Start] menu to start the multi slide show. Downloaded From camera-usermanual.com Samsung Manuals... -
Page 68: Setting Play Interval
3. Press the OK button to save the and a [No Image File] message will appear. Back configuration. 3. After deletion, the screen will be changed to the play mode screen. Downloaded From camera-usermanual.com Samsung Manuals... -
Page 69: Protecting Images
- Press the shutter button to take a picture. The images are saved Select saved and the menu will on the memory. After saving the image, the voice will record for disappear. 10 seconds. - To stop the recording, press the shutter button. Downloaded From camera-usermanual.com Samsung Manuals... -
Page 70: Dpof
- Up / Down button : Select a number of Quantity prints [Reset] : Cancel the print setup. 4. Press the OK button to confirm the setting. If an image carries DPOF instructions, the DPOF indicator ( ) will show. Downloaded From camera-usermanual.com Samsung Manuals... - Page 71 [Reset] : Cancel all of the print size settings. DPOF [Size] secondary menu : Cancel, 3X5, 4X6, 5X7, 8X10 Depending on the manufacturer and print model, cancelling the printing may take a little longer for the printer to process. Downloaded From camera-usermanual.com Samsung Manuals...
-
Page 72: Copy To Card
[Copy To Card], the last stored image of the last displayed. After copying has been completed, the screen copied folder is displayed on the LCD monitor. will return to play mode. - [No] : Cancels "Copy to Card". Downloaded From camera-usermanual.com Samsung Manuals... - Page 73 If automatic connection fails, set the [USB] menu to [Printer]. (p.52) For a printer that can enable removable disks, set the [USB] menu to [Printer]. Connecting the Camera to a Printer Downloaded From camera-usermanual.com Samsung Manuals...
-
Page 74: Pictbridge : Picture Selection
Some menu options are not supported on all printers. the number of prints. If not supported, the menus are still displayed in the LCD, but are not 4. Press the play mode button ( ) and images will be printed. selectable. Downloaded From camera-usermanual.com Samsung Manuals... -
Page 75: Pictbridge : Reset
- If you use this camera in wet places, such as beach or pool, do not let water or sand get inside the camera. Doing so may result in failure or may permanently damage the unit. Downloaded From camera-usermanual.com Samsung Manuals... - Page 76 - Take a picture for testing the camera condition and prepare extra battery. - Samsung cannot be held responsible for camera malfunctions. If the digital camera is not used for a long period, the date and time may adopt the default settings by automatical battery discharged.
-
Page 77: Warning Indicator
The memory card or internal memory is full. Insert new memory card. Delete the unnecessary image files [No Image File] There are no images stored on the memory Take images Insert a memory card that is holding some images Downloaded From camera-usermanual.com Samsung Manuals... -
Page 78: Before Contacting A Service Centre
Select an appropriate macro mode to take a clear image. Taking a picture beyond the flash range Take a picture within the flash range The lens is smudged or dirty Clean the lens Downloaded From camera-usermanual.com Samsung Manuals... - Page 79 Images are too bright Exposure is excessive vertical line may appear. Reset exposure compensation This is a phenomenon called smear and it does not affect the quality of the recorded image. This is not a malfunction. Downloaded From camera-usermanual.com Samsung Manuals...
-
Page 80: Specifi Cations
- Range : Wide : 0.4m ~ 3.8m, Tele : 0.5m ~ 2.1m Lens - Focal Length : SAMSUNG Lens f = 6.3 ~ 18.9mm - Recharging Time : Approx. 5 sec (35mm film equivalent : 35 ~ 105mm) - F No. : F3.2(W) ~ F5.8(T) - Page 81 · Movie Editing (Embedded): Pause during Normal About 472 About 511 About 613 About 619 About 793 About 1067 About 1876 recording, Still Image Capture These figures are measured under Samsung standard conditions and Storage - Media may vary depending on shooting conditions and camera settings.
- Page 82 Operating Temperature - 0 ~ 40°C Operating Humidity - 5 ~ 85% Software - Samsung Master, Adobe Reader Specifications are subject to change without prior notice. All trademarks are the property of their respective owners. Downloaded From camera-usermanual.com Samsung Manuals...
-
Page 83: Software Notes
Minimum 256MB RAM - Using a Hand-made PC or a PC and OS that has not been space (Over 512MB recommended) guaranteed by the manufacturer is not covered by the Samsung 250MB of available hard disk warranty. space (Over 1GB recommend) -
Page 84: About The Software
If the frame does not appear, run the [Windows Explorer] and select [Installer.exe] in the CD-ROM Drive root directory. Samsung Master : This is the all-in-one multi media software solution. You can download, view, edit and save your digital images and movie clips with this software. -
Page 85: Setting Up The Application Software
Setting up the application software To use this camera with a PC, install the application software first. 2. Install DirectX, Samsung Master by selecting a button shown on After this has been done, the stored images in the camera can be the monitor. - Page 86 USB cable. 4. Turn the camera power on. The [Found New Hardware Wizard] will open and the computer will recognise the camera. If your OS is Windows XP/ Vista, an image viewer program will open. Downloaded From camera-usermanual.com Samsung Manuals...
-
Page 87: Starting Pc Mode
2. Connect the camera and computer with the supplied USB cable. 3. Once the camera is turned on, the camera automatically recognizes the computer and is connected to it. If automatic connection fails, set the [USB] menu to [Computer]. (p.52) Downloaded From camera-usermanual.com Samsung Manuals... -
Page 88: Starting Pc Mode
[My computer] and double click [Removable Disk DCIM 100SSCAM].The image files will then be displayed. Disconnecting the camera and PC Refer to page 89 (Removing the removable disk). 3. Select an image and press the right mouse button. Downloaded From camera-usermanual.com Samsung Manuals... - Page 89 Starting PC mode 4. A pop-up menu will open. - By using [Samsung Master], you can see the stored images in the Click the [Cut] or [Copy] menu. memory directly on the PC monitor and you can copy or move the - [Cut] : cuts a selected file.
-
Page 90: Removing The Removable Disk
3. The [Unplug or Eject Hardware] window will open. Select the [USB Mass Storage Device] and click the [Stop] button. 4. The [Stop a Hardware device] window will open. Select the [USB Mass Storage Device] and click the [OK] button. Downloaded From camera-usermanual.com Samsung Manuals... -
Page 91: Samsung Master
- If you click the [Cancel] button, downloading will be cancelled. folder will be displayed on the upper side of the window. Click the [Start] button to 3. Click [Next >] button. download the images. 7. Downloaded images will be displayed. Downloaded From camera-usermanual.com Samsung Manuals... - Page 92 Preview window : You can preview the changed image. selected image. Image display window : Images of the selected folder are displayed. A still image edited with Samsung Master can’t be played back on Refer to the [Help] menu in Samsung Master for further information. the camera.
- Page 93 Some movie clips that were compressed with a codec that is music files together in a movie clip. not compatible with the Samsung Master can’t play back in the Samsung Master. Refer to the [Help] menu in Samsung Master for further information.
-
Page 94: Setting Up The Usb Driver For Mac
3. Connect the camera to the Macintosh and turn the camera power First complete uploading from computer to camera and then remove the removable disk with the Extract command. 4. A new icon will be displayed on the desktop after connecting the camera to the MAC. Downloaded From camera-usermanual.com Samsung Manuals... -
Page 95: Faq
The camera may malfunction when it is connected to the PC at the same time as another USB cable. In this case, disconnect the other USB cable, and connect only one USB cable to the camera. Downloaded From camera-usermanual.com Samsung Manuals... -
Page 96: Correct Disposal Of Batteries In This Product
For information on its replacement, please contact your service provider. extracted or an error message displays during the file transfer. If you install only the Samsung Master, the problems mentioned above occasionally happen. - Close the Samsung Master program by clicking the Samsung Master icon on the Taskbar. -
Page 97: Correct Disposal Of This Product
This Class [B] digital apparatus complies with Canadian ICES-003. Samsung Eco-mark It is Samsung’s own symbol mark is used to effectively communicate Samsung’s environmental friendly product activities to the consumers. The mark represents Samsung’s continuous effort on development of environmental conscious products. - Page 98 Downloaded From camera-usermanual.com Samsung Manuals...
Need help?
Do you have a question about the ES15 and is the answer not in the manual?
Questions and answers