Advertisement
CHIMNEY HOOD WALL:
ISALND HOOD:
UNDER CABINET HOOD :
PRO UNDER CABINET HOOD: VT-PROC30,VT-PROC36
INSERT HOOD:
General user manual
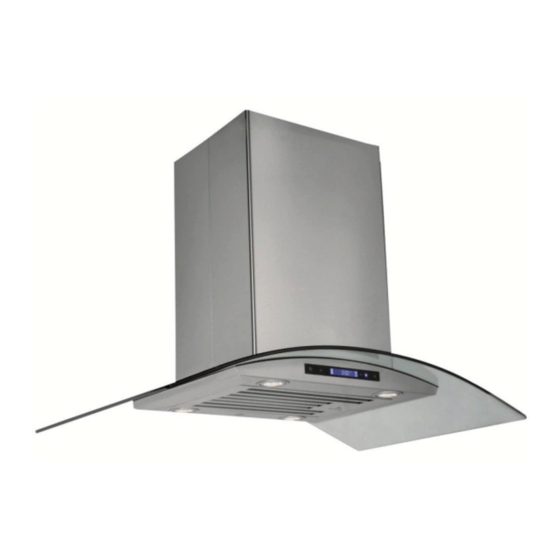
Veneto
VT-ANG30, VT-ANG36,VT-ANG650, VT-VIT30, VT-VIT36, VT-ZEN2, VT-ZEN30,
VT-ZEN36,VT-ZEN650 VT-BAC30
VT-ANG36IL, VT-VIT36IL, VT-ZEN36IL, VT-ZEN3612IL, VT-ZEN42IL
VT-REG30,VT-REG30W,VT-CON30
VT-IN2816, VT-IN2812
///
Range hoods
1
Advertisement

Summary of Contents for Veneto VT-ANG30
- Page 1 General user manual Veneto Range hoods CHIMNEY HOOD WALL: VT-ANG30, VT-ANG36,VT-ANG650, VT-VIT30, VT-VIT36, VT-ZEN2, VT-ZEN30, VT-ZEN36,VT-ZEN650 VT-BAC30 ISALND HOOD: VT-ANG36IL, VT-VIT36IL, VT-ZEN36IL, VT-ZEN3612IL, VT-ZEN42IL UNDER CABINET HOOD : VT-REG30,VT-REG30W,VT-CON30 PRO UNDER CABINET HOOD: VT-PROC30,VT-PROC36 INSERT HOOD: VT-IN2816, VT-IN2812...
-
Page 2: Table Of Contents
Summary Safety Notice…..........................3-4 Electrical requirements and installation requirements..............5 Examples and positioning possibilities for ducts................6 to12 Clearance……..........................13 Necessary Tools .………………………………………..…………………………………………………………….…………..14 Installation Drawings and Dimensions ………………………………………………………………………………...15 to 28 Maintenance..........................29 warranty...........................30... -
Page 3: Safety Notice
Safety Notice APPROVED FOR RESIDENTIAL TYPE UNITS FOR RESIDENTIAL USE ONLY READ THESE INSTRUCTIONS AND BE SAFE. PLEASE READ THESE INSTRUCTIONS COMPLETELY BEFORE STARTING. THE INSTALLATION OF THE APPLIANCE MUST RESPECT ALL CODES. IMPORTANT: Save these instructions so that you can provide the electrical inspector in your area. Safety Warning: Turn off the circuit in the electrical panel and lock the front panel to connect the cord of this unit. - Page 4 WARNING TO AVOID INJURING SOMEONE IN A GREASE FIRE, FOLLOW THE FOLLOWING: 1. SMOTHER FLAMES with a lid to the dimensions of the cooking hobs, a cookie sheet or other metal tray, then turn off the gas or power supply of the stove. BE CAREFUL NOT TO BURN YOURSELF. If the flames do not go out immediately, LEAVE AND CALL THE FIRE DEPARTMENT.
-
Page 5: Electrical Requirements And Installation Requirements
Electrical requirements and installation requirements Power Requirements IMPORTANT Observe all governing codes and ordinances. The customer is responsible for: Contacting an electrician-installer. Check that the electrical installation is adequate and in conformance with the National Electrical Code, ANSI / NFPA 70 (latest edition *) or CSA Standards C22.1-94, Canadian Electrical Code, Part 1 and C22.2 No.0-M91 (the latest edition **) of the CSA, and all codes and ordinances in your area. -
Page 6: Examples And Positioning Possibilities For Ducts
Ventilation methods The hood is equipped with a vertical transition to remove fumes outside. Recommended diameter conduit is 7’’ for model VT-ANG30, VT-ANG36, VT-VIT30, VT-VIT36, VT-ZEN30, VT-ZEN36 Recommended diameter conduit is 6’’ for model VT-ANG650, VT-ZEN650 Models Chimney hood Wall... - Page 7 Chimney hood Wall: VT-BAC30 Positioning options for the hood ducts VT-BAC30 Vertical outlet 6'' round and rectangular horizontal rear exit 4'' 1/2'' x 9'' or 3 1/4 X 10'' provides...
- Page 8 Exit 4’’ 1/2 x 9’’ include Exit 3’’1/4 x 10’’ include...
- Page 9 Island model Hood : VT-ANG36il, VT-VIT36il, VT-ZEN36il, VT-ZEN3612IL, VT-ZEN42IL Positioning options for blocks ducts hoods VERTICAL DUCT 7'', maximum length pipe is 20’...
- Page 10 Under cabinet models: VT-PROC30,VT-PROC36 maximum length pipe is 20’ VERTICAL DUCT 8'' Positioning options for hood ducts under cabinets...
- Page 11 Under cabinet models : VT-REG30, VT-REG30W,VT-CON30 VERTICAL AND HORIZONTAL RECTANGULAR PIPE 3'' 1/4'' X 10 REQUIRED, otherwise it will create additional noise. maximum length pipe is 15’...
- Page 12 Insert Hood models : VT-IN2816,VT-IN2812 Positioning options for blocks ducts hoods maximum length pipe is 20’...
-
Page 13: Clearance
Clearance Training Do not cut a joist or stud unless it is absolutely necessary to do so. If you need to cut a joist or stud, you must build a support framework. Supplied hardware can secure the hood to most walls and ceilings. However, you should ask a qualified technician to check the strength of materials depending on the type of wall or ceiling. -
Page 14: Necessary Tools
Installation Installation - Version with duct • If possible, unplug the stove and move it in order to have better access to the rear wall. Otherwise, place a thick blanket on the counter and the cooking surface to protect it from damage and dirt. Select a flat surface for assembling the device. Place a protective cover on the surface, then place the pieces of the canopy hood and hardware. - Page 15 Installation and dimensions diagram, patterns for chimney hood VT-ANG30, VT-ANG36,VT-ANG650 VT-VIT30, VT-VIT36 VT-ZEN30, VT-ZEN36, VT-ZEN2, VT-ZEN650 VT-BAC30...
- Page 16 Installation and dimensions diagram, patterns for hood's chimney...
- Page 17 Installation and dimensions diagram, patterns for island hoods VT-ANG36il VT-VIT36il...
- Page 18 Installation and dimensions diagram, patterns for island hoods VT-ZEN36il, VT-ZEN42 Installation dimensions and patterns for island hoods, ceiling pattern for up to 12 VT-ZEN3612IL...
- Page 19 Installation and dimensions diagram patterns for island hoods...
- Page 20 Installation and dimensions diagram, patterns for hoods: VT-PROC30,VT-PROC36...
- Page 21 Installation and dimensions diagram, patterns for hoods: VT-PROC30,VT-PROC36...
- Page 22 Description orders for model: VT-PROC30, VT-PROC36 Automatic activation control function of the sensor: When the hood is off, press the K1 button to enter the automatic sensor mode, an automatic detection mode, the fan does not turn unless it detects gas. Then it will turn off automatically as long as the gas dissipates.
- Page 23 Horizontal installation dimensions, diagrams for models of hoods: VT-REG30,VT-REG30W,VT-CON30...
- Page 24 Vertical installation dimensions and patterns, diagram for hoods: VT-REG30,VT-REG30W,VT-CON30...
- Page 25 Vertical installation dimensions and patterns, diagram for hoods: VT-IN2816...
- Page 26 Vertical installation dimensions and patterns, diagram for hoods: VT-IN2812...
- Page 27 Description orders for all models except VT-PROC30, VT-PROC36, VT-IN2816, VT-IN2812 K1: Power on / off: When the hood is on, press K1 key to enter Power-Off Delay Timer. K2:Light knob: Press this button to turn on the light again, turn off the light. K3, K4: Button to decrease and increase button : Press these two buttons to adjust the speed when the hood is ON.
-
Page 28: Installation Drawings And Dimensions
Description orders for model VT‐IN2816 Press + to switch on the fan .The timer will only operate when the fan is switch Press – to decrease the fan speed Press + to increase the fan speed To switch on or off the lights Up to 15 minutes timer setting and fully adjustable. -
Page 29: Maintenance
MAINTENANCE WARNING Before servicing or cleaning unit, switch power off at service panel and lock in access to prevent it being switched on accidentally. If the power panel can not be locked, put a prominent warning device, such as a brightly coloured label. Grease filters The grease filters should be cleaned once a month or as needed. -
Page 30: Warranty
This warranty supersedes all prior warranties. Contact the service guaranties Ste-fan 2012 Fan Inc., dial your authorized dealer (in Canada). For a claim to succeed, the owner of the Veneto range hood should have on hand the model number of the device as well as proof of the purchase date of the product.
Need help?
Do you have a question about the VT-ANG30 and is the answer not in the manual?
Questions and answers
The electronics to open/close fan and lighting are not functioning properly ..there are flickering and inconsistent ...the same goes for the clock . Model VT-BAC30