Table of Contents
Advertisement
Quick Links
Download this manual
See also:
User Manual
User's Manual
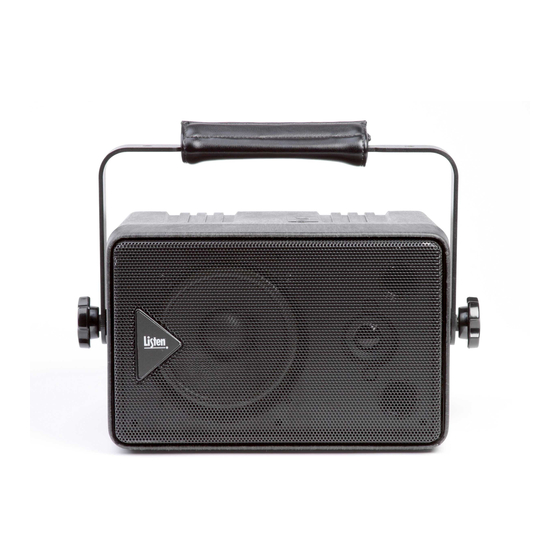
LR-600 Wireless Speaker / Receiver
D o n ' t m i s s a s i n g l e s o u n d . L i s t e n .
Listen Technologies Corporation
8535 South 700 West, Suite A
Sandy, Utah 84070-2515 USA
Telephone: +1.801.233.8992
Toll Free (North America): 1.800.330.0891
Fax: +1.801.233.8995
E-mail: info@ListenTech.com
Advertisement
Table of Contents

Related Manuals for Listen LR-600

Summary of Contents for Listen LR-600
- Page 1 User’s Manual LR-600 Wireless Speaker / Receiver D o n ’ t m i s s a s i n g l e s o u n d . L i s t e n . Listen Technologies Corporation 8535 South 700 West, Suite A Sandy, Utah 84070-2515 USA Telephone: +1.801.233.8992...
- Page 2 Should there be any prob- lems with your Listen products, we are ready to help you in any way we can. Should you have any comments on how we might improve our products or our service, we’re here to listen.
-
Page 3: Table Of Contents
Listen SQ™ ........ -
Page 4: Architectural Specifications
Rechargeable batteries and include recharging components for said NiMH batteries. The speaker should have a minimum SPL of 110dB (±3dB). An included bracket will be able to be used as a handle for carrying, or be adjustable up to 360 degrees around the unit for mounting. The Listen LR-600 is specified. Specifications... -
Page 5: Block Diagram
LR-600 Block Diagram Power Off/Charge/On Channel External Down Power Supply 115VAC 18VAC UL Listed +12VDC or Seek 8VAC Listen LCD Display Power Supply (backlighted) CPU Module Battery Select Top of Speaker NiMH Select (8) AA Batteries External Alkaline or NiMH... -
Page 6: Quick Reference
Quick Reference LR-600 Rear Panel: Connections and Controls POWER ON / CHARGE / OFF Three-band equalizer Connect the (included) power To operate and charge batteries, AUXILIARY CONNECTORS used to adjust sound supply here, or a +12VDC move to ON position. To only... -
Page 7: Powering Instructions
· External +12VDC Battery or Power Supply · Internal Batteries Power Supply (included with unit) If you are using the LR-600 with the external power supply, connect the power supply to the LR-600 and plug the power supply into a 115VAC/60 Hz outlet. External +12VDC Source... -
Page 8: Internal Batteries
LR-600 Internal Batteries Internal Batteries If you are using the LR-600 with internal batteries, do the following: · Open the battery compartment by removing the thumbscrew and then removing the cover. · Slide the battery holder out of the battery compartment. - Page 9 Turn the unit on by sliding the power switch to the ON position. The LCD will activate; if using the LR-600 on the power supply, the LCD backlight will activate and remain on. If you are using the unit on batteries, the LCD backlight will operate for 12 seconds after any button is pressed, and then...
-
Page 10: Antenna Options
LR-600 Antenna Options The LR-600 has two antenna options: internal or external. To use the internal antenna, move the antenna switch to INT. To use the external antenna, move the switch to EXT. Internal antenna As shipped, your LR-600 is set up for use with its internal antenna. The internal antenna will work well for a large number of uses, but it cannot be positioned for best coverage. -
Page 11: Setup & Programming
LR-600 Setup and Programming Channel Selection Using the channel select buttons (UP and DOWN buttons on the rear panel) or the SEEK button, select the desired receive channel. For more information, see Channel Selection on page 19. Use Channel UP / DOWN or Seek to select a receive channel. - Page 12 · Move the SQ switch on the back of the unit to the ON position. · If you are using the LR-600 with another brand transmitter or if you don’t want to use the SQ function, move the SQ switch to the OFF position.
-
Page 13: Squelch Adjustment
· It doesn’t matter if the user hears the noise if the transmitter is turned off. · The transmitter is located a long distance from the LR-600. The adjustable squelch can be programmed from 0 (no squelch) to a maximum of 20 (highest sensitivity). -
Page 14: External Speaker
TV or computer) and connect it to the two phono connectors on the rear panel of the LR-600. If you want to take the audio out of the LR-600 and record it or send it to a mixer, use the Auxiliary Output phono connectors to connect to your recorder or mixer. -
Page 15: Operation
(indicating low battery). When charging, the battery icon changes through all of these states to show it is charging. Signal Strength Just as on your cellular telephone, the dots above the Listen logo show the signal strength coming from the transmitter. Padlock Icon If illuminated, indicates the channel selection function is locked. -
Page 16: Battery Options
LR-600 Operation Battery Operation To set up the unit for battery operation, see page 8. To operate the unit on batteries, move the Power switch to the ON position. Alkaline battery operation. Note that the power supply is not connected and the Battery switch is in the ALK position. -
Page 17: Mounting & Carrying Options
Seek button on the rear panel instead. Pressing Seek will cause the LR-600 to search for an available transmission. You may also use the Channel UP and DOWN buttons on the rear panel to step through the channels available to the LR-600. - Page 18 LR-600 Mounting Options You have the option to mount the LR-600 on a microphone stand, or you can mount the U bracket directly to any vertical or horizontal surface. Microphone Stand Mounting · Locate the microphone stand nut in the included poly bag, or use the nut that comes with the microphone stand.
-
Page 19: Rf Reception Maximization Strategies
CAUTION: When installing antennas, ensure the antenna is clear of power lines. NOTES: If the RF signal to the LR-600 is too high, the audio will be distorted. This may happen if you are within 40 feet of the LT-800 transmitter. Consider... -
Page 20: Listen Sq
Listen systems, including the system you received in this shipment. If you products are planning to use this product with older Listen systems that do not have Listen SQ or equipment not manufactured by Listen, you should disable Listen SQ. -
Page 21: Channel Selection
(lettered channels at 72MHz a wide band channel unless you need to and channels that start with a “2” for 216MHz when using a Listen receiver). be compatible with existing narrow Listen to the audio through the headphone or via the speaker. -
Page 22: 72 Mhz Frequency Compatibility Table
72MHz Compatibility Chart Frequency Phonic Listen Comtek Phonak Williams* Gentner Telex Drake 72.0250 (11, 1) 72.0500 72.0750 (12, 3) 72.1000 A, (13, 4) 72.1 72.1250 (14, 5) 72.1500 72.1750 (15, 7) 72.2000 K, (8) 72.2 72.2250 (16, 9) 72.2500 (10) 72.2750... -
Page 23: 216 Mhz Frequency Compatibility Table
216MHz Compatibility Chart Frequency Phonic Light Listen Comtek Phonak Williams Gentner Speed 216.0125 216.0250 216.0375 216.0625 216.0750 216.0875 216.1125 216.1250 216.1375 216.1625 216.1750 216.1875 216.2125 216.2250 216.2375 216.2625 216.2750 216.2875 216.3125 216.3250 216.3375 216.3625 216.3750 216.3875 216.4125 216.4250 216.4375 216.5125 216.5250... -
Page 24: Troubleshooting
LR-600 Troubleshooting The unit does not power up, or it has stopped operating. · Ensure the power supply is connected properly. · Your batteries may be dead. Replace or recharge the batteries. The audio is muted occasionally. · The unit’s squelch sensitivity (a smaller number in the squelch setting) may be too high. - Page 25 · Yes, as long as the power switch is in the ON or CHG position. Can I use this product in a motor vehicle? · Yes, the LR-600 is designed to work with +12VDC from any vehicle. See page 7 for more information.
-
Page 26: Fcc Statement
FCC Statement This equipment has been tested and found to comply with the limits for a class B digital device, pursuant to part 15 of the FCC Rules. These limits are designed to provide reasonable protection against harmful interference in a residential installation. This equipment generates, uses and can radiate radio frequency energy and if not installed and used in accordance with the instructions, may cause harmful interference to radio communications. -
Page 27: Warranty
Warranty does not cover normal wear and tear on the product or any other physical damage unless the damage was the result of a manufacturing defect. Listen is not liable for consequential damages due to any failure of equipment to perform as intended. Listen shall bear no responsibility or obligation with respect to the manner of use of any equipment sold by it. -
Page 28: Optional Accessories
Optional Accessories Other Stationary Unit Antennas 90 Degree Helical Coaxial Dipole Antenna LA-116 (Rear Mount) LA-123 for 72MHz or LA-124 for 216MHz LA-122 Universal Antenna Kit The single solution for all of your indoor remote antenna needs. Includes: 72 and 216MHz components;... - Page 29 Optional Accessories continued BNC Adapter BNC Connector BNC Connector for RG58 for RG8 LA-121 LA-127 LA-128 RG58 Coaxial RG8 Coaxial Installation of Cable Cable BNC Connectors LA-112 LA-114 LA-113 Expansion Speaker Expansion Speaker LA-316...
- Page 32 Listen Technologies Corporation 8535 South 700 West, Suite A Sandy, Utah 84070-2515 USA Telephone: +1.801.233.8992 Toll Free (North America): 1.800.330.0891 Fax: +1.801.233.8995 E-mail: info@ListenTech.com...
Need help?
Do you have a question about the LR-600 and is the answer not in the manual?
Questions and answers