Table of Contents
Advertisement
Quick Links
Advertisement
Table of Contents

Summary of Contents for media-tech MT4205
-
Page 1: User Manual
PORTABLE WLAN SERVER ROUTER 3,5G PRO User Manual Version 1.1... -
Page 2: Table Of Contents
Network Testing ....................... 18 1.5.1.1 Testing with Internet Browser ..................18 1.5.1.2 Testing with DOS (Windows XP Platform) ..............18 CHAPTER 2 HARDWARE INSTALLATION..................21 MT4205 ............... 21 IAGRAM OF ONNECTING ARDWARE TO 2.1.1 Router Mode Hardware Connection and Application ........... 21 2.1.2... - Page 3 3.2.8 Firewall Setup ......................38 3.2.9 QoS Configuration Setup ..................39 3.2.10 FTP Server Setup ..................... 40 3.2.11 Printer Server Setup ....................40 3.2.12 Web Camera Server Setup ..................40 3.2.13 Samba Server Setup ....................41 3.2.14 Quick Setup Finish....................41 IP C .......................
- Page 4 ......................88 YSTEM ANAGEMENT 3.6.1 Reboot ........................88 3.6.2 Change Password ....................88 3.6.3 Firmware Upgrade....................89 3.6.4 Profile Sasve ......................90 3.6.5 Remote Management ....................91 3.6.6 Time ........................... 93 3.6.7 UPnP Setting ......................94 3.6.8 User Account Management ..................94 3.6.9 Folder Management ....................
- Page 5 4.3.1 LAN ........................... 117 4.3.2 Wireless ........................119 ..........................123 ERVER 4.4.1 Samba Server ......................124 4.4.1.1 How to Access File Sharing Directory ................124 4.4.2 FTP Server ......................126 4.4.3 Web Camera Server ....................127 4.4.3.1 Web Camera Server Basic Setup................... 128 4.4.3.2 Web Camera Server Advanced Configuration ..............
- Page 6 ........................... 158 CHAPTER 5 CLIENT MODE ......................159 .................... 159 DMINISTRATOR UICK ETUP ........................160 UICK ETUP 5.2.1 ....................161 URVEY ETUP 5.2.2 Wireless Setup ....................... 162 5.2.3 Time Server Setup ....................163 5.2.4 Password Setup ..................... 163 5.2.5 USB Disk Management Setup ................163 5.2.6 User Account Management Setup ................
- Page 7 7.1 I .......................... 210 NSTALLATION 7.2 LED ............................210 7.3 IP A ..........................211 DDRESS 7.4 OS S ..........................211 ETTING 7.5 MT4205 S ........................213 ETUP 7.6 W LAN ........................215 IRELESS 7.7 S ........................218 AMBA ERVER 7.8 USB FTP S ........................
- Page 8 USB D ........................226 EVICES ......................227 PERATING YSTEMS ........................227 ROWSERS ........................228 ETUP ..............228 OMMUNICATIONS EGULATION NFORMATION Version 1.1...
-
Page 9: Fcc Caution
FCC Caution The device complies with Part 15 of the FCC rules. Operation is subject to the following conditions: 1. This device may not cause harmful interference, and this device must accept any interference received, including interference that may cause undesired operation. 2. -
Page 10: Safe Seating Gestures
Safe Seating Gestures You should follow the manufacturer’s instructions for adjusting the backrest to fit your body properly. An adjustable chair that provides firm, comfortable support is best. Adjust the height of the chair so your thighs are horizontal and your feet flat on the floor. -
Page 11: Chapter 1 Introduction
2 USB ports available for connecting any devices which allow LAN users to utilize shared printer and samba server. Also, apply MT4205 with a Webcam to monitor in real time, or with a USB-connected Flash/Drive to become a FTP server providing shared download service in the mean time. -
Page 12: Features
Friendly user interface only requires supported web browser to start advanced setup. Printer Server MT4205 supports LPR protocol, so users can use shared printer from both WAN and LAN. Webcam Server The product supports USB Web Camera, which provides easy and affordable solution for home security. -
Page 13: Specifications
Specifications Star 9105gu Flash ROM 8Mbyte (NAND Gate) Components DRAM 32MByte WAN Port 1 x 10/100 Mbps RJ45, with auto MDI/MDIX Interface LAN Port 1 x 10/100 Mbps RJ45, with auto MDI/MDIX 2 x Standard _A type—USB 2.0 for 3.5G USB Dongle, USB Webcam, USB2.0 Port USB printer, USB Flash/HDD Wireless... -
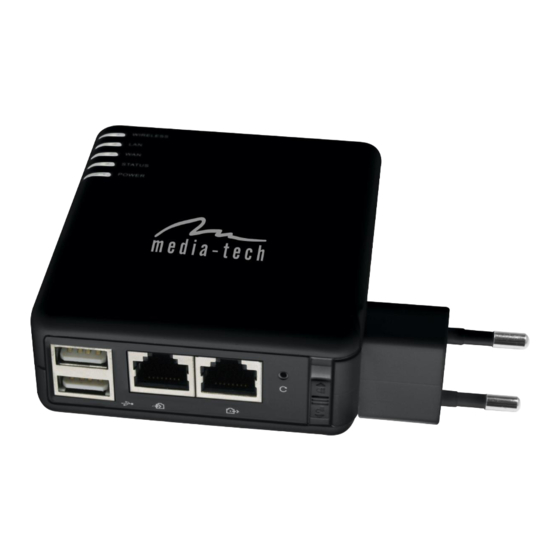
Page 14: Six Views Of Product Appearance
1.3.1 Six Views of Product Appearance Version 1.1... -
Page 15: System Requirements
Recommended OS: Win2000 or WinXP / Linux. Get Your IP Automatically & Manually After MT4205 connected with your computer, please make sure your IP is in the automatic IP position or you adjust it manually in order to activate the Internet network from home to Internet. - Page 16 【Step 2】 Click on Properties 【Step 3】 Double click on Internet Protocol (TCP/IP). Version 1.1...
- Page 17 【Step 4-1】 For getting IP automatically if you are one of the users under MT4205, please skip Use the following IP address and then select Obtain an IP address automatically and Obtain DNS server address automatically and then click on OK button.
-
Page 18: Network Testing
1.5.1 Network Testing There are two ways to test your Network whether it can work on Internet or not. They are ―Testing with Internet Browser‖ and ―Testing with Dos‖. 1.5.1.1 Testing with Internet Browser Open an Internet Browser, such as Internet Explore or Netscape. Input a valid web address you like, for example, http://www.yahoo.com... - Page 19 【Step 1】 Go to start > Run. 【Step 2】 Input cmd in the blank, and then click OK button. The Command Prompt window appears. 【Step 3】 Input ipconfig in the flashing area then press enter. You will get an IP Address 192.168.1.100, for example, and Default Gateway as 192.168.1.1.
- Page 20 If it can’t work, it will show Request timed out. Version 1.1...
-
Page 21: Chapter 2 Hardware Installation
2.1.1 Router Mode Hardware Connection and Application When MT4205 switches to Router Mode, there will be each WAN and LAN port existing, the administrator can do the Quick Setup including WAN Setup, LAN Setup, Wireless Setup, Time Server Setup, Password Setup, USB Disk Management Setup, User Account Management Setup, Firewall Setup, QoS Setup, FTP Server Setup, Web Camera Setup, Print Server Setup and Samba Server Setup. -
Page 22: Ap Mode Hardware Connection And Application
2.1.2 AP Mode Hardware Connection and Application Under AP Mode, it supports 2 LAN ports as Bridge, and user can connect to MT4205 via LAN port or Wireless (WDS). The administrator can set up quickly, including LAN Setup, Wireless Setup, Time Server Setup, Password Setup, USB Disk Management Setup, User Account Management Setup, FTP Server Setup, Web Camera Setup, Printer Server Setup and Samba Setup. -
Page 23: Chapter 3 Router Mode
Chapter 3 Router Mode Administrator Quick Setup Instruction Make sure to switch the mode into Router Mode, then open a Microsoft Internet Explorer, Mozilla Firefox or Apple Safari browser, and enter http://192.168.1.1 (Default Gateway) into browser’s blank. Notice: If the homepage doesn’t appear, please check if the TCP/IP configuration is obtaining IP address automatically or not. -
Page 24: Quick Setup
User Name and Password The default values for User Name and Password are admin (all in lowercase letters). Click Login to enter. Notice: Only the password can be changed, please read setup ―3.2.5 Password Setup‖ or ―3.6.2 Change Password‖. In order to protect your own settings, it’s strongly recommended to change the password before you finish the Router Basic Setup. - Page 25 The above diagram shows all PCs and devices connected to your MT4205 and their Click Quick Setup on the left of the main menu. Then you’ll see the full status. functionality selection screen appears and detailed settings for each item, including ―Basic‖...
-
Page 26: Wan Setup (Internet Connection)
All IP information in the WAN settings is public IP addresses which are accessible on the Internet. MT4205 supports 5 connection types to WAN. Select one of the WAN connection modes required by your ISP in the following Internet Connection Configuration page, the WAN setup pages will vary depending on what kind of WAN Type you select. -
Page 27: Wan Type - Static Ip
See 3.2.1.1 See 3.2.1.2 See 3.2.1.3 See 3.2.1.4 See 3.2.1.5 Choose your WAN type as the above mentioned, and its associated settings will show up underneath at the same time. WAN Type – Static IP 3.2.1.1 Choose Static IP Address if all WAN IP information is provided to you by your ISP. You will need to enter the IP address, IP Netmask and IP gateway as provided. -
Page 28: Wan Type - Dynamic Ip
Please click on Next button to go on 3.2.2 LAN Setup. WAN Type – Dynamic IP 3.2.1.2 Choose Dynamic IP to obtain IP address information automatically from your ISP. Select this option if your ISP does not give you any IP numbers to use. This option is commonly used for Cable modem services. -
Page 29: Wan Type - Pppoe
IP connection is back during the next detection. Input it if requested by your ISP (Ex: Wireless Mobile Router) MAC address Click on Next button to go on 3.2.2 LAN Setup. WAN Type – PPPoE 3.2.1.3 This option is typically used for DSL services. Choose PPPoE (Point to Point Protocol over Ethernet) if your ISP uses PPPoE connection. -
Page 30: Wan Type - Pptp
In particular, here provides 3G or 3.5G transmission rate when the device is plugged, either a 3.5G USB Dongle or Card Bus; just check to apply for the backup. In other words, once Dynamic IP connection is disconnected, the system automatically connects Internet via 3.5G adapter. - Page 31 This option is typically used for DSL services. Some DSL service providers supply a special DSL modem. This kind of modem only supports the PPTP tunnel to access the Internet, you should create a PPTP tunnel that carries a PPP session and terminates on the DSL model.
-
Page 32: Hsdpa/Umts
PPTP Server IP, My WAN IP and My WAN Subnet Mask are all necessary inputs. The fields on the left are required. Please enter the account’s name and password which provided by your ISP, and then click on Next button to go on 3.2.2 LAN Setup. 3.2.1.5 HSDPA/UMTS If you are using HSDPA/UMTS (3.5G connection) as the WAN Type, please check... -
Page 33: Lan Setup
Click on Next button to go on 3.2.2 LAN Setup. 3.2.2 LAN Setup If you are using MT4205 with multiple PCs on your LAN, you must connect the LAN via the Ethernet ports on the built-in Ethernet switch. You must assign a unique IP address to Version 1.0... -
Page 34: Wireless Setup
3.2.3 Wireless Setup MT4205 is based on industry standards to provide compatible high-speed wireless connectivity within your home, business or public access wireless networks. Strictly adhering to the IEEE standard, the router will allow you to access the data you want, when and where you want it. -
Page 35: Time Server Setup
Select AP/Bridge or WDS from drop-down list. You can use the default ESSID unless more than one AP/Router is deployed in the same area. And it will show when searching the wireless signal. For selecting configuration utility in AP/Bridge wireless connection, the Channel 6 is the default channel;... -
Page 36: Password Setup
Notice 1: Only the password can be changed, the user name for administrator is admin and not to be changed. Notice 2: If you forget administrator’s password, please reset MT4205 to default setting by pressing the ―Reset‖ button on the rear panel over 5 seconds. And the password will return to admin. -
Page 37: Usb Disk Management Setup
3.2.6 USB Disk Management Setup Easy to check all the USB storage devices connected to your MT4205, view the entire data folder inside each storage device, manage disk formatting/partitioning via click on the button of this page. Select the USB Disk and click on OK button for refreshing all disks before you execute disk partition, and the Unplug button will appear. -
Page 38: Firewall Setup
Set each user’s right and space arrangement, and then click on Add button for saving user’s account. Click on Next button after finished. 3.2.8 Firewall Setup The Firewall rules of MT4205 are an advance feature used to deny or allow traffic from passing through the router. Version 1.0... -
Page 39: Qos Configuration Setup
The default setting for Firewall Protection Level security is Low, which attacks Blocking Policy, allow all Inbound and Outbound IP Filter Policy, and allow all router service access policy from WAN. Please change it as your demand, and click on Next button to next step (see also 3.4.2.1 Firewall Configuration). -
Page 40: Ftp Server Setup
Enable the printer and click on Next button to next setup. Notice: After above Printer Server in Quick Setup finished, the related printing settings on MT4205 and PC have to be set up, too. Please refer to 3.5.4 Printer Server to set the details. -
Page 41: Samba Server Setup
If you plan to use MT4205 as a Web Camera site, connect a supported USB Web Camera to the USB port of MT4205. Check to enable the server and WAN access by demand. Make sure the webcam already connected to 3.5G plus WLAN Mobile Server Router, and then select “Enable”... -
Page 42: Ip Configuration
You may connect to Internet via wired or wireless at this moment according to above settings. IP Configuration This function allows you to add routing rules into MT4205. It is useful if you connect several computers behind MT4205 to share the same connection to Internet. 3.3.1 Select WAN under the IP Config menu. - Page 43 If you applied for a Static IP connection type from ISP, please follow the steps to set up your WAN connection. 1. IP Address Input your IP Address supplied by ISP. If you don’t know, please check with your ISP. 2.
- Page 44 This feature requires user to enter user name, password and SIM PIN etc.; also it is working as mutual backup for other 4 WAN Types. That is, setting up the interval time to auto detect whether the Internet connection is lost or not. If yes, the system immediately switches to 3.5G Internet connection until the original connection is back during the next detection.
- Page 45 1. Host Name The host name is optional; but if your ISP requires you to input a specific host name, please put it in, for example, MT4205 applied from ISP. Generally, Cable Modem will provide the hostname information. 2. MAC Address: Keep, Clone & Input MAC Address Select Keep or Clone MAC Address for copying the MAC address of your Ethernet adapter to the gateway, or input a group of MAC Address.
- Page 46 working as mutual backup for other 4 WAN Types. That is, setting up the interval time to auto detect whether the Internet connection is lost or not. If yes, the system immediately switches to 3.5G Internet connection until the original connection is back during the next detection.
- Page 47 1. User Name Input your user name supplied by ISP. If you don’t know, please check with your ISP. 2. Password Input your Password supplied by ISP. 3. MTU MTU stands for Maximum Transmission Unit. For PPPoE connection, you may need to set the MTU setting in order to work correctly with your ISP.
- Page 48 1. PPTP Select connect to PPTP by Dial On Demand, Always Online or Manual connects. 2. PPTP Account Input the PPTP Account supplied by ISP, MT4205, for example. If you don’t know, please check with your ISP. ※ Notice: Don’t copy the mentioned example as yours.
- Page 49 5. PPTP Server IP Input the Server IP supplied by ISP. If you don’t know, please check with your ISP. Input the WAN IP address provided by your ISP. 6. My WAN Subnet Mask Input the WAN Subnet Mask supplied by your ISP. If you don’t know, please check with your ISP.
- Page 50 When 3.5G signal cannot be reached, the system starts to search downward for 3/2.75/2.5G signals until none existed. 1. 3.5G This feature requires user to enter user name, password and SIM PIN etc.; also it is working as mutual backup for other 4 WAN Types. That is, setting up the interval time to auto detect whether the Internet connection is lost or not.
-
Page 51: Lan
Connect to the Internet by setting up each time. After the Setup is finished, user has to go to Network Configuration page to manually set up the connection and disconnection. 5. DNS If ISP provides you DNS information, please select Specify DNS Server IP and input the DNS information into the blank;... -
Page 52: Wireless
3.3.3 Wireless MT4205 enables fastest 54 Mbps IEEE802.11g wireless transmissions and keeps compatibility with existing IEEE 802.11b devices. MT4205 complies with IEEE 802.11b standard. Please select Wireless under the main menu. Follow the instructions to configure the Wireless settings. Version 1.0... - Page 53 Under this situation, it is advised that you should use a different ESSID and radio channel for each of MT4205 or access point in order to distinguish from each other. All of MT4205s and your wireless LAN cards must have the same ESSID to allow a wireless mobile client roaming inbetween.
- Page 54 Make sure that MT4205 sharing the same Channel (or Channels close in number) is as far away from each other as possible, based on the results of your site survey of the facility. You can find the site survey utility in MT4205’s setup CD. By default, the channel is 6.
- Page 55 WEP drop-down menu. Type a combination of up to 64 letters, numbers, or symbols in the blank, MT4205 uses an algorithm to generate four WEP keys for encryption. If you want to type in the keys manually, leave this field blank.
-
Page 56: Ddns
Radius with 802.x: Check this circle to enable Radius client function. WPA Rekey Timer: Allows for the session keys to be refreshed over time, minimizing the amount of data that is encrypted with the same session key. RADIUS Server IP: The IP address of RADIUS server. RADIUS Server Port: The UDP port number that the RADIUS server is listed. -
Page 57: Advanced
1. Service Provider Choose correct Service Provider from drop-down list, here including dyndns, dhs, ods and tzo embedded in MT4205. 2. Enable / Disable DDNS Select enable to use DDNS function. Each time your IP address to WAN is changed, and the information will be updated to DDNS service provider automatically. -
Page 58: Nat
3.4.1 NAT is a method of mapping one or more IP addresses and/or services ports into different specified services, where NAT stands for Network Address Translation. It allows the internal IP addresses of many computers on a Local Area Network (LAN) to be translated to one public address, saving users’... -
Page 59: Virtual Dmz
MT4205. 2. Description: Enter the description of the virtual server, this field allows you to record what this rule is used for. 3. Private IP: Specify the private IP address of the internal host offering the service. 4. Protocol Type: Specify the transport layer protocol (TCP or UDP). -
Page 60: Firewall
3.4.2.1 Firewall Configuration MT4205 provides built-in firewall functions, enabling you to protect the system against denial of service (DoS) attacks and other types of malicious accesses to your LAN while providing Internet access sharing at the same time. You can also specify how to monitor attempted attacks, and who should be automatically notified. - Page 61 Medium and Low. The below screen including SPI service and ICMP setting will change according to your level setup. 2. Enable SPI Service: MT4205 often monitor a wider range of activity, such as patterns of traffic and the type of application sending traffic. With SPI, the router looks at...
- Page 62 IP packet. This option is required if your connection to the ISP is through PPPoE. This data is used during transmission or reception of IP fragments. When large sized packets are sent via MT4205, the packets are chopped into fragments as large as MTU (Maximum Transmission Unit). By default, this number is set to 45.
-
Page 63: Ip Filter
The list shows all the DoS attacks blocking items. 3.4.2.2 IP Filter Use IP Filter to deny LAN IP addresses from accessing the Internet. You can deny specific port numbers or all ports for the specific IP address. 1. Enable IP Filter: Check enable or disable to apply IP Filter function. Version 1.0... -
Page 64: Mac Filter
Shows all filtered IP information for administrator to edit or delete. 3.4.2.3 MAC Filter Use MAC filters to deny LAN computers by their MAC addresses from accessing the Internet. You can manually add a MAC address that is currently connected to MT4205. Version 1.0... -
Page 65: Url Filter
1. MAC Filter Action: To deny or allow all MAC filter action. 2. Enable MAC Filter: Check enable or disable to apply MAC Filter function. 3. Enable Log: All packets between WAN and LAN will be logged. 4. Description: Enter the filter description into this blank. 5. - Page 66 1. Enable URL Filter: Check enable or disable to apply URL filter function. 2. Enable log: All packets between WAN and LAN will be logged. 3. Description: Enter the filter description into this blank. 4. URL keyword: Enter the URL words into this blank to apply filter blocking, example: ―www.yahoo‖, then it’ll block all the websites from www.yahoo range.
-
Page 67: Qos
3.4.3 Quality of Service (QoS) refers to the capability of a network to provide better service to selected network traffic over various technologies, including Frame Relay, Asynchronous Transfer Mode (ATM), Ethernet and 802.1x networks, and IP-routed networks that may use any or all of these underlying technologies. The primary goal of QoS is to provide priority including dedicated bandwidth, controlled jitter and latency (required by some real-time and interactive traffic), and improved loss characteristics. -
Page 68: Server
MT4205 provides FTP Server, Web Camera Server, Printer Server and Samba Server applications. 3.5.1 Samba Server By supporting NetBIOS Protocol, MT4205 provides LAN users to share files or printer via My Network Places. Click Samba Server to proceed. Version 1.0... -
Page 69: How To Access File Sharing Directory
1. Enable Samba Server Check to Enable/Disable while connecting. 2. Workgroup Name Fill in the name, and the default is Workgroup. 3. Server Name Name your server. 4. Server Description Describe your server by demand, and the default is Wireless Mobile Router. 5. - Page 70 【Step 2】 Fill in blank address field with \\192.168.1.1. 【Step 3】 A window pops up asking for user name and password. If log in as an administrator, please enter admin for both fields; otherwise, fill in with personal account and password. Click OK after finished.
-
Page 71: Ftp Server
Note: Only 2 icons show up at most. 1. If a USB flash drive/hard disk is connected and enabled, the samba folder shows up. 2. If a USB printer is connected and enabled, the printer icon shows up. 3.5.2 FTP Server By directly connecting USB storage devices to any USB port, FTP server can be created with simple configuration. -
Page 72: Web Camera Server
3.5.3 Web Camera Server MT4205 has built-in Web Cam Server. By connecting web camera to the router, it allows user to monitor their home or office from remote locations. Motion Detection function has also been built-in and allows user to use webcam to detect any movements in their houses or offices and send email alert with captured images. -
Page 73: Web Camera Server Basic Setup
3.5.3.1 Web Camera Server Basic Setup 1. Enable Webcam Server: Allow using this function by checking on enable. 2. Access from WAN: Allow webcam can access from WAN side by checking on enable for this item. 3. Image format: The default is 320x240 pixels. 4. -
Page 74: Application For Web Camera
Click on Apply button to continue. Click on Cancel button to clear the settings on this page. 3.5.3.3 Application for Web Camera 3.5.3.3.1 Web Camera Monitoring Application Monitor your home or take pictures with a Webcam via MT4205; one can set up the Version 1.0... -
Page 75: Web Camera Monitoring Via Wan Connection
monitoring or recording of all images into the USB HDD for reviewing. Often marketed as surveillance tools for home or office security; network Webcams are now being employed by early adopters for more personal matters, such as watching kids and monitoring pets. The Webcam can be remotely accessed and controlled via a browser. -
Page 76: Web Camera Monitoring Via Wifi Mobile Phone
Input the WAN IP Address (as you see on above screen) into browser blanks. You will see the personal account login screen appear, and then input your own user account and password. After logging in as a user, your will see the personal control panel screen as below, please click on My Webcam. -
Page 77: Web Camera Recording
Please fill the WAN IP address plus ―/webcam.html‖ (e.g. http://210.64.134.25/webcam.html) into the mobile phone’s browser blank and you will see the webcam user login screen appear as below. After logging in with your own account, you will see the monitor image from web camera via WiFi mobile phone. - Page 78 MT4205 also can record the pictures from Webcam; only Administrator can activate the settings. Select Web Camera Server from main Menu and enable this function, click on Record Setting button for further setting. To set up the Webcam Advanced Configuration for each text field, the image from webcam will be recorded into your USB HDD or Remote FTP.
-
Page 79: Personal Application
After click on Disk Explorer, you will see the folder screen appear including all the folders inside MT4205. (Below is the example.) For getting the images from web camera or any files inside router, you may copy the files into... -
Page 80: Printer Server
After click on My Document, you will see folder screen appear as the example below. Notice: If you can’t open the folder, please check with administrator to set up your FTP access right. 3.5.4 Printer Server Version 1.0... -
Page 81: Printer Setting On Pc
MT4205 has two USB ports for connecting with printers to be shared on the local area network. Follow the steps to set up your PC to connect to a printer server. 1. Enable Printer Server: Check enable for applying printer server. - Page 82 After setting USB printer on MT4205’s setup page, please go to Start > Printers and Faxes to add a printer. 【Step 2】 Click on Add a printer item. 【Step 3】 Click on Next button. Version 1.0...
- Page 83 【Step 4】 Select Local printer attached to this computer, and click Next. 【Step 5】 Select Create a new port and choose Standard TCP/IP Port from drop-down list, then click Next. Version 1.0...
- Page 84 【Step 6】 Click Next. 【Step 7】 Put in MT4205’s address: 192.168.1.1 and click Next. Version 1.0...
- Page 85 【Step 8】 Select Custom and click on Settings… button to set the detail setting. 【Step 9】 Select LPR and give it the same Queue Name as USB Printer Name has shown, and mark LPR Byte Counting Enabled. Finally, click on Next button. Version 1.0...
- Page 86 It has to be the same with the Printer Name as shown in section 3.5.4 Printer Server Configuration. 【Step 10】 Click Finish on the next screen after the aforesaid settings, you have to install the printer driver as well. 【Step 11】 Select the Manufacturer and Printers.
- Page 87 insert its driver CD and then click on Have Disk… button for installation. Or click on Next button to finish the setting. You can name your printer, set it as default printer and share your printer as the next screen shown, the Printer Server setting is getting completed. 【Step 12】...
-
Page 88: System Management
System Management MT4205 provides system management including password changing, firmware upgrade, time setting, user’s account setting and other detail settings. Following is detail explanation for each. 3.6.1 Reboot If you had entered the wrong configuration while setting up your router or other utilities, you can always reboot your MT4205 by this setting. -
Page 89: Firmware Upgrade
There is certain risk while upgrading firmware. Upgrading firmware is not recommended unless the significant faulty is found. You can upgrade the firmware of MT4205 on this page. Make sure the firmware you want to use is on the local hard drive of the computer. -
Page 90: Profile Sasve
2. OK & Cancel Click OK to confirm or click Cancel to clear the setting on this page. Notice: Before using a whole new disk, please format it on your PC first, so that it can be formatted on MT4205. 3.6.4... -
Page 91: Remote Management
3.6.5 Remote Management Remote Management allows MT4205 to be configured from the Internet by a web browser. In general, only a member of your network can browse the built-in web pages to perform ―Administrator‖ tasks. This feature enables you to perform the tasks from the remote (Internet) host. - Page 92 1. HTTP Connection Port: The port number used to access the router. 2. Remote Management: You can allow any Internet IP address to access the router, or set up deny rule according to IP setting. 3. IP Address: Internet IP address of the computer that has access to the router. 4.
-
Page 93: Time
3.6.6 Time The System time is the time used by MT4205 for scheduling services. You can manually set the time or connect to a NTP (Network Time Protocol) server. If a NTP server is set, you will only need to set the time zone. If you manually set the time, you may also set Daylight Saving dates and the system time will automatically adjust on those dates. -
Page 94: Upnp Setting
Click on Apply button to activate, or Cancel button to clear the settings. 3.6.7 UPnP Setting UPnP (Univsersal Plug and Play) allows users to connect their UPnP-enabled broadband router, printer server and other devices right to the network with zero-configuration, meaning easier setup for installing the device on the network. - Page 95 1. Max Login User: Set up the maximum users to log in at the same time, select the number from drop-down list. If you want to change the maximum login users only without changing user’s information, please click on OK button after select login user’s number.
-
Page 96: Folder Management
The list shows all users’ names, passwords, status and rights. 3.6.9 Folder Management Easy to check all the USB storage devices connected to MT4205, view the entire data folder inside each storage devices, and you can manage the disk formatting / partition via clicking the button on this page. -
Page 97: Email Alert
Notice: You have to click on Unplug button before removing the USB device from MT4205. 3.6.10 Email Alert To monitor router activity, you can run on a local PC or a remote one elsewhere on the Internet. And MT4205 provides the email alert facility so that the log messages can be packed as an e-mail for someone who wants to receive these messages by scheduled time. - Page 98 1. Email Alert: Check the enable box to activate the email alert service. 2. SMTP Server: Specify an IP address of the SMTP server which can send mails from your MT4205 to the recipients’ mailboxes directly. 3. Your Mail (from): Enter the email address indicated the sending location.
-
Page 99: Log & Status
Click on Refresh to renew the login data and other system status information, or click on Delete to clear these logs. Log & Status MT4205 provides the log list, connection status and user’s account. 3.7.1 Network Configuration Network Configuration shows all connection status of LAN, WAN, Wireless and plugged USB devices. -
Page 100: User Account List
3.7.2 User Account List This section shows all users’ information. Check the user name, status and opened directory/file on screen. Version 1.0... -
Page 101: Event Log
3.7.3 Event Log MT4205 provides system logs for review. The system status log shows logging time, type and detail information as below. Click Refresh to update. Logout Click Logout on the bottom menu to exit and go back to GUI login home page as illustrated on page 23. - Page 102 Notice: If the homepage doesn’t appear, please check whether the TCP/IP configuration is obtaining IP address automatically or not. If you don’t know how to do this, please refer to 1.5 Get your IP Automatically & Manually. Homepage Click Personal Panel and log in with your own user account. (If you can’t access your personal account, please check with administrator for validation.) Personal Panel Screen below shows every login user’s access rights, including Anonymous, My...
-
Page 103: Anonymous
MT4205 provides personal control panel for every login user’s entrance to each application screen, please click on each icon for various applications. The icons appearing in gray color can’t be clicked if the user doesn’t have the right to use that function; even though there is none to be set, the user can still apply My Status. -
Page 104: My Document
Notice: If you can’t access Anonymous folder, please check with administrator to enable your FTP server rights. Files under this directory are only for downloading, but not for uploading, deleting, or edting. 3.9.2 My Document ―My Document‖ shows all the files in USB HDD under each user’s account. -
Page 105: My Webcam
3.9.3 My Webcam ―My Webcam‖ application allows you to view the real time image when the web camera is on. Click My Webcam, and the system pops up a new window to display real time image as the example below shows. Notice: If you can’t view the real-time image, the cause may be the setting of Internet Security and needs to be adjusted, or to install the Java program 3.9.4... -
Page 106: 3.10 Site Map
Notice: All above usage information is based on administrator’s setup. 3.10 Site Map MT4205 provides site map clicking for each icon to carry out the easy setup from the home page. Version 1.0... -
Page 107: Chapter 4 Ap Mode
Chapter 4 AP Mode Administrator Quick Setup Instruction Make sure to switch the mode into AP Mode, then open a Microsoft Internet Explorer, Mozilla Firefox or Apple Safari browser, and enter http://192.168.1.254 (Default Gateway) into browser’s blank field. Notice: If the homepage doesn’t appear, please check whether the TCP/IP configuration is obtaining IP address automatically or not. -
Page 108: Quick Setup
User Name and Password The default values for User Name and Password are admin (all in lowercase letters). Click Login to enter. Notice: Only the password can be changed, please read setup 4.2.4 Password Setup or 4.5.2 Change Password. In order to protect your own settings, it’s strongly recommended to change the password before you finish the Router Basic Setup. - Page 109 The above diagram shows all PCs and devices connected to your MT4205 and their Click Quick Setup on the left of the main menu. Then you’ll see the full status. functionality selection screen appears and detailed settings for each item, including ―Basic‖...
-
Page 110: Lan Setup
4.2.1 LAN Setup If you are using MT4205 with multiple PCs on your LAN, you must connect the LAN via the Ethernet ports on the built-in Ethernet switch. You must assign a unique IP address to each device residing on your LAN. The LAN IP address identifies the router as a node on your network;... -
Page 111: Wireless Setup
1 and 253 that is not used by another device.) Please don’t change the default LAN IP settings at this section until after you have completed the rest of the configurations and confirm that your Internet connection is working. And the DHCP Server will automatically allocate an unused IP address from the IP address pool to the requesting computer;... - Page 112 requests from unauthorized wireless clients. As the Encryption Type, select WEP or WPA can protect your data from eavesdroppers, if you do not need the encryption, select ―None‖ to skip the following setting. After checking each above and choose the suitable item by demand, click Next to proceed.
-
Page 113: Time Server Setup
Notice 1: Only the password can be changed, the user name for administrator is ―admin‖ and not to be changed. Notice 2: If you forget administrator’s password, please reset MT4205 to default setting by pressing the ―Reset‖ button on the rear panel over 5 seconds. And the password will return to ―admin‖. -
Page 114: Usb Disk Management Setup
4.2.5 USB Disk Management Setup Easy to check all the USB storage devices connected to your MT4205, view the entire data folder inside each storage device, manage disk formatting/partitioning via click on the button of this page. Select the USB Disk and click OK for refreshing all disks before you do disk partition, and the Unplug button will appear. -
Page 115: Ftp Server Setup
4.2.7 FTP Server Setup MT4205 can be the FTP Server providing users to transmit files, also for the guest to download the files from assigned website. Moreover, by connecting USB HDD, USB Flash to the router, user can easily set up a FTP Server to share or download files for local or remote users. -
Page 116: Printer Server Setup
Enable the printer and click on Next button to next setup. Notice: After above Printer Server in Quick Setup finished, the related printing settings on MT4205 and PC have to be set up, too. Please refer to 4.4.4 Printer Server to set the details. -
Page 117: Quick Setup Finish
You may connect to Internet via wired or wireless at this moment according to above settings. IP Configuration This function allows you to add routing rules into MT4205. It doesn’t provide functions of WAN and DDNS in AP mode, though. 4.3.1 Use this page to set up the local IP address and subnet mask for your router. - Page 118 1. IP Address The default value of LAN IP address is 192.168.1.254 for this router. 2. IP Netmask Fill in Subnet Mask, normally it is 255.255.255.0. 3. IP Gateway Fill in with the default gateway address. If you don’t know, please check your ISP. 4.
-
Page 119: Wireless
4.3.2 Wireless MT4205 enables fastest 54 Mbps IEEE802.11g wireless transmissions and keeps compatibility with existing IEEE 802.11b devices. MT4205 complies with IEEE 802.11b standard. Please select Wireless under the main menu. Follow the instructions to configure the Wireless settings. Version 1.0... - Page 120 Under this situation, it is advised that you should use a different ESSID and radio channel for each of MT4205 or access point in order to distinguish from each other. All of MT4205s and your wireless LAN cards must have the same ESSID to allow a wireless mobile client roaming inbetween.
- Page 121 Make sure that MT4205 sharing the same Channel (or Channels close in number) is as far away from each other as possible, based on the results of your site survey of the facility. You can find the site survey utility in MT4205’s setup CD. By default, the channel is 6.
- Page 122 WEP drop-down menu. Type a combination of up to 64 letters, numbers, or symbols in the blank, MT4205 uses an algorithm to generate four WEP keys for encryption. If you want to type in the keys manually, leave this field blank.
-
Page 123: Server
Click Apply to save or Cancel to clear the settings. The functional button, Cancel, can take effect after clicking on Apply button. Server MT4205 provides 4 server setups, including FTP Server, Web Camera Server, Printer Server and Samba Server. Version 1.0... -
Page 124: Samba Server
4.4.1 Samba Server By supporting NetBIOS Protocol, MT4205 provides LAN users to share files or printer via My Network Places. Click Samba Server to proceed. 1. Enable Samba Server Check to Enable/Disable while connecting. 2. Workgroup Name Fill in the name, and the default is Workgroup. - Page 125 Please follow the steps below. 【Step 1】 Go to Start and click My Computer. 【Step 2】 Fill in blank address field with \\192.168.1.254. 【Step 3】 A window pops up asking for user name and password. If log in as an administrator, please enter admin for both fields;...
-
Page 126: Ftp Server
【Step 4】 As the window below appears, login user has entered file sharing directory, and the folders underneath are all available for sharing locally. Note: Only 2 icons show up at most. 1. If a USB flash drive/hard disk is connected and enabled, the samba folder shows up. 2. -
Page 127: Web Camera Server
4.4.3 Web Camera Server MT4205 has built-in Web Cam Server. By connecting web camera to the router, it allows user to monitor their home or office from remote locations. Motion Detection function has also been built-in and allows user to use webcam to detect any movements in their houses or offices and send email alert with captured images. -
Page 128: Web Camera Server Basic Setup
4.4.3.1 Web Camera Server Basic Setup 1. Enable Webcam Server: Allow using this function by checking on enable. 2. Access from WAN: Allow webcam can access from WAN side by checking on enable for this item. 3. Image format: The default is 320 x 240 pixels. 4. -
Page 129: Application For Web Camera
Application for Web Camera 4.4.3.3.1 Web Camera Monitoring Application Monitor your home or take pictures with a Webcam via MT4205; one can set up the monitoring or recording of all images into the USB HDD for reviewing. Often marketed as Version 1.0... -
Page 130: Web Camera Monitoring Via Wan Connection
For viewing the image via WAN connection, see the diagram below. Follow instructions below to set up WAN IP address. 【Step 1】 Plug your internet wire into the LAN port and put 192.168.1.254 in web browser’s address field to enter MT4205’s home page. Then click Administrator. Version 1.0... - Page 131 【Step 2】 Enter the default value, admin, for both administrator’s name and password and log in the product’s main menu page. 【Step 3】 Click LAN under IP Config folder on the left side menu. Then set IP Address in the same subnet with upper-layer device, for example, 192.168.2.49;...
- Page 132 【Step 4】 Click Remote Management under System Management directory and change HTTP Connection Port into 800. Click Apply to save the settings. 【Step 5】 Plug another internet wire into the WAN port and apply IP Release & Renew commands via command prompt window in order to obtain new IP address.
-
Page 133: Web Camera Recording
Web Camera Recording 4.4.3.3.2.1 Administrator Setup MT4205 also can record the pictures from Webcam; only Administrator can activate the settings. Select Web Camera Server from main Menu and enable this function, click on Record Setting button for further setting. To set up the Webcam Advanced Configuration for each text box, the image from webcam will be recorded into your USB HDD or Remote FTP. -
Page 134: Personal Application
After click on Disk Explorer, you will see the folder screen appear including all the folders inside MT4205. (Below is the example.) For getting the images from web camera or any files inside router, you may copy the files into... - Page 135 All the users under administrator’s setting can view webcam real-time images from My Webcam. Please log in with your own personal account. For viewing your own folder, please click “My Document”. After click on My Document, you will see folder screen appear as the example below. You can store files here, too.
-
Page 136: Printer Server
4.4.4 Printer Server Follow the illustrations below to set up your MT4205 and USB-connected printer. 1. Enable Printer Server: Check enable for applying printer server. 2. Enable Printer Access From WAN: Allow printer can access from WAN side by checking enable for this item. - Page 137 After setting USB printer on MT4205’s setup page, please go to Start > Printers and Faxes to add a printer. 【Step 2】 Click on Add a printer item. 【Step 3】 Click on Next button. 【Step 4】 Select Local printer attached to this computer, and click Next.
- Page 138 【Step 5】 Select Create a new port and choose Standard TCP/IP Port from drop-down list, then click Next. 【Step 6】 Click Next. 【Step 7】 Version 1.0...
- Page 139 Put in MT4205’s address: 192.168.1.254 and click Next. 【Step 8】 Select Custom and click on Settings… button to set the detail setting. 【Step 9】 Select LPR and give it the same Queue Name as USB Printer Name has shown, and mark LPR Byte Counting Enabled.
- Page 140 It has to be the same with the Printer Name as shown in section 4.4.4 Printer Server Configuration. 【Step 10】 Click Finish on the next screen after the aforesaid settings, you have to install the printer driver as well. Version 1.0...
- Page 141 【Step 11】 Select the Manufacturer and Printers. If your printer is not listed in the table, please insert its driver CD and then click on Have Disk… button for installation. Or click on Next button to finish the setting. You can name your printer, set it as default printer and share your printer as the next screen shown, the Printer Server setting is getting completed.
-
Page 142: System Management
System Management MT4205 provides system management including password changing, firmware upgrade, time setting, user’s account setting and other detail settings. Following is detail explanation for each. 4.5.1 Reboot If you had entered the wrong configuration while setting up your router or other utilities, you can always reboot your MT4205 by this setting. -
Page 143: Firmware Upgrade
There is certain risk while upgrading firmware. Upgrading firmware is not recommended unless the significant faulty is found. You can upgrade the firmware of MT4205 on this page. Make sure the firmware you want to use is on the local hard drive of the computer. -
Page 144: Profile Save
2. OK & Cancel Click OK to confirm or Cancel to clear the setting on this page. Notice: Before using a whole new disk, please format it on your PC first, so that it can be formatted on MT4205. 4.5.4... -
Page 145: Remote Management
4.5.5 Remote Management Remote Management allows MT4205 to be configured from the Internet by a web browser. In general, only a member of your network can browse the built-in web pages to perform ―Administrator‖ tasks. This feature enables you to perform the tasks from the remote (Internet) host. -
Page 146: Time
4.5.6 Time The system automatically shows the local time and time on PC. You can set the date and time manually so that it can be adjusted on router accordingly. 1. Local Time: The default time within. 2. Set the Time: Select this item to set up time by manual, select the date and time from each drop-down list. -
Page 147: User Account Management
1. Enable/Disable UPnP: Select to enable or disable this service. 2. Apply, Cancel Click Apply to activate this function or Cancel to clear the setting. 4.5.8 User Account Management Personal users can use each individual application such as My Status, My Webcam and My Document. -
Page 148: Folder Management
The list shows all users’ names, passwords, status and rights. 4.5.9 Folder Management Easy to check all the USB storage devices connected to MT4205, view the entire data folder inside each storage devices, and you can manage the disk formatting / partition via clicking the button on this page. -
Page 149: Email Alert
3. Moreover, if you want to view the data inside the disk, please go to 4.2.7 FTP Sever Setup to enable FTP server and then click on Disk Explorer to view all the folders inside the device. Notice: You have to click on Unplug button before removing the USB device from MT4205. 4.5.10 Email Alert To monitor router activity, you can run on a local PC or a remote one elsewhere on the Internet. - Page 150 1. Email Alert: Check the enable box to activate the email alert service. 2. SMTP Server: Specify an IP address of the SMTP server which can send mails from your MT4205 to the recipients’ mailboxes directly. 3. Your Mail (from): Enter the email address indicated the sending location.
-
Page 151: Log & Status
Click on Refresh to renew the login data and other system status information, or click on Delete to clear these logs. Log & Status MT4205 provides the log list, connection status and user’s account. 4.6.1 Network Configuration Network Configuration shows all connection status of LAN, Wireless and plugged USB devices. -
Page 152: User Account List
4.6.2 User Account List This section shows all users’ information. Check the user name, status and opened directory/file on screen. 4.6.3 Event Log MT4205 provides system logs for review. Version 1.0... -
Page 153: Logout
The system status log shows logging time, type and detail information as below. Click Refresh to update. Logout Click Logout on the bottom menu to exit and go back to GUI login home page. Personal Configuration Open a Microsoft Internet Explorer, Mozilla Firefox or Apple Safari browser, and enter (Default Gateway) into browser’s blank field. - Page 154 Click Personal Panel and log in with your own user account. (If you can’t access your personal account, please check with administrator for validation.) Personal Panel Screen below shows every login user’s access rights, including Anonymous, My Document, My Webcam and My Status. Version 1.0...
-
Page 155: Anonymous
MT4205 provides personal control panel for every login user’s entrance to each application screen, please click on each icon for application. The icons appear in gray color can’t be clicked if the user doesn’t have the right to use that function; even though there is none to be set, the user can still apply My Status. -
Page 156: My Document
Notice: If you can’t access Anonymous folder, please check with administrator to enable your FTP server rights. Files under this directory are only for downloading, but not for uploading, deleting, or edting. 4.8.2 My Document ―My Document‖ shows all the files in USB HDD under each user’s account. -
Page 157: My Webcam
4.8.3 My Webcam ―My Webcam‖ application allows you to view the real time image when the web camera is on. Click My Webcam, and the system pops up a new window to display real time image as the example below shows. Notice: If the image from webcam can’t be viewed, it may be caused by Internet security setting and needs to be corrected or installed with the Java program 4.8.4... -
Page 158: Site Map
Notice: All above usage information is based on administrator’s setup. Site Map MT4205 provides site map clicking for each icon to carry out the easy setup from the home page. Version 1.0... -
Page 159: Chapter 5 Client Mode
Chapter 5 Client Mode Administrator Quick Setup Make sure to switch the mode into Client Mode, then open a Microsoft Internet Explorer, Mozilla Firefox or Apple Safari browser, and enter http://10.64.64.64 (Default Gateway) into browser’s blank field. Notice: If the homepage doesn’t appear, please check whether the TCP/IP configuration is obtaining IP address automatically or not. -
Page 160: Quick Setup
User Name and Password The default values for User Name and Password are admin (all in lowercase letters). Click Login to enter. Notice: Only the password can be changed, please read setup 5.2.4 Password Setup or 5.5.2 Change Password. In order to protect your own settings, it’s strongly recommended to change the password before you finish the Router Basic Setup. -
Page 161: Site Survey Setup
The above diagram shows all PCs and devices connected to your MT4205 and their Click Quick Setup on the left of the main menu. Then you’ll see the full status. functionality selection screen appears and detailed settings for each item, including ―Basic‖... -
Page 162: Wireless Setup
Select the preferred AP for connection, for example, Storage_Fax_Server_Router as the above, and click Next to continue. 5.2.2 Wireless Setup Display connected wireless AP information. After setup completed, click Next. Version 1.0... -
Page 163: Time Server Setup
Notice 1: Only the password can be changed, the user name for administrator is ―admin‖ and not to be changed. Notice 2: If you forget administrator’s password, please reset MT4205 to default setting by pushing the ―Reset‖ button on the rear panel for 5 seconds. And the password will return to ―admin‖. -
Page 164: User Account Management Setup
Easy to check all the USB storage devices connected to your MT4205, view the entire data folder inside each storage device, manage disk formatting/partitioning via click on the button of this page. Select the USB Disk and click OK for refreshing all disks before you do disk partition, and the Unplug button will appear. -
Page 165: Ftp Server Setup
5.2.8 Web Camera Server Setup If you plan to use MT4205 as a Web Camera site, connect a supported USB Web Camera to the USB port of MT4205. Check both Enable webcam server and Access from WAN as Enable to activate. -
Page 166: Samba Server Setup
Enable the printer and click Next to continue. Notice: After above Printer Server in Quick Setup finished, the related printing settings on MT4205 and PC have to be set up, too. Please refer to 5.4.4 Printer Server to set the details. -
Page 167: Ip Configuration
IP Configuration This function allows you to add routing rules into MT4205, including LAN and Site Survey. 5.3.1 Use this page to set up the local IP address and subnet mask for your router. Please select LAN under the IP Config menu and follow the instructions below to enter the LAN setting page to configure the settings you want. -
Page 168: Site Survey
This field specifies the last address in the pool to be assigned by the DHCP server in your local network. The default setting is 75. 5. DHCP Clients List The list shows all clients’ IP and MAC addresses. 5.3.2 Site Survey Click Site Survey under IP Config directory. - Page 169 Select the transmission rate up to 54Mbps for the network. The default setting is Auto. Channel MT4205 supports up to 14 overlapping channels for radio communication (For the US and most of Europe, channel 1, 6 & 11 are used.) By default, the channel is Auto.
-
Page 170: Server
MT4205 provides 4 server setups, including Samba Server, FTP Server, Web Camera Server and Printer Server. 5.4.1 Samba Server By supporting NetBIOS Protocol, MT4205 provides LAN users to share files or printer via My Network Places. Click Samba Server to proceed. Version 1.0... -
Page 171: How To Access File Sharing Directory
1. Enable Samba Server Check to Enable/Disable while connecting. 2. Workgroup Name Fill in the name, and the default is Workgroup. 3. Server Name Name your server. 4. Server Description Describe your server by demand, and the default is Wireless Mobile Router. 5. - Page 172 【Step 2】 Fill in blank address field with \\10.64.64.64. 【Step 3】 A window pops up asking for user name and password. If log in as an administrator, please enter admin for both fields; otherwise, fill in with personal account and password. Click OK after finished.
-
Page 173: Ftp Server
Note: Only 2 icons show up at most. 1. If a USB flash drive/hard disk is connected and enabled, the samba folder shows up. 2. If a USB printer is connected and enabled, the printer icon shows up. 5.4.2 FTP Server FTP Server utility allows both local and remote users to upload or download files, pictures or MP3 music from the same storage device in most easy and timely fashion. -
Page 174: Web Camera Server
5.4.3 Web Camera Server MT4205 has built-in Web Cam Server. By connecting web camera to the router, it allows user to monitor their home or office from remote locations. Motion Detection function has also been built-in and allows user to use webcam to detect any movements in their houses or offices and send email alert with captured images. -
Page 175: Web Camera Server Advanced Configuration
5.4.3.2 Web Camera Server Advanced Configuration Click Record Setting, and the screen below appears. 1. Enable save image: If you want to save the image from webcam, please check on enable. 2. Save image interval: For saving image, you can set the save interval time, the default value is 5 seconds. -
Page 176: Application For Web Camera
5.4.3.3.1 Web Camera Monitoring Application Monitor your home or take pictures with a Webcam via MT4205; one can set up the monitoring or recording of all images into the USB HDD for reviewing. Often marketed as surveillance tools for home or office security; network Webcams are now being employed by early adopters for more personal matters, such as watching kids and monitoring pets. - Page 177 Open web browser and fill http://192.168.1.1 into address field. The homepage of connected router with MT4205 shows up. Click Network Configuration under the directory of Log & Status to check its IP address, such as the example below. Version 1.0...
- Page 178 【Step 3】 Click Virtual Server under the directory of NAT in Advance setup. Then check Enable and put 192.168.1.2 in Private IP field. Fill in 80 for both Private Port and Public Port, and then click Add. After completed, click Apply to save the setting. 【Step 4】...
-
Page 179: Web Camera Recording
Web Camera Recording 5.4.3.3.2.1 Administrator Setup MT4205 also can record the pictures from Webcam; only Administrator can activate the settings. Select Web Camera Server from main Menu and enable this function, click on Record Setting button for further setting. Version 1.0... - Page 180 Folder Management and click on Disk Explorer to view entire folder inside the disk including webcam record files. After click on Disk Explorer, you will see the folder screen appear including all the folders inside MT4205. (Below is the example.) Version 1.0...
-
Page 181: Personal Application
For getting the images from web camera or any files inside router, you may copy the files into your HDDs directly. addition, image files stored webcam_recorded_files folder, click to examine the content inside. 5.4.3.3.2.2 Personal Application All the users under administrator’s setting can view entire webcam real-time images from My Webcam. -
Page 182: Printer Server
After click on My Document, you will see folder screen appear as the example below. You can store files here, too. Notice: If you can’t open the folder, please check with administrator to set up your FTP access right. 5.4.4 Printer Server Version 1.0... -
Page 183: Printer Setting On Pc
Follow the illustrations below to set up your MT4205 and USB-connected printer. 1. Enable Printer Server: Check enable for applying printer server. 2. Enable Printer Access From WAN: Allow printer can access from WAN side by checking enable for this item. - Page 184 【Step 2】 Click on Add a printer item. 【Step 3】 Click on Next button. 【Step 4】 Select Local printer attached to this computer, and click Next. Version 1.0...
- Page 185 【Step 5】 Select Create a new port and choose Standard TCP/IP Port from drop-down list, then click Next. 【Step 6】 Click Next. Version 1.0...
- Page 186 【Step 7】 Put in MT4205’s address: 10.64.64.64 (as in Client Mode) and click Next. 【Step 8】 Select Custom and click on Settings… button to set the detail setting. 【Step 9】 Select LPR and give it the same Queue Name as USB Printer Name has shown, and mark LPR Byte Counting Enabled.
- Page 187 It has to be the same with the Printer Name as shown in section 5.4.4 Printer Server Configuration. 【Step 10】 Click Finish on the next screen after the aforesaid settings, you have to install the printer driver as well. 【Step 11】 Select the Manufacturer and Printers.
- Page 188 You can name your printer, set it as default printer and share your printer as the next screen shown, the Printer Server setting is getting completed. 【Step 12】 It shows you the printer settings that you have specified, and then click Finish. Version 1.0...
-
Page 189: System Management
System Management MT4205 provides system management including password changing, firmware upgrade, time setting, user’s account setting and other detail settings. Following is detail explanation for each. 5.5.1 Reboot If you had entered the wrong configuration while setting up your router or other utilities, you can always reboot your MT4205 by this setting. -
Page 190: Firmware Upgrade
There is certain risk while upgrading firmware. Upgrading firmware is not recommended unless the significant faulty is found. You can upgrade the firmware of MT4205 on this page. Make sure the firmware you want to use is on the local hard drive of the computer. -
Page 191: Profile Save
2. OK & Cancel Click OK to confirm or Cancel to clear the setting on this page. Notice: Before using a whole new disk, please format it on your PC first, so that it can be formatted on MT4205. 5.5.4... -
Page 192: Remote Management
5.5.5 Remote Management Remote Management allows MT4205 to be configured from the Internet by a web browser. In general, only a member of your network can browse the built-in web pages to perform ―Administrator‖ tasks. This feature enables you to perform the tasks from the remote (Internet) host. -
Page 193: Time
2. Remote Management: You can allow any Internet IP address to access the router, or set up deny rule according to IP setting. 3. IP Address: Internet IP address of the computer that has access to the router. 4. Description: Enter the description for the remote configuration. 5. -
Page 194: Upnp Setting
1. Local Time: The default time within. 2. Set the Time: Select this item to set up time by manual, select the date and time from each drop-down list. 3. Set Time: Click Set Time to set local PC time on router. 4. - Page 195 1. Max Login User: Set up the maximum users to log in at the same time, select the number from drop-down list. If you want to change the maximum login users only without changing user’s information, please click on OK button after select login user’s number.
-
Page 196: Folder Management
The list shows all users’ names, passwords, status and rights. 5.5.9 Folder Management Easy to check all the USB storage devices connected to MT4205, view the entire data folder inside each storage devices, and you can manage the disk formatting / partition via clicking the button on this page. -
Page 197: Email Alert
To monitor router activity, you can run on a local PC or a remote one elsewhere on the Internet. And MT4205 provides the email alert facility so that the log messages can be packed as an e-mail for someone who wants to receive these messages by scheduled time. -
Page 198: Log & Status
Click on Refresh to renew the login data and other system status information, or click on Delete to clear these logs. Log & Status MT4205 provides the log list, connection status and user’s account. 5.6.1 Network Configuration Network Configuration shows current status of wireless connection and plugged USB devices. -
Page 199: User Account List
5.6.2 User Account List This section shows all users’ information. Check the user name, status and opened directory/file on screen. 5.6.3 Event Log MT4205 provides system logs for review. Version 1.0... -
Page 200: Logout
The system status log shows logging time, type and detail information as below. Click Refresh to update. Logout Click Logout on the bottom menu to exit and go back to login home page. Personal Configuration Open a Microsoft Internet Explorer, Mozilla Firefox or Apple Safari browser, and enter (Default Gateway) into browser’s blank field. - Page 201 Homepage Click Personal Panel and log in with your own user account. (If you can’t access your personal account, please check with administrator for validation.) Personal Panel Screen below shows every login user’s access rights, including Anonymous, My Document, My Webcam and My Status. Version 1.0...
-
Page 202: Anonymous
MT4205 provides personal control panel for every login user’s entrance to each application screen, please click on each icon for application. The icons appear in gray color can’t be clicked if the user doesn’t have the right to use that function; even though there is none to be set, the user can still apply My Status. -
Page 203: My Document
Notice: If you can’t access Anonymous folder, please check with administrator to enable your FTP server rights. Files under this directory are only for downloading, but not for uploading, deleting, or edting. 5.8.2 My Document ―My Document‖ shows all the files in USB HDD under each user’s account. -
Page 204: My Webcam
5.8.3 My Webcam ―My Webcam‖ application allows you to view the real time image when the web camera is on. Click My Webcam, and the system pops up a new window to display real time image as the example below shows. Notice: If the image from webcam can’t be viewed, it may be caused by Internet security setting and needs to be corrected or installed with the Java program 5.8.4... -
Page 205: Site Map
Notice: All above usage information is based on administrator’s setup. Site Map MT4205 provides site map clicking for each icon to carry out the easy setup from the home page. Version 1.0... -
Page 206: Chapter 6 Ddns Service Application
Chapter 6 DDNS Service Application DDNS is a service changes the dynamic IP to the static IP. The settings of DDNS can solve the problem of being given the different IP by router every time. After setting the Router, your host name would correspond to your dynamic IP. Moreover, via the host name application, it could be easier for you to use FTP, Webcam and Printer remotely. - Page 207 Version 1.0...
- Page 208 【Step 3】 When you got this account created message, close it, and check your mailbox. You would get a mail from DynDNS website. 【Step 4】 Click on the indicated address within your mail to confirm. 【Step 5】 Click on login. 【Step 6】...
- Page 209 【Step 7】 Click Add New Hostname. 【Step 8】 Put in your favorite hostname and service type, and then click Create Host after finished. Version 1.0...
-
Page 210: Chapter 7 Q & A
A: Check if the output voltage is suitable, or check if the power supply is out of order. 2. Q: The Internet browser still cannot find or connect to MT4205 after verifying the IP address and LAN cable, the changes cannot be made, or password is lost. -
Page 211: 7.3 Ip Address
A: There are two ways to know. Way 1: Check with your Internet Service Provider. Way 2: Check the setting screen of MT4205. Click on Status & Log item to select Network Configuration on the Main Menu. WAN IP is shown on the WAN interface. - Page 212 A: It’s possible that your Internet protocol (TCP/IP) was set to use the following IP address. Please do as the following steps. (Windows 2000 & XP) Start>Settings> Network and Dial-up Connections>double click on Internet Protocol(TCP/IP)> select obtain IP address automatically> Click on OK button. Then, open Internet browser for testing.
-
Page 213: 7.5 Mt4205 Setup
Why does MT4205’s setup page shut down unexpectedly? 1. Q: A: If one of the pages appears incompletely in MT4205’s setup pages, please click on Logout item on the Main Menu before shutting it down. Don’t keep it working. Then, close Internet browser and open it again for going back to the previous page. - Page 214 3.3.2 (Router Mode) or 4.3.1 (AP Mode). 4. Q: How do I upgrade the firmware of MT4205? A: Periodically, a new Flash Code is available for MT4205 on your product supplier’s website. Ideally, you should update MT4205’s Flash Code using Firmware Upgrade on the System Management menu of MT4205 Settings.
-
Page 215: 7.6 Wireless Lan
7. Q: MT4205 couldn’t save the setting after click on Apply button? A: MT4205 will start to run after the setting finished applying, but the setting isn’t written into memory. Here we suggest if you want to make sure the setting would be written into memory, please reboot the device via Reboot under System Management directory. - Page 216 Next make sure the router and the NIC are configured to use the same communications channel. There are normally 11 of them, and the default channel can also vary from vendor to vendor. You might also want to confirm that the router has DHCP services enabled and an address pool configured.
- Page 217 A: The wireless system will connect at highest possible speed, depending on the distance and the environment. To obtain the highest possible connection speed, you can experiment with following: Access Point location: Try adjusting the location and orientation of the Access Point.
-
Page 218: 7.7 Samba Server
1. Q: How does MT4205 assign numbers for the Hard Disk? A: The USB FTP operation of MT4205 is to assign the numbers as a, b, c, d when catch different HDs, if there are 2 or more main partitions in the same HD, then the assign number will plus 1,2,3,4 (e.g. -
Page 219: 7.9 Webcam Server
MT4205. 4. Q: How to remove or revise the files on FTP server? A: If there is any file needing to be revised, here suggests downloading the file to the HDD of PC and modifying it locally. -
Page 220: 7.10 Printer Server
2. Q: Why can’t my USB devices work on MT4205? A: Maybe your USB devices and MT4205 are not compatible. So if you want to know whether your inserted device such as USB Web Camera, USB Printer or USB HDD corresponds with MT4205, please check with your product supplier. -
Page 221: 7.12 Others
MT4205 supports the listed USB devices as follows. Printer MT4205 supports LPR protocol, while the printer drivers can be installed on Windows 98/2000/XP platforms, the connected printer works for the unit as well. If you need more information of supported models, please check the following websites. -
Page 222: Web Camera
Web Camera MT4205 supports OV511, OV511+, OV518, OV518+, SAA8115HL and SAA8116HL chipsets; besides, adding spca5xx/LE driver into firmware as the table below shows. Vendor Name Product Name Chipset Aiptek HyperVcam Mobile OV511+ Aiptek HyperVcam Fun OV511+ Aiptek HyperVcam Home OV511+... - Page 223 Lifetec LT 9388 OV511 Logitech QuickCam 3000 Pro SAA8116HL Logitech QuickCam 4000 Pro SAA8116HL Logitech QuickCam Orbit/Sphere SAA8116 Maitech AWK-300 OV511+ Maxxtro CAM22U OV511 Maxell Maxcam (MPCC-1) OV511 Medion MD9388 OV511+ MediaForte MV300 OV511 MediaForte PC Vision 300 OV511 Mustek WCam 3X OV511 Mtekvision...
- Page 224 Terratec TerraCam PRO OV511+ Terratec TerraCam USB PRO OV511+ Waytech I-Pac VIC-30 OV511+ Webeye 2000B OV511+ Driver Vendor Name Product Name Spca5xx/LE Aiptek Aiptek PocketDVII1.3 MPixels spca533a Aiptek Mini PenCam 2M spca504b Aiptek PenCam SD 2M spca504b Aiptek Pocket DV3100 spca533a Aiptek Pocket DV3500...
- Page 225 Creative WebCam Live! Motion Creative WebCam Live! Ultra Creative WebCam Live! Ultra for Notebooks Creative Webcam Mobile Zc0301P Creative Webcam NoteBook Zc0301P Digital Dream Enigma 1.3 spca504b Digital Dream Epsilon 1.3 spca533a Generic Generic vimicro 303b Generic Generic Zc0305b Genius Dsc-1.3M Smart spca504b-P3 Genius...
-
Page 226: Usb Devices
Ion 80 spca504b Polaroid PDC2030 spca504b Polaroid PDC3070 spca533a Terratec TeraCam2 move1.3 spca504b USB Devices MT4205 supports FAT16, FAT32 and EXT3 file systems. 1. Flash Drive Vendor Name Product Name Note Panram MEMORY BLOCK USB2.0 A-DATA Lover USB2.0 Version 1.0... -
Page 227: Operating Systems
A-DATA My Flash PD1 (512MB) USB2.0 Zynet PD-A2 USB 2.0 Maxtor DiamondMax Plus8 USB 2.0 Kingston Data Traveler 2.0 Shuttle SFD-0128 Apacer HandyDrive I-Ststick 32MB Apacer Handy Steno 64MB USB 1.1 ASUS AI-flash 2 64MB ASUS 32MB GENUINE 32MB NEXS SD card Transcend JetFlash 128 MB... -
Page 228: Easy Setup
3. Safari ver. 2.0.4 or higher version Easy Setup MicroSoft: Windows 2000, XP, Vista Communications Regulation Information Should any consumers need to learn more information, services and supports, please contact the supplier of your product directly. Version 1.0...
Need help?
Do you have a question about the MT4205 and is the answer not in the manual?
Questions and answers