
Summary of Contents for Open Labs Miko LXD
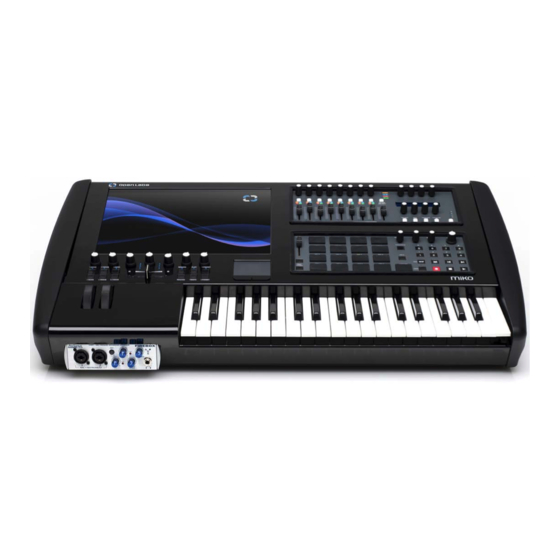
- Page 1 MiKo™ LXD MiKo™ LXD keyboard production station (Gen5) Operation Manual Open Labs MiKo LXD Production Station Manual...
- Page 2 Users Manual written by: James Edwin Rhone Jr. Editors: Ed Ablan, Christopher Brown, Steve Miller Super special thanks to the Open Labs Development Team for your efforts and meticulous attention to detail. You have truly made this a great product.
- Page 3 Open Labs technical support. Caution To ensure that the MiKo LXD or any device connected to it is not damaged during usage or maintenance, it is important to adhere to the following instructions. Do not expose the MiKo LXD to inclement weather conditions such as heavy rain, or use the unit •...
-
Page 4: Table Of Contents
Adding Software to your Open Labs Production Station............28 New Software Installation Considerations..............29 Chapter 4 – Quickstart...................30 Steps to Playing Sounds on an Open Labs Production Station..........30 Chapter 5 - Playing Sounds - Riff..............33 Before you Begin......................33 Setting up the Audio......................34 Setting up the MIDI.......................35... - Page 5 Adding MIDI FX....................73 Creating and using Audio Inputs................75 Edit Mode vs. Live Mode....................76 MIDI Learning Hardware Controllers.................76 Learn Relative......................79 Creating and Using Live Controls..................80 Create a New Live Control...................81 Using Oscillators with Knobs/Sliders................84 Open Labs MiKo LXD Production Station Manual...
- Page 6 Adding and Deleting Output Busses................126 Instrument Modules....................126 Adding and Deleting Instrument Modules................126 Instrument Console....................126 Docking and Floating the Instrument Console..............126 Adding and Removing Effects..................127 Working with Audio Inputs....................127 Advanced Performance Recovery..................127 Preferences.........................127 MIDI Input Ports......................127 Open Labs MiKo LXD Production Station Manual...
- Page 7 MimiK Tutorial (Quick Start)..................164 How to Playback a Sound after using MimiK..............164 Chapter 9 – System Restore, Backup............166 Chapter 10 – Hardware Maintenance............167 Please Read.........................167 New Hardware Installation Considerations...............167 Opening your Open Labs Production Station..............167 Open Labs MiKo LXD Production Station Manual...
- Page 8 Appenidix D - Making Adjustments .............188 Adding a Second Display....................188 Accessing the Intel® Graphics Properties Window............189 Calibrating the Touchscreen...................193 Adding a New Program to Launch from the Open Labs Shell..........196 Limited Warranty Information..............197 LIMITED WARRANTY COVERAGE ...................197 OBTAINING WARRANTY SERVICE ..................197 ASSIGNMENTS AND SEVERABILITY ................198...
- Page 9 Third-Party Sites .....................210 International Transfers .....................210 Notices......................211 Typographical Errors ....................211 Proprietary Notice .......................211 WAIVER ........................211 POLICIES ........................211 LEGAL ........................211 SUPPORT ........................211 PLATINUM SERVICE .....................211 PRODUCT REGISTRATION.....................211 Open Labs MiKo LXD Production Station Manual...
-
Page 10: Preface
First time: instructions on what to expect from the software and hardware environment of your • Open Labs production station. Playing Sounds: instructions on how to use Riff and Karsyn to play sounds with your Open Labs • production station. -
Page 11: Chapter 1 - Introduction
I n t r o d u c t i o n Welcome to the Open Labs MiKo LXD. Please read this manual thoroughly in order to familiarize yourself with the unit. Please keep this manual in a safe place for further reference. -
Page 12: Open Labs Production Station Components
Internet. DIMM Expansion Slots If your Open Labs production station is currently fitted with less than 4GB of RAM, you can install additional memory. Open Labs production stations support 240-pin, DDR2 DIMMs. Call technical support for details about expanding an Open Labs production station’s memory capacity. - Page 13 In a moment, the right-click options will pop up for you. For fine details, use the supplied touchpad. Either use a finger on the touchpad with a • thumb on the left button for clicking, or use two hands. Open Labs MiKo LXD Production Station Manual...
-
Page 14: Chapter 2 - Getting Started
The first time you open the box, you should ensure that all the parts are enclosed. Because each Open Labs production station may be customized with different options, you should validate its contents with your order. Ensure that all components are included and that none of them were damaged during shipping. -
Page 15: Rear Panel I/O
See the end of this chapter for examples of connections to the various inputs and outputs. Front Panel Audio Interface There is also an audio interface located on the front of Open Labs production station, providing two more audio inputs and an output for headphones. -
Page 16: Connecting The Cables
1. Open Labs production stations have cooling vents on the back panel and on the underneath the chassis. Make sure that none of these vents are obstructed. 2. There should be ample room on the left side of your Open Labs production stations to allow for the DVD/CD-ROM tray to eject without obstruction. - Page 17 Connect your Open Labs production station’s audio outputs to your monitoring system. -or- 1. Main Volume Control 2. Headphone volume Open Labs MiKo LXD Production Station Manual...
- Page 18 There are two power switches on the MiKo LXD. One is located on the power supply in the rear, and the other power switch is located on the right side end bell within the recessed area. The MiKo LXD has an auto switching powersupply.
-
Page 19: Basic Connection Diagrams
Basic Connection Diagrams The following picture shows examples of the rear audio and MIDI connections. Open Labs MiKo LXD Production Station Manual... - Page 20 The following picture shows examples of the front audio connections. Open Labs MiKo LXD Production Station Manual...
-
Page 21: Turning On An Open Labs Production Station
About the Open Labs GUI The Open Labs GUI is not a standard part of Microsoft Windows XP. It is a customizable overlay to the standard Microsoft XP work environment. You can toggle between the two modes by clicking on the Open Labs icon (located in the lower left-hand corner of the screen), select Quit, and then select Go To Windows. -
Page 22: Chapter 3 - First Time
T i m e The first time you power up your Open Labs MiKo LXD it loads directly to Riff, once you close Riff, you may realize that the screen looks nothing like Microsoft Windows XP. The look is the Open Labs Graphical User Interface that will enhance your productivity, especially in combination with the touchscreen. - Page 23 Starting from the bottom, the icons will be explained. QUIT Clicking on this button will give you the following options: Go To Windows: This button will close the Open Labs GUI and take you to the standard • Windows XP desktop.
- Page 24 APPS The Apps button is a way to access various programs installed on your Open Labs production station. When you click the Apps button you will see the following options: Burn CD-DVD: Launches a CD/DVD burning program.
-
Page 25: About The Midi Controllers
Bump MP • Both of these are actually programmable MIDI control surfaces. Open Labs production stations ship with MIDI control maps for use with the installed applications (Karsyn, REAPER, and so on), but you can also create your own custom maps to use with any MIDI application. -
Page 26: Dj/Vj Controller
Bump MP The MiKo LXD offers a new controller, the Bump MP. This controller offers tons of features to give you a drum machine style experience. Here are some of the features of this fine controller. Fixed Level controls •... -
Page 27: The Track Pad
Using USB Devices The Open Labs production station comes with two USB ports on the back panel. If you require more USB ports, you can purchase a USB hub. Typically, USB devices also require you to have Windows XP USB drivers in order for the device to work properly in Microsoft Windows. -
Page 28: Using The Internet
The network adapter allows you to connect a high-speed network to your Open Labs production station. Depending on your setup, the network could be local area only (just connects to other computers around you) or to the Internet. Open Labs production stations will support a 10 Mbits or 1000 Mbits network. -
Page 29: New Software Installation Considerations
The software does not conflict with software that is already on your system. An example of • this is having two brands of anti-virus software running at the same time. The software you are installing has support. Open Labs does not support software that is • not part of the factory installation. -
Page 30: Chapter 4 - Quickstart
– Q u i c k s t a r t Steps to Playing Sounds on an Open Labs Production Station 1. Make sure the power and audio connections are setup. 2. Check to make sure the powersupply power switch is in the on position. - Page 31 8. Offst - Controls the timing of the speed of a Live Controls Oscillation. 9. Press this button to select Bank A. This activates the correct map for the Mix Edit Panel for Riff. Mixer Panel The Mixer Panel is not used in this particular setup. Open Labs MiKo LXD Production Station Manual...
- Page 32 8. Tempo - You can use this button to tap the tempo of Riff. 9. Preset Up/Down - If you are using an Instrument that has MIDI program change, these buttons will allow you to scroll through the preset programs. Open Labs MiKo LXD Production Station Manual...
-
Page 33: Chapter 5 - Playing Sounds - Riff
MIDI control change messages or VST automation. Before you Begin You should have a good working knowledge of an Open Labs workstation and a computer's operating system. For example, you will need know how to use the touch screen, touchpad, standard menus and commands. -
Page 34: Setting Up The Audio
This next section will explain to you how to setup Riff after manually installing it. If Riff came stock on your Open Labs production station, you can skip this section as it will already be configured. However, if you have custom plug-in folders, you will want to read the “Setting up your Plug-ins”... -
Page 35: Setting Up The Midi
MIDI Input: Use “MIDI input 1” to select your primary MIDI driver. The application also allows • you to select three additional MIDI drivers. MIDI Output: Use this to select an available MIDI driver to send MIDI to an external source. • Open Labs MiKo LXD Production Station Manual... -
Page 36: Setting Up Your Plug-Ins
Setting up Your Plug-ins By default, all Open Labs production station's plug-ins are located in “C:\Program Files\Open Labs System (do not delete) Plugins”. With Riff, you can add three more additional locations for plugs. When you install your own plug-ins, please install them to "c:\plugins\". Then tell Riff where this folder is. -
Page 37: Setting Up General And Keyboard Options
Library Directory: Use the “Dir” button to browse over and select a directory to be used as the • default save folder for Riff. Start Up Set: Click in this window to choose a project to be the default project that starts up • with Riff. Open Labs MiKo LXD Production Station Manual... -
Page 38: Keyboard
Keyboard Low Range: Allows you to select the low range of your keyboard. The range is 0-144. • Keyboard High Range: Allows you to select the high range of your keyboard. The range is 0-144. • Open Labs MiKo LXD Production Station Manual... -
Page 39: 5A- Riff Architecture
The Set List window is where you start, allowing you to add instruments. Once you right-click and press “Add” you will see the following windows. Each square of a Set List is called a Song. Open Labs MiKo LXD Production Station Manual... -
Page 40: Sound Browser (Default View)
Sound Browser (Default View) If you would like to see more details about each instrument, click the [Advanced] button in the upper left corner. Open Labs MiKo LXD Production Station Manual... -
Page 41: Sound Browser (Advanced View)
Sound Browser (Advanced View) The Sound Browser is explained more in Chapter 5a. Open Labs MiKo LXD Production Station Manual... - Page 42 Meters that display the overall CPU and Memory usage of the ENTIRE system. • MIDI activity light. • Since this window is scroll-free, you can literally play an entire show with this screen. Refer to Chapter 4 for more information on using the Set List. Open Labs MiKo LXD Production Station Manual...
-
Page 43: Signal Chain
Signal Chain The Signal Chain is a collection of plug-ins that start with an audio input stream and end with an audio output stream. This is explained more in Chapter 5a. Open Labs MiKo LXD Production Station Manual... -
Page 44: Instrument Editor
The Instrument Editor allows you access to a selected instrument/plug-in's graphical user interface (GUI). You can also reach the Instrument Editor screen by double-clicking the instrument in the Instrument Rack or in the Signal Chain. This is explained more in Chapter 5a. Open Labs MiKo LXD Production Station Manual... -
Page 45: Live Controls
MIDI controllers that can be linked to any instrument, effect, or signal chain control contained within a Song. Live controls for a Song are saved within that Song and can be easily recalled, imported or exported. This is explained more in Chapter 3. Open Labs MiKo LXD Production Station Manual... -
Page 46: 5B- Understanding Riff
This screen is called the “Set List”. The Song Grid, Title Bar, Title Bar Controls, Status Bar, and Lower Section Controls make up this screen. This window allows you to add and switch between virtual instruments. Each square of the grid is called a “Song”. Open Labs MiKo LXD Production Station Manual... -
Page 47: Song
If you want to make a new Set, the current Set will be replaced with the new Set. • Open Set ▪ Opens the Set List Browser. • Open Recent Set ▪ Lists recently accessed Sets. Selecting from here will launch the selected set. • Open Labs MiKo LXD Production Station Manual... - Page 48 Options • General, Audio, MIDI, Plugin, and Keyboard options. ▪ Help • Open Help ▪ Opens the Riff Help File. • About ▪ Displays the information regarding the build version of Riff. • Open Labs MiKo LXD Production Station Manual...
-
Page 49: Title Bar Controls
Overall Master output volume knob of the host Can be dragged up or down to change value • Ctrl + Left-click restores default (This applies to all knobs in Riff) • Right-clicking here only brings up “Learn” mode • Open Labs MiKo LXD Production Station Manual... -
Page 50: Lower Section Controls
CPU monitors the current processor usage of the entire system. Not just the program. Displays the usage in percentages. • MEM displays the physical memory usage of the entire computer system. Open Labs MiKo LXD Production Station Manual... -
Page 51: Signal Chain
8 instruments. Each Instrument can have up to seven effects added to it. Preset > Inputs > 8 Instruments > 1 Signal Chain > 1 Plug-in + 7 Effects Open Labs MiKo LXD Production Station Manual... -
Page 52: Upper Bar Controls
The lower section of the screen shows the controls for the Input Column. Those controls are: Vol – Volume control for the Input. All instruments and their signal will be affected. ▪ Monitor – Allows you to monitor the Open Labs Keyboard, pad module, or external MIDI ▪ device. -
Page 53: Signal Chain
Signal Chain Add Signal Chain – Accesses the Sound Browser, where you can select a plug-in and add it to the • Instrument rack. Up to eight instruments can be added per Track. Open Labs MiKo LXD Production Station Manual... -
Page 54: Signal Chain Column Controls
Riff will not allow illogical configurations, (e.g. Sound generating plug-in, followed by a MIDI VST, followed by an effect followed by another sound generator). Once you add an effect, you will get a new tab on the Title Bar called “Effect Editor”. Open Labs MiKo LXD Production Station Manual... - Page 55 Params page. This is helpful for locating hard-to- distinguish parameters. This is a list of the raw parameters of an effect. This will also display parameters that might not be accessible from the plug-in GUI. Open Labs MiKo LXD Production Station Manual...
-
Page 56: Effect Column Controls
Make Default – Locks user created parameters as the default setting. This only applies to the • selected Song. Loading another instance of the VSTi will not load with this as the default setting. The only exception to this of course is "Shared Instruments". Open Labs MiKo LXD Production Station Manual... -
Page 57: Instrument Editor
Show Params – This button brings up the parameters view of the current plug-in. Clicking it • again switches back to the plug-in's GUI. Refer to the next page for an example. Make Default - Locks user created parameters as the default setting for the selected song. • Open Labs MiKo LXD Production Station Manual... -
Page 58: Instrument Parameters
Exporting and Importing User Patches If you tweak out a patch in an instrument, you can export that setting by going to Menu>File>Export>Export FXP (Program). This also applies to Banks. Except you would pick Export FXP(Bank) instead. Open Labs MiKo LXD Production Station Manual... -
Page 59: Live Controls
A left-click, right-click or a touch via the touchscreen on an empty space will bring up the “Add” menu. You can add a Knob, Button, Horizontal Slider, Vertical Slider, XY Pad, and a Text Editor. Open Labs MiKo LXD Production Station Manual... -
Page 60: Knob Properties/ Horizontal Slider Properties/ Vertical Slider Properties
Lock – This will lock down all the live controls making them operable. This is similar to live-mode • but still allows you to edit the live controls, with the exception of resizing them. Open Labs MiKo LXD Production Station Manual... -
Page 61: Button Properties
Pick Color – Brings up the Color Picker dialog box. Here, the user can select the color choice for • the text. Delete – Deletes the currently. • Open Labs MiKo LXD Production Station Manual... -
Page 62: 5C- Using Riff: Tutorials
After right-clicking, you can choose from “Add...”, or you can choose from an instrument category. The instrument categories are: KEYS, SYNTHS, DRUMS&SEQUENCERS, BASS, SAMPLERS, MULTI- INSTRUMENT, and GUITAR. Refer to Appendix B for a list of instruments. Open Labs MiKo LXD Production Station Manual... - Page 63 If you click “Add” you will see the Sound Browser. Pick an instrument from the list and press the [Add] button. This will insert this instrument into the Song grid for you to play. Open Labs MiKo LXD Production Station Manual...
-
Page 64: About The Sound Browser
6. Advanced – Switches the sound browser over to the advanced view. Selecting the advanced view will become the default Sound Browser view until you press it again. Refer to the image on the next page. Open Labs MiKo LXD Production Station Manual... - Page 65 8. Options – This launches Riff's options page as detailed in Chapter 2 “Plug-in Options”. 9. Add/Cancel – When you select an instrument in the list, press the [Add] button to add it to the song. Open Labs MiKo LXD Production Station Manual...
- Page 66 You can now play this sound with the ivory keys. If you want to adjust the settings of the instrument in the first song, click the [Instrument Editor] tab, which is located on the Title Bar. Open Labs MiKo LXD Production Station Manual...
-
Page 67: Saving A Set
Go to Menu>Import> here you will see the various import options. Exporting Racks, Signal Chains, Songs, Inputs Go to Menu>Export> here you will see the various export options. Make sure to have the item you want to export selected. Open Labs MiKo LXD Production Station Manual... -
Page 68: Using The Signal Chain
Sound Browser. The next image shows you that there are now two inputs in this song. Clicking on each input will play (solo) that sound. Open Labs MiKo LXD Production Station Manual... -
Page 69: Creating Keyboard Splits In A Song (Signal Chain)
Select the first signal chain. Press the [Set High Range] or [Low Range] buttons. These are located at the bottom of the screen. Pressing the [High Range] button brings up the following dialogue window. Open Labs MiKo LXD Production Station Manual... - Page 70 Now, select the second Signal Chain. And press the [Set Low Range] button. You will see the following: Press the “C#3” key on the MiKo/NeKo ivories. As you can see you now have the lower section of True Pianos split from C3 down, and Purity split from “C#3” up. Open Labs MiKo LXD Production Station Manual...
-
Page 71: Adding Effects To An Input Or Signal Chain
You may find it simpler to just touch the Audio FX area, then you will see the following: You can choose an effect by the category. The next screen shot shows that there is an effect (in the Stream Processor) under True Pianos. Open Labs MiKo LXD Production Station Manual... - Page 72 When the effect is selected the “Effect Editor” will be present in the title bar. Open Labs MiKo LXD Production Station Manual...
-
Page 73: Adding Midi Fx
A screen similar to the sound browser will appear, here you choose the MIDI effect. The type of MIDI effects you can expect to find here in Riff are arpeggiators, MIDI note repeaters, basic MIDI step sequencers, humanizers, etc. Open Labs MiKo LXD Production Station Manual... - Page 74 The next screen shot shows the MIDI effect "Sequencer Baby" has been added to the MIDI FX slot. Just like regular audio effects, a MIDI effects parameters can be edited via the effect editor. Open Labs MiKo LXD Production Station Manual...
-
Page 75: Creating And Using Audio Inputs
Click on the [Add Audio Input] button to insert the audio input to the signal chain. Once the input is inserted, click the [Input Output] button in the center of the lower control section. Use this to configure your audio input source. Open Labs MiKo LXD Production Station Manual... -
Page 76: Edit Mode Vs. Live Mode
These are the items you can see in this window. 1. Learn – MIDI learn maps host buttons to MIDI controllers, virtual live controls to VST's, and virtual live controls to MIDI controllers. Open Labs MiKo LXD Production Station Manual... - Page 77 The [ + ] sign is for something that has been learned, the [ # ] sign represents that a control has been learned relative. Open Labs MiKo LXD Production Station Manual...
- Page 78 Instead of sending +/-1 it will scale from 1 to 127. Sensitivity: Will change the rate at which the value is increased or decreased. It's • similar to the "touchy" knob in live controls. Open Labs MiKo LXD Production Station Manual...
-
Page 79: Learn Relative
• Instrument editor lower section previous/next preset buttons • Live controls lower section low/high knobs (all live controls Virtual Live Controls) • Live controls lower section knob/horizontal properties time and offset knobs • Open Labs MiKo LXD Production Station Manual... -
Page 80: Creating And Using Live Controls
Hovering over a latched Live Control like the volume for instance, will allow you to see what parameter a Live Control is latched to. Not all VST plug-ins will give such detailed information. Open Labs MiKo LXD Production Station Manual... -
Page 81: Create A New Live Control
“Keys” category and select “MrRay22”. Click on the instrument editor tab to show the GUI of Mr. Ray. The first Live Controls will be for the “Strength”, “Stiffness”, “Rel”, and “Kbd” knobs in the Mallets section. Open Labs MiKo LXD Production Station Manual... - Page 82 Once you do this, the entire grid will turn red indicating a control ready for “Learning”. When Riff is in Learning mode, the program awaits for you to select a parameter to latch this knob Open Labs MiKo LXD Production Station Manual...
- Page 83 To rename or change the color of a Live Control, switch back to “Edit Mode” select the Live Control and press the [Pick Color] or [Rename] button. Go ahead and learn the other three knobs to the controls of the Mallets section of Mr. Ray. Open Labs MiKo LXD Production Station Manual...
-
Page 84: Using Oscillators With Knobs/Sliders
When you hit play the oscillators start oscillating along with a sequencer (if you have put it to sync with the host). This only applies to the selected live control. Open Labs MiKo LXD Production Station Manual... -
Page 85: Mapping Live Controls To The Lower Control Section
Select the new knob and add an oscillator. 2. Select the [Learn] button, then select the Knob. 3. Select the [Signal Chains] tab and select the volume knob in the Lower Controls. Open Labs MiKo LXD Production Station Manual... -
Page 86: Saving And Exporting Live Controls
Export this out of Riff for use with another song. Keep in mind, no mappings will be kept in this type of export. To export, go to Menu>File>Export>Export Live Controls, type in a name and hit [OK]. Open Labs MiKo LXD Production Station Manual... -
Page 87: Using Multi-Timbral Instruments / Sharing Instruments
A multi-timbral instrument is a VSTi that can use up to 16 MIDI channels at once. Purity is an instrument that falls into this category, and is also preinstalled on an Open Labs production station. If you are using an Instrument like Purity, which is multi-timbral and a sample player, the benefits are crucial. -
Page 88: Sharing Instruments
Purity and either press the [Add] button or double left-click the instrument. This is how you share an instrument in Riff. The next part tutorial will show you how to use this shared instance of Purity as a multitimbral instrument. Open Labs MiKo LXD Production Station Manual... -
Page 89: Song Grid And The Multi-Timbral Instrument
2. Select the [Currently Loaded Plugins] tab and add the currently loaded (shared) version of "Purity". After [Add] has been pressed, a new Song is created with this "shared" instance of Purity as the instrument. Open Labs MiKo LXD Production Station Manual... - Page 90 The goal here is to have one instance of Purity running, utilizing its multi-timbral interface having sounds loaded on separate Songs. For this tutorial, only four Purity MIDI channels and sounds will be used. Open Labs MiKo LXD Production Station Manual...
- Page 91 16 MIDI channels. Select sounds for the one through four slots of Purity. These channels will also represent the corresponding MIDI channels. Go back to the Signal Chain. Open Labs MiKo LXD Production Station Manual...
- Page 92 Now let us add a second item to the grid that will trigger the sound you have in MIDI channel two of Purity. Also, doing this will allow us to utilize the shared instrument we prepared. Select a spot directly beside the first Song on your Setlist and click "Add". Open Labs MiKo LXD Production Station Manual...
- Page 93 We want this Song and Signal Chain to only use MIDI Channel 2. On the Signal Chain page click the [Bypass Channel Out] button in the lower controls and select MIDI channel 2. Open Labs MiKo LXD Production Station Manual...
- Page 94 Purity. Now, when you switch Songs on the Setlist, the selected Song will trigger the adjacent channels in Purity or whatever multi-timbral instrument you are using. Open Labs MiKo LXD Production Station Manual...
-
Page 95: Creating Keyboard Splits With Multi-Timbral Instruments
We will create splits in the signal chain to match these sounds and MIDI channels. Go back to the Signal Chain and add three "Empty Signal Chains". Refer to the instructions and images on the next page. Open Labs MiKo LXD Production Station Manual... - Page 96 To add an empty signal chain, click in the first empty signal chain slot. From the menu select [Add Empty Signal Chain]. Add three empty signal chains below "Signal Chain 1". As you can see in the following image, there are three additional signal chains stemming from Signal chain 1. Open Labs MiKo LXD Production Station Manual...
- Page 97 Click [Bypass Channel Out] in the lower controls section and set Signal Chain 1 to MIDI out Ch: 1. Next, signal chains two, three, and four, need to be routed through Signal Chain 1 which contains the instance of Purity. Open Labs MiKo LXD Production Station Manual...
- Page 98 This will complete this multi-timbral setup, each split should be triggering the patch that you have in Follow the same procedure that was used to set Signal Chain 2. the corresponding channel of Purity. Open Labs MiKo LXD Production Station Manual...
- Page 99 Signal Chain 4 lower controls, MIDI channel out set to channel four. This will complete this multi-timbral setup, each split should be triggering the patch that you have in the corresponding channel of Purity. Open Labs MiKo LXD Production Station Manual...
-
Page 100: Advanced Multi-Timbral Instruments / Signal Chain
Do this and the "MIDI Input I/O" option box appears. Set "Force MIDI Output Channel" to "Output Ch 1". Then press [Set]. This forces the input to only use MIDI channel 1. Open Labs MiKo LXD Production Station Manual... - Page 101 Once that empty input has been added and the Input is selected the Signal chain area remains empty. That is ok, the next page will show you how to assign the proper options. Open Labs MiKo LXD Production Station Manual...
- Page 102 The following image shows that Input 2 is routed to the Signal Chain 1 instance of Purity. Now, whatever sound you add to MIDI channel 2 of Purity will be triggered by Input 2. From here you should be able to add more Inputs and experiment with the settings. Open Labs MiKo LXD Production Station Manual...
-
Page 103: Midi Input I/O Options Window
MIDI Input Channels - Choose the MIDI Input Channel for the selected Input. ▪ Force MIDI Output Channel - This option enables the selected input to send MIDI out on a particular ▪ MIDI channel. Open Labs MiKo LXD Production Station Manual... -
Page 104: Using Different Preset Sounds With A Shared Instrument
Now add a second Song to the Setlist, but for this song instead of adding a new instance of Mr. Ray, select "ADD" on the Setlist, and go to the [CUrrently Loaded Instruments] tab and select "MrRay22". Open Labs MiKo LXD Production Station Manual... - Page 105 4. Go into the Instrument Editor of the new Song, find a new preset, then hit the [Make Default] button. After you hit the [Make Default] press the [Song Restore] button in this song. 5. Now you can change songs while getting different sounds from the same plug-in. Open Labs MiKo LXD Production Station Manual...
-
Page 106: 5D - Using Bump Mp, The Mix Edit Panel With Riff And Guru
G u r u The MiKo LXD offers an awesome new drum machine style rhythm tool. Using Bump MP, the Mix Edit Panel with Riff and Guru you will be able to create rhythms like never before. The following sections shows what controls what. -
Page 107: Importing The Bump Mp/Guru Song Template
Guru template which contains everything pre assigned. Aways be careful not to save over any of the default templates. Go to Menu>Import Song Then select "Guru LXD Template.song" and hit [OK]. Open Labs MiKo LXD Production Station Manual... - Page 108 Bump MP this way. The following image shows what the Bump MP/Guru template song looks like in the Signal Chain. There are two inputs from Bump MP feeding the instance of Guru. Open Labs MiKo LXD Production Station Manual...
- Page 109 If you look at the "MIDI Input Channel" for this Input, you will see that Input Ch 11 is selected. This isolates the drum pads from receiving MIDI from any other channel or device not using MIDI channel 11. Open Labs MiKo LXD Production Station Manual...
- Page 110 If you look at the "MIDI Input Channel" for this Input, you will see that Input Ch 12 is selected. This isolates the control buttons and knobs from receiving MIDI from any other channel or device not using MIDI channel 12. Open Labs MiKo LXD Production Station Manual...
-
Page 111: Guru Quickstart: Engines, Pads, Patterns And Graphs
GURU even provides a Scene view, where you can store ‘snapshots’ of the state of all 8 Engines together, and change between them by using MIDI note input. Open Labs MiKo LXD Production Station Manual... -
Page 112: Slicer
1/4 note down to 64th note. Hold SHIFT to set the sensitivity control to non-power-of-2values in this mode (by default it snaps 4, 8, 16, 32, 64). Open Labs MiKo LXD Production Station Manual... -
Page 113: Overview Of The Guru Interface
Graphs view • Pad Edit view • Aux Effects view • Mix view • Scenes view • Options panel • Each of these view modes have a corresponding button in the GURU toolbar. Open Labs MiKo LXD Production Station Manual... -
Page 114: Guru Toolbar
– if you don’t like what you hear, just hit the [X] button next to the Randomizer fader. 3. Engine selectors & activity display 4. Load/Save Bundle Buttons Open Labs MiKo LXD Production Station Manual... -
Page 115: Browser
You can then click the button in order to load it, or preview another. See chapter 2 from the main GURU manual for and in-depth look at the Browser. Open Labs MiKo LXD Production Station Manual... -
Page 116: Midi Pads
Pads are also selected for editing by clicking the pad and selecting the [Edit] button in the toolbar. This provides quick access to the Pad Edit view. See chapter 3 of the GURU manual for more details on Pads and the Pad Edit view. Open Labs MiKo LXD Production Station Manual... -
Page 117: Pattern Keys
It is also worth remembering that [ALT] is a key modifier which results in modifying all similar parameters. This depends in many cases on what is being clicked. Please see section 11:2 for a full list of GURU’s keyboard shortcuts. Open Labs MiKo LXD Production Station Manual... -
Page 118: Loading And Saving In Guru
The Browser also allows you to save the current Pattern (a .G01 file), or a group of all the current Engine’s Patterns into a Pattern Set (a .G24 file). See the Guru manual for more details. Open Labs MiKo LXD Production Station Manual... -
Page 119: Creating Beats With Guru: The Basics
2. Go to the [Signal Chains] tab of Riff, and press the [BPM] button. This is located towards the top right of the [Signal Chains] tab. Once you press this, you can type in the desired BPM and press [Enter]. Open Labs MiKo LXD Production Station Manual... -
Page 120: Record Mode
Click the [Undo] button in order to revert the Pattern back to its state when you last hit Commit • (or, if you haven’t pressed [Commit] yet, when you entered Record mode). Please note that the the [Undo] button is only active during Recording and not during normal operation. Open Labs MiKo LXD Production Station Manual... -
Page 121: Patterns And Graphs: Guru's Step-Sequencing System
MIDI notes C3 to B4. When you click a Pattern key, or play its corresponding MIDI note, that Pattern will be selected for editing in the Pattern view. Open Labs MiKo LXD Production Station Manual... -
Page 122: Graphs
The Shift Graph, represents timing deviations, smaller than a step, from hard step-divisions. Careful use of Graphs can inject a humanized ‘swing’ effect into your Patterns. Open Labs MiKo LXD Production Station Manual... -
Page 123: Graph Types
Graphs are very closely linked to Patterns – each of the 24 Patterns in each Engine has individual Graphs. All Pad lanes in each Pattern can have individual Repeat, Shift, Scrub, Pitch, Fine Pitch, Filter Cut, Filter Resonance, Volume, Pan, Reverse, Duration, and Force Layer. Open Labs MiKo LXD Production Station Manual... -
Page 124: Chapter 6 - Playing Sounds - Karsyn
Karsyn is a live performance work station software application for virtual instruments. The software is based on the product Forte by Brainspawn, Inc. Open Labs has modified the interface, and updated the design to support touchscreen users. Karsyn is designed for musicians transitioning from hardware rack-mount rigs, and uses the concept of stackable horizontal modules. -
Page 125: Karsyn's Control Module
Karsyn’s Control Module To open Karsyn: 1. Select the “Open Labs” icon in the lower left corner of the screen 2. Select the “QUIT” button. 3. Select “Go to Windows”. The Open Labs shell will close. 4. Click the [START] button and go to "All Programs>Open Labs>Karsyn". -
Page 126: Adding And Deleting Output Busses
To dock a floating window, double-click on the title bar of the console window. More information on this subject can be found by viewing page 23 of the Karsyn users manual. Open Labs MiKo LXD Production Station Manual... -
Page 127: Adding And Removing Effects
The list can be of any length, up to 128 entries. Additionally, MIDI program changes can be ignored. When checked, program change messages are not remapped or passed to the instrument. Open Labs MiKo LXD Production Station Manual... -
Page 128: Key Range And Transpose
Channel remap is MIDI input port-specific. You will have as many channel maps as you have input ports. Highlight the input port at the left to display and change the map on the right. Open Labs MiKo LXD Production Station Manual... -
Page 129: Continuous Controller Map
The last-used MIDI configuration is always saved with an instrument module. Usually, this MIDI configuration will be reloaded automatically on any future instrument module using the same instrument. However, if you select a MIDI configuration to be the default, it will be used instead. Open Labs MiKo LXD Production Station Manual... -
Page 130: Insert Manager
If the [Auto-Train] button is on when [New] is pressed, training will be started automatically. You must manually select the “to” field. Most effects provide a list of automatable parameters which will be shown in the “to” field. Open Labs MiKo LXD Production Station Manual... -
Page 131: Working With Presets
The tempo dialog will let you adjust tempo using the horizontal slider control- or by typing the tempo into the edit box. If you click [Follow MIDI Clock] on the input port, Karsyn will follow the tempo of incoming MIDI Clock messages from the highlighted input port. Open Labs MiKo LXD Production Station Manual... -
Page 132: Chapter 7 - Recording - Reaper
REAPER? Try right-clicking on everything, you’ll be surprised at the power hidden just below the surface. The following pages will teach you how to record using your Open Labs production station. This is not intended to replace the REAPER PDF manual. Topics covered in this guide are: Opening REAPER •... -
Page 133: Opening Reaper For The First Time
Opening REAPER for the First Time To open REAPER, click on the Open Labs icon. The icon is located at the bottom left of the opening screen. If you have exited the Open Labs shell, simply double left-click the REAPER Icon on the desktop. -
Page 134: Inserting And Using A Vsti
Inserting and Using a VSTi Using VSTi’s is simple in REAPER. REAPER on your Open Labs keyboard has already profiled your VSTi’s, and is ready to go. The following section tells you how to scan directories of VSTi’s that you have added. -
Page 135: Vst Plug-In Settings
Save full VST plug-in state if supported (recommended): By default, REAPER saves the full VST plug-in state if the plug-in supports this function. Clear this checkbox to prevent this behavior. Open Labs MiKo LXD Production Station Manual... - Page 136 “hear” that it is rendering, and if the VST(i) has the feature, it will usually increase the quality for rendering (Voxengo plug-ins do this; so does Image-Line’s Sytrus and Fxpansion’s BFD). Open Labs MiKo LXD Production Station Manual...
-
Page 137: Setting Up A Virtual Instrument
Press Control+T to add a new track. Then click the FX button: You will then see the FX chain view page. Press the Add button located to the bottom left. Open Labs MiKo LXD Production Station Manual... - Page 138 On the left side, select “VSTi”. This will show you all the VSTi’s included with your Open Labs production station, as shown in the following illustration. Select VSTi from the left side menu. For this example select MrRay22 in the VSTi window, either double left-click, drag and drop it onto the track, or select it and press “OK”.
-
Page 139: Setting Up Recording
After arming the track, you will be able to hear this VSTi when you play notes on the keys. By default, REAPER on your Open Labs production station is set to record MIDI whenever the ARM button is pressed. However, there is more than one recording mode for MIDI. Right-click the Record icon (pictured above), and you will see these options: Record Input: This is the default recording mode. -
Page 140: Setting Up Track Input
This is located on the VU meter on the track: In the examples below you will see the input source sections. If you need to input a drum machine, guitar, or microphone, follow these guidelines: Open Labs MiKo LXD Production Station Manual... - Page 141 MIC input 1 and the guitar into Mic Input 2 (these are the front inputs of the production station). For the drum machine and keyboard use LineIn 1 and LineIn 2 (these are located on the back of the production station). Remember to arm your tracks! Open Labs MiKo LXD Production Station Manual...
- Page 142 Stereo input allows a source to be assigned to paired inputs of the Firebox. The process is the same as for the mono inputs, except the stereo-ins are paired together as Mic 1 and 2, and LineIn 1 and 2. Open Labs MiKo LXD Production Station Manual...
- Page 143 MIDI ports. The Open Labs MIDI Driver 2 is the port that all your production stations control and keyboard keys are routed through. By default, all tracks are preset to this port. If you need to route MIDI from an external sequencer or MIDI device, use the Presonus FIREBOX MIDI-In.
-
Page 144: Recording In Reaper With A Vsti
8. F3 - Pressing this button brings up the REAPER mixer window. 9. F4 - Pressing this button switches REAPER over to the a full screen view of the track environment. 10. Editor Select - The default editor bank for REAPER is Bank C. Open Labs MiKo LXD Production Station Manual... -
Page 145: Dj Control Panel Layout And Assignments For Reaper
8. Tempo - Allows you to use "tap" tempo to set the desired BPM for a project. 9. Preset Change UP/DOWN - This will allow you to go to the next preset of an instrument. The instrument has to allow MIDI preset change. Open Labs MiKo LXD Production Station Manual... -
Page 146: Recording
Hit the play button to play it back. You may need to hit rewind. The metronome will help you to stay on time. Here is how you setup your metronome: First, right- click the metronome icon. You will then see the metronome settings window. Open Labs MiKo LXD Production Station Manual... -
Page 147: Enable Metronome
A higher number makes the click sound longer. This does not affect a custom click source. Notes: If you do choose a custom sound it will be used until you select the text in the custom field and delete it. Open Labs MiKo LXD Production Station Manual... -
Page 148: Looping
To loop playback or recording, you need to turn cycle on. Do this either by pressing the cycle button, or by using the “R” key on your QWERTY keyboard. Once playback or record reaches the end of the selection, it will return to the beginning and playback. Hence, looping. Open Labs MiKo LXD Production Station Manual... - Page 149 When loop recording is in normal MIDI record mode, every time the transport cycles around a new take will be created. Start recording and let it make four cycles. Vary what you play each cycle. Open Labs MiKo LXD Production Station Manual...
- Page 150 This example has the second take selected. Right-click the take you want, and select “glue”. This keeps the take you want, while deleting the others. Refer to the REAPER PDF manual for more information on recording with plug-ins. Open Labs MiKo LXD Production Station Manual...
-
Page 151: Mixing
When your mix is finished, it’s time to combine your individual tracks into a single, stereo file. Rendering is done by clicking File>Render, or pressing the C5 button on your Open Labs production station’s master panel. REAPER supports .WAV, .Ogg, .AIFF, as well as many other audio formats. -
Page 152: Exporting Tracks
Once it has finished, you will be able to burn it to CD. Your Open Labs production station is bundled with a CD/DVD burning program. If you are unsure how to access this program, please call an Open Labs technician. - Page 153 The processed event will show your original MIDI event with the new AUDIO take directly underneath. From here you need to decide whether the audio portion of the event is what you want. Left-click to select the audio portion of the event. Open Labs MiKo LXD Production Station Manual...
- Page 154 This is the finished event. MIDI has been converted to a stereo audio track. You can export this as a track stem to be used in another program. To do so, go to File>Consolidate/Export tracks. Open Labs MiKo LXD Production Station Manual...
- Page 155 For more information on consolidation, please refer to the REAPER PDF user guide. To learn more about the power of REAPER, please read the REAPER PDF users guide. Also, visit (http://www.REAPER.fm), and visit the REAPER online Wikipedia, (http://www.cockos.com/wiki/index.php/Main_Page). Open Labs MiKo LXD Production Station Manual...
-
Page 156: Chapter 8 - Mimik Users Guide
MimiK is a program designed to sample your MIDI-capable keyboards and hardware. It can be set up to automatically record all the sounds on your favorite hardware for use on your Open Labs production station. The basic algorithm behind MimiK is that it will send MIDI messages for every note on the target keyboard you want to sample. -
Page 157: How To Physically Set Up Mimik
Now we need to test if cables have been correctly hooked up. Make sure the Open Labs production station is hooked up to a set of speakers or that you have a pair of headphones plugged into the headphone jack. You will use these to monitor the sounds coming from the keyboard you are cloning. -
Page 158: Setting Up Mimik
Setting up MimiK If the Open Labs production station is not turned on, do so now. Shut down all other programs that are running. Other programs may interfere with the recording process. Launch MimiK. The main window should appear. Click on the Options button. - Page 159 MIDI output device, but it can be any MIDI output device you have installed. This is the default Output Directory for the samples. The default save path is "C:\Program Files\Cakewalk\Dimension LE\Multisamples\MImik Output". Open Labs MiKo LXD Production Station Manual...
-
Page 160: Mimik Features Guide
This should get rid of any stuck notes. Monitor Button: By default this is on. When highlighted, all audio input will be routed to the audio outputs of the Open Labs production station. This is useful when you want to hear the progress of the MimiK process. -
Page 161: Options Window
Note Down Time: Defines the time in seconds that each velocity layer of each note is sampled. The longer the note down time the better. The trade off is in how much disk space is used and how long it Open Labs MiKo LXD Production Station Manual... - Page 162 VU Meter: Audio input VU meter. It mirrors the VU on the main window. Input Gain: Some keyboards can be a bit soft or loud. Adjusting this will allow for keyboards with different levels of output. Open Labs MiKo LXD Production Station Manual...
- Page 163 Chop Leading Samples: Anything below the noise floor is chopped off at the beginning of the sample. There is a slight delay in the time that the MIDI information is sent by the Open Labs production station and when the keyboard output sound is recorded by MimiK. This delay can be noticeable, so this option is useful in removing it.
-
Page 164: Mimik Tutorial (Quick Start)
How to Playback a Sound after using MimiK To play back sounds that have been made in Mimik, Open Labs has provided you with the sample player Dimension LE. - Page 165 The test file made for this lesson was called "Grand Piano". You can see "Grand Piano.sfz" loaded into Dimension LE. This sound is ready to be played. To learn more about Dimension LE, please read the Dimension users guide located on the MiKo LXD. Open Labs MiKo LXD Production Station Manual...
-
Page 166: Chapter 9 - System Restore, Backup
Have all disks available in the event you need to use them. • The True Image software can be found by exiting the Open Labs shell, then clicking on the Start Menu icon. (Start Menu>Program Files>Acronis>Acronis True Image>Acronis True Image) -
Page 167: Chapter 10 - Hardware Maintenance
Do not work on hardware with the Open Labs Production Station plugged in. • Always work on your Open Labs Production Station on a flat table-top and not on the carpet • or floor. Do not use excessive force on any components within the case. -
Page 168: Appendix A Pro Audio Primer
A collection of Presets that are loaded into memory for easy access and low load time. BITRATE In digital multimedia, bit rate represents the amount of information, or detail, that is stored per unit of time of a recording. The bit rate depends on several factors: Open Labs MiKo LXD Production Station Manual... - Page 169 Waveform Display is said to have a DC Offset. This is usually caused by a calibration problem in the audio hardware. It is desirable to remove this offset after Open Labs MiKo LXD Production Station Manual...
- Page 170 MP3 - MPEG-1 Audio Layer 3, more commonly referred to as MP3, is a popular digital • audio encoding and lossy compression format, designed to greatly reduce the amount of data required to represent audio, yet still sound like a faithful reproduction of the original Open Labs MiKo LXD Production Station Manual...
- Page 171 Latency is the amount of time an application allocates to prepare a buffer full of audio data for playback. Lower latency settings add processing time because of the need to refill the smaller data buffers more often. You may need to increase your applications latency under the following conditions: Open Labs MiKo LXD Production Station Manual...
- Page 172 The processing and transferring of a final, sequenced audio tape to a medium for duplication. MFUSION Open Labs mFusion software unifies multiple MIDI interfaces, MIDI keyboards, and MIDI controllers into a single MIDI control panel for assigning MIDI channels, providing keyboard splits, assigning MIDI controllers, and setting other parameters for incoming MIDI data.
- Page 173 This is the most common method of recording popular music. Multitracking can be achieved with hard disk based systems like an Open Labs production station, often employing a computer and multitrack audio recording software. Multitrack recording devices vary in their specifications, such as the number of simultaneous tracks available for recording at any one time;...
- Page 174 The capability of an electronic musical instrument to output multiple notes at one time. PRESET A collection of Instruments and/or Audio Effect chains with unique settings for each plugin in the preset. PRESET GROUP User defined group of Presets contained within a Bank. PUNCH-IN PUNCH-OUT Open Labs MiKo LXD Production Station Manual...
- Page 175 In general, SMPTE timecode frame rate information is implicit, known from the rate of arrival of the timecode from the medium, or other metadata encoded in the medium. The interpretation of several bits, including the "color framing" and "drop frame" bits, depends on the underlying data Open Labs MiKo LXD Production Station Manual...
- Page 176 The connection between a plug-in parameter and a physical hardware MIDI control (or a virtual soft control). An example of a link would be when a user moves a hardware MIDI knob and the volume output of a soft synth changes. Open Labs MiKo LXD Production Station Manual...
- Page 177 S/PDIF, AES/EBU, ADAT and other formats use a word clock. A word clock neither produces nor uses timecode; it is used entirely to keep a perfectly-timed and constant bitrate to avoid data errors. Open Labs MiKo LXD Production Station Manual...
-
Page 178: Appendix B - Sound Presets
Subtractive/ FM Synth- Lead, Pads, Ambient Sounds- Trance, Ambient- Brian Eno, Jean- Michaael Jarre Cubix Drum/ Bassline Synth- Drums, Synth- Electro, House- Kraftwerk, Depeche Mode delay Delay; Basic delay_chorus Delay; with added chorus delay_sustain Delay; Auto sustaining Open Labs MiKo LXD Production Station Manual... - Page 179 Configure midi mapping midi_chorderizer Offset up to four voices midi_chordkey Chord in key midi_humanizer Velocity and timing humanizer MIDI_KeySnap Midi note constrainer midi_modal_randomness Convert midi into modal randomness midi_note_repeater Simple midi note repeater Open Labs MiKo LXD Production Station Manual...
- Page 180 SP1LimiterJS Dynamics; Simple peak limiter spectro_filter_paint Filter; Draw the filter field spectropaint Draw the effect StereoField EQ; Stereo field manipulator String Theory 1.5 String / Hybrid Synth- Lead, Ambient Sounds- Rock, Pop, Electronic, Open Labs MiKo LXD Production Station Manual...
- Page 181 Get in tune Univibe Filters; Simulated Modulation Stompbox- Provides Reverb/ Phaser Type Effects waveShapingDstr Distortion: Wave shaping Wusikstation FM Synth- Lead, Bass, Pads- Electronic, Pop- New Order, J Saul kane Wusikstation Multi-Out Open Labs MiKo LXD Production Station Manual...
-
Page 182: Appendix C - Audio Interface Control Panel
Input Level Boost Input Level Boost: clicking this button will boost the input level of each corresponding analog input by +12dB. Use this feature for recording quiet instruments or devices with low output. Open Labs MiKo LXD Production Station Manual... - Page 183 Note: The default settings (pictured above) for the interface mixer has all faders set to 0dB and all pans set to center, with the Software Playback set to channels 1/2, the Mixer Output set to Bypass, and the Playback to Phones set to channels 1/2. Open Labs MiKo LXD Production Station Manual...
- Page 184 Mixer to the headphone output. 6. In the MIXER OUTPUT section of the interface Mixer, select the pair of outputs to send out of the interface (for example studio monitors connected to outputs 1/2). Open Labs MiKo LXD Production Station Manual...
- Page 185 OPERATION OF MIXER The silver tracks represent the six possible inputs from the interface as well as the software playback. The blue section contains information on the output of the mixer. Open Labs MiKo LXD Production Station Manual...
- Page 186 Open Labs MiKo LXD Production Station Manual...
- Page 187 Open Labs MiKo LXD Production Station Manual...
-
Page 188: Appenidix D - Making Adjustments
However, once the system loads up, the second display will be blank. From here, the second display needs to be set to. 1. Press the Open Labs icon in the lower left corner of the screen, press the [QUIT] button and select “Exit to Windows”. -
Page 189: Accessing The Intel® Graphics Properties Window
When you first enable Extended Desktop mode, your taskbar and any icons on your desktop appear on the Open Labs touch screen; desktop space without icons appears on the external monitor. You may find it easier to show the taskbar on the external monitor since it is usually the larger of the two screens. - Page 190 Once you click the Intel® logo this is the window you will see. Even though your external monitor is connected, it will not show up until you choose the correct settings. The default Operating Mode is "Single Display". The Open Labs production station touchscreen is called "Digital Display".
- Page 191 By default, we recommend that the primary display always be set to Digital Display. However, you can change this and select the external display to be the primary, the touchscreen then becomes the secondary monitor. Open Labs MiKo LXD Production Station Manual...
- Page 192 If you chose "Extended Desktop" as the operating mode, you can use the window on the right side called "Position" to arrange the monitors to match the way they are physically arranged. Select the monitor and just drag it where you want it to be. Open Labs MiKo LXD Production Station Manual...
-
Page 193: Calibrating The Touchscreen
There is a property in the “TouchKit” utility used to customize your touchscreen to your "touch style", that property is called "4-points Calibration". Start by pressing the Open Labs icon in the bottom left corner. Press “Control Panels”, then press the [Touch Screen] Icon to launch it's interface. - Page 194 Once the Touch Screen utility loads, press the [Tools] tabs. Now, select "4 Points Calibration". The Calibration screen will appear next. Please go to the next page. Open Labs MiKo LXD Production Station Manual...
- Page 195 Touch the blinking symbol on the screen until it beeps or it stops blinking. There will be four symbols to push. 1. Bottom left 2. Bottom Right 3. Top Right 4. Top Left Upon completion, this dialog window will pop up: Press [OK] and you are done. Open Labs MiKo LXD Production Station Manual...
-
Page 196: Adding A New Program To Launch From The Open Labs Shell
Adding a New Program to Launch from the Open Labs Shell If you would like to add for example, Reason to the [Record] button of the Open Labs shell, follow these steps. 1. Make sure there is a shortcut on your desktop of the item you want to create a shell link with. -
Page 197: Limited Warranty Information
Open Labs hardware product. Open Labs limited warranty obligations are limited to the following set forth in this document. If a defect exists, at its option Open Labs will: a) repair the product at no charge, using new or refurbished replacement parts, b) exchange the product with a product that is new or which has been manufactured from new or serviceable used parts and is at least functionally equivalent to the original product, or c) refund the purchase price of the product. -
Page 198: Assignments And Severability
Authorized Service Provider; c) to a product or a part that has been modified without the written permission of Open Labs; or d) if any Open Labs serial number has been removed or defaced e) damage to units used for loan or rental. - Page 199 Buyer that the warranty is fulfilled to Buyer’s satisfaction, unless Buyer has previously notified Open Labs in writing of a particular defect. Failure of Open Labs to enforce any term and condition of this Agreement will not be deemed to be a waiver of such term or condition.
-
Page 200: Policies
Every carrier used by Open Labs is required to verify and sign for the condition of and the number of pieces that are released to them for delivery. Our control and responsibility for any shipment ceases when the carrier signs the Bill of Lading. -
Page 201: Warranty Returns Or Exchanges
Labs only. Returns will be refused without a proper RMA number. The RMA number is valid for only 20 calendar days from the date issued. Open Labs must receive the product back within 20 calendar days; otherwise, you are subject to be billed for the item. All returns must be sent prepaid - no collect shipments will be accepted. -
Page 202: Support
If your packing slip or invoice does not state the length of your limited warranty, then it is ONE (1) year from the date of original retail purchase of your Open Labs hardware product. Support is included for all hardware/software shipped with our hardware products. -
Page 203: Online User Forums And Support
Open Labs hardware owners/buyers by visiting forum.openlabs.com. Since the hardware and software products shipped by Open Labs change over time, the details in the materials and information available through the tutorials and online forums may or may not apply to your hardware or software. -
Page 204: Platinum Services - Year 1
1 Hour “Get to Know Your Open Labs System Training” To get you up and running quickly, Open Labs will provide you with 1 Hour of “Get to Know Your Open Labs System Training” by one of our Open Labs technical support specialists using phone, web and remote access. -
Page 205: Plus Access To Technical Support On Saturday
Monday – Friday between 10:00am – 7:00pm CST. This Saturday support is available for one year from the date of purchase of your Open Labs hardware. Technical support assistance is limited to Open Labs hardware & software issues as well as Platinum support services. -
Page 206: Service Description: Open Labs Platinum Services Legal Terms
1 Hour “Get to Know Your Open Labs System Training” To assist you in getting up and running quickly, Open Labs will provide you with 1 hour of Get to Know Your Open Labs System Training by one of our technical support specialists using phone, web, and remote access. -
Page 207: Platinum Service How To & Usage Training Sessions
Year 2 & 3 Upgrade 7 Sessions Open Labs specialists will keep track of your sessions in 5 minute increments and also keep track of your remaining 1 hour sessions. To use your limited number of training sessions, you must contact Open Labs technical support to schedule your sessions in advance. -
Page 208: Refunds
Open Labs product. Cancellation Open Labs may cancel this Service at any time during the Service term if the Customer fails to pay the total price for this Service in accordance with the invoice terms; Customer fails to abide by the terms of this Service Description;... -
Page 209: Legal
In some areas of the Web site Open Labs may collect other information to enhance your site visit to assist you with technical support issues or to follow up with you after your visit. -
Page 210: Access To Your Personal Information
Internet. Change your passwords often, use a combination of letters and numbers, and make sure you use a secure browser. Access to your personal information If you would like to review other personal information that Open Labs may have about you, send us an e-mail. Collecting other Personal Information In some of our e-mail to you, we use a "click-through URL."... -
Page 211: Notices
Buyer that the warranty is fulfilled to Buyer’s satisfaction, unless Buyer has previously notified Open Labs in writing of a particular defect. Failure of Open Labs to enforce any term and condition of this Agreement will not be deemed to be a waiver of such term or condition.
Need help?
Do you have a question about the Miko LXD and is the answer not in the manual?
Questions and answers