Table of Contents
Advertisement
Quick Links
Advertisement
Table of Contents

Subscribe to Our Youtube Channel
Related Manuals for GENERAL MOBILE DST3G SMART


Summary of Contents for GENERAL MOBILE DST3G SMART
-
Page 1: User Manual
DST3G SMART User Manual User Manual Page 1 of 65... - Page 2 The information contained in this User Manual is written for the DST3G Smart model. The contents of this document are provided “as is”. Except as required by applicable law, no warranties of any kind, either express or implied, including, but no limited to, the implied warranties of merchantability and fitness for a particular purpose, are made in relation to the accuracy, reliability or contents of this document.
-
Page 3: Table Of Contents
Contents IMPORTANT SAFETY INFORMATION ................... 4 GETTING STARTED ......................... 7 1.1 SIM ......................7 CARD AND ATTERY 1.2 C ......................9 HARGING THE BATTERY 1.3 I ....................10 NSTALLING THE EMORY 1.4 Y .......................... 11 OUR PHONE 1.5 D ......................12 EFINITION OF UTTONS 1.6 S... -
Page 4: Important Safety Information
Important Safety Information Emergency Services To make an emergency call in any country Ensure that your phone is switched on and in service. Press 112 followed by the Send key. Follow the instructions and do not end the call until told to do so. Tell the operator which service you require: Police, Ambulance, Fire Brigade, Coastguard or Mountain Rescue Service. - Page 5 The operation of some medical electronic devices, such as hearing aids and pacemakers, may be affected if you use a mobile phone next to them. Observe any warning signs and the manufacturer's recommendations. Your phone contains metal which may cause a skin irritation, a rash or eczema. Do not place sharp metal objects such as pins near the earpiece.
- Page 6 Service The phone, batteries and charger contain no user-serviceable parts. We recommend that your phone is serviced or repaired by a General Mobile authorized service center. Please contact your service provider for more information. Efficient use The phone has an internal antenna. For optimum performance with minimum power consumption, please do not cover the internal antenna area with your hand.
-
Page 7: Getting Started
1 Getting started 1.1 SIM card and Battery The Service Provider supplies you with a SIM card on which you can store your important phone numbers and other personal data. Note: When inserting or removing the SIM card, you must disconnect the handset with the power adapter. - Page 8 Fig. 3 4. Open the MicroSD card holder, and insert the MicroSD memory card into the slot in the right side as shown in Fig. 4, then close the MicroSD card holder; Fig 4 5. Insert the battery with the label side up. Align the tabs and metal contacts at the top of the battery with the tabs and contacts on the back of the phone.
-
Page 9: Charging The Battery
Do not leave your phone connected to the charger for over a day as overcharging can shorten the battery‟s service life A fully charged battery will gradually discharge when the phone is not in use. Use only batteries approved by General Mobile and recharge your battery using only chargers approved by General Mobile. 1.2 Charging the battery ... -
Page 10: Installing The Memory Card
Unplug the charger from the AC outlet, and then unplug the charger connector from the phone. 1.3 Installing the Memory Card This phone uses T-Flash memory card. You can install the memory card to save images, media clips, music, and other data on your phone. You can find the memory card slot at the right side of the phone. Note: Use only compatible T-flash cards or microSD cards with this device. -
Page 11: Your Phone
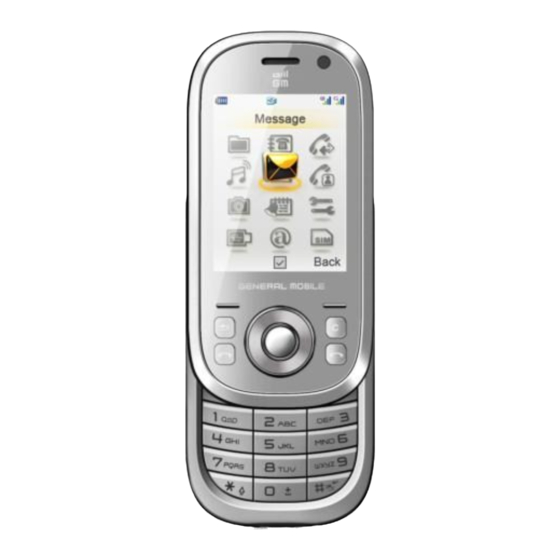
1.4 Your phone Front Earphone camera lens Rear camera Volume keys Power key connector Earpiece lens Mini USB Loudspeaker Camera key connector User Manual Page 11 of 65... -
Page 12: Definition Of Buttons
1.5 Definition of Buttons Right Navigation key Up Navigation key Right Selection Key OK key [RSK] Left Selection Key Clear key [LSK] GSM Send key Left Navigation key [G-Send key] Return key Asterisk key (*) WCDMA Send key Alpha-numeric keys [W-Send key] Hash key (#) Down Navigation key... - Page 13 Selection keys Left Selection Key Idle mode: Performs the function shown directly above the button [LSK] Long press to lock keypad (Each key can be assigned with a Menu mode: Press to enter the menu list of the LSK function) Editing mode: Press to enter the menu list of the LSK Right Selection Key Idle mode: Performs the function shown directly above the button...
-
Page 14: Status Icons
Return key Idle mode: if Music/FM radio is playing background, press to ask whether exit the background Call Mode: no function Others mode: Press to go back to Idle screen Alpha-numeric keys Idle mode: Press to enter numbers and characters Call Mode: Press and Hold [Number keys 2 to 9] to fast dial the phone number which you have setted in settings application. - Page 15 Battery level Charging status SMS status Unread SMS ⑵ Unsent SMS SMS Inbox is full MMS status Unread MMS ⑶ WAP prompt WAP prompt Mobile phone full MMS Inbox is full Incoming call transfer Incoming call of WCDMA slot SIM ⑷...
- Page 16 Driver mode, WCDMA slot is Primary Meeting mode, WCDMA slot is Secondary SIM Outdoor mode, WCDMA slot is Secondary SIM Driver mode, WCDMA slot is Secondary SIM Display the Phone profiles for GSM Meeting mode, GSM slot is Primary slot Outdoor mode, GSM slot is Primary Driver mode, GSM slot is Primary SIM Meeting mode, GSM slot is Secondary...
-
Page 17: Basic Functions
2 Basic Functions Your phone supports dual-network, WCDMA and GSM. You can make voice calls on either the SIM-1 (WCDMA) or SIM-2 (GSM). Only the SIM-1 supports video call. 2.1 Switch the phone On/Off To turn the power On or Off, press and hold the Power button for approximately 3 seconds. 2.2 PIN and PUK Codes ... - Page 18 You can dial a phone number quickly by entering its storage location in the Contact List memory in the phone or SIM card. 1. On idle screen, enter the location number then press “*” key to display the corresponding phone number stored in the Contacts List of the phone.
-
Page 19: Receiving A Call
Press [W-Send] key or [G-Send] key to dial the number. The phone will automatically dial the extension number after connecting to the telephone exchange. Emergency call Calls to emergency service numbers can be made under any circumstances, even if the phone, and/or SIM card is locked. - Page 20 folders. Phone Book During a call, press [LSK] then select Phone Book to search for the phone number in the Contacts List. Mute/Unmute During a call, press [LSK] then select “Mute” to turn off the microphone. At this mode, the other party will not hear you but you can still hear the other party.
-
Page 21: In-Call Options (Video Call)
Note: Do not hold the device near your ear when the loudspeaker is in use, because the volume may be extremely loud. 2.7 In-Call Options (Video Call) Note: Video phone feature is only available in UMTS network. Only the Primary SIM of the phone supports Video Call. -
Page 22: Idle Mode And Main Menu
3 Idle Mode and Main Menu In idle mode, the screen displays lots of useful information, such as Missed Calls, New Messages, Alarms, Scheduler, or To Do List. The Main Menu screen allows you to access any of your phone‟s features. These are displayed in a grid or list format. -
Page 23: M Yfiles
3.1 My Files Use My Files to manage files such as pictures, videos, sound, Java installing application and other applications stored in the phone memory or memory card. To access My Files, press [OK] to open the Main Menu, select My Files, and then press [OK]. Another way to access My Files is to simply press [Number key 1] while the Main Menu is open. - Page 24 Move: Move the file to the memory deleting the original file in the phone Delete: Delete the current file Rename: Rename the current file Type of view: Arrange the selection according to titles or thumbnails Sort: Arrange the files according to name, size or date Multi-delete (Delete Several): Play, delete selected or all files Property/ies: Display file details include: Format, Date and time, Size Note: The phone supports the following audio formats: AMR, SMF (MIDI), SMAF, WAV, AAC, MP3,...
-
Page 25: Phone Book
T-Flash T-Flash is the memory card used for storing your data. Select T-Flash to view all the files stored in the memory card. Press [LSK] for the options in handling the files. Management This function helps you check the memory status of your phone or memory card. Storage type: Set the phone or T-Flash as memory storage Format T-Flash: Clear all the data in memory card 3.2 Phone Book... - Page 26 to SIM-2/ SIM-1, Delete, Send via SMS. When viewing a contact entry, select [LSK] to select from the following options: Edit, Voice call via SIM-1, Voice call via SIM-2, Video call, Edit before call, Send SMS, Send MMS, Copy to SIM-1/ Phone/SIM-2, Copy to SIM-2/ SIM-1, Delete, Send vCard via Bluetooth.
- Page 27 While a contact entry is highlighted, press [LSK] and select from the following options: New contact, Voice call via SIM-1, Voice call via SIM-2, Video call, Send SMS, Send MMS, Copy to SIM-1, Copy to phone, Delete, Send via SMS. To edit a contact entry, press [LSK] and select from the following options: Edit, Voice call via SIM-1, Voice call via SIM-2, Video call, Edit before call, Send SMS, Send MMS, Copy to Phone, Copy to SIM-1, Delete, Send vCard via Bluetooth.
- Page 28 Search type: You can set search type as Fuzzy and Exact. - Fuzzy: User can search a contact by fuzzy type. - Exact: User can search a contact by exact type. For example: To search for the contact name „Michael Jackson‟ in your Phone Book, only input characters “mic” and it is able to search the name. Copy &...
-
Page 29: Log
[OK]. All your Phone Book contacts will now be sent to the new paired device, provided the other device has a Receive all feature too. Memory status This function shows you the number of used and available storage locations in the Contact List of the phone, SIM-1 and SIM-2. - Page 30 your hearing. Do not hold the device near your ear when the loudspeaker is in use, because the volume may be extremely loud. Music player With the music player you can play audio files stored in the phone memory or memory card. This phone feature allows you to play music while using other functions of the phone.
- Page 31 Property/ies: View the property of the current audio file Games Your phone comes with two built-in games: Boxman and Colored ball. Boxman: The object of the game is to push boxes to the target locations. When all boxes are stored at the target places, you then advance to the next level.
-
Page 32: Message
* Delete: Delete the current tuned station from My favorite list * Delete all: Delete all channels from My favorite list - Search Mode: Set channel selection to Manual, Favorite, or Automatic - Shortcut key setting: assign any key in the phone keypad as shortcut to frequently tuned FM Stations - Minimize: return to idle mode or use other applications while the FM radio continues playing as background music... - Page 33 5. Press [OK] to select SIM card and send message. After composing your message in Step (4), you may press [LSK] and select from the following edit options: “Send via SIM-1”, “Send via SIM-2”, “Add recipient”, “Save”, “Insert contact”, “Notes”, “Cut”, “Copy”, “Paste”, “Symbols”, “Line feed”...
- Page 34 - Reply: Create a message in response to a received message. The number of the message sender will be automatically copied to the “To:” field - Forward: Forward a received message to another party. The message is copied to an edit text field then you can enter the number/s of the recipient(s) to the “To:”...
- Page 35 - Delete all: Delete all messages in Outbox • Sent All messages sent successfully from your phone are stored in the Sent folder. Enter Message>SMS menu, press [Down Navigation key] to find Sent and open the message list. Use [Up/Down Navigation key] then press [OK] to open the selected message. Press [LSK] to perform any of the following options: - Read: View details of sent message - Forward: Forward the selected message to another recipient...
- Page 36 Memory status Displays the number of used and available storage locations on the phone, SIM-1, and SIM-2. MMS MMS allows you to send and receive Multimedia messages with images, audio files and video clips attached. Before you start using this function, you must first configure your phone‟s connection settings for GPRS/Internet access.
- Page 37 Note: You can import a video, sound, or image from the memory card and attach it to your MMS message. Other MMS Folders All received MMS messages are stored in the Inbox. When a new MMS message is received, your phone will sound an alarm and display a closed envelope icon as well as the number of unread messages.
- Page 38 From the Outbox message list, press [LSK] to open and then select from the following options: Resend via SIM-1, Resend via SIM-2, Delete, Delete all, Lock/Unlock or Sort by. Sent Store MMS messages successfully sent from your phone From the Sent Items message list, press [LSK] to open and then select from the following options: Send again via SIM-1, Send again via SIM-2, Forward, Move to, Delete, Multi-Delete, Delete all, Lock/Unlock or Sort by.
- Page 39 photos, audio and video clips. Before you start sending and receiving e-mail messages, your phone must be configured to the network settings in order to connect to an e-mail server. Note: Only SIM-1 can be used to send and retrieve e-mail messages. Select Message from Main Menu, then select E-mail to open a list of default e-mail folders: New, Inbox, Drafts, Outbox, Sent, Settings and Accounts.
- Page 40 The e-mail message will be temporarily placed in Outbox while sending is in progress. If sending is unsuccessful, the message will be left in the Outbox with the status “Failed”. Inbox All received e-mail messages are stored in the Inbox. To access your e-mail messages, you must first set up your e-mail account and create a Mailbox.
- Page 41 • Read E-mail Note: Exercise caution when opening messages. E-mail messages may contain malicious software or otherwise be harmful to your device or PC. In the read e-mail of Inbox screen, press [LSK] pop-up menu for operation below: - Expand: If there are multiple contacts in the e-mail, expand all contacts of this e-mail - Reply: Automatically adds the sender number or mailbox address to the receiver column in the e-mail editing interface - Reply to all: Automatically add the sender or receiver number or mailbox address to the receiver...
-
Page 42: Video Call
* Outgoing server: SMTP Server Name, SMTP Server Port, Use SSL/TLS, Authentication * Incoming server: Server Type, Server Name, Server Port, Use SSL/TLS - Msg preferences: Download mode, Maximum message size, Leave copy on server (POP3), Save sent, Include original, Download limit, Read Receipt, Add signature - Signature: Enter text editor screen to edit content as signature. - Page 43 Camera Taking a picture Use the LCD screen as viewfinder for your picture. Hold the camera in a horizontal position with Camera button on top and use both hands to keep it still. To adjust the brightness, press [Up/Down Navigation key] when the Screen direction is Horizontal, press [Left/Right Navigation key] when the Screen direction is Vertical.
-
Page 44: Organizer
To adjust the brightness, press [Up/Down Navigation key] when the Screen direction is Horizontal, press [Left/Right Navigation key] when the Screen direction is Vertical Press [LSK] to change the video camera settings. Press [OK] or the [Camera] button to start recording the video. Record tone will sound to indicate that recording has started. - Page 45 - Snooze: Set the time for the alarm to sound again after turning it off. You can select Off, 2 minute, 5 minutes or 10 minutes - Ring: Change the alert tone - Rename: Change the name of alarm Select Status then select Start to save and enable the alarm settings. An alarm indicator will then be displayed at idle mode.
- Page 46 Calculator Your phone comes with a calculator function which can perform the four basic arithmetic operations: addition, subtraction, multiplication and division. Note: This calculator has limited accuracy and is designed for simple calculations. In the Organizer list, select Calculator then press [OK] to display the calculator screen. Keypad operation for calculator is as follows: - Use [0-9] numeric keys to enter a number - Press [*] key to enter a decimal point...
-
Page 47: Settings
3. In the To-Do list, press [LSK] then select Sort. You can then sort your tasks by date, by priority or by completion. World clock Your phone comes with a world clock function which can figure out the destination city. Note: This world clock has limited accuracy. - Page 48 Select Phone to display the following settings: Clock (Time and date): Use the settings to change the time and the date, as well as the format in which time and date are displayed. Select from the following settings: - Set time: Enter the current time - Set date: Enter the current date - Set time format: Select if time will be formatted to 12-hour or 24-hour clock - Set date format: Select how the date will be formatted...
- Page 49 that you can change. - Ring volume: Adjust the volume level of the ringtone - Message volume: Adjust the volume level of the message alert tone - Ringtone: Assign a ringtone each for voice call, video call and message alert - Keypad volume: Select volume level 0 to 6 of the tone when a key is pressed - Low battery tone: Set a warning tone On or Off when the battery power is already low - Vibration pattern: Set to On to make the phone vibrate when there is an incoming call or when a...
- Page 50 - Voice call divert: Use the call divert settings to set a phone number to divert voice calls to, for example, your voice mailbox. Open Voice call setting to display the following options: * Divert always: Divert all incoming voice calls * On busy: Divert all incoming voice calls if a call is currently active * No reply: Divert incoming voice calls after the phone has rung after a length of time.
- Page 51 an unsuccessful call attempt - Headset auto answer:Set to On to enable your phone so that incoming calls are automatically answered after five seconds (e.g. if you are using a headset) - Prefix setting:You can create a list of prefix numbers used for international access codes and area codes - Alert tone:Open Alert tone to display two options: * Connection: Set to On and the phone will sound when the recipient picks up your call...
- Page 52 In Network, the following options are displayed: SIM selection, Search type, New search, Preferred network and SIM-1 network mode. - SIM selection:Select Automatic and the phone will automatically register to both networks after power On. Set to Manual and the phone will automatically register to network of the selected SIM after power On.
-
Page 53: Connectivity
- Secondary DNS:the IP address of the secondary Domain Name Server - Security:Set the security for network, include None, PAP and CHAP; In the interface of Select active data profile, you can select profile of MMS, JAVA, Internet or e-mail application. - Page 54 From the Bluetooth settings, select Paired devices then press [OK] then select Search for device. Your phone will then search for all Bluetooth enabled devices within the 10 metre range, and display a list of devices found. Select a device you want to pair with then press [OK]. You will be prompted to enter a password.
-
Page 55: Internet
PC synchronization You can connect your phone to your PC and use the PC Suite/Tools software provided on the Companion CD and perform the following: • Synchronize your phone's calendar, contacts and e-mail with your PC. • Install programs and applications on your phone. •... - Page 56 Home You can access Internet via a home page using an assigned URL. Bookmarks The bookmark can store interesting websites, and can be configured freely for easy recall. When the cursor is in a web page, select the menu in the interface to pop up the options below: Details: Displays name, URL and update time of the web page Edit: Edits the title and address of the web page Change order: Change the order of web page in list...
-
Page 57: Sim Toolkit
the [RSK/LSK] keys in the screen will prompt the operations, the contents are displayed in the middle and the underlined text refers to the super linkage. Press [LSK] for pop up menu, press [Up/Down Navigation key] to scroll among functions: Add to bookmark, Bookmarks, Navigation, Advanced, View, Send link, Home, Settings. -
Page 58: Reference Information
4 Reference Information Input Text You can enter text and numbers on your phone using the keypad. Your phone supports some input modes for entering text and numbers: T9 mode T9 input method predictive text input mode Abc, abc, ABC Multi-tap input mode Numeric input mode When you select a field that requires text or numeric entry, the phone automatically defaults to the... - Page 59 to confirm your choice and then a space is inserted automatically. Press [OK] to confirm your choice. User Manual Page 59 of 65...
-
Page 60: Accessories
Specific standby and talk times shall be determined subject to the actual condition of use. Note: The use of other types of chargers, batteries or any accessories other than those recommended by General Mobile will invalidate the manufacturer‟s warranty of the phone. USB data cable In order to synchronize data or communicate between your phone and the compatible PC, you can connect them through a USB data cable. -
Page 61: Troubleshooting
6 Troubleshooting Thank you for using the 2.0 Duo SIM mobile phone by General Mobile. In case of any problem regarding mobile phone usage, please contact our local distributor or any of our General Mobile authorized service centers/partners in your locality. - Page 62 o call barring to check configure. 4. Go to Settings-> Security -> Fixed numbers to check configure. 1. Powered on the phone 1. Phone is powered off. 2. Go to Fail to receive incoming call 2. Incoming calls barring Settings->Calls->Voice/Vide maybe on o call barring to check configure.
-
Page 63: Care And Maintenance
7 Care and maintenance A phone contains delicate electronic circuitry, magnets and battery systems. You should treat it with care and pay attention to the following: This phone is fitted with an internal battery that can only be replaced by a qualified service engineer. There is a risk of explosion if the battery is replaced with an incorrect battery type. - Page 64 In the unlikely event of a battery leak, take care to keep the battery discharge away from your eyes or skin. If the leakage does come into contact with the eyes or skin, please flush thoroughly in clean water and consult a doctor. Remove a worn out battery immediately.
-
Page 65: European Rf Exposure Information
8 European RF exposure information This mobile phone complies with the EU requirements for exposure to radio waves. Your mobile phone is a radio transceiver, designed and manufactured not to exceed the SAR limits for exposure to radio frequency (RF) energy, which SAR value. While there may be differences between the SAR* levels of various phones and at various positions, they all meet the EU requirements for RF exposure.
Need help?
Do you have a question about the DST3G SMART and is the answer not in the manual?
Questions and answers