
Subscribe to Our Youtube Channel
Related Manuals for iSys V24

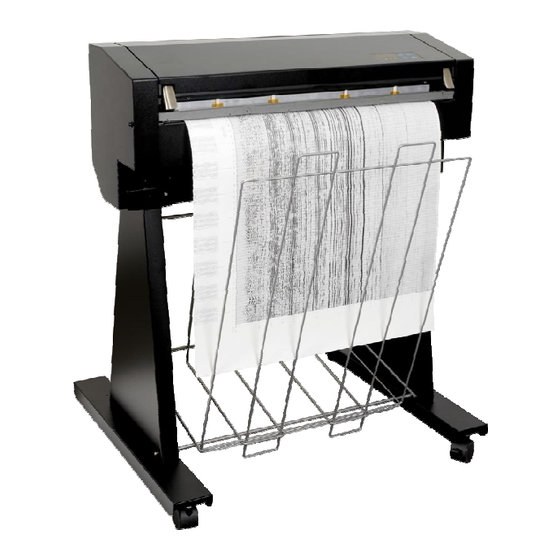
Summary of Contents for iSys V24
- Page 1 V24 User Guide iSys - The Imaging Systems Group Inc. © Copyright 2009...
- Page 2 Thank you for selecting the V24 plotter. The employees and management at iSys will make every effort to assist you with operation of your new plotter. It is our sincere desire that your ownership experience meets your expectations. This guide is provided to help you easily install and operate your new plotter. It contains important information on the features and functions of the V24.
-
Page 3: Table Of Contents
Contents Unpacking ......................... 4 Location of the V24 Plotter ....................5 Overview ........................... 5 Cable Connections ......................6 Versatec™ Interface Setup ....................8 Driver Installation ......................9 Quickdraw Media Installation ..................18 Quickdraw Media for the V24 ..................20 Starting the V24 Plotter ....................21 Warranty, Maintenance and Service ................ -
Page 4: Unpacking
NOTE: Inspect the shipment for any concealed damage that may have occurred during shipment. Report any damage to the carrier of the shipment and the iSys Technical Support team immediately. While iSys assumes no liability for “in transit” damage, we will assist in damage claims with carriers. -
Page 5: Location Of The V24 Plotter
Location of the V24 Plotter Properly locating the V24 will help to enhance its performance and extend its useful life. The plotter has a wide operating range and functions well under various conditions. For best performance, we recommend the following conditions: •... -
Page 6: Cable Connections
Cable Connections INSTALLING THE DATA CABLE. 1. Push the black button on the left side panel (figure 3). 2. With the black button sticking out, pull on the button to open the side panel exposing the data bulkhead (figure 4). - Page 7 Install data cable into the bulkhead and secure thumb-screws (figure 5). Slide cable into the exit slot on the bottom back corner and close side panel (figure 6). To lock side panel, press the black button. INSTALLING THE AC POWER CORD WARNING: Electric shock warning.
-
Page 8: Versatec™ Interface Setup
Versatec™ Interface Setup CAUTION: The electronic components of the V24 plotter can be damaged by electrostatic discharge (ESD). To avoid ESD, maintain contact with a ground source. A grounded wrist strap or similar should be used. WARNING: Electric shock warning. 1. -
Page 9: Driver Installation
Driver Installation Driver is compatible with Microsoft XP, Vista, and Windows 7: 32/64bit Step 1 Go to Windows Start Settings Printers and Faxes Step 2 Select Add a Printer on the Left hand side of the window Press Next... - Page 10 Step 3 Welcome to the Add Printer Wizard Press Next Step 4 Select Local printer attached to this computer Press Next...
- Page 11 Step 5 Select Create a new port: Type of port Standard TCP/IP Port Press Next Step 6 Welcome to the Add Standard TCP/IP Printer Port Wizard Press Next...
- Page 12 Step 7 Enter the printers IP Address into the box Press Next Step 8 Under Device Type Select Standard Generic Network Card Press Next...
- Page 13 Step 9 Completing the Add Standard TCP/IP Printer Port Wizard Press Finish Step 10 Select Have Disk...
- Page 14 Step 11 Select Browse Locate and select the V24 Driver Press Ok Press Next Step 12 Select the iSys V24 Printer Press Next...
- Page 15 Step 13 Enter the printer name Select yes if you would like the iSys V24 to be your default printer or no if you do not Press Next Step 14 Select a sharing option Press Next...
- Page 16 Step 15 Enter a location and a comment Press Next Step 16 Select Yes or No to print a test page press Next...
- Page 17 Step 17 Completing the Add Printer Wizard press Finish...
-
Page 18: Quickdraw Media Installation
Quickdraw Media Installation CAUTION: Do not touch the thermal print head. Natural body oils can damage it. Scratches in the print head will affect image quality. Print head damage caused by users is not covered by warranty. Your plotter comes with a sample roll of media properly installed. To replace or change media, refer to the following procedure: 1. - Page 19 8. Ensure the lid latches are in the “open” position. 9. Lift up on lid and pull up on lid support to release, slowly lower the lid. 10. Close and seat the lid latches by pressing down on one corner and pushing the latch lever down and in.
-
Page 20: Quickdraw Media For The V24
Quickdraw Media for the V24 The iSys QuickDraw line of direct image media is matched to the performance characteristics of our plotters to give you consistent, high quality results at an economical price. Qualified QuickDraw papers are an essential part of the imaging system that helps to assure peak performance and long, trouble-free imager life. -
Page 21: Starting The V24 Plotter
Starting the V24 Plotter To start the plotter, press the main Power (ON/OFF) Switch shown in Figure 1. The plotter will go through its start up sequence, beginning with the warm-up phase, which brings the unit to its operating temperature. NOTE: During the warming phase, “Warming”... - Page 22 Toggles between ONLINE and OFFLINE modes. With plotter OFFLINE, pressing this button once will cause the plotter to formfeed up to 250 inches, pressing and holding the button will feed media until button is released. With plotter ONLINE, and receiving data pressing this button will cancel the current job plotting.
- Page 23 USER MODE Selects between two user-defined settings. Default “User 1”. To access functions in either user mode: • Select ON/OFFLINE • Press MENU button once “User Mode” is displayed • Then “User 1” will be displayed • Press UP Arrow to change setting SPEED Adjust the speed of the plot output.
- Page 24 Change the number of bytes per scan (image width) by selecting the “BPS” option in the appropriate menu. Move up or down the scale by pressing the up and down arrows. Default “1184”. Range: 1184 ..594 (400 dpi resolution) 592 .....64 (200 dpi resolution) NOTE: The selected bytes per scan on the plotter must match the bytes per scan in the application software that is running on the attached computer host.
- Page 25 Default “Off”. Range: Off, 1..5 (darkest) NOTE: This setting can make the fill patterns look lighter or darker.
- Page 26 EOT CUT Automatically cuts the media when an EOT command is received from the host. This setting will advance the media past the cutter then cut the media off. Default “No”. Setting: Yes or No PRE-BUFF Helps hosts with slower data transfer rates to plot using a faster speed without the stop and start gaps.
-
Page 27: Warranty, Maintenance And Service
Warranty, Maintenance and Service WARRANTY The iSys written warranty is included with your shipment. Please take the time to read the warranty so you fully understand your coverage under its provisions. MAINTENANCE The V24 requires little routine or preventative maintenance. Recommended maintenance will enhance performance, extend useful life and can be performed quickly and easily at the installed location.
Need help?
Do you have a question about the V24 and is the answer not in the manual?
Questions and answers