
Summary of Contents for KERUI DP-8218G
- Page 1 Touch Keypad TFT Color Display GSM&PSTN Burglar Alarm System -8218G) User Guider...
-
Page 2: Table Of Contents
Table of the content Identification Section--------------------------------------------------------------------------------------4 1. Summarize------------------------------------------------------------------------------------------------6 2. System Features------------------------------------------------------------------------------------------6 3. Alarm system setup--------------------------------------------------------------------------------------6 4. Alarm Process----------------------------------------------------------- ---------------------------------8 4.1 Alarm process description----------------------------------------------------------------------8 4.2 Alarm SCHEMATICS---------------------------------------------------------------------------9 5 .Alarm System Operation and settings----------------------------------------------------------------9 5.1 Alarm Panel Initial Setup-----------------------------------------------------------------------9 5.2 Arm--------------------------------------------------------------------------------------------------9 5.3 Stay Arm--------------------------------------------------------------------------------------------10 5.4 Disarm----------------------------------------------------------------------------------------------10 5.5 Emergency alarm-------------------------------------------------------------------------------10 5.6 Phone number settings---------------------------------------------------------------------------10... - Page 3 5.22 Set remote control accompanying sound----------------------------------------------------------15 5.23 Scheduled arm and disarm time setting-----------------------------------------------------------15 5.24 Set CID number----------------------------------------------------------------------------------------15 5.25 Set the Hand shake Tone------------------------------------------------------------------------------15 5.26 Set the mode of uploading arm/disarm message-------------------------------------------------15 5.27 Set scheduled self-checking Test Time -------------------------------------------------------------15 5.28 Set scheduled self-checking Test Week-------------------------------------------------------------15 5.29 Set the LCD save ON/OFF----------------------------------------------------------------------------15 5.30 Set Tamper ON/OFF------------------------------------------------------------------------------------15 5.31 Restore factory setting----------------------------------------------------------------------------------16...
- Page 4 5.37.25 Stay arm-------------------------------------------------------------------------------------------20 5.37.26 Turn on relay-------------------------------------------------------------------------------------20 5.37.27 Turn off relay------------------------------------------------------------------------------------20 5.37.28 Query the General Parameters --------------------------------------------------------------20 5.37.29 Query the number of ring tones and test line----------------------------------------------20 5.37.30 Query the phone alarm number --------------------------------------------------------------20 5.37.31 Query the Helpline number -------------------------------------------------------------------20 5.37.32 Query SMS number -----------------------------------------------------------------------------20 5.37.33 Query alarm center number-------------------------------------------------------------------20 5.37.34 Query the system date and time---------------------------------------------------------------20...
-
Page 5: Identification Section
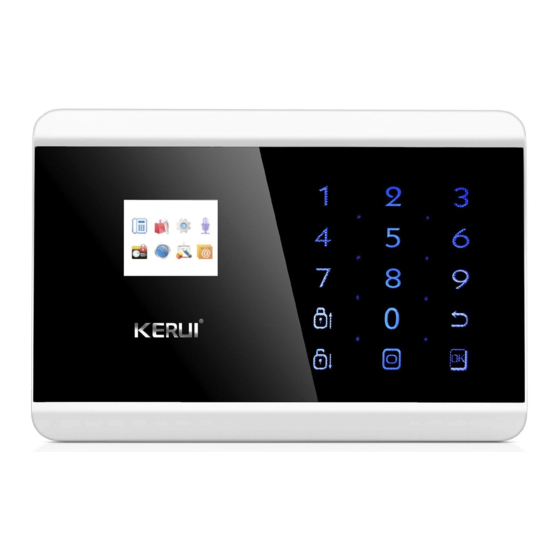
Identification Section: Control Panel: Receiver and control center of alarm system Remote Control: Applied to switch the status of arm, disarm, stay and for emergency alarm. Need to learn to the control panel first. Detector: Install detector in the detection area, sent alert to host once detector was triggered. Such as PIR detector, door sensor, gas detector, smoke detector etc. -
Page 6: Summarize
Network code: defined the alarm attributes(such as burglar alarm, fire alarm) by three-digit numbers Build-in siren: can setup to ring the siren or not when alerting. Defense Zone Type: 8 types Defence zone optional NORMAL Defense Zone: The Panel only works on the arming status. When disarming, there is no response. -
Page 7: System Features
2. System Feature ■ TFT color display, humanized menu, voice prompt and easy to use. ■ Up to 99 wireless zones, each wireless zones can be defined as one of the 8 zone types, each zone can setup the siren independently. ■... - Page 8 The touch-key figure of the host...
-
Page 9: Alarm Process
■Notice Display ”DISARM” Alarm host in DISARM status Display ”ARM” Alarm host in ARM status Display ”STAY ARM” Alarm host in STAY ARM status Display ”XX zone XX zone in a ARM status, display arming” Display”98 zone arming” Emergency arming by pressing the emergency button Display”97 zone arming”... -
Page 10: Alarm Schematics
Alarm System Operation and settings 5.1 Alarm Panel Initial Setup At first, Connect the telephone line to the perimeter phone interface of the host, and connect telephone to the inside phone interface. Secondly, connect the siren to the siren interface, and plug in adapter. At last, the host will voice prompt “welcome to use alarm system”, then it’s done after switch the power switch to “ON”. -
Page 11: Stay Arm
5.5 Emergency alarm When an emergency occurs, press emergency button on the remote control or on panel to activate alarm. Remark: If password protect function is open, you need to enter password before other operations, the initial password is 1234. 5.6 Phone Number Settings The model can support 6 groups of alarm numbers, 2 groups CID numbers, 3 groups help numbers, 6 groups SMS numbers. -
Page 12: Set Up Voice Alarm Phone Number
5.6.3 Set up Contact ID phone number As picture 5-1, Press 【menu】 to enter main menu, Press 【Up/Down】 move the cursor to 【 2. CID numbers】 , press【OK】or number【2】to enter CID number settings, choose group number 1-2 , then input CID number like 88889999. -
Page 13: Delete Sms Phone Number
5.7 Pre-record Voice Message Alarm panel will play a pre-recorded voice message in the alarm call. As follow: Picture 5-2 As picture 5-2, press 【menu】 to enter main menu. Press【4】 to enter message recording, and then press 【1】to start recording , speak your message to the panel for recording. System will record 10 seconds and then automatically exit. -
Page 14: Add Detector
5.8.3 Add detector As picture 5-3, press【2】to enter add detector , the menu would be indicate that "type the Number (00~99)", if add 1st detector , please input 01; add 89 , input 89. Press【OK】to save the settings. Then press any key of the detector to send a signal to the alarm panel, Panel beep twice, voice prompt "Set successful"... -
Page 15: System Voice Volume Adjustment
5.14 Set system voice ON or OFF As picture 5-4.press 【 3.Voice Setting】 ,then press 【 Down】 move the cursor behind 【System voice】 .press 【Menu】switch switch ON or OFF.OFF means the alarm system no voice in the operation, but with the press sound. -
Page 16: Set Remote Control Accompanying Sound
5.22 Set remote control accompanying sound Picture 5-5 As picture 5-5,press 【 6.sound setting】 ,The menu prompts "Enter number(00-99)"then press 【OK】 ,press 【Menu】switch ON or OFF,On is means press the remote control in these number,the siren will sound "di di". 5.23 Scheduled arm and disarm time setting As picture 5-5.press 【... -
Page 17: Set Tamper On/Off
5.30 Set Tamper ON/OFF As picture 5-5,press 【9.LCD Save&Tamper】 ,press 【OK】 move the cursor behind 【Tamper】 ,press 【Menu】 switch ON or OFF.OFF is means the host not alarm when the tamper is trigger.Press 【OK】 to save. 5.31 Restore factory setting AS picture 5-5,press 【0.Restore Factory】... -
Page 18: Set Zones Dial Calling Number Group
5.33.4 Set zones dial calling number group As picture 5-6,input zones number(1-99) behind 【Enter Number】,press 【OK】,then press 【down】 move the cursor behind 【Zone dial】,input the calling number group when this zones alarm,can be used123456 group,but if the zone type is help zones,the group fixed for the help group.press 【OK】 to save. -
Page 19: Sms Commands
5.37 SMS commands The following You can set the alarm panel to the menu ,also can use SMS message to set it . instructions are only for SMS command to control panel remotely: 5.37.1 Set phone alarm number Syntax :1234+3+group number1-6+phone number+# Example :to set 13812345678 as the first group phone alarm number ,send message to the alarm panel:12343113812345678# 5.37.2 Set center number... -
Page 20: Scheduled Arm And Disarm Time Setting
5.37.10 Scheduled arm and disarm time setting Syntax :1234+57+Group NO 01-04 + AAAA Scheduled time of arm+BBBB Scheduled time of disarm+week number +# Example: set up the second group scheduled time to arm at 12 : 00 am and disarm at 18:00 (means 06 :... -
Page 21: Set The Mode Of Uploading Arm/Disarm Message
5.37.18 Set the mode of uploading arm/disarm message Syntax : [1234]+[91]+[0-3] +[#],Example: Only upload the arm message ,send the message to the alarm panel:1234911#。Here 0 means Don't upload any message 1 Upload the arm message 2 Upload the disarm message 3 Upload the message of ARM/DISARM。... -
Page 22: Query The Defense Zone Type
5.37.36 Query the defense zone type Syntax :[1234]+[60]+[zone number 01-99]+[#]。 5.37.37 Query the alarm mode of the wired zone Syntax : [1234]+ [61]+[zone number 51-52]+[#]。 5.37.38 SMS message content setting Syntax : [1234]+[80]+[zone number 01-99]+[Content] +[#], Example : set the 60 zone message content as : front door open ,send the message to the alarm panel : 12348060front door open #。... -
Page 23: Guideline For Installing Door Or Window Sensor
Detailed parameters: The alarm should be compatible with PT2262, PT2240 and EV1527. Using PT2262 encoding, the resistance is recommended 1.5M-4.7M; using with EV1527 encoding, the resistance is recommended 150K-470K. Alarm loudness: 110dB Detailed accessories parameters: The alarm should be compatible with PT2262, PT2240 and EV1527. Using PT2262 encoding, the resistance is recommended 1.5M-4.7M;... -
Page 24: Guideline For Installing Pir Motion Sensor
7. Guideline for Installing PIR Motion Sensor Before use, make sure the power switch of PIR motion sensors is at the ON position. Installation height is about 2.2 meters above ground and the optimized detection angle for most motion sensor is 90 degree. The sensor should face the detected area with this consideration for best coverage. It is advised to install with the face of motion sensor perpendicular to the most probable moving detection of people for the highest effective detection. - Page 25 Troubleshooting Reasons Methods 1,No dial for alarm 1. no arming 1. do arming operation 2. alerting phone unsetted re-set according to the 3. parts improperly installed, specification distance too far away 3. coordinating the location of 4. code no match parts 4.
Need help?
Do you have a question about the DP-8218G and is the answer not in the manual?
Questions and answers