Advertisement

Operating & Safety Manual
RL350/550/850
www.friendlyrobotics.com
DOC0015D

Advertisement

Table of Contents
loading
Need help?

Need help?

Do you have a question about the RL350 and is the answer not in the manual?

Questions and answers

Summary of Contents for Robomower RL350

  • Page 1 Operating & Safety Manual RL350/550/850 www.friendlyrobotics.com DOC0015D...
  • Page 4: Ec Declaration Of Conformity

    1. F. Robotics Acquisitions, Hatzabar St., Industrial Zone, Pardesiya, Israel declares that the machines described in item 2 conforms with the directives listed in items 3 & 4. 2. Product: 24 Volt Battery operated automatic lawn mower, models RL350, RL500, RL550, RL800 RL850 and RL1000*.
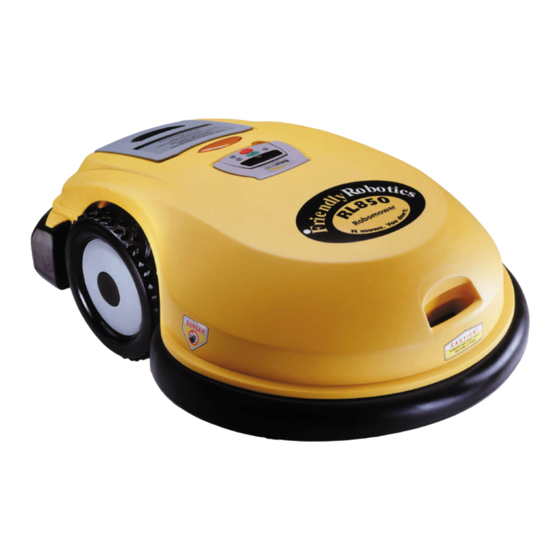
  • Page 5 Thank you for purchasing our product. We know that you will enjoy the extra free time you will have while using RoboMower to mow your lawn. When set up and used properly, RoboMower will operate safely on your lawn and provide you with a quality of cut matched by a few mowers of any kind. You will be impressed with your lawn’s appearance and best of all, RoboMower did it for you.
  • Page 6: Table Of Contents

    Safety Features …………………………………………………………….….…..…. 8 What’s in the Box ……………………………………………………………….…... 10 Chapter 1 – Perimeter Wire Setup………………………………………….….….. 12 ® Chapter 2 – Preparing the RoboMower …………………………………………. 21 Chapter 3 – Manual & Automatic Operation…………………………………….…28 Chapter 4 – Charging…………………………………………………………………33 Chapter 5 – Settings and Advanced Features…………………….…………….…36 Chapter 6 –...
  • Page 7: Safety Warnings & Precautions

    Do not use RoboMower for any purpose other than for which it is intended. Never allow children or people unfamiliar with these instructions to operate RoboMower®. Never mow while people, especially children, or pets are nearby. The user is responsible for accidents or hazards occurring to other people or their property.
  • Page 8 1. Use caution when lifting RoboMower, it’s heavy! Before lifting it, always take out the battery. 2. Use the Manual Controller to drive it from place to place (See section 2.4) 3. In case of different height level or stairs, remove the Power Pack from the mower and carry the mower by the carrying handle (See Figure no.
  • Page 9 Keep hands and for any reason. feet away. Do not dispose Serious injury RoboMower or any other can occur. part of it as unsorted municipal waste – it should be collected separately.
  • Page 10: Safety Features

    (<1 second). 5. Automatic Mode Recognition The RoboMower is designed so that it cannot be operated in the manual mode while the Manual Controller is in its pocket and it cannot operate in the automatic mode while the Manual Controller is removed.
  • Page 11 In such event, the RoboMower will stop operation of at least that motor and possibly the mower itself and indicate that the motor is cooling down. While unusual, this may happen when the mower is put in grass that is severely overgrown;...
  • Page 12: What's In The Box

    1. RoboMower 2. Power Pack 3. Operating & Safety Manual 4. Standard Power Supply Used for recharging the RoboMower power pack. Indoor use only. 5. RoboRuler Used for setting the distance of the perimeter wire from the lawn edge. 6. Pegs...
  • Page 13 The virtual wall is visible only to the RoboMower, keeping the RoboMower where you want it, on your lawn. The perimeter switch must be turned on to activate the perimeter wire before the RoboMower will operate.
  • Page 14: Chapter 1 - Perimeter Wire Setup

    While many lawns can be effectively cut during the course of one single, most lawns and homes are not laid out in such fashion to efficiently allow the RoboMower to operate freely all over the lawn. Because of this, the typical setup of the perimeter wire may actually be two separate areas or zones, as they are called.
  • Page 15 It is not necessary to bury the perimeter wire, though you may do so if you wish, up to 3 inches (7.5 cm). Small pegs or stakes are supplied with the RoboMower and they are used to fasten and hold the perimeter wire to the ground, below grass level.
  • Page 16 1.5 Narrow Areas And Narrow Passes There is a limitation to the width of an area the RoboMower can effectively navigate through in order to move into another larger, but attached area. A narrow pass is defined as an area that narrows down substantially from the initial width and in which the RoboMower must pass through in order to access and cut other zones, an hourglass shape.
  • Page 17 Young, sapling aged trees are not good examples, as they are not very rigid. Other obstacles that are not rigid and at least 6 inches high (15 cm) must be protected from the RoboMower using the perimeter wire. This is done as part of the setup process and is commonly referred to as a perimeter island. Good examples of these types of obstacles are flowerbeds, islands, small trees and low bed edging.
  • Page 18 Figure 1.6 – Perimeter Wire Setup Distances for Obstacles Tree too close to perimeter, less than 4 Trees large enough to allow Small tree, must feet (1.2m), loop out with Robomow to bump into do not exclude with perimeter perimeter wire require a perimeter wire around it wire Minimum distance...
  • Page 19 The key is to set up the zones that will allow the RoboMower to operate with the greatest efficiency, even if it is more than one or two zones. You will quickly find that mowing the lawn in these zones is an easy process that will allow you greater flexibility in your mowing habits.
  • Page 20 Bear in mind that a 15-degree slope, though it may not sound very steep, is in fact a relatively steep slope. In cases where it is attempted to operate the RoboMower on a slope that is too severe, normally the front of the machine will try to rise from the ground surface slightly when climbing the slope vertically.
  • Page 21 Using a small flat blade Strip back ¼ inch (6 mm) of screwdriver, tighten these insulation from each wire end two screws to secure the and insert each perimeter wire perimeter wires into the end into hole of connector. connector Figure 1.10 –...
  • Page 22 The Perimeter Switch has an automatic shutoff feature, eliminating the need for you to turn it off after each use. It will shut itself off after 5 continuous hours of operation. You can expect a good set of alkaline batteries in the Perimeter Switch to last most, if not all, of a normal cutting season. You may manually turn the perimeter switch off by pressing the ‘ON’...
  • Page 23: Chapter 2 - Preparing The Robomower

    2.1 Inserting Power Pack Fuse Your RoboMower is shipped with the Power Pack fuse removed and it will not operate without it. The fuse is contained in a small plastic bag attached to the top of the Power Pack. Remove the Power Pack from the RoboMower and insert the fuse.
  • Page 24 2.2 Using The Manual Controller The RoboMower is equipped with a Manual Controller. It enables you to manually drive and operate the mower. To get started on using the Manual Controller, study figure 2.3 to view the various operating controls and their functions. Refer to Chapter 5, Manual Operation for full details regarding use of the Manual Controller.
  • Page 25 Manual Controller has been removed from its’ holder and is in the possession of the user to operate the buttons. See Figure 2.4. The manual mode is used to primarily move/drive the RoboMower into the lawn and to return it after mowing. It is also used for moving the RoboMower around to other areas if needed.
  • Page 26 2.5 Setting The Cutting Height And Ground Clearance Remove the Power Pack before making any adjustments. The RoboMower has two basic adjustments, cutting height and ground clearance. When using the high cut blades, the cutting height is adjustable from approximately 1.5 inches to 3.5 inches (3.8 cm – 8.9 cm) and with the low cut blades from 1 inch to 2.5 inches (2.5 cm –...
  • Page 27 RoboMower. To re-calibrate, simply drive the RoboMower to another smooth level spot at least 10-15 feet (3 - 4.5 m) away from the spot first used, and repeat the same steps for calibration. Once calibration is successful, the message requiring you...
  • Page 28 Figure 2.10 – Calibrating Sequence LCD Display Action Requi Zone A Zone A Dock Zone Dock Zone GO’ Press ‘ Press GO Press GO Press GO Press GO GO’ Set Country Set Country Set Country Set Country Press ‘ Press GO Press GO Press GO Press GO...
  • Page 29 Press GO to test Walk along the side of the RoboMower while it is following the edge. At any point where the mower position is too far to the outer edge of the lawn area, note this area and slightly move the wire towards the interior.
  • Page 30: Chapter 3 - Manual & Automatic Operation

    ‘Speed’ button once while in the process of driving the mower. Position the RoboMower at least 6-8 feet (1.8 – 2.4 m) from any straight length of perimeter wire, with the front of the mower pointing to the perimeter wire. Figure 3.1.
  • Page 31 During this process, it will also make other turns and moves in order to navigate itself back and forth across the lawn. Keep in mind that the RoboMower will not mow all the grass on its first pass; in fact it will leave uncut grass in between many of the legs it makes. This is expected and is entirely normal.
  • Page 32 Figure 3.6 – Text Message After Pressing ‘GO’ Mowing Complete When the RoboMower has operated the allotted time, it will simply stop in the lawn, waiting for you to drive it back home and plug it into the , ready for the next mowing session. As discussed...
  • Page 33 Manual Mowing (not available in RL350) You have the ability to manually activate the blades on the RoboMower in order to trim small areas. After the blades are activated you may drive the mower using the navigator button and you may cut in any direction the navigator button will operate, including reverse.
  • Page 35: Chapter 4 - Charging

    Charging 4.1 Charging Of all the areas regarding the RoboMower, proper charging of the Power Pack is second only to safety in importance. Failure to follow the charging guidelines will result in poor performance and a short Power Pack life. After the completion of any daily cutting session it is very important to bring the RoboMower to...
  • Page 36 It is the level two system that communicates to you through LCD messages and audio. The basic assumption of the system is that the RoboMower will be connected to a Power Supply at all times when a Power Pack is inserted in the mower, except when in operation. This assumption is made because this is the only way to insure that the Power Pack will always deliver satisfactory performance during operation and will also provide a reasonable service life.
  • Page 37 LCD displays the message in Figure 4.5 is the RoboMower fully charged and ready for mowing. And lastly, use the RoboMower for the job it was designed to do, cutting normal levels of grass growth. The RoboMower can operate under two different run-time scenarios; 1) operate the maximum time...
  • Page 38: Chapter 5 - Settings And Advanced Features

    Chapter 5 Settings and Advanced Features 5.1 User Options Lifting the Manual Controller from its holder will change the text display on the LCD to the manual operating menu, as seen in Figure 5.1. Manual Figure 5.1 User options Pressing ‘GO’ once will take you to the next screen, ‘User Preferences’. Figure 5.2. Using the ‘Up ⇑...
  • Page 39 Allows the user the option of setting the operating time from the ‘MAX’ default setting to times ranging from 20 minutes up to 2:40 hours (1:40 hours in RL350). Figure 5.5. This option is available for up to 4 different zones, Dock Zone, Zone B, C or D. Having four different zones can allow you to set operating time for several different zones that are of varying sizes, not requiring the same operating time for mowing.
  • Page 40 Wide scan will increase the distance between subsequent legs of mowing after each movement off of the perimeter wire. If it appears that the RoboMower is simply driving along the same path back and forth, activate wide scan.
  • Page 41 The anti-theft system provides the user a disabling function that will prevent anyone from using or driving the RoboMower unless they have the valid code to enter. You will be prompted to enter a four- digit code of your choice to use as your personal security code. Use the scroll arrows in order to change each digit position to a different number and then press ‘GO’...
  • Page 42 When selected, the safety test feature will allow you to test the primary safety devices on the RoboMower; 1) front and rear bumpers, 2) lift sensor and 3) the Manual Controller buttons. Follow the prompts on the menus for testing. Never use the RoboMower with a safety device or feature not properly operating.
  • Page 43: Chapter 6 - Text Messages And Troubleshooting

    Text Messages and Troubleshooting Messaging The RoboMower is equipped with a sophisticated monitoring system that will notify you in the form of a text message in the LCD panel when common operational faults occur. In addition, it will also communicate in text form several messages that are meant as a prompt to the user to perform a certain function or action.
  • Page 44 - The RoboMower has driven onto an obstacle, raising the front end. Remove or exclude this object from the mowing area. - The RoboMower is being used on a slope too Front Wheel steep for safe mowing. Exclude this from the...
  • Page 45 Replace lamp - The Operating Lamp is burnt out Operating Bulb as soon as possible - Calibration failure from interference in the - Move the RoboMower 10-12 feet (3-4m) from Retry elsewhere immediate area this spot and attempt calibration again.
  • Page 46 - If not connected to the Power Supply at all times when not in use, the RoboMower will - Mower is in deep sleep. conserve power by entering into a deep sleep mode.
  • Page 47 Problem Encountered Probable Cause/Event Corrective/User Action RoboMower has crossed over wire during operation CAUTION The RoboMower is designed to remain within an active perimeter of your lawn when - Refer to the setup rules for wire placement, - Improper perimeter wire setup OR properly installed.
  • Page 48 Watch the full operation of edge and confirm Obstacle along path no obstacles are present RL500 & RL550, start edge from the RoboMower does not opposite side of the lawn. Contact your complete the edge service provider if this does not correct the Peculiar geometry of perimeter situation.
  • Page 49: Chapter 7 - Specifications

    Chapter 7 Specifications Bottom Dimensions 89cm l x 66.5cm w x 31.5cm h (35” x 26” x 12.5”) Weight 22.6kg (50lb.) Unit + 12.6kg (28lb.) Power Pack Front Noise level < 85 db (A) Mowing Width 3 Blades and a total cutting width of 53cm (21”) Cuts 1.5cm outside the wheels Mowing Height 6 settings at the front and 2 at the rear...
  • Page 50: Chapter 8 - Maintenance And Storage

    Machine sharpening is not recommended, as a good balance cannot be achieved after machine sharpening. See Figure 9.1. RoboMower has an automatic reminder to replace the blades after every 200 hours of operation. ’Replace blades – every 200 hours’ message appears and pressing the GO button will clear the message and...
  • Page 51 Whenever replacing the blades, it is recommended to restart the counter of the blades replacement reminder by choosing the ‘Blades replaced’ option under the ‘User Preferences’ menu and press the GO button again to clear the reminder. Figure 8.1 Squeeze tabs & pull Squeeze tabs &...
  • Page 52 Fully charge the Power Pack till ‘Ready keep charging’ is displayed and store it separately from the RoboMower off the ground i.e. on a wooden shelf in a dry location and a cool place not colder than -4ºF (- 20 ºC). A fully charged Power Pack may be stored for up to 3 months before recharging it, if stored in a cool, dry place.
  • Page 53: Chapter 9 - Accessories

    Chapter 9 Accessories Perimeter Switch Convenience of having a switch for each zone and not moving one switch from zone to zone. Peg Pack (50) For larger lawns and additional zones. Perimeter Wire For larger lawns and additional zones. Power Pack Convenience of increasing capacity with a second battery.
  • Page 54 Friendly Robotics RL Series Limited Warranty Friendly Robotics warrants to the original purchaser that the RL series ‘Product’ is free from defects in materials and workmanship when used under normal residential* purposes for a period of 24 months, 12 months for the batteries, beginning from the date of purchase.
  • Page 56 www.friendlyrobotics.com...

This manual is also suitable for:

Rl550Rl850

Table of Contents