Table of Contents

Summary of Contents for PHINX PASRW050-V
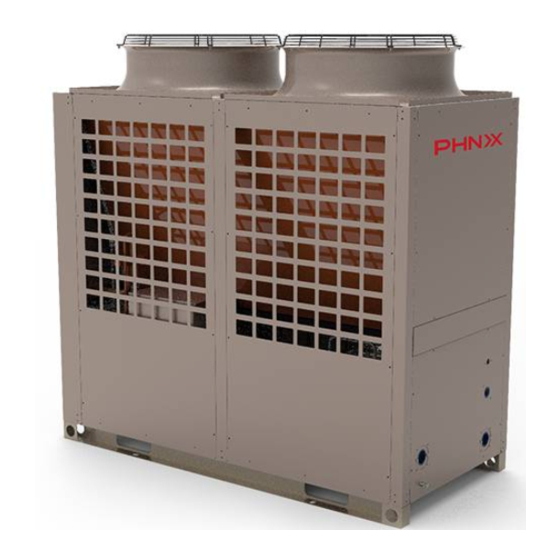
- Page 1 Air Source Water Chiller and Heat Pump Floor heating and Air-con Unit (with Super Heater) Installation and Instruction Manual This is for: PASRW050(SB)-V(-TD) PASRW060(SB)-V(-TD) PASRW080(SB)-V(-TD) PASRW100S(B)-V(-TD) PASRW130S(B)-V(-TD)
-
Page 2: Table Of Contents
CONTENT 1 Preface 2 Safety Precaution (1) Mark notes (2) Icon Notes (3) Warning (4) Attention 3 Specification (1) Nomenclature of the heat pump (2) Appearance and Structure of the unit (3) Specification data (4) Unit Dimension 4 Installation (1) Application of heat pump (2) Choose a right heat pump unit (3) Installation place (4) Installation method... -
Page 3: Preface
Preface In order to provide the customers with high quality, strong reliability and good versatility product, this heat pump is produced by strict design and manufacture standards. This manual includes all the necessary information about installation, debugging, discharging and maintenance. Please read this manual carefully before you open or maintain the unit. -
Page 4: Safety Precaution
Safety Precaution To prevent the users and others from the harm of this unit, and avoid damage on the unit or other property, and use the heat pump properly, please read this manual carefully and understand the following information correctly. Mark Notes Meaning Mark... -
Page 5: Warning
Safety Precaution Warning 安装前注意事项 Meaning Installation The heat pump must be installed by qualified personals, to avoid improper installation which can lead to water Professional installer leakage, electrical shock or fire. is required. Please make sure that the unit and power connection have good earthing, otherwise may cause electrical shock. -
Page 6: Attention
Safety Precaution ATTENTION 安装前注意事项 Meaning Installation The unit CANNOT be installed near the flammable gas. Once there is any leakage of the gas, fire can be occur. Installation Place Make sure that the basement of the heat pump is strong enough, to avoid any decline or fall down of the unit Fix the unit Make sure that there is circuit breaker for the unit, lack of... -
Page 7: Specification
Specification 1 Nomenclature of the heat pump P A S R W 050 S B- V- T D 1 2 3 4 5 6 7 8 9 10 11 P--Product heat source A--air source W--water source system loop X--gas loop S--water loop mode C--cooling only... -
Page 8: Specification Data
Specification 3. Specification data Unit Model PASRW 050(B)-V(-TD) 050S(B)-V(-TD) 060(B)-V(-TD) 060S(B)-V(-TD) 11.5 11.6 13.5 13.5 Cooling Capacity BTU/h 40000 40000 46000 46000 15.0 15.0 17.0 17.0 Heating Capacity BTU/h 52000 52000 58000 58000 Cooling Power Input Heating Power Input Running Current(Cooling/Heating) 18.3/15.7 7.1/6.4 8.4/7.1... -
Page 9: Unit Dimension
Specification 4.Unit Dimension Model:PASRW050/060(B)-V(-TD) 1015 Without water tank With water tank of the units of the units Remark: Water inlet Water outlet Drainage Sanitary hot water inlet Sanitary hot water outlet Model: PASRW050/060S(B)-V(-TD) 1015 Without water tank With water tank of the units of the units Remark:... -
Page 10: Installation
Installation Application of heat pump 1.1 Only for air-con WATER COUPLING AUTOMATIC AIR VENT CHECK-VALVE FOR WATER FLEXIBLE CONNECTION FOR WATER DIRTY DRAIN WATER THERMOMETER WATER PRESSURE METER WATER FILTER... -
Page 11: Choose A Right Heat Pump Unit
Installation Choose a right heat pump unit 2.1 Based on the local climate condition, construction features and insulation level, calculate the required cooling(heating) capacity per square meter. 2.2 Conclude the total capacity which will be needed by the construction. 2.3 According to the total capacity needed, choose the right model by consulting the heat. pump features as below: Heat pump features Cooling only unit:... -
Page 12: Water Loop Connection
Installation 5 Water loop connection Please pay attention to below matters when the water pipe is connected: Try to reduce the resistance to the water from the piping. The piping must be clear and free from dirty and blocks. Water leakage test must be carried out to ensure there is no water leaking. -
Page 13: Transit
Installation 8 Transit When the unit need to be hung up during installation, a 8 meters cable is needed, and there must be soft material between the cable and the unit to prevent damage to the heat pump cabinet. (See picture 1) Picture 1 WARNING DO NOT touch the heat exchanger of the heat pump with fingers or other objects!... -
Page 14: Usage
Usage 5.1 The displaying of the wire controller Reference Meaning refrigerant Symbol Colour circuit With LED ON With LED flashing Compressor 1and/or Start up request Amber Compressor 3and/or Start up request Amber At least one Amber compressor ON Amber Start up request Pump ON Amber Condenser fan ON... - Page 15 Usage 2 Functions associated with the buttons Button Unit status Button press Press at power ON Loading default values Go up a sub-group inside the programming Press once area, until exiting (saving changes to EEPROM) In the event of alarms, mute the buzzer Press once (if present) and deactivate the alarm relay Press for 5s...
- Page 16 Usage 3 Programming and saving the parameters [1]Start or stop unit ” lasts 3 seconds to start or stop unit, the press“ LED display as following: ”,the unit will be heating mode; If you press“ ”,the unit will be cooling mode; If you press“...
-
Page 17: Installation Of Remote Controller
Usage 5.2 Installation of remote controller (1)Connection G0 G Insert 120 ohm Max.l.=40m Telephone cable terminal resistor between Tx/Rx+ and Tx/Rx- for lines RS485 longer than 20 m twisted pair + shield Rx/Tx+, Rx/Tx-, Gnd RJ12 Power supply Fuse 250mA Max.l.=250m (min.cross-section 24Vac 17VA... -
Page 18: Symbol Meaning
Usage In the event where the RS485 connection is not performed correctly or the controller is off, the terminal will clear the display and show the message“OFFLINE” Pressing the “Up”+“Down”+“Sel” buttons together for more than 6 seconds displays the“INFO”screen containing information on the UC2 system and on the communication. -
Page 19: Functions Associated With The Buttons
Usage 5.4 Functions associated with the buttons Button Unit status Button operation Switch off buzzer or alarm relay, Press once if alarm active Manual reset of alarms that are no Press for 5 s longer active Enter parameter programming mode Press once after entering password Return to higher subgroup inside the... -
Page 20: Maintenance
Maintenance 、 Maintenance Check the water supply and air vent frequently, to avoid lack of water or air in the water loop. Clean the water filter in a certain period to keep good water quality. Lack of water and dirty water can damage the unit. -
Page 21: Ordinary Malfunctions And Solution
Maintenance 2.Ordinary malfunctions and solution 1) According to failure code of the controller,we can judge and solute the failure. display malfunction Reason resolution Normal working Water inlet temp. The sensor is open Check or change the sensor Sensor failure or short circuit Water outlet temp. - Page 22 Maintenance 2)、Look over and clear the failure according to below information. Failure Possible causes for the failure Solutions 1 shut off the power and check power supply; Heat pump 1 Wrong power supply 2 check power cable and make right connection 2 power supply cable loose cannot 3 check for the cause and replace the fuse or...
-
Page 23: Appendix (1) Appendix
Appendix Appendix 1 Install sketch map Especial installation( expandable water tank) automatic Pressure fill-water leakage valve valve Technical request: 1.Each connection must be connected tightly and have no leakage. 2.the arrowhead orientation of automatic filled- water must accord with water supply. 3.The pressure of automatic filled-water has been set,and please do not remove screw. -
Page 24: Appendix 2
Appendix Appendix 2: The installation explanation of automatic filled-water When automatic filled-water valve is installed,the arrowhead orientation of inlet water must accord with the orientation of valve ; 2 Automatic filled-water has been adjusted in advance to 1.5bar; 3 If readjust the pressure of inlet water,please operate as follows: * open the screw cap(C);... -
Page 25: Appendix
Appendix Appendix 3: The installation explanation of the leakage pressure valve. 1 The action pressure of leakage pressure valve 'is more than 3bar(valve is open), but the pressure can not be adjusted. 2 The valve will open automatically to make sure that the water loop of air-con system is safe when the water pressure in the backwater side is higher than the set pressure. -
Page 26: Appendix
Appendix Appendix5、 The unit's parameter Please set according the below table: Limits Unit Description ℃ Cooling set-point ℃ Cooling differential ℃ Heating set-point ℃ Heating differential... -
Page 27: Appendix 6
Appendix Appendix 6、Compensate temperature chart When the parameter set : R01=20 R02=2 R03=30 R04=2 R17=-0.5 R18=20 R19=15 R20=20 R31=-0.8, The compensate graphs in the heating and cooling mode are as follows: Heating mode: starting(stopping) temp.( C) 47.8(50) TgA1=-0.8=R31 43.8(46) 39.8(42) 35.8(38) 31.8(34) 27.8(30) -
Page 28: Appendix 7
Appendix Appendix 7、Connection of PCB illustration CC04 RO04 CC03 RO03 CC02 RO02 CC01 RO01 RLY4 RLY3 RLY2 RLY1 BHB10 Connections explanation: Meaning Symbol System1 mangtic valve outlet(220-230VAC) RO01 System2 mangtic valve outlet(220-230VAC) RO02 System1 alert outlet(220-230VAC) RO03 System2 alert outlet(220-230VAC) RO04 System1 mangtic valve inlet(220-230VAC)... - Page 29 Appendix 2.SYSB malfunction Table The common failure cause and solution. Display Malfunction Canse Solution System 1 exhaust temp.failure The sensor is open or short circuit Check or change the sensor P181 System 2 exhaust temp.failure The sensor is open or short circuit Check or change the sensor P281 Ambient temp.sensor failure...
-
Page 30: Appendix 8
Appendix Appendix 8 (1) Caution & Warning 1. The unit can only be repaired by qualified installer centre personnel or an authorised dealer.(for Europe market) 2. This appliance is not intended for use by persons (including children) with reduced physical sensory or mental capabilities, or lack of experience and knowledge, unless they have been given supervision or instruction concerning use of the appliance by a person responsible for their safety. -
Page 31: Appendix
Appendix (2) Cable specification 1. Single phase unit Nameplate Creepage protector Signal line maximum Phase line Earth line current No more than 13A 2×1.5mm 1.5mm 30mA less than 0.1 sec 30mA less than 0.1 sec 13~25A 2×4mm 30mA less than 0.1 sec 25~30A 2×6mm n 0.5mm... - Page 32 code:20090713-0003...
Need help?
Do you have a question about the PASRW050-V and is the answer not in the manual?
Questions and answers
hello.. what error code is it?bc1 thanks
The error codes for PHINX part number PASRW050-V include:
- P181: System 1 exhaust temperature failure (sensor open or short circuit)
- P281: System 2 exhaust temperature failure (sensor open or short circuit)
- P04: Ambient temperature sensor failure (sensor open or short circuit)
- E171: System 1 anti-freeze temperature failure (sensor open or short circuit)
- E271: System 2 anti-freeze temperature failure (sensor open or short circuit)
- P101: System 1 economizer inlet temperature failure (sensor open or short circuit)
- P201: System 2 economizer inlet temperature failure (sensor open or short circuit)
Each error indicates a sensor issue and the solution is to check or replace the sensor.
This answer is automatically generated