
Subscribe to Our Youtube Channel
Summary of Contents for Astralpool RTX
- Page 1 RTX Robotic Pool Cleaner with Top Access Operating Instructions Product 11711 Product Inst 321...
-
Page 2: Important Safety Instructions
Dear Customer, IMPORTANT SAFETY INSTRUCTIONS Thank you for choosing our product to clean your pool. We hope that you will enjoy using your new robot to maintain your swimming pool for years to come. READ AND FOLLOW ALL THE INSTRUCTIONS Before you begin to use your robot, please take a few minutes to carefully read these operating instructions. - Page 3 Operating the pool cleaner 1. Place the power supply (transformer) at least 3.6 meters / 11.8 feet from the pool and at 4. Place the unit in the water. Turn the unit least 12 cm / 4 Inch above the surface (fig.1). The transformer will supply low voltage to side to side in the water to allow air to the cleaner.
- Page 4 Operating the pool cleaner Grounding Plugs Type I The power supply must be connected to a grounded 3 conductor socket. The mains power supply To plug the cable (Fig A) into the socket on the power supply (Fig. B), please do the must be connected via a GFCI (ground fault circuit interrupter) or RCD (residual current device) following: having a rated residual operating current not greater than 30mA.
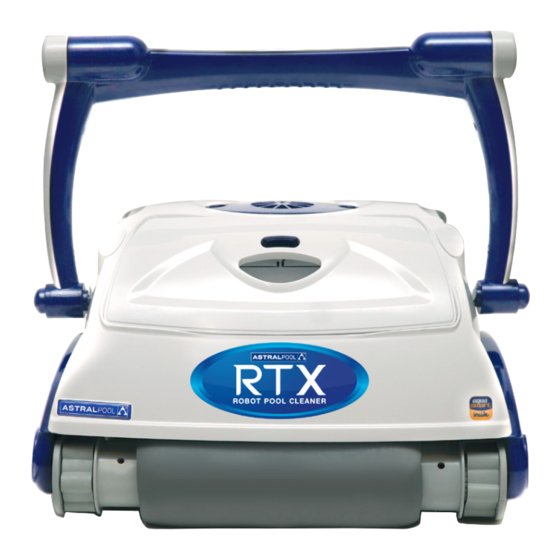
- Page 5 Operating the pool cleaner and power supply a. Power LED The blue LED flashes when the power supply is in standby mode and lights continuously when the pool cleaner is operating.The power button switches between ON and STANDBY b. "POWER" button The button switches between "ON"...
- Page 6 Model 200 - Aquacontrol Smart Premium Cleaning program PROGRAM PROGRAM Internal timer PROGRAM Check filter External timer 1. Cleaning program selection: Program 01 – 1 hour floor cleaning. Program 02 – 1.5 hour floor and wall cleaning. Program 03 – 2 hour floor and wall cleaning. 2.
- Page 7 Aquacontrol Power Supply Specifications Physical Dimensions (W * D * H) 273mm * 242mm * 90mm Weight 1.9 Kg Electrical Input rating 100-240V~, 50/60Hz, 210W Output rating 29V ,6.3A. Storage temperature -10° C - 60° C Operating temperature 0° C - 45 ° C Ingress protection IP54 Maintenance and adjustment - Cleaning the filter...
-
Page 8: Maintenance And Adjustment
Maintenance and adjustment Adjusting the suction valve: In order to increase suction power, the valves located underneath your cleaner can be adjusted by pulling out the rim of the valve. Before lowering the rim of the valve, make sure there is enough clearance and the unit movements won’t be obstructed by any obstacles on the swimming pool floor or walls, such as (drains, steps, etc.) 1) To pull out the rim rotate counterclockwise using a screwdriver (Fig. -
Page 9: Important Tips
Maintenance and adjustment IMPORTANT TIPS: Shut off and unplug the power supply every time you remove the cleaner from the water. Clean the filter bag after every cycle. Periodically straighten out the floating cable. Replace worn brushes to ensure maximum cleaning performance Save your cleaner's packaging for off-season storage or for shipping the unit to your dealer if service is required. -
Page 10: Installation Instructions
Caddy Installation Parts 1. Caddy handle 2. Handle screws 3. Body screws 4. Caddy body Installation Instructions 1. INSTALL THE ENTIRE CADDY HANDLE using the two handle screws (2) as is shown in the picture. 2. INSERT THE CADDY HANDLE into the caddy body special place and fix it with three body screws (3) as is shown in the picture. -
Page 11: Troubleshooting Guide
Troubleshooting Guide PLEASE CHECK THE FOLLOWING BEFORE CALLING YOUR SERVICE CENTER Before troubleshooting, the pool cleaner must be disconnected from the power supply and the power supply must be unplugged from the electrical outlet to prevent damage to the unit and possible personal injury. 1. -
Page 12: Warranty Terms And Conditions
WARRANTY TERMS AND CONDITIONS Astral Pool Australia Pty Ltd (ABN 97 007 284 504) ("Astral Pool") provides the following warranty in relation to its Robotic Pool Cleaners. Our goods come with guarantees that cannot be excluded under the Australian Consumer Law. You are entitled to a replacement or refund for a major failure and for compensation for any other reasonably foreseeable loss or damage. -
Page 13: Warranty Claims
WARRANTY CLAIMS 1.If a fault covered by warranty occurs, the customer must first contact AstralPool at the contact address listed below, or an Authorised AstralPool Service Agent. 2. Any warranty claim must be accompanied by: (a) proof of purchase; (b) full details of the alleged defect; and (c) appropriate documentation (such as historical and maintenance records). -
Page 14: Exclusions And Limitations
EXCLUSIONS AND LIMITATIONS EXCLUSIONS The warranty will not apply where: the customer is in breach of the Terms and Conditions of Sale; the Product was used for a purpose other than one it was intended for; the Product was repaired, modified or altered by any person other than AstralPool; the Product has not been installed, maintained and/or operated in complete compliance with the installation and operating instructions and any instructions by AstralPool;... - Page 15 Melbourne Townsville Sydney Seven Hills Sydney Moorebank 39-45 Cyber Loop 17 Auscan Crescent 2/2 Welder Road 6/30 Heathcote Road Dandenong VIC 3175 Garbutt QLD 4814 Seven Hills NSW 2147 Moorebank NSW 2170 P: 03 8796 8600 P: 07 4796 0100 P: 02 9853 2100 P: 02 8778 9500 Adelaide...
Need help?
Do you have a question about the RTX and is the answer not in the manual?
Questions and answers