Table of Contents
Advertisement
52726
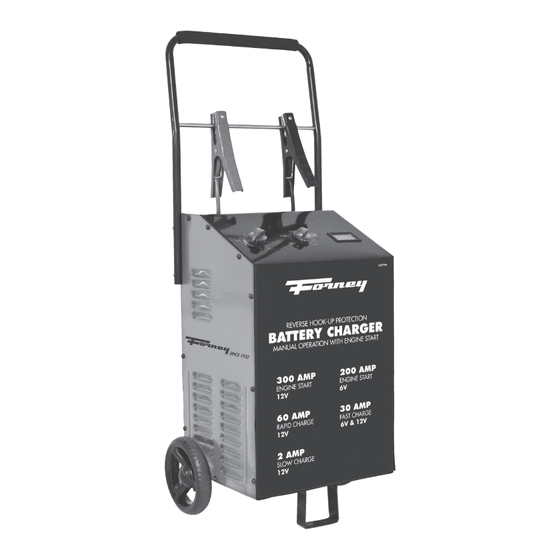
300–200–60–30–2 AMP • 6 & 12 VOLT • BATTERY CHARGER
OWNER'S MANUAL
MANUAL OPERATION WITH ENGINE START
• 300A for Emergency Engine Start at 12V
• 200A for Emergency Engine Start at 6V
• 60A Rapid Charge
• 30A Fast Charge
• 2A Trickle Charge
• Fan Cooled
• Rotary Switch for Ease-of-Use & Accuracy
• Timer with Hold for Continuous Charging
• Reverse Hookup & Short Circuit Protection
• Overheat Protection
• ETL certified
• 5-3-1 Warranty with "Advanced
Replacement"
POWER TO GET THE JOB DONE
1
WWW.FORNEYIND.COM
Advertisement
Table of Contents

Related Manuals for Forney 52726


Summary of Contents for Forney 52726
- Page 1 52726 300–200–60–30–2 AMP • 6 & 12 VOLT • BATTERY CHARGER OWNER’S MANUAL MANUAL OPERATION WITH ENGINE START • 300A for Emergency Engine Start at 12V • 200A for Emergency Engine Start at 6V • 60A Rapid Charge • 30A Fast Charge •...
-
Page 2: Important Safety Instructions
Simply turning off the 3. Use only recommended attachments. Use of an controls will not reduce this risk. attachment not recommended or sold by Forney 7. Remove personal metal items such as rings, Industries, Inc. may result in a risk of fire, electric bracelets, necklaces and watches when working shock or injury to persons or damage to property. -
Page 3: Personal Precautions
PERSONAL PRECAUTIONS 1. Working in the vicinity of a lead-acid battery is metal tool onto the battery. It might spark or short- dangerous. Batteries generate explosive gases circuit the battery or other electrical part that may during normal battery operation. For this reason, cause an explosion. -
Page 4: Follow These Steps When Battery Is Installed In Vehicle
CHARGER LOCATION 1. Connect and disconnect the DC output clips only after setting all of the charger switches to the “off” position and removing the A.C. plug from the electrical outlet. Never allow the clips to touch each other. 2. Attach the clips to the battery and chassis. FOLLOW THESE STEPS WHEN BATTERY IS INSTALLED IN VEHICLE 1. -
Page 5: Battery Charging - A.c. Connections
BATTERY CHARGING – A.C. CONNECTIONS 1. This battery charger is for use on a nominal 120- of an adapter plug in the United States is not volt circuit and has a grounded plug that looks like recommended. the plug illustrated. The charger must be grounded 4. -
Page 6: Control Panel
ASSEMBLY INSTRUCTIONS Wheel Charger Assembly Instructions: NOTE: Charger must be assembled before operating Parts Tools (2)10-32 screws 5/16" wrench (2) 1/4-20 screws 3/8" wrench (2) wheels Hammer (2) axle caps Screwdriver (1) handle (1) mounting foot (1) axle Tools necessary 1. -
Page 7: Operating Instructions
OPERATING INSTRUCTIONS Charging 3. Plug the charger A.C. power cord into the A.C. 1. Ensure that all of the charger components are in outlet, and then move the timer switch from OFF to place and in good working condition, including the HOLD position. -
Page 8: Calculating Charge Time
CALCULATING CHARGE TIME The Hydrometer or Electronic Method To find the time needed to fully charge your battery, determine the battery’s charge level with a hydrometer or electronic Percent-of-Charge Tester. The following table will help you convert hydrometer readings to percent of charge values. SPECIFIC GRAVITY PERCENT OF CHARGE PERCENT OF CHARGE NEEDED... - Page 9 WWW.FORNEYIND.COM...
-
Page 10: Maintenance Instructions
MAINTENANCE INSTRUCTIONS 1. After use and before performing maintenance, 3. Ensure that all of the charger components are in unplug and disconnect the battery charger. place and in good working condition, including the plastic boots on the battery clips. 2. Use a dry cloth to wipe all battery corrosion and other dirt or oil from the terminals, cords, and the 4. - Page 11 PROBLEM POSSIBLE CAUSE SOLUTION The charger is making an Circuit breaker is cycling. The settings may be wrong. Check the charger settings. audible clicking sound. Battery is defective. Have the battery checked. Shorted battery cables or clips. Circuit breaker cycles when current draw is too high.
- Page 12 Forney Industries and/or approved for use with this product. This ‘Limited Warranty” is void if the product is misused, subjected to abuse or is repaired or modified by anyone other than Forney or its authorized repair station. It is the purchaser’s obligation to read and follow the instructions provided in the owner’s manual.
Need help?
Do you have a question about the 52726 and is the answer not in the manual?
Questions and answers