
Summary of Contents for Power Plus H1775
- Page 1 ITEM 1600PSI ELECTRIC PRESSURE WASHER MODEL H1775 READ AND SAVE THESE INSTRUCTIONS...
-
Page 2: Table Of Contents
TABLE OF CONTENTS Safety Information ........................Safety Features ........................Power Supply and Electrical Info ..................... Package Contents ......................... Operation Instructions ......................End of Use / Storage Instructions .................... Care and Maintenance ......................Troubleshooting ........................PRODUCT SPECIFICATIONS Max pressure 1600 PSI * Max flow rate 1.5 GPM * Electrical requirement... -
Page 3: Safety Information
SAFETY INFORMATION Please read and understand this entire manual before attempting to assemble, operate or install the product. If you have any questions regarding the product, please contact our customer service. Safety precautions are essential when any mechanical equipment is involved. These precautions are necessary when using, storing, and servicing mechanical equipment. - Page 4 SAFETY INFORMATION 15. Check power cords before using. Damaged cords can reduce performance of pressure washer or cause a fatal electric shock. 16. The narrow pin point stream is very powerful. It is not recommended for use on painted surfaces, wood surfaces or items attached with an adhesive backing. 17.
-
Page 5: Safety Features
SAFETY FEATURES AUTOMATIC STOP The pressure washer is equipped with a stop device which will sense when the trigger on the gun is released. It will open the power circuit to the motor and cause the pressure washer to stop. WARNING: If Automatic Stop fails to operate, DO NOT USE THE MACHINE. -
Page 6: Power Supply And Electrical Info
POWER SUPPLY AND ELECTRICAL INFO POWER SUPPLY CONNECTION The pressure washer is factory-equipped with an electrical cord. This cord should only be connected to an electrical outlet installed in accordance with local safety regulations. NOTE: The power supply must be 120 V, 60 Hz and a minimum 15 amp dedicated circuit. A. -
Page 7: Package Contents
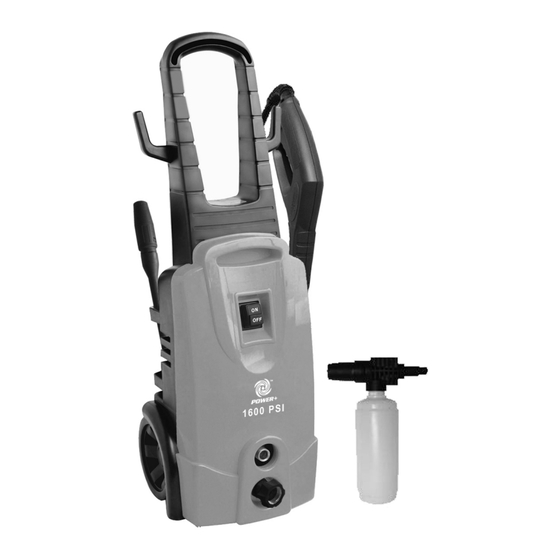
PACKAGE CONTENTS Quantity Part Description Hook for electrical cable and high-pressure hose Tool box Spray gun with high-pressure hose Holder for accessories Garden hose connector High-pressure outlet Turbo spray nozzle Variable spray nozzle Spray wand On/Off switch Detergent bottle Nozzle cleaner... -
Page 8: Operation Instructions
OPERATING INSTRUCTIONS Step 1 Romove the toolbox. Secure the lower end of the carrying handle to the unit (Fig.1-1). Insert the two screws found in the toolbox into the holes on the end of the carrying handle and tighten (Fig.1-2). Now reattach the toolbox to the carrying handle (Fig.1-3). - Page 9 OPERATING INSTRUCTIONS Step 4 Connect the garden hose to water supply and turn on the water for a few seconds to flush out any debris that may have collected in the hose. Fig. 4 Step 5 Connect the high pressure hose to the machine outlet. To connect, carefully insert the fitting with the o-ring into the high pressure outlet and tighten the threaded nut by hand.
- Page 10 OPERATING INSTRUCTIONS Step 7 Insert the wand “Tee” lock into the spray gun slot. The “Tee” lock will be positioned in an up and down (verticle) position and when the wand reaches the stop spring you will need to push the wand into the gun very firmly overcoming the spring force while simultaneously rotating the wand clockwise turn until the wand is firmly locked in place.
- Page 11 OPERATING INSTRUCTIONS Step 10 Depress the ON button. Note that the motor will momentarily start and then stop. Fig. 10 Step 11 Squeeze the trigger to start motor and begin pressure washing. Fig. 11 WARNING: Risk of Injection or Injury. Do not directly discharge stream at anyone. WARNING: If the wand and nozzle are not securely locked into place, they could be ejected under high pressure when operating the gun.
- Page 12 OPERATING INSTRUCTIONS Variable Spray The variable fan nozzle can adjust from fan to pencil point spray. The spray can be adjusted by turning the nozzle head. CAUTION: The pencil point spray adjustment is very aggressive. We recommend that for most cleaning applications a 20° spray angle be used to avoid damage to the surface being cleaned.
- Page 13 END OF USE AND WINTER STORAGE INSTRUCTIONS 1) Turn the machine OFF and squeeze the trigger to release the trapped pressure inside of the machine. 2) Remove both the garden hose and high pressure hose from the unit. 3) Turn ON the machine and allow it to run for 5 seconds. (This will clear out most of the water trapped in the pump).
-
Page 14: Care And Maintenance
CARE AND MAINTENANCE Connections Connections on Pressure Washer hoses, gun and spray wand should be cleaned regularly and lubricated with non-water soluble grease to prevent leakage and damage to the o-rings. Nozzle The nozzle should be lubricated with non-water soluble grease or light oil regularly. Clogging of the nozzle causes the pump pressure to build up too high and cleaning is immediately required. -
Page 15: Troubleshooting
TROUBLESHOOTING PROBLEM POSSIBLE CAUSE CORRECTION Motor will not start or stops while Extension cord length or gauge incorrect. Use proper extension cord. See Operator’s operating. Manual page 6. Loose or disconnected plug. Reconnect plug. Open motor circuit. Contact Customer Service. Spray Gun Trigger not operating Contact Customer Service.
Need help?
Do you have a question about the H1775 and is the answer not in the manual?
Questions and answers
I have oil leaking out the bottom. The large O ring looks okay. Are the seal still available?