Advertisement
Table of Contents
- 1 Prior to Use
- 2 Safety Precautions
- 3 Installing Batteries
- 4 Outdoor Station
- 5 Installation Instruction
- 6 Turning On/Off
- 7 PIR Motion Sensor
- 8 Light Sensor
- 9 Do Not Disturb Mode
- 10 Receiver Display
- 11 Menu Functions
- 12 Date and Time
- 13 Snap Setting
- 14 Reset to Factory Default
- 15 Engineering Mode
- 16 Technical Specification
- Download this manual
Advertisement
Table of Contents

Summary of Contents for iCreation CL-3223
- Page 1 Wireless Digital Video Doorbell CL-3223 USER’S MANUAL...
-
Page 2: Prior To Use
Prior To Use Congratulations ...on purchasing our high quality product. Please read the manual carefully before installing your system and follow all of the directions to ensure proper installation. Safety Precautions To reduce the risk of electrical shock and injury, please follow these basic safety precautions before using the product. - Page 3 Introduction Supports up to 4 Outdoor Stations(sold separately) 3.5'' (320x240) QVGA LCD display Video resolution: 320 x 240, with 25 frames per second Wide angle lens and LED for night vision Long standby doorbell (battery life up to 2 years or connect with DC+12V) Water-proof outdoor station IP55 Microphone and speakerphone...
- Page 4 Once you have unpacked your product, make sure that all the parts shown below are available. If any pieces are missing or broken, please promptly call your dealer. Charger Receiver Outdoor station CL-3223 USER’S MANUAL Rechargeable Rain cover User’s Manual Ni-MH battery pack...
- Page 5 Layout Outdoor Station LED lights Microphone Camera Sensor light Call button Speaker...
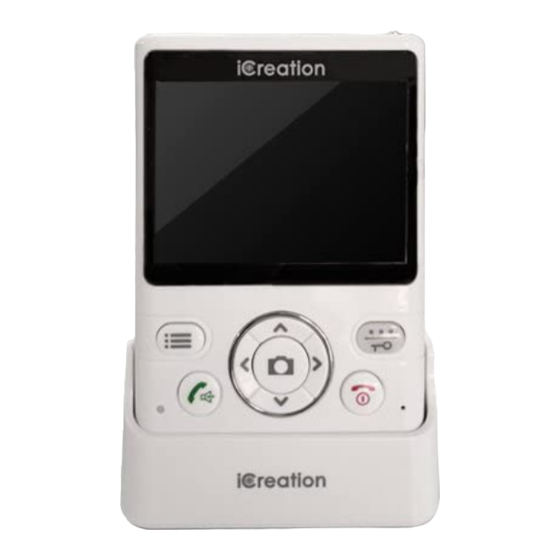
- Page 6 Receiver LCD display Speaker Navigation key Left Soft key Right Soft/ Unlock/ Replay key Power/ Accept key End key Microphone Charge indicator Manual Snap Charging pins Monitor key Battery compartment cover Antenna Antenna Locking Switch Charger Charge pins Shaker jack(Optional)
-
Page 7: Installing Batteries
Installing Batteries Receiver The rechargeable Ni-MH batteries (AAA size, 3.6V, 800mAh) come with your receiver. Install the batteries before use. Plug the Rechargeable Ni-MH battery pack into the battery compartment. 3. To replace the battery cover, slide the cover up until it snaps in place. Notes: The batteries need to be replaced if they don't r e c o v e r t h e i r f u l l s t o r a g e c a p a c i t y a f t e r... -
Page 8: Outdoor Station
Outdoor station Install six LR6(AA) 1.5V alkaline batteries (not supplied) into the battery compartment, matching correct polarity(+,-). Notes: Reversing the orientation may damage the outdoor station. When replacing the batteries, always use good quality alkaline batteries. Charging Receiver Important Note: Before initial operation, YOU SHOULD FULLY CHARGE THE RECEIVER for about 15 hours. - Page 9 Receiver If you prefer to mount the receiver on the wall: a. Install the two self-tapping screws at a distance of 45mm from each other and located on a horizontal line. Slowly slide the unit down until it snaps into place. Outdoor station 1.Choose a proper location for the outdoor station.
- Page 10 Notes: Notes: 1. Avoid locating near electrical appliances, TV or a cordless phone for best signal performance. 2. Ideal location is a central place with minimal obstructions. 3. A pop up antenna is available to enhance the signal should it be needed.
- Page 11 Diagram For Lock Installations Normally Open Lock DC Power DC Power for Lock Lock Outdoor Station Normally open lock Normally Closed Lock DC Power Normally closed lock Lock DC Power for Lock Outdoor Station Rubber wire path Puncture the rubber carefully to preserve water tight wire path through the rain cover.
-
Page 12: Turning On/Off
Operations Turning On / Off To turn the receiver on, press and hold To turn the receiver off, press and hold Register a New Outdoor Station Note: The Outdoor Station and Receiver are already registered together as supplied in as a set. These instructions are for adding up to 3 more Outdoor Stations. - Page 13 Register(Continued) The Receiver can support up to 4 Outdoor stations. 1.When you have registered one Outdoor station, the register interface will display as follows: 2.When you have registered 4 Outdoor stations, the register interface will display as follows:...
- Page 14 Monitor The receiver can monitor the video feed from the Outdoor Station by pressing and holding If there is one Outdoor Station, the receiver will display 1# Monitor. If there are more than 1 Outdoor Stations, the Monitor can be selected by pressing Up or Down to choose the Monitor and select by beneath Select.
-
Page 15: Pir Motion Sensor
PIR Motion Sensor 1.Switch the selector switch on the back of the Outdoor Station to the ON position. 2.When the selector detects an object at the camera it will show on the Receiver. 3. To automatically record a photo of the detected object(person) refer to Snap Setting on page 20 and turn Auto Snap to On. - Page 16 Video Doorbell Operation When the button is pressed on the Outdoor Station, the Receiver rings and a video image of the visitor appears on the Receiver. 1. To decline press to cancel the ring and video feed. 2. To answer press to conduct a video conversation.
-
Page 17: Light Sensor
Light Sensor LEDs will light the caller when the ambient light becomes too low. Do Not Disturb Mode if you press and hold for 3 seconds, the communication between the Receiver and the Outdoor Station will discontinue for 5 minutes. Then, the connection will resume and operate as normal. -
Page 18: Menu Functions
Menu Functions Date&Time 1.Press beneath Menu to display the main menu items. 2.Press Up or Down to choose , then press beneath Select. 3.To set the time, press Left or Right to choose the Hour or the Minute, and press the Up or Down adjust. - Page 19 Menu Functions (continued) Volume There are 9 levels to adjust call volume. 1. If no video call is active, press Left or Right to adjust the volume. 2. If a call is in progress, press beneath Menu to display the main menu items.
- Page 20 Menu Functions (continued) Brightness There are 9 levels to adjust brightness on the Receiver. 1. If no video call is active, press Up or Down adjust the brightness. 2. If a call is in progress, press beneath Menu to display the main menu items.
-
Page 21: Snap Setting
Menu Functions (continued) Snap Setting The unique Snap Shot function records up to 50 photos of any visitors whether you are there or not. To get Auto Snap, set it up in the receiver as follows. 1.Press beneath Menu to display the main menu items. 2.Press Up or Down to choose... - Page 22 Menu Functions (continued) Snap Show You can save or delete the recorded photo s under this menu. The outdoor station's number will also be displayed on the upper left of the photo. 1.Press beneath Menu to display the main menu items. 2.Press Up or Down to choose...
-
Page 23: Reset To Factory Default
Menu Functions (continued) Reset to Factory Default 1.Press beneath Menu to display the main menu items. 2.Press Up or Down to choose , then press beneath Select. 3.Press Up or Down to choose YES or NO to enable or disable the function. 4.Press beneath Select to save the settings. -
Page 24: Engineering Mode
Engineering Mode Delete a Registered Outdoor Station 1.Press and hold the at the same time about 5 seconds in standby mode, then the display will show as follows: 2.After 5 seconds, it will exit automatically. Change the Unlock Time 1.press and hold the at the same time about 5 seconds in standby mode, then the display will show as follows:... -
Page 25: Technical Specification
Technical Specification Item Detail Outdoor station Transmit Frequency Range 2.400GHz~2.4835GHz 2.0Mbps Data Rate 19dBm (TYP) Transmitting Power Modulation Type GFSK Outdoor:200m, Indoor:50m Transmitting Distance ″ 1/4 Color CMOS Image Sensor Image Sensor Type H:320 V:240 Effective Pixels Image Processing Motion JPEG Image Resolution / Frame Rate H:320 V :240 / 25fps Auto... - Page 26 Technical Specification Item Detail Receiver Receiving Frequency Range 2.400GHz~2.4835GHz 3.5''Color LCD Monitor 2.0Mbps Data Rate Receiving Sensitivity -90dBm GFSK Demodulation Type 320×240(RGB) Resolution Transmitting Power 19dBm(TYP) Power Requirement Ni-MH 3.6V,800mAh Power Consumption 400mA Max -10℃ ~40℃ Operating Temperature Operating Humidity 0%~85%RH No.
Need help?
Do you have a question about the CL-3223 and is the answer not in the manual?
Questions and answers
Is the 12V DC inside the outdoor station box equivalent to the six batteries? See the photo below. Or is it just for the door lock?
The 12V DC in the iCreation CL-3223 outdoor station is used to power the outdoor station instead of using six batteries. It is not only for the door lock.
This answer is automatically generated
Got new battery as not charging. But has sat with red light for 3 days. And yes it is the official new battery.