
Related Manuals for Godrej ET4C1E


Summary of Contents for Godrej ET4C1E
- Page 1 Digital Video Recorder: User Manual USER MANUAL ET4C1E 4 channel CIF Digital Video Recorder...
- Page 2 Digital Video Recorder: User Manual DVR User’s Installation and Operation Manual Welcome Thank you for purchasing our DVR. This manual is designed to be a reference tool for the installation and operation of your system. Here you can find information about this series, DVR features and functions as well as a detailed menu tree. Before installation and operation, please read the following safeguards and warnings carefully! Important Safeguards and Warnings: 1.
-
Page 3: Table Of Contents
Digital Video Recorder: User Manual Table of contents Table of contents ............................................3 1. Product Introduction ..........................................5 1.1 Product overview ..........................................5 1.2 Main functions ...........................................5 2. Open-package check and cable connections ....................................7 2.1 Description of front panel: ........................................7 2.2 Hard Disk Installation ........................................8 3. - Page 4 Digital Video Recorder: User Manual 4.4 System setup ............................................24 4.4.1 General setup...........................................24 4.4.2 Encode setup ...........................................25 4.4.3 Network setup .........................................26 4.4.4 Network service ........................................26 4.4.5 GUI display ..........................................28 4.4.6 PTZ setup ..........................................28 4.4.7 Tour setup ..........................................28 4.5 Management tools..........................................29 4.5.1 Hard disk management ......................................29 4.5.2 User management ........................................29 4.5.3 Online user ..........................................30 4.5.4 Output adjust ...........................................30...
-
Page 5: Product Introduction
Digital Video Recorder: User Manual 1. Product Introduction 1.1 Product overview The series DVR is designed especially for security and defense field which is outstanding Digital Surveillance product. It introduces embedded LINUX operating system which is more stable. It introduces standard H.264 video compression format and G 711A audio compressed format which ensures the high quality image, low error coding ratio and single frame playing. - Page 6 Digital Video Recorder: User Manual Communication interface RS485 interface which fulfills the PTZ control. Standard Ethernet network interface which fulfills the telecommunication function. Intelligent operating Mouse action function. Fast copy and paste operating for the same setting.
-
Page 7: Open-Package Check And Cable Connections
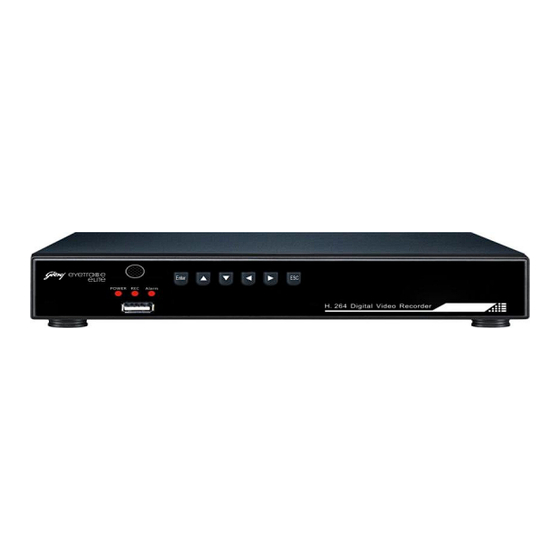
Digital Video Recorder: User Manual 2. Open-package check and cable connections 2.1 Description of front panel: Record Start recording. Enter Press this key to pop up the main menu. To show the working status of the DVR. "REC” is recording indicator; "POWER” is Status indicator power indicator;... -
Page 8: Hard Disk Installation
Digital Video Recorder: User Manual 2.2 Hard Disk Installation Before you use the DVR for the first time, the HDD should be installed in, 1/2/4 units of HDD can be installed according to the model of DVR. Take off the cover Open the DVR Fix the HDD by Cover the housing... - Page 9 Digital Video Recorder: User Manual Name Description Video input Standard BNC port connected with the Camera. Video output Connected with the video input of the monitor. Name Description VGA video signal output port connected with a VGA port of a computer monitor. Audio output Connected with earphone or cable speaker.
-
Page 10: Basic Operation
Digital Video Recorder: User Manual 3. Basic operation 3.1 Turn on Plug the power supply and turn on the power supply switch. Power supply indicator light indicates „turning on‟ of the video r ecorder. After the startup you will hear a beep. The default setting of video output is multiple-window output mode. If the startup time is within the video setting time, the timing video recording function will start up automatically. -
Page 11: Preview
Digital Video Recorder: User Manual Picture 3.1 Login 3.4 Preview You can right click mouse to choose to switch between the windows. The system date, time and channel name are shown in each viewing wi ndow. The surveillance video and the alarm status are shown in each window. 3.5 Desktop shortcut menu In preview mode you can right click mouse to get a desktop shortcut menu. - Page 12 Digital Video Recorder: User Manual In the desktop shortcut menu. Main menu > Record> playback. Note: The hard disk that saves the video files must be set as read-write or read-only state. [Listed files] Look up the listed files that accord with the searching criteria. [File information] Look up the found file information.
- Page 13 Digital Video Recorder: User Manual Previous file Next file Repeat playback Full screen Picture 3.6 File searching File type: Set the searching file type. Channel: Set the searching channel. Start Time: Set the searching time scan. Playback control: Refer to the following sheet for more information. Operation hint: Displays the function of the cursor place.
-
Page 14: Record Mode
Digital Video Recorder: User Manual 3.5.3 Record Mode Picture 3.7 Recording Control Interface Picture 3.8 PTZ Setup Please check current channel status: “o” means it is not in recording status “●” means it is in recording status. You can use desktop shortcut menu or click [main menu] >... - Page 15 Digital Video Recorder: User Manual Special Function: 1. Preset. Set a location for the preset, calls the preset points, PTZ automatically turns to the set position. 1) Preset option Set a location for the preset, procedure is as follows: Step 1:In picture 3.10, clicking the direction buttons will turn into preset position, click the 'set' button to enter Picture 3.11. Step 2:Click the 'Preset' button, then write the preset points in the input box.
- Page 16 Digital Video Recorder: User Manual which has been set up). Step 3: Repeat step 1 and step 2, until all the points in the preset designated tour is set. Del Preset: Please input preset value in the box, click 'Del Preset' button to remove the preset points. Del Tour: Input the number of tour line, click 'Del Tour' button to remove the tour lines set.
- Page 17 Digital Video Recorder: User Manual Picture 3.13 Boundary Scan Setup Picture 3.14 Auxiliary Function Control 5. Horizontal Rotating Click Horizontally rotating button, PTZ begins to rotate horizontally (relative to original position of the camera). Click 'Stop' button to stop. Picture 3.15 PTZ menu settings Picture 3.1 6 Image colour 6.
-
Page 18: Color Setting
Digital Video Recorder: User Manual Enter Menu: Enter PTZ menu. Exit Menu: Exit PTZ menu. Direction Button: The function buttons to choose PTZ menu. Confirm/Cancel: To choose PTZ menu. 3.5.5 Color Setting Set the selective image parameters (current channel for single window display and cursor place for multi-window display). You can use the desktop shortcut menu and enter the interface. -
Page 19: Main Menu
Digital Video Recorder: User Manual 4. Main Menu 4.1 Main menu navigation Main Menu Sub Menu Function Recording Set the recording configuration, recording type, recording time section. Configuration Recording Playback Set recording look-up, recording play, video file storage. Backup Detect or format backup equipment, back the selective files. Set motion detect alarm channel, sensitivity, area, linkage parameters: defending time section, Motion detection alarm output, screen hint, recording, PTZ, tour. - Page 20 Digital Video Recorder: User Manual System Configuration Network service PPPOE, NTP, E-Mail purview, DDNS parameter, cloud functionality Output Mode Set channel name, purview hint icon state, transparency, cover area, time title, channel time fold. PTZ configuration Set channel, PTZ protocol, address, baud rate, date bit, stop bit, check System configuration Serial port Set serial port function, baud rate, date bit, stop bit and address.
-
Page 21: Recording Function
Digital Video Recorder: User Manual Code stream statistics Display code stream information System information Logs View all log information according to the log video and time Version Display edition information Shutdown Logout, shut down or reboot 4.2 Recording function 4.2.1 Recording Configuration. Set the recording parameters in the surveillance channel. -
Page 22: Video Playback
Digital Video Recorder: User Manual [Pre-Record] Record 30 seconds before the action. (time length is decided by the code stream) [Mode] Set video state: schedule, manual or stop. Schedule: Record according to the set video type (regular, detection and alarm) and time section. ... -
Page 23: Alarm Function
Digital Video Recorder: User Manual [Detect] Detect the storage connected with the DVR such as hard disk or universal disk. [Erase] Choose the file to delete and click erasure to delete the file. [Stop] Stop the backup. [Backup] Click backup button and the dialog, box is popped up. You can choose the backup file according to the type, channel and time. Remove: Clear the file information. -
Page 24: Video Loss
Digital Video Recorder: User Manual [Period] Trigger the motion detect signal in the set time section. You can set according to week or set uniformly. Each day is divided into four time sections. Means the set valid. [Interval] Only one alarm signal is turned on (even there are several motion detect signals) in the set interval. [ Record Delay ] Delay a few moments and stop when the alarm state is turned off. -
Page 25: Encode Setup
Digital Video Recorder: User Manual Picture 4.7 regular setup Picture 4.8 week setup Picture 4.9 date setup [Time format]: Choose time format: 24 hour or 12 hour. [Language]: English or Chinese. [Hard disk full]: ▪ Choose stop: Stop recording when the hard disk is full. ▪... -
Page 26: Network Setup
Digital Video Recorder: User Manual [Code stream value] Set the code stream value to modify the image quality. The larger code stream value the better image quality. [Video/ Audio] When the icons are all in reverse displayed, the video file is video and audio multiplex stream. Picture 4.10 network setup Picture 4.11 Encode setup Picture 4.12 PPPOE setup... - Page 27 Digital Video Recorder: User Manual [PPPOE setup]: Input the user name and password that ISP (Internet service provider) provides. After saving it reboot up your system. Then the DVR will build a network connection based on PPPOE. The IP address will change into dynamic IP address above operation is well done. Operation: After PPPOE dialing successfully look up the IP address in the [IP address] and obtain the current IP address.
-
Page 28: Gui Display
Digital Video Recorder: User Manual 4.4.5 GUI display 【Channel name】■ Click the channel name modify button and enter the channel name menu. Modify the channel name. The 16 Chinese characters and 25 letters are supportive. 【Time title】■ means the selective state. Display the system data and time in the surveillance window. 【channel title】■... -
Page 29: Management Tools
Digital Video Recorder: User Manual 4.5 Management tools 4.5.1 Hard disk management Configure and manage the hard disk. The menu displays current hard disk information: hard disk number, input port, type, status and overall capability. The operation include: setup the write-read disk, read-only disk, redundant disk, hard disk format, resume default. Choose the hard disk and click the right function button to execute. -
Page 30: Online User
Digital Video Recorder: User Manual is the subclass of the group. We recommend that the common user‟s purview is lower than the advanced user. [Add group] Add user group and set the purview. There are different criteria: shut down the equipment, real time surveillance, playback, recording setup, video file backup and so on. -
Page 31: 5Auto Maintenance
Digital Video Recorder: User Manual 4.5.5Auto maintenance The user can set the auto reboot time and auto file deleting time limit. 4.5.6 Resume default The system resume to the default setup. You can choose the items according to the menu. 4.5.7 Upgrade Picture 4.25 upgrade information Picture 4.26 hard disk statistics... -
Page 32: Log Information
Digital Video Recorder: User Manual 4.6.3 Log information Look up system log according to the set mode. Log information include: System operation, configuration operation, data management, alarm affair, recording operation, user management, file management and so on. Set the time section to look up and click the look up button. The log information will display as a list. (one page is 128 items) Press Page up or Page down button to look up and press delete button to clear all the log information. -
Page 33: Faqs And Maintenance
Digital Video Recorder: User Manual 5. FAQs and Maintenance 5.1 FAQs If the problems are not listed, please contact the local service or call the HQ service. We are willing to offer the service. The DVR cannot boot up normally. Possible reasons are as followed: ... - Page 34 Digital Video Recorder: User Manual Possible reasons are as followed: The program is not matched. Please update the program. The image brightness is all 0. Please resume the default setup. There is no video input signal or the signal is too weak. ...
- Page 35 Digital Video Recorder: User Manual Possible reasons are as followed: Settings: the audio is not chosen. The according channel is not connected with the video. 10. The time is wrong. Possible reasons are as followed: Setting is wrong. ...
- Page 36 Digital Video Recorder: User Manual Network setting issues. Invalid password or user name. The user edition is not matched the DVR program edition. 14. The image is not clear or there is no image in network preview state or video file playback state. Possible reasons are as followed: ...
- Page 37 Digital Video Recorder: User Manual The setting of the alarm is not correct. The alarm output Is turned on manually. The input machine is damaged or the connections are not correct. There are some problems for specific program edition, please update the program. Alarm is not working.
-
Page 38: Maintenance
Digital Video Recorder: User Manual 5.2 Maintenance Please brush printed circuit boards, connectors, fans, machine box and so on regularly. Please keep the grounding well done to prevent the video or audio signal interfered and the DVR from static or inductive electricity. ... -
Page 39: Appendix 1.Remote Controller Operation
Digital Video Recorder: User Manual Appendix 1.Remote controller operation Serial number Name Function (1) Multi-window button Same function as Multi-window button in the front panel (2) Numeric button Code input/ number input/ channel switch (3) 【Esc】 Same function as 【Esc】 button in the front panel (4)... -
Page 40: Appendix 2. Mouse Operation
Digital Video Recorder: User Manual Appendix 2. Mouse Operation *Take right hand as an example The mouse in USB connection is supportive. Operation Function Double click one item in the file list to playback the Add or subtract number in the number setting video Press middle button... - Page 41 These rules apply to every producer, consumer or bulk consumer involved in the manufacture, sale, purchase and processing of electrical and electronic equipment or components as specified in Schedule 1 (please refer to our website www.godrej.com in the „Good & Green‟ section of CSR module for more details).
- Page 42 Digital Video Recorder: User Manual...
Need help?
Do you have a question about the ET4C1E and is the answer not in the manual?
Questions and answers