Table of Contents
Advertisement
Available languages
Available languages
Quick Links
Advertisement
Table of Contents

Related Manuals for Kalley K-LED39FHDN


Summary of Contents for Kalley K-LED39FHDN
- Page 1 2012.03.3 1 13:22:59 +08'00'...
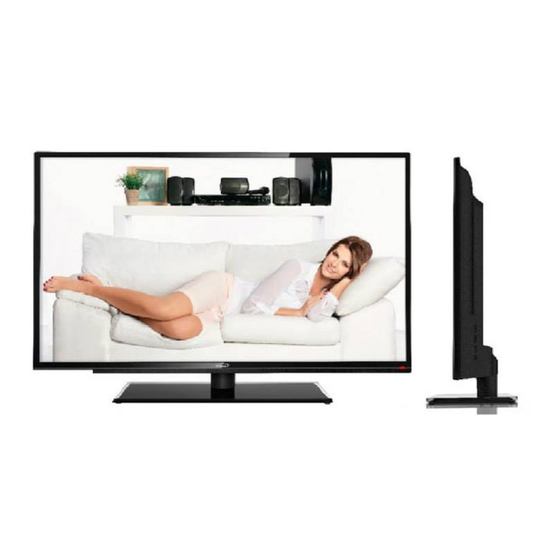
- Page 2 Tv LED 39” K-LED39FHDN K-LED39FHDS...
- Page 3 Instrucciones PRECAUCIÓN ATENCIÓN: El uso de controles, ajustes o procedimientos distintos de los especificados en este manual puede causar niveles de radiación peligrosos. El rayo con punta de flecha dentro de un triángulo tiene por finalidad alertar al usuario de la presencia de "voltaje peligroso " dentro de la caja del producto, que puede ser de magnitud suficiente para constituir un riesgo de descarga eléctrica a la persona.
- Page 4 Instrucciones INSTRUCCIONES IMPORTANTES DE SEGURIDAD 1. Lea las instrucciones. 2. Guarde estas instrucciones. 3. Preste atención a todas las advertencias. 4. Siga todas las instrucciones. 5. No utilice este aparato cerca del agua. 6. Limpie sólo con un paño seco. 7.
- Page 5 Instrucciones INSTRUCCIONES IMPORTANTES DE SEGURIDAD No ponga en peligro las normas de diseño aplicando una fuerza excesiva sobre la parte frontal o superior de la carcasa, lo que podría hacer volcar el producto. Asimismo, no ponga en peligro, o los niños, mediante la colocación de equipos electrónicos o juguetes en la parte superior del aparato.
- Page 6 Instrucciones TABLA DE CONTENIDO Capítulo 1: Introducción Precauciones del producto Energía y enchufe Cable de energía y de señal Ambiente de Uso Limpieza Colgar el televisor en la pared Los botones en el televisor Funciones del Control Remoto Capítulo 2: Funcionamiento General Encendido Apagado Ajuste Automático de canales...
- Page 7 Instrucciones CAPITULO 1: INTRODUCCIÓN PRECAUCIONES Lea todas las instrucciones antes de utilizar el Televisor. Conserve estas instrucciones para uso futuro. PRODUCTO No obstruya ni tape las rejillas de ventilación en la cubierta posterior. No introduzca objetos de ningún tipo en esta unidad a través de las ranuras del gabinete ya que podrían tocar las partes de corriente o partes de corto circuito, provocando un incendio, choque eléctrico o daños a la unidad.
- Page 8 Instrucciones CAPITULO 1: INTRODUCCIÓN LIMPIEZA Limpie el polvo del aparato pasando por la pantalla y la carcasa con un paño suave y limpio o un limpiador líquido especial. No aplique fuerza excesiva a la pantalla durante la limpieza. No utilice agua o limpiador químico para limpiar la pantalla, ya que podría dañar la superficie de la pantalla del televisor.
- Page 9 Instrucciones CAPITULO 1: INTRODUCCIÓN BOTONES DE LA TV 1. CANAL ARRIBA / ABAJO Va hacia arriba y abajo por la lista de canales. En el sistema de menús, funcionan como los botones de dirección arriba / abajo del control remoto y ajuste. 2.
- Page 10 Instrucciones CAPITULO 1: INTRODUCCIÓN Conexión USB (entrada) Estas conexiones se pueden utilizar para conectar un dispositivo USB. Nota: El número de conexiones USB en el televisor pueden variar según el modelo. Conexión SPDIF (salida) La conexión SPDIF se utiliza para conectar un receptor de audio digital compatible. Conexión audífonos (salida):Esta conexión se puede utilizar para conectar los audífonos o audífonos estéreo.
- Page 11 Instrucciones CAPITULO 2: FUNCIONAMIENTO GENERAL CAPITULO 1: INTRODUCCIÓN FUNCIONES DEL CONTROL REMOTO La mayoría de las funciones del televisor están disponibles a través de los menús que aparecen en la pantalla. El control remoto suministrado con el televisor se puede utilizar para navegar por los menús y configurar todos los ajustes generales.
- Page 12 Instrucciones CAPITULO 2: FUNCIONAMIENTO GENERAL ENCENDIDO Siga las instrucciones que aparecen en esta página sobre la manera de encender el televisor y el mando a distancia antes de pasar a las siguientes páginas se describe cómo utilizar el canal procedimiento de configuración. 1.
- Page 13 Instrucciones CAPITULO 2: FUNCIONAMIENTO GENERAL CONFIGURACIÓN AUTOMÁTICA DE CANALES La configuración de Canales consiste en seleccionar todos los ajustes necesarios para poder buscar y almacenar todos los canales que puede recibir. Asegúrese de que el televisor está encendido y siga todos los pasos a su vez se especifica a continuación. Mostrar el menú pulsando el botón Menú.
- Page 14 Instrucciones CAPITULO 3: FUNCIONES AVANZADAS AJUSTE DE LA IMAGEN Los menús para ajustar la imagen se utilizan para obtener el mejor ajuste de imagen de acuerdo con su preferencia, el tipo de programa que está viendo y la iluminación ambiente. Para abrir el menú pulse el botón Menú.
- Page 15 Instrucciones CAPITULO 3: FUNCIONES AVANZADAS Contraste dinámico: se activa esta opción para ajustar el contraste de forma automática. Pulse Menú para regresar o Salir para cerrar el menú. AJUSTE DEL SONIDO se mostrará el menú pulsando el botón Menú. Pulse el botón de dirección izquierda o derecha para seleccionar el icono de sonido y pulse arriba o hacia abajo la dirección o el botón OK para visualizar el menú...
- Page 16 Instrucciones CAPITULO 3: FUNCIONES AVANZADAS CONFIGURACIÓN DE FUNCIONES Mostrar el menú pulsando el botón Menú. Pulse el botón de dirección izquierda o derecha para seleccionar el icono y oprima hacia arriba o hacia abajo la dirección o el botón OK para visualizar el menú...
- Page 17 Instrucciones CAPITULO 3: FUNCIONES AVANZADAS y derecha para seleccionar el ícono de captura, luego presione OK para capturar la foto. 3. Presione arriba o abajo para elegir LOGO1 y presione OK para confirmar. 4. ActiveConfiguración de inicio y seleccione LOGO1, luego presione OK para confirmar. El televisor mostrará...
- Page 18 Instrucciones CAPITULO 3: FUNCIONES AVANZADAS Hora actual: pulse izquierda, derecha, arriba, abajo para ajustar la hora actual. Modo de encendido: seleccione el tiempo para encender el televisor a una hora específica, presione el botón de dirección izquierda o derecha para alternar entre Off, una vez y todos los días. (Nota: si selecciona desactivar, el tiempo de activación, Fuente de activación y el Canal de activación no son ajustables.) Encienda a un Tiempo determinado: pulse izquierda, derecha, arriba, abajo para fijar la hora de...
- Page 19 Instrucciones CAPITULO 3: FUNCIONES AVANZADAS activando la función Smart Switch, al pulsar el botón de origen sólo pueden cambiar entre las fuentes de señal. Revisión del diseño de terminales 1. Pulse la tecla arriba, abajo, derecha o izquierda para seleccionar el diseño y pulse Aceptar para mostrar el estado de interfaz.
- Page 20 Instrucciones CAPITULO 3: FUNCIONES AVANZADAS Multimedia Movie Show Photo Show Music Show Auto Play REPRODUCCIÓN DE PELÍCULAS: 1. Seleccione la película que quiere reproducir, a continuación, pulse el botón derecho o Aceptar para entrar en el dispositivo USB. 2. Pulse el botón de dirección izquierda o derecha para seleccionar el símbolo de disco USB y pulse el botón OK para entrar en el disco seleccionado.
- Page 21 Instrucciones CAPITULO 3: FUNCIONES AVANZADAS REPRODUCCIÓN DE MÚSICA: 1. Seleccione Música, a continuación, presione la derecha o el botón OK para entrar en el dispositivo USB 2. Pulse el botón de dirección izquierda o derecha para seleccionar el símbolo de USB y presione el botón OK para entrar en la carpeta seleccionada.
- Page 22 Instrucciones CAPITULO 3: FUNCIONES AVANZADAS 3. Preste atención a la fuente de energía del dispositivo cuando se utiliza un disco duro móvil o una cámara digital. Si la fuente de energía no es suficiente o no es estable, puede encontrar problemas durante el funcionamiento o no puede funcionar en absoluto.
- Page 23 Instrucciones CAPITULO 4: OTRA INFORMACIÓN SOLUCIÓN DE PROBLEMAS La mayoría de los problemas que podría encontrar con el televisor se pueden corregir mediante la consulta de la lista de solución de problemas. No hay imagen ni sonido 1. Compruebe si el fusible o el circuito está funcionando. 2.
- Page 24 Instrucciones CAPITULO 4: OTRA INFORMACIÓN SOLUCIÓN DE PROBLEMAS Pantalla en blanco en el modo VGA Tal vez la televisión no puede reconocer la resolución fijada por el PC. Se sugiere cambiar a la mejor resolución o resolución estándar del sistema de Windows. Puntos blancos e interferencia Si la antena se encuentra en la zona periférica de una señal de televisión donde la señal es débil, la imagen puede ser empañado por puntos.
- Page 25 Instrucciones INSTALACIÓN DEL SOPORTE DE MESA NOTAS: Si el soporte de mesa ha sido ensamblado previamente, ignore las siguientes instrucciones. Siga las instrucciones de acuerdo al soporte de mesa que se le ha suministrado. Los gráficos utilizados en estas instrucciones son solamente una representación . Cuando el televisor esta boca abajo, no coloque la pantalla sobre bordes afilados para evitar que se raye la pantalla.
- Page 26 CAUTION: Use of controls, adjustments or procedures other than those specified herein may result in hazardous radiation exposure. The lighting flash with arrowhead symbol, within an equilateral triangle is intended to alert the user to the presence of uninsulated "dangerous voltage" within the product's enclosure that may be of sufficient magnitude to constitute a risk of electric shock to the person.
- Page 27 IMPORTANT SAFETY INSTRUCTIONS Read before operating equipment 1. Read these instructions. C.The appliance has been exposed to rain; 2. Keep these instructions. D.The appliance does not appear to operate normally or 3. Heed all warnings. exhibits a marked change in performance; 4.
-
Page 28: Table Of Contents
Table of Contents Chapter 1: Introduction Precautions ............................Product ............................. Power and Plug ..........................Power Cord and Signal Cable ......................Use Environment ..........................Cleaning ............................Hanging the TV Set on the Wall ....................... Buttons on the TV ..........................Sockets ..............................Remote Control Functions ......................... -
Page 29: Chapter 1: Introduction
Chapter 1 Introduction Precautions Use Environment Read all of the instructions before operating the set. Keep these instructions well for future use. Do not place the set on an unstable cart, stand, or table. Product Place the set on a place that allows good ventilation. Do not block or cover the ventilation openings on the Do not use the set near damp, and cold areas. -
Page 30: Buttons On The Tv
Introduction Buttons on the TV 1. CHANNEL UP/DOWN button Scans up/down through the channel list. In the menu system, they act like the up/down direction buttons on the remote and adjust menu controls. 2. VOLUME UP/DOWN button Increases/decreases the volume. In the menu system, they act like the right/left direction buttons on the remote and adjust menu controls (Note: In some menus, VOLUME UP also acts like the OK button on the remote.) MENU ( )button... - Page 31 Introduction USB socket (input) The socket can be used to connect an USB device. Note: The number of USB sockets on the TV may vary according to TV model. SPDIF socket (output) SPDIF The SPDIF socket can be used to connect a compatible digital audio receiver. Headphone socket (output) This socket can be used to connect headphones or stereo earphones.
-
Page 32: Remote Control Functions
Introduction Remote Control Functions Most of your television's functions are available via the menus that appear on the screen. The remote control supplied with your set can be used to navigate through the menus and to configure all the general settings. (MUTE) Reduces the TV's volume to its minimum level. -
Page 33: Chapter 2: General Operation
Chapter 2 General Operation Switching on Follow the instructions on this page on how to switch on your TV set and the remote control before going on to following pages describing how to use the channel set-up procedure. 1. Insert two AAA batteries in the remote control. Precautions on using batteries: - Only use the battery types specified. -
Page 34: Automatic Channel Set-Up
General Operation Automatic Channel Set-up Note: Depending on the number of channels you receive, it may take several minutes for the channel Channel set-up involves selecting all the settings required search to finish. If you want to interrupt the process, to be able to search for and store all the channels you can press the Menu button. -
Page 35: Adjusting The Sound
Advanced Functions Function Settings Display the menu by pressing the Menu button. Press the Tint adjusts the balance between the red and green left or right direction button to select the Setting icon levels. and press the up or down direction or OK button to display Note: Tint is available to be adjusted only when the the Setting menu. -
Page 36: Selecting A Signal Source Or Look Over The Layout Of Terminals
Advanced Functions Startup Setting: Sets the startup picture. You can set the Setting Default or captured picture as open picture. High Light Sensor For example, if you want to set a family photo as the Smart Switch startup logo: Startup Setting Default 1. -
Page 37: Geometry Settings
Advanced Functions AD Clock: adjusts the clock sync of the picture. Source Phase: adjusts the picture if there is flicker of screen letters, color misalignment, or blurring. YPBPR Press Menu to return or Exit to close the menu. HDMI1 HDMI2 HDMI3 AV 1 AV 2... - Page 38 Advanced Functions Showing Photo: 3. Press Exit to return the USB root catalog. 1. Select Photo Show item, then press the right or OK button to enter the USB device. Attention and Frequently Asked Questions: 2. Press the left or right direction button to select the USB disk symbol and press the OK button to enter the Attention: selected disk.
-
Page 39: Special Functions
Advanced Functions 8. For some USB device with power supply, such as large size hard disk, MP4, etc., Suggests using it with power to avoid electric power shortage. -The parameters of file, such as the pixel of picture, code rate of audio and video file, sampling rate of audio file, exceed the limit of the system;... -
Page 40: Chapter 4: Other Information
Chapter 4 Other Information Troubleshooting Most problems you encounter with your TV can be 1. Adjust the position and orientation of the indoor/outdoor corrected by consulting the following troubleshooting list. antenna. 2. Check the connection of antenna. No picture, no sound 3.
Need help?
Do you have a question about the K-LED39FHDN and is the answer not in the manual?
Questions and answers