
Related Manuals for Lightwave Link JSJSLW500


Summary of Contents for Lightwave Link JSJSLW500
- Page 1 Version 2 Lightwave Link Model No. JSJSLW500 Instruction Manual Connect Series www.lightwaverf.com...
-
Page 2: Ec Declaration Of Conformity
Birmingham B7 4BB Tel: +44 (0)121 250 3625 Email: enquiries@lightwaverf.com Model Number(s): JSJSLW500 Description: Lightwave Link Directives this equipment Complies with: 2006/95/EC The Low Voltage Directive N/A 2004/108/EEC The Electromagnetic Compatibility Directive 1999/5/EC R&TTE Directive 93/68/EEC CE Marking Directive Standards Applied in order to verify compliance... -
Page 3: Get Started
Get Started How do I get started? Power the Lightwave Link and connect it to your home WiFi router. The instructions in this booklet will explain how. The Lightwave Link will the set itself up automatically. Download the free ‘LightwaveRF’ App and follow the in-App instructions. -
Page 4: Device Setup
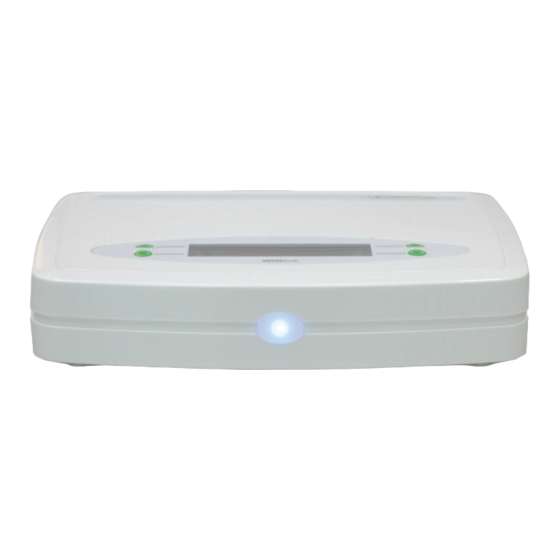
Device Setup Overview Menu Buttons Information display Indicator LED If at any stage you encounter a problem that you cannot resolve, please visit the support section on www.lightwaverf.com for additional assistance. - Page 5 2. Plug in the power supply, and push the jack plug into the AC connection on the back of the Lightwave Link. Turn on the power supply. The green LED on the Lightwave Link will illuminate to indicate that the Link has power and is...
-
Page 6: Understanding The Display
Energy Monitor ‘Install/Link’ - Allows an energy monitor to be linked with the Lightwave Link by pressing this button and then pressing the manual button on the Energy Monitor (see Energy Monitor Instructions for more information). - Page 7 ‘Auto’ - Enables BST/GMT automatically changing System ‘Info’ - This displays the Lightwave Link firmware and also the number or Timers (T), Events (E) and number of currently running Events (R). ‘MAC/IP’ - This displays the MAC address of the Link (also found on the back of the unit) as well as the IP address on your local network.
-
Page 8: App Setup
‘Help’). Web App You can also control the Lightwave Link from the LightwaveRF Web App. This is a more extensive platform very suited to setting up and viewing large installs. It also allows you to access the Heating Planner, which provides more detailed and convenient scheduling. - Page 9 App Setup Basic App features Rooms The LightwaveRF Apps organise your linked LightwaveRF lighting and power devices into rooms which you can name. These rooms could be, most commonly, the rooms of your house, such as ‘lounge’ or ‘kitchen’, but you can personalise them to represent what ever you like.
- Page 10 App Setup Choosing device type & Moods Once you have set up a room, you can begin to populate it with LightwaveRF devices. You need to define the device type as this allows the correct command buttons to be displayed when you control that device from the App.
-
Page 11: Additional App Features
App Setup Additional App features Events An Event is simply a list of LightwaveRF devices that you want to control at the same time. When you activate the Event, all the devices in the list will do whatever you have preset them to do. You could, for instance, set an Event called ‘cinema’... - Page 12 App Setup Heating devices The Lightwave Link can also be used to coordinate and schedule LightwaveRF heating devices. Each heating device, such Thermostats, Radiator Valves Boiler Switches, can be linked to the LightwaveRF App in the same way as other LightwaveRF devices using the Heating Page.
-
Page 13: Energy Monitor
This could be by pressing a button on a Heating Remote, by the opening of a Magnetic Trigger, or by the detection of movement on a PIR. The Lightwave Link will automatically take an action that has been preset using the App; it can turn on/o number of devices, trigger a mood, or even send an ‘alert’... - Page 14 Creative Ideas for the Lightwave Link 1. (Basic): Scene lighting Required: Lightwave Link, Dimmer(s), Dimmable Plug-ins LightwaveRF Dimmer Switches & Dimmable Plug-ins enable you to control all of your ceiling lights and socket powered lamps individually or together as a group.
- Page 15 Dangerous appliances in the kitchen (blender, microwave, hot plate, etc.) might be a worry if you’re not always around to supervise the family. With the Lightwave Link, you can control the Sockets from anywhere using your smartphone. This means that you can lock dangerous devices when you’re on...
- Page 16 Required: Lightwave Link, Dimmer(s)/Plug-ins This setup gives you control over your devices from anywhere in the world. Via the Lightwave Link, every LightwaveRF Dimmer or Plug-in can be controlled using a smartphone wherever you are. So, when you’re away on holiday, you can turn on lights to make it look like someone’s home.
-
Page 17: Troubleshooting
Lightwave Link and resoring it. If successful, the LED indicator light/s on the device will flash to indicate that they have stored the new command from the Lightwave Link. - Page 18 Monitor will not transmit properly. Next, ensure that the Energy Monitor is in range of the Lightwave Link. Try moving it closer to the Link (even if the clamp has to be disconnected) and see if a reading appears (even if it is 00.00kW).
- Page 19 FAQs What do the ‘S’ or ‘X’ letters represent on the screen? An ‘S’ confirms that the Lightwave Link is connected to the LightwaveRF server. An ‘X’ signifies that Cloud Server link is turned o . How do I know if I have the latest firmware? The Lightwave Link will automatically check for firmware updates several...
- Page 20 It is possible to use the Link without this connection later, however remote commands will not function. Which ports does the Lightwave Link use? The Lightwave Link operates on ports 69 & 2011 on UDP for remote connectivity and 9760 & 9761 for local connectivity.
-
Page 21: Specification
Technical Specification Specification RF frequency: 433.92 MHz & 868 MHz Input rating: 12V Output rating: 3.4W Warranty: 2 year standard warranty... - Page 22 Version 2 Innovation Birmingham Campus Faraday Wharf Holt Street Birmingham B7 4BB 01707 386035 www.lightwaverf.com...
Need help?
Do you have a question about the Link JSJSLW500 and is the answer not in the manual?
Questions and answers