Table of Contents
Advertisement
Quick Links
Download this manual
See also:
Instruction Manual
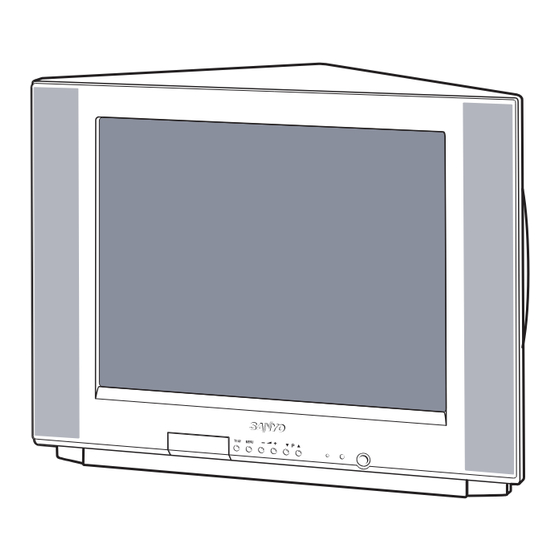
SERVICE MANUAL Colour Television
Specifications
Power Source . . . . . . . . . AC220-240V, 50Hz/60Hz.
Colour System . . . . . . . . PAL (AV input: PAL/NTSC4.43/NTSC/PAL-60Hz)
Sound System . . . . . . . . B/G
Channel Coverage . . . . . Australia
New Zealand
Video IF . . . . . . . . . . . . . . 38.0MHz
Aerial Input Impedance . . 75Ω
Ext. Terminals
Video inputs: Phono jack x 2 (1Vp - p, 75Ω)
Audio inputs: Phono jack (L/R) x 2 (436mVrms, more than 40KΩ)
Video monitor outputs: Phono jack x 1 (1Vp - p, 75Ω)
Audio monitor outputs: Phono jack (L/R) x 1 (436mVrms, less than 600Ω)
Speaker
. . . . . . . . . 5 cm x 12 cm x 2 pcs.
Sound Output (RMS) . . . . 5W + 5W
Dimensions . . . . . . . . . . . 587 (W) x 458 (H) x 486 (D)mm
Weight . . . . . . . . . . . . . . . approx. 21.3 Kg
Specifications subject to change without notice.
C3RW/C3RV
-
+
P
VHF: 0-11, 5A
UHF: 28-69
CATV: S1-S41, X, Y, Z, Z+1, Z+2
VHF: 1-11
UHF: 21-69
CATV: S1-S41, X, Y, Z, Z+1, Z+2
FILE NO.
Model No. CP21AF1V
(Australia / New Zealand)
Service Ref. No. CP21AF1V-00
TIMER
TV/AV
1
2
3
4
5
6
7
8
0
-/--
9
BASS
A B
SURROUND
PL
P
P
CH SCAN
PM
SWAP
MENU
PIC MODE
JXMYA
Product Code: 111351447
Original Version
Chassis Series: FC3-B
- NOTE -
Service Ref. No. CP21AF1V-10 is electrically the
same as Service Ref. No. CP21AF1V-00.
The difference between Service Ref. No.
CP21AF2V-00 and CP21AF1V-10 are as follows:
1) Destination CP21AF1V-00...Australia
CP21AF1V-10...New Zealand
2 ) The difference in a parts list is only a rated
label.
Give complete "SERVICE REF. NO." for
parts order or servicing. It is shown on the
rating plate at the cabinet back of the unit.
This T.V. receiver will not work properly in
foreign countries where the television
transmission system and power source dif-
fer from the design specifications. Refer to
the specification table.
REFERENCE NO.
(Australia)
CP21AF1V-10
(New Zealand)
SM
5110468
Advertisement
Table of Contents

Related Manuals for Sanyo CP21AF1V


Summary of Contents for Sanyo CP21AF1V
- Page 1 Sound System ..B/G - NOTE - Channel Coverage ..Australia Service Ref. No. CP21AF1V-10 is electrically the VHF: 0-11, 5A same as Service Ref. No. CP21AF1V-00. UHF: 28-69 The difference between Service Ref.
-
Page 2: Table Of Contents
Contents Safety Notice ............... . 2 Chassis Block Diagram . -
Page 3: Chassis Block Diagram
Chassis Block Diagrams MAIN SIGNAL PROCESSING CIRCUIT... - Page 4 Chassis Block Diagrams SYSTEM CONTROL...
-
Page 5: Ic Block Diagrams
IC Block Diagrams IC201 < IF/Video/Chroma/Def. > LA76818 Audio Output SIF Input FM Output/Selected SIF APC Filter Audio Output SIF Output PIF AGC Ext. Audio Input RF AGC Output PIF Input1 APC Filter VCO Coil 1 PIF Input 2 VCO Coil 2 IF Ground VCO Filter IF Vcc... - Page 6 IC Block Diagrams IC201 <IF System Block Diagram> LA76818...
-
Page 7: Service Information
IC Block Diagrams IC501 < Vertical Output > LA78040/TDA9302H Thermal Protection Pump IC001 < Audio AMP.> AN5274 Volume Over Current Ripple Thermal Filter Protection Circuit Service Information I Protection Circuit This TV set has a built-in power supply protection circuit. It is provided to protect the TV set in case of a power supply circuit malfunctions. -
Page 8: Service Adjustments With Replacing Memory Ic (Ic802)
Service Adjustments with Replacing Memory IC (IC802) Note: The CPU (IC801) and memory IC (IC802) store the service adjustments data and controls data for each circuit. When the Memory IC(IC802) is replaced, some of the service adjustments should be readjusted to obtain the best performance. - Page 9 Service Adjustments with Replacing Memory IC(IC802) Following table shows the initial values which have been stored in the CPU ROM, and items for the service adjustments. Service mode adjustments table in CPU ROM INITIAL INITIAL DATA DATA DESCRIPTION ITEM SETUP DESCRIPTION ITEM SETUP...
- Page 10 Service Adjustments with Replacing Memory IC (IC802) INITIAL INITIAL DATA DATA ITEM SETUP DESCRIPTION DESCRIPTION ITEM SETUP RANGE RANGE DATA DATA CPU Debug Date. 00~255 CPU Debug Date. 00~255 CPU Debug Date. 00~255 CPU Debug Date. 00~255 CPU Debug Date. 00~255 CPU Debug Date.
-
Page 11: Entering To Service Mode
Service Adjustments with Replacing Memory IC(IC802) [Entering to Service Mode] Press and hold the MENU button on the Remote Control and press the VOLUME (+) button on the TV set. Following setting items appears on the screen. MENU Display for [RF AGC] RF AGC adjustment MENU Read Status SI. -
Page 12: Service Mode Adjustments
Service Mode Adjustments Following adjustments should be carried out when the memory IC is replaced. How to enter the service mode and adjust values, please refer to “ Entering to Service mode” on page 13. Item 05 [V-SCO] V-S CORRECTION Item 01 [RF AGC] AGC NOTE: Do not attempt this adjustment with weak signal. - Page 13 Service Mode Adjustments Items 14-17, 19-21 GREY SCALE (1) Receive the monochrome circular pattern. (2) Set the brightness and colour to normal, contrast to maximum. (3) Enter to the service mode. (4) Set each value of Item-14 RBIAS, 15 GBIAS, 16 BBIAS, 17 RDRIV and 19 BDRIV mode to 64. (5) Select Item-20 mode to be one horizontal scanning line and turn the screen volume on the FBT to obtain just visible one coloured line.
-
Page 14: Service Adjustments
Service Adjustments +B VOLTAGE ADJUSTMENT HORIZ. WIDTH ADJUSTMENT 1. Connect DC meter to TP-B and the ground. 1. Receive a monochrome circular pattern. 2. Tune the receiver to an active channel and synchronized 2. Set the brightness and contrast to maximum. picture. -
Page 15: Special Function
Special Function The following special functions can be set up on this TV How to set the special function: set. Note: When making the VOLUME LOCK setting, set the (1) Volume Lock setting desired maximum sound volume by pressing the VOLUME + or - button before entering Special Function setting mode. -
Page 16: Purity And Convergence Adjustment
Purity and Convergence Adjustment CAUTION: The Convergence and Purity adjustments have been made at the factory. Readjustment should be made only after picture tube or deflection yoke replacement, following the steps below: PURITY ADJUSTMENT 8. Tighten the mounting screw of the Deflection Yoke. Adjust 1. -
Page 17: Mechanical Disassemblies
Mechanical Disassemblies CABINET BACK REMOVAL CHASSIS REMOVAL 1. Refer to Figure 1, remove 8 screws. 1. Remove cabinet back. 2. Pull off cabinet back and remove. 2. Discharge the picture tube anode (2nd anode lead) to the dag coating (picture tube grounding lead). 3. -
Page 18: Cabinet Parts List
CABINET FRONT-C3RW 610 286 5080 DOOR-C2GA 610 284 7741 DOOR COVER-C2SA 610 303 4911 DEC SHEET DOOR-C3RM 645 041 7269 BADGE,SANYO 610 304 4644 CABINET BACK-C3RG 610 304 5092 LABEL RATING-C3RW (SERVICE REF.NO.CM21AF1V-00) 610 304 5108 LABEL RATING-C3RV (SERVICE REF.NO.CM21AF1V-10) -
Page 19: Chassis Electrical Parts List
C3RV Chassis Electrical Parts List (Service Ref. No. CP21AF1V-00, CP21AF1V-10) Product safety should be considered when a component replacement is made in any area of a receiver. Components indicated by a mark in this parts list and the circuit diagram show components whose value have special significance to product safety. - Page 20 C3RV Ref. No. Part No. Description Ref. No. Part No. Description Q011 405 014 4509 TR 2SC2412K T146 R 405 004 3109 TR 2SA564A-Q(CU) 405 014 4608 TR 2SC2412K T146 S 405 004 3208 TR 2SA564A-R(CU) 405 015 8704 TR 2SC2812-L6-TB 405 006 1707 TR 2SA933S-Q 405 015 8902...
- Page 21 C3RV Ref. No. Part No. Description Ref. No. Part No. Description 405 020 7501 TR 2SC945A-PA C008 403 044 6609 ELECT 10U M 405 020 7709 TR 2SC945A-QA C009 403 179 0909 POLYESTER 0.047U K 405 020 7907 TR 2SC945A-RA C010 403 045 1504 ELECT...
- Page 22 C3RV Ref. No. Part No. Description Ref. No. Part No. Description C243 403 215 2201 CERAMIC 0.01U K 403 269 1809 CERAMIC 470P K C244 403 051 3103 ELECT 47U M 403 269 1809 CERAMIC 470P K C245 403 086 2300 NP-ELECT 1U M C635...
- Page 23 C3RV Ref. No. Part No. Description Ref. No. Part No. Description R024 401 105 3406 MT-GLAZE 27K JA 1/16W R210 401 105 3703 MT-GLAZE 3K JA 1/16W R026 401 105 6506 MT-GLAZE 680 JA 1/16W R211 401 025 1308 CARBON 150 JA 1/6W R027...
- Page 24 C3RV Ref. No. Part No. Description Ref. No. Part No. Description R602 402 067 7709 WIRE WOUND 3.9 KA R862 401 105 7404 MT-GLAZE 8.2K JA 1/16W 402 072 4403 WIRE WOUND 3.9 KA R863 401 105 5400 MT-GLAZE 47K JA 1/16W R611 401 027 2600 CARBON...
- Page 25 C3RV Ref. No. Part No. Description Ref. No. Part No. Description 407 013 7109 DIODE 1S2473 D617 407 007 6606 DIODE ES1 D004 407 099 5808 ZENER DIODE MTZJ7.5A 407 007 6903 DIODE ES1Z 407 057 6304 ZENER DIODE RD7.5EB1 408 009 9008 DIODE BYD33D 407 151 8808...
- Page 26 C3RV Ref. No. Part No. Description Ref. No. Part No. Description 645 027 7382 SWITCH,PUSH 1P-1TX1 R723 401 105 7206 MT-GLAZE 82 JA 1/16W SW1905 645 003 4701 SWITCH,PUSH 1P-1TX1 R724 401 065 4604 OXIDE-MT 12K JA 645 019 4887 SWITCH,PUSH 1P-1TX1 R725 401 009 1508...
- Page 27 -27-...
- Page 28 SANYO Electric Co., Ltd. A14800 /Mar. /’03 /30 BB Printed in Japan...
- Page 29 K1002 REAR JP3405 C1015 R FRONT IN R FRONT IN R FRONT IN JP1008 R FRONT IN R1030 L REAR IN L REAR IN V IN JP1007 R REAR IN R REAR IN 1/16GZ0C C1016 C1014 R1029 L FRONT IN L FRONT IN L FRONT IN JP1003...
- Page 30 CRT BOARD (Component Location) Waveforms & Voltages (On the Main Board) B10S0120B IC201 (IF/VIDEO/CHROMA) R741 Pin-1 2.3V 2.2V 2.5V 2.1V 2.9V 2.9V 5.0V 2.5V JS741 1.6V 4.0V 3.8V 4.3V 1.6V 1.7V 1.6V 8.3V 2.5V 2.5V 2.5V 2.0V 2.5V 2.7V 5.2V 2.6V 0.9V 1.3V...
Need help?
Do you have a question about the CP21AF1V and is the answer not in the manual?
Questions and answers