Table of Contents
Advertisement
Advertisement
Table of Contents

Subscribe to Our Youtube Channel
Related Manuals for PaceSaver Eclipse series

Summary of Contents for PaceSaver Eclipse series
- Page 1 PaceSaver Owner's ® Scooters Manual Plus III Series Espree Series Eclipse Series ™ ™ ™ (Must Be Given to User) READ this entire Owner's Manual BEFORE you operate your new scooter! See inside front cover for special instructions. PN 16619 Revised 0610 SMAN0610.INDD...
- Page 2 "SPECIAL OPTION" WARNINGS SEAT MOUNT INFORMATION CAUTION: Some seats have a second set of mounting holes. The front hole location can provide1" extra leg room. If the front set of holes is used, it will reduce the maximum incline rating of the vehicle by 3 degrees.
-
Page 3: Table Of Contents
SCOOTERS. BE SURE AND FIND THE INFORMATION THAT PERTAINS TO YOUR STYLE. Introduction Important Safety Information PaceSaver Specifi cations Getting On and Off The PaceSaver Operating the PaceSaver Your First Ride The PaceSaver Braking Systems Brake Disengage Mechanism Seat Assembly Operation Disassembly &... -
Page 4: Introduction
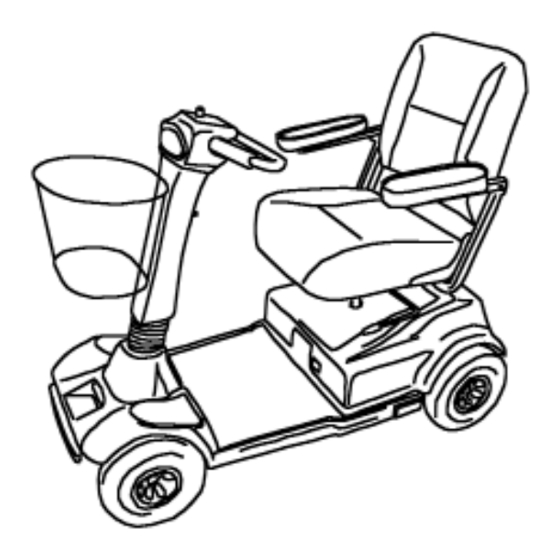
OWNERS MANUAL Introduction Congratulations on your choice of a PaceSaver Scooter! It is a dependable vehicle built for power and performance. The PaceSaver’s rear wheel drive sys- tem will outperform front wheel drive styles on any surface, indoors or out. It has excellent handling characteristics and its compact design makes it agile in even the smallest places. -
Page 5: Important Safety Information
fl exibility - Fingertip controls may be required. Use extra caution when riding your PaceSaver off of the pavement or on rough, uneven surfaces or tipping and injury will result. If you intend to operate your PaceSaver on rough, uneven surfaces, and are willing to sacrifi... - Page 6 Do not exceed the incline specifi cations for the style of PaceSaver that you own or it will become unstable and tipping will result. Persons with limited ability to protect them- selves (like persons paralyzed on one side) should use protective equipment such as bicycle headgear.
- Page 7 DO NOT remain seated on your PaceSaver while it is being loaded into a vehicle us- ing anything other than a special scooter lift. DO NOT use the PaceSaver as a seat in a moving vehicle. As of this date, the De- partment of Transportation has not approved any tie down system for transportation of a user while in a scooter in a moving vehicle of any type.
- Page 8 DO NOT leave the PaceSaver where it is exposed to high temperatures (a car trunk, etc.) or to poor weather conditions such as rain or snow or freezing conditions as damage to the unit will occur.
- Page 9 USE CURB CUTS whenever possible to go up and down curbs. Always drive straight up/down or perpendicular to curbs or curb cuts. Never traverse at an angle. RIDER TRANSFER: Refer to the section of the owners manual titled 'Getting On and Off the PaceSaver'.
-
Page 10: Pacesaver Specifi Cations
Plus III Series Specifi cations Spec's subject to Plus III Plus III Plus III Plus III slight variations 9" Premier 10" Premier Titan Junior 10"/9" 45.5" 45.5" 45.5" 42" OVERALL LENGTH 23.5" 24" 24." 24" / 23.5" OVERALL WIDTH -------- -------- -------- --------... - Page 11 Plus III Cont. & Eclipse Series Specifi cations Spec's subject to Eclipse Eclipse Plus III slight variations Atlas Premier Atlas 45.5" 49.75" 49.75" OVERALL LENGTH 26.5" 26.5" 24" OVERALL WIDTH -------- -------- -------- WEIGHT 43.3 lbs. 41 lbs. 41 lbs.
- Page 12 Espree Series Specifi cations Spec's subject to Espree Espree Espree Espree slight variations 9" Premier Atlas 10" Premier Titan 45.5" OVERALL LENGTH 45.5" 45.5" 45.5" 26.5" OVERALL WIDTH 23.5" 24" 24" -------- WEIGHT -------- -------- -------- 41 lbs. REAR DRIVE UNIT 40 lbs.
- Page 13 Espree 500 and Eclipse 500 Series Specifi cations Spec's subject to Espree Eclipse slight variations Atlas 500 Atlas 500 OVERALL LENGTH 45.5" 49.75" OVERALL WIDTH 26.5" 26.5" WEIGHT -------- -------- REAR DRIVE UNIT 41 lbs. 41 lbs. BASE AND TILLER 45 lbs.
-
Page 14: Getting On And Off The Pacesaver
Sudden accidental movement of the scooter will be avoided with the key in the OFF position. Tipping can occur if you get on the PaceSaver in a manner other than recommended. Tipping can be avoided by keeping your weight away from the outer edges until seated. -
Page 15: Operating The Pacesaver
Operating the PaceSaver All controls for PaceSaver operation are located on the tiller mounted panel (See FIGURE 1). Become familiar with all controls with the key in the OFF position. Each is described in Control the following section. Console Key Switch... - Page 16 NOTE: The battery indicator will tell you if power is applied. The indicator only works when the key is switched ON and all battery connections are made. Your scooter is equipped with a battery saver circuit. It will shut off the controller after 20 minutes of non-use (even with your key "ON").
- Page 17 (See FIGURE 2). NOTICE: The battery charger provided is specially designed for use with PaceSaver brand equipment. In the unlikely event of failure it should be replaced only with a PaceSaver approved charger to assure proper performance ot the charger and scooter.
-
Page 18: Your First Ride
WARNING PaceSaver Titan and Atlas models are high performance vehicles. As with Sport Utility Vehicles they require more caution when operating. Because of the extra power and speed they are more susceptible to tipping in rough terrain and tight turns at high speed. -
Page 19: The Pacesaver Braking Systems
3. Posi-Lock Electric Braking Disk is activated with delay when all power is stopped to the motor. This electric brake has a short delay and ultimately holds the PaceSaver at a complete stop. The scooter cannot be moved when this brake is activated. Dynamic Braking works in conjunction with Posi-Lock Electric Braking to bring you to a gradual and complete stop. -
Page 20: Brake Disengage Mechanism
MANUAL BRAKE RELEASE FOR ALL PACESAVER SCOOTERS Activating the disengage mechanism is as follows. 1. Be certain the scooter is on fl at level ground. 2. Locate the Black release knob on the top right of the rear cover. Pull the black knob up fi... -
Page 21: Seat Assembly Operation
The PaceSaver seat rotates 360 degrees. The seatlock allows you to lock the seat in any position. Seatlock operation is as follows. 1. Rotate the seat to the desired position. - Page 22 6. Replace the metal cones, bolt, and nut in their proper order. Tighten until all play is elimi- nated. 7. Replace the seat assembly and test the new height. It is recommended that the seat assembly be positioned at the lowest possible comfortable seat height. PaceSaver stability will be improved at the lower height. -20-...
- Page 23 500 lb capacity scooters include separate dis- connect plugs for the motor power and the motor brakes. To prevent pos- sible damage of the plugs, it is important that you disconnect the smaller (2-pin) brake connector plug fi rst. Locate the plugs above and slightly in front of the drive motor.
-
Page 24: Disassembly & Assembly
Disassembly and Assembly of the PaceSaver Scooter The PaceSaver’s patented separation makes it easy to disassemble and assemble. Complete disassembly can be accomplished in seconds WITHOUT tools. 1. Remove the key from the switch. (It should already be in the OFF position since it was placed there when you last got off the scooter). - Page 25 The following is the procedure for assembling the PaceSaver Scooter. With practice this will become easier and easier. 1. Align the silver tongue of the rear section with the square tube on the front section. Check that there are no cables caught between the two sections.
-
Page 26: Charging Your Batteries
1. Never smoke or allow open fl ame or sparks around a charging battery. 2. Never charge a frozen battery. 3. Use a PaceSaver charger designed for charging deep-cycle gelcell and AGM batteries. 4. The user is instructed to NOT use the charger with a battery confi guration not matching the output voltage rating of the charger. - Page 27 5. An extension cord is not recommended for use with this equipment. Use of an improperly rated extension cord could result in risk of fi re or electrical shock. Should it be required to use an extension cord, make certain that it is of 3-wire construction and has a wire size of at least 16-gage, and the cord must be in good electrical condition.
- Page 28 A TEMPORARY AC ADAPTER may be used to connect the plug provided with this charger to a two-pole receptacle if a properly grounded receptacle is not available. The temporary adapter should only be used until a properly grounded outlet can be installed by a qualifi ed electrician.
- Page 29 Useful Battery Information 1. The battery meter in the tiller's Control Console indicates the charge condition of the batteries while you are driving. The meter will not indicate the “true condition” while sitting still. The green area corresponds to a good charge. The red area corresponds to a low charge or to a deep cycle discharge condition.
- Page 30 • Periodically check that all electrical connections are secure. Tips for maximizing the battery life and reducing total recharge time: • Always use the PaceSaver battery charger that is provided with the scooter. • Park the scooter in the shade whenever possible.
- Page 31 In the unlikely event of failure we recommend replacement only with a PaceSaver brand charger. The charger is intended for use with AGM or gelcell sealed lead-acid deep cycle discharge type batteries only. This is a 24 volt DC charger for use only with batteries connected for 24 volt DC service.
- Page 32 fi xed time limit. Note: The PaceSaver Battery Charger used must used according to the instructions. Failure to do so may damage or destroy the batteries, give poor range, or be potentially dangerous. Batteries should not be abused (for example by regularly deep discharging) and must be operated and maintained according to the instructions.
-
Page 33: Onboard Battery Charger
The PaceSaver Onboard battery charger is recommended for use with deep cycle AGM or gel sealed lead acid batteries, and can be left "on charge" indefi nitely without harm to the batteries. - Page 34 2. Check that the wall outlet has power to it. The outlet may be on a switch and will not function if not switched on. 3. If all connections are properly made and the unit is connected to a working outlet, check the fuse in the charger (see Fuse section).
-
Page 35: General Care & Maintenance Section
- Check the tire pressure for proper infl ation. See the proper specifi cations for your scooter. - Clean the PaceSaver using a damp cloth with a mild soap. Use a minimal amount of water. Do not allow electrical components to get wet. Wipe dry. -
Page 36: Seat Lock
In the same way a car would not last forever without service, a scooter should be maintained regularly. AND REMEMBER! If you ever notice any part of your PaceSaver scooter working in an improper or unsafe manner, stop riding it immediately and contact your dealer to arrange repairs. - Page 37 The recommended pressure for the tires is listed below. MAKE SURE that you are using the specifi cation for the STYLE PaceSaver that you own. Be careful not to overin- fl ate. Properly infl ated tires aid in the PaceSaver’s effi ciency. Under-infl ated tires require more energy to oll, thus decreasing scooter performance.
-
Page 38: Troubleshooting
Troubleshooting 1. Turn the keyswitch off, and then back on again. 2. Some styles have a visible circuit breaker. It is located on the black controller housing near the chrome seat post (See FIGURE 14). You will not see any white on the button when it is switched in the correct operating position. - Page 39 DIAGNOSTIC INFORMATION Leisure Lift products are known for excellent reliability and service. To further enhance this capability, your PaceSaver is equipped with a state of the art diagnostic system. While the system does indicate basic areas the user can check, it's primary purpose is to help your dealer identify the problem to get your scooter repaired as quickly as possible.
-
Page 40: Commonly Asked Questions And Possible Answers
3. Under-infl ated tires. Check for proper infl ation (check the specifi cations for your particular scooter). 4. Excessive weight on the cart. Remember that the PaceSaver takes a maximum of 300 Lbs. - Plus III Premier & Espree Premier 350 Lbs. - Page 41 fl ooded cell lead-acid deep cycle battery. Spillage of the battery acid can cause severe burns and will damage many components of your PaceSaver. The charger which came with the PaceSaver is designed specifi cally to charge AGM or gel cell batteries. Why will my PaceSaver not climb an incline? 1.
- Page 42 -40-...
-
Page 43: Addendums
Addendum All "ATLAS" Models PLEASE READ THE FOLLOWING INSTRUCTIONS CAREFULLY! THIS INFORMATION ONLY APPLIES TO ATLAS SCOOTER MODELS SEAT POST ADJUSTMENT While the seat post adjustment works much the same as shown in your manual (Refer to seat assembly operation section in this manual for more information), there are some extra components used on the ATLAS for increased support. - Page 44 Throttle Operated Power Seat Instructions CAUTION: Only drive the scooter when the power seat is in the lowest position to avoid tipping. RAISING AND LOWERING THE SEAT Position the DRIVE/SEAT switch to SEAT. A green LED will light up (See FIGURE 16). IMPORTANT: Do not change the drive/seat switch position during opera- tion (Doing so will cause the scooter to come to an abrubt stop).
-
Page 45: Electromagnetic Interference
EFFECTIVE DECEMBER 2, 1994 THE FEDERAL GOVERNMENT REQUIRES THIS STATEMENT TO BE INCLUDED. ELECTROMAGNETIC INTERFERENCE CAUTION: IT IS VERY IMPORTANT THAT YOU READ THIS INFORMATION REGARDING THE POSSIBLE EFFECTS OF ELECTROMAGNETIC INTERFERENCE ON YOUR POW- ERED WHEELCHAIR / POWERED SCOOTER. Electromagnetic Interference (EMI) From Radio Wave Sources Powered wheelchairs and powered scooters (in this text, both will be referred to as powered wheelchairs) may be susceptible to electromagnetic interference (EMI), which is interfering to electromagnetic energy... - Page 46 20 volts per meter (v/m) is a generally achievable and useful immunity level against EMI (as of May 1994) (the higher the level, the greater the protection). This model of PaceSaver vehicle has a minimum immunity level of 20 volts per meter (20 v/m).
- Page 47 All rights under this limited warranty must be exercised within 20 days after the end of the warranty. This warranty does not apply to any PaceSaver that meets any of the following conditions and Leisure-Lift, Inc.
- Page 48 HAVE THEM CONTACT Leisure-Lift. If Leisure-Lift did not receive your original registration and proof of purchase you will be required to resubmit proof of purchase. Warranty is not transferable. All other terms and conditions of Leisure-Lift’s regular PaceSaver warranty apply. Failure to return a completed registration form within the time limits will void this offer.
Need help?
Do you have a question about the Eclipse series and is the answer not in the manual?
Questions and answers
how to remove the batteries on the pacemaker 4 wheel scooter.
To remove the batteries on a PaceSaver Eclipse series 4-wheel scooter, follow these steps:
1. Remove the key from the switch (ensure it's in the OFF position).
2. Remove the armrests from the seat assembly if desired.
3. Unlock the seat lock, lift the seat assembly upward, and set it aside.
4. Lift off the rear cover (for units with one-piece battery covers).
5. Disconnect each battery by pressing the tab on the side of the 3-pin connector and pulling the connectors apart.
6. Unfasten the Velcro-backed battery hold-down straps.
7. Remove both batteries.
This answer is automatically generated