Table of Contents
Advertisement
Advertisement
Table of Contents

Subscribe to Our Youtube Channel
Summary of Contents for DAD AX32
- Page 1 AX32 AD/DA Converter System User Manual...
- Page 2 User Manual AX32 IMPORTANT SAFETY INSTRUCTIONS READ AND KEEP THESE INSTRUCTIONS WARNING – when using electric products, basic precautions should be followed, including the following: Read all of the safety and installations instructions and explanation of graphic symbols before using the product.
- Page 3 4. The product does not appear to be operating normally or exhibits a marked change in performance, or 5. The product has been dropped, or the enclosure damaged. WARNING – Hazardous moving parts inside the AX32. Keep fingers and other body parts away. Doc no. AX32-8001-A-4 Rev. date 140107...
-
Page 4: Table Of Contents
Clock and synchronisation system Router functions and principle OPERATION Front panel LED’s Front panel status display Reconfig button DADMAN CONTROL SOFTWARE Assigning the IP address for the computer and the AX32 Top bar functions Operation AD Section DA Section Connections General... -
Page 5: Revision History
AX32 FW. V.1.3 DADman SW v. 4.0 © 2014 All rights reserved. DAD - Digital Audio Denmark is a registered Trademark of NTP Technology A/S, who is the legal owner of the brand. Product features and specifications are subject to change without notice. -
Page 6: Introduction
Before you start This user manual provides basic information about the operation and use of the AX32. For more detailed information related to the installation of the AX32 please refer to the installation guide on the DAD website, www.digitalaudio.dk. Overview of the AX32... -
Page 7: General Description
An AX32 with 6 cards can operate on one power supply only, so the AX32 will not go down if one of the power supplies fail. However it is not recommended to leave the AX32 operating like this for several days as the lifetime of the remaining power supply may be reduced considerably. -
Page 8: Clock And Synchronisation System
IP Audio interface powered by Dante™ the sample rate of the Dante™ I/O node to the IP Audio network can be set to follow the sample rate of the AX32. When more AX32 units are operating in the same set up or IP Audio network they must be set to the same sample rate. -
Page 9: Operation
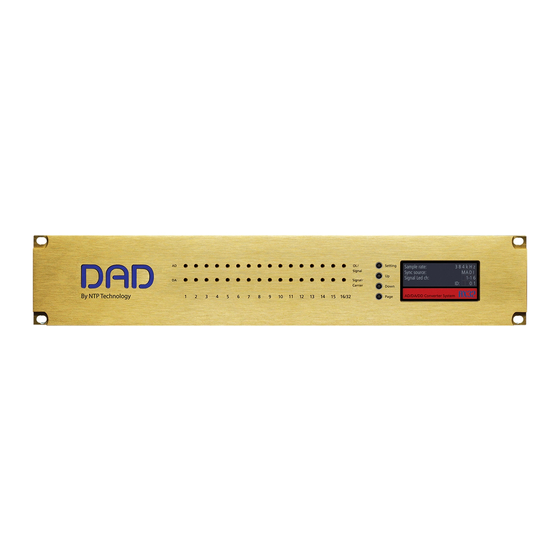
4 buttons for operating the status display. Status display. Front panel LED’s AX32 has two rows of 16 LED indicators on the front panel showing the signal status for the AD inputs and DA outputs. Signal of AD channel 1-16. Yellow indicates... -
Page 10: Front Panel Status Display
Front panel status display The display of the AX32 has four rows for displaying information and four knobs for entering and scrolling information. The display can show more pages and each page can consist of rows where settings can be changed, and with rows for just showing status information. -
Page 11: Reconfig Button
Green LED turns OFF The selection of either of the two recovery modes are fixed after selection. The AX32 will start with a basic boot software and IP configuration. The AX32 will not be operational until a proper firmware has been downloaded via the DADman software and it has been restarted. -
Page 12: Dadman Control Software
Configure via DADman each AX32 in turn with a unique IP address and the preferred network mask e.g. 10.0.7.21 | 255.255.255.0. In this window you can also configure the IP audio network settings When you are done you can connect more than one AX32 to the network, and they will appear in the DADman Device List. -
Page 13: Top Bar Functions
The settings of an AX32 is always stored in the unit it self, so when connected DADman will show this status. A complete DADman preset can also be saved on the computer storing all setting and network configuration. - Page 14 The DADman windows are separated into the four functions: AD, DA, Connections and General as shown below. Most of the functions are quite intuitive. In the following section, the configuration and operation of the AX32 is explained in more details. Each subsection can be hidden by clicking on the symbol.
-
Page 15: Ad Section
Also names for each analogue input and output channel can be assigned. This name is only stored in the DADman settings file and not in the AX32 unit. AD Section The AD section refers to the mic/line AD and line AD cards. If there are no AD cards in the AX32, the section will be blank. Mono/stereo... -
Page 16: Da Section
User Manual AX32 DA Section The DA section refers to DA cards in the AX32. If there are no DA cards, the section will be blank. Valid Signal Signal carrier above -0.5 above -42 Mute dB FS dB FS Mono/stereo... -
Page 17: General
MADI Opt. 1-2, Dante IP Sampling 44.1 kHz, 48 kHz This determines the sample rate of the AX32 if the “Adapt to” 88.2 kHz, 96 kHz setting is set to Internal. If the 176.4 kHz, 192 kHz “Adapt to” setting is set to any of... - Page 18 Default mode. Input rate can be set to “Auto” or “As AD”. In Auto mode, the AX32 will try to determine the sample rate of the incoming MADI signal. In As AD mode, the AX32 will assume that the incoming MADI has the same sample rate as the AX32.
- Page 19 Default mode. Input rate can be set to “Auto” or “As AD”. In Auto mode, the AX32 will try to determine the sample rate of the incoming MADI signal. In As AD mode, the AX32 will assume that the incoming MADI has the same sample rate as the AX32.
-
Page 20: Network Fundamentals
User Manual AX32 Network fundamentals The following is a basic introduction to networks and how to set them up in relation to the AX32. Covering the entire subject of “network” would require several hundred pages so we will focus on the “need-to- know”... -
Page 21: Addressing
User Manual AX32 CAT5 and CAT6 cable, on the other hand, is more pliable and better suited for shorter-distance, movable cabling such as on-the-fly patch cabling. The maximum cable length for 1 Gb/s Ethernet is 100m when using solid cables, for both CAT5e and CAT6. NEVER assume you can go any further than that. - Page 22 User Manual AX32 Let’s have a look at how this works in real life, using an AX32 as an example. The following is a screenshot from the DADman software showing how to set the IP address of the AX32. On the left-hand side you will find the network settings of the AX32 itself. On the right-hand side you will find the network settings for the Dante Audio over IP module, if it is installed in the AX32.
- Page 23 User Manual AX32 the same, are on the same subnet. For example, 192.168.0.5 is on the same subnet as 192.168.0.21 because the first 3 numbers (192.168.0) are the same, whereas 192.168.1.10 is not on the same subnet as the 3 number is different.
-
Page 24: Rear Panel Connections
User Manual AX32 Rear panel connections. Figure 4, Rear panel layout Rear panel layout 1. Card slot 1 to card slot 8. 25 pole female D-sub connector with Tascam pin-out. Up to 6 pcs. 8- channel analogue input or output cards can be installed. Slots 2 and 6 are currently not used. - Page 25 User Manual AX32 and can be used for MADI audio I/O. The right part of the SFP connector is the receiver and the left part is the transmitter. AES11 Sync input, Female XLR connector Pin 1. TX. + Pin 2.
-
Page 26: Analogue I/O Connections
User Manual AX32 Analogue I/O Connections Analogue I/O 25 pole female D-sub connectors There are three types of optional analogue card for the AX32: CARD-AX32-L8, 8 ch. Line AD Card • CARD-AX32-M8, 8 ch. Mic/Line AD Card • CARD-AX32-DA8, 8 ch. Line DA Card •... -
Page 27: Specifications
User Manual AX32 Specifications Audio Specifications Analogue input Sampling, resolution 5bit sigma/delta@5.645 or 6.144 MHz, 24 bit PCM PCM (DXD) sample rates 44,1, 48, 88.2, 96, 174.4, 192, 352.8, 384 kHz DSD sample rates 2.8224 & 5.6448 Mhz (64 & 128 fs) Dynamic range (A) >... -
Page 28: Mechanical Specifications
User Manual AX32 Electrical Specifications Power consumption 90 VA max. Input voltage 90 – 260 VAC 100 – 240 VAC Nominal, 47 - 63 Hz Mains fuse, mounted in IEC connector 1 A, T1AH/250V Safety compliance EN 60950-1:2006 Power supply cord must be min. light sheathed flexible cord according to IEC60227 (designation 60227 IEC 52) and include a protective earth conductor having a green-and-yellow insulation. -
Page 29: Appendix A, Guide To Establish Connection To A Pro Tools Pre
User Manual AX32 Appendix A, guide to establish connection to a Pro Tools Pre This Appendix describes how to connect AX32 to Pro Tools to control the microphone preamps from within the Pro Tools environment (Mac) 1. Preparation In the beginning you need to create two busses in the Audio-MIDI Setup’s... - Page 30 As Type you choose PRE from the popup menu for as many AX24s as connected. For the first 8 channels that the AX32 will Receive needs to be set to Predefined>IAC-Driver, Bus 2>Channel-1. Continue for all other 8 channel groups of the AX32s with Predefined>IAC-Driver, Bus 2>Channel-2 and so on.
- Page 31 User Manual AX32 For AX32 Sent To needs to be set to Predefined>IAC-Driver, Bus 1>Channel-1. Continue for all other AX32s with Predefined>IAC-Driver, Bus 1>Channel-2 and so on. Close the Peripherals dialog by clicking OK. Go to Setup>I/O Setup>Mic Preamps. Now click with the little pencil tool on the first channel where the AX24 is physically connected.
Need help?
Do you have a question about the AX32 and is the answer not in the manual?
Questions and answers