Table of Contents
Advertisement
Quick Links
Advertisement
Table of Contents
Troubleshooting

Subscribe to Our Youtube Channel
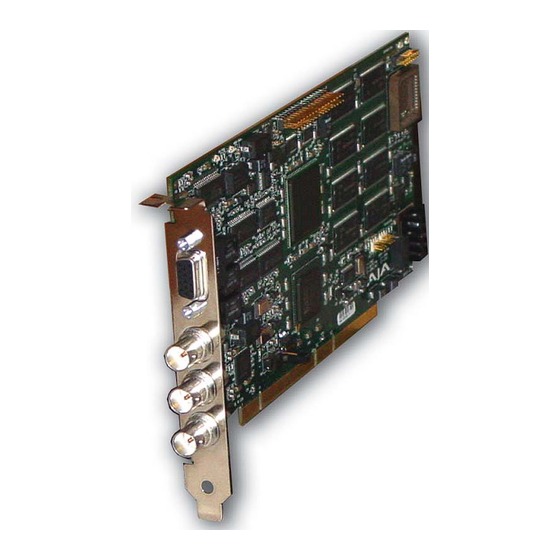
Related Manuals for AJA XenaHS


Summary of Contents for AJA XenaHS
- Page 1 XenaHS PCI Card Module User Manual July 12, 2005 P/N 101664-00...
-
Page 2: Fcc Emission Information
AJA Video, with shipping charges prepaid. AJA Video shall pay for the return of the product to the Customer if the shipment is to a location within the country in which the AJA Video service center is located. -
Page 3: Table Of Contents
AJA XenaHS User Manual — Contents Table Of Contents Trademarks ............................ii Notice ..............................ii FCC Emission Information ......................... ii Contacting Support ..........................ii Limited Warranty ..........................ii Table Of Contents ..........................1 Introduction ............................1 Features ............................... 1 Windows Media Support ......................1 Microsoft applications ......................... - Page 4 Install AfterEffects Plug-ins ....................43 Install PowerCG Support ....................43 WM9Capture Installation ....................43 DirectX9 Installation ......................43 Downloading and Installing Software From The AJA Website ..........44 Troubleshooting Installation Problems ..................44 Driver Has Not Loaded ...................... 44 PCI slot Compatibility ......................44 Page Table Entries ......................
-
Page 5: Table Of Contents
The XenaHS driver (“XenaHD” available from www.aja.com/xena.htm) supplies a generic Windows Media interface for applications. XenaHS also supports PowerCG, ThumbsPlus, and Adobe Photoshop and After Effects. XenaHS offers one channel of either standard definition or high definition Serial Digital video (input and output). Features •... -
Page 6: Other Applications
Some of the more complex applications have many possible settings that can interfere with proper XenaHS usage. WmCap and Sound Recorder can also be useful in their own right; WmCap can save uncompressed video to an .avi file for viewing with Windows Media Player, or save compressed video for use with an encoding application such as Cleaner or Windows Media Encoder. -
Page 7: Hardware
The XenaHS card also works in a 5.0 v PCI slot of a modern computer bearing both 5.0 v and 3.3 v slots. Again, however, this is dependent on the motherboard supplying both 5.0 v and 3.3 v power to the slot. -
Page 8: Disk Arrays And Pci Performance For Hd
21 MB/second, with at least 42 MB/second system PCI performance (for each channel), as the data must go from the AJA Xena card to main memory, and then from main memory to the disk. -
Page 9: Block Diagram
AJA XenaHS User Manual — Block Diagram Block Diagram Video Out Output Video In VIDEO PROCESSING MIXER/ KEYER/ Key In SPLIT or PASSTHRU Format Format Convert Convert Constant NOTES: Mix/Split Control Input and output are Serial Digital Format Channel 1... -
Page 10: Reference Input-Bnc
Reference Input — BNC This BNC connector allows you to synchronize outputs to your house reference video signal (or black burst). If you have a sync generator or central piece of video equipment to use for synchronizing other video equipment in your studio, then connect its composite output here. - Page 11 AJA XenaHS User Manual — Using Xena With Application Software Xena Control Panel Settings Dialog Video Format settings you can choose, include: • 1080i 50.00 Hz. • 1080i 59.94 Hz. • 1080i 60.00 Hz. • 720p 59.94 Hz. • 720p 60.00 Hz.
-
Page 12: Test Patterns
HD mode. Test Patterns This tab in the Control Panel allows you to output a known video signal from the XenaHS output for testing purposes. When exporting, you can choose which components you wish to export (Y/Cb/Cr). Checking all the boxes downloads all the components of the chosen test pattern. -
Page 13: Capture
AJA XenaHS User Manual — Using Xena With Application Software Capture Xena Control Panel, Capture Window... -
Page 14: Windows Media Preferences-Set Dither
A capture window provides you with the ability to directly grab frames or fields from the video input channel and then save them locally on the PC at a selected size (Capture Size 25, 50, 75 or 100%), file type (Capture To BMP, JPEG, YUV, or TIFF), and location (destination folder and filename on your hard drive or network). -
Page 15: Windows Media Preferences-Windows Media Player Preferences
AJA XenaHS User Manual — Using Xena With Application Software Xena Control Panel, Windows Media Preferences Audio Record Delay—change this slider as necessary for synchronization of audio during recording. (There is no video delay available for Record.) A factory default value of 10 milliSeconds provides synchronized audio and video when using Windows Media Player to playback a “.wmv”... -
Page 16: Video Processing Settings
Xena card. On this tabbed page you can select video sources, and even mix or wipe between them. Although XenaHS only has one input and output channel, but you can mix/wipe between input video and framestore video/key. - Page 17 AJA XenaHS User Manual — Using Xena With Application Software Xena Control Panel Windows Media Settings, Video Processing Settings Enable—when checked, this turns video processing on. If unchecked, video is passed without any mix/split/key etc. Vid Proc Mode—selecting one of these buttons chooses a function (Mix video, split video, or key) to be performed on the sources selected in the pulldowns to the right of the buttons.
-
Page 18: Using Xena With Adobe Photoshop
H Slit—In this mode, the Slit Start and Slit Width Sliders are active. The Slit Start slider determines where the first transition between Foreground Video (left) and the Background Video (right) occurs. The Slit Width determines how wide the Background Video is shown before it transitions back to the Foreground Video. -
Page 19: Export Plug-In
Xena board’s selected output channel. No AfterEffects menus or Adobe AfterEffects windows are changed or altered in any way. As long as the supplied AJA plug-in is put in the AfterEffects plug-in folder, the composition window will be available at the Xena output. The plug-in can be found in the “AfterEffects”... -
Page 20: Using Xena With Powercg
Use of PowerCG with Xena is completely transparent. No user interface changes (menus etc.) are altered by Xena software. By adding the AJA “PCG_HWFA.DLL” file located in the PowerCG directory on the Xena Installation CD to the PowerCG folder, the Xena board outputs PowerCG video and title key. -
Page 21: Using Xena With Thumbsplus
ThumbsPlus can be configured to copy a graphics file to the clipboard when a thumbnail is double-clicked (instead of viewing the file on the desktop). With the AJA-supplied utility “copyname.exe”, ThumbsPlus can also be configured to copy the name of a graphics file to the clipboard when a thumbnail is double-clicked. -
Page 22: Clipboard 'Filename' Interface
ThumbsPlus Default Action (for Double-click) - Copy to Clipboard Clipboard ‘filename’ interface To support YUV files, ThumbsPlus must copy the filename of the image to the clipboard instead of copying the actual image. How to configure this is discussed later in “Supporting YUV Files within ThumbsPlus.”... -
Page 23: Supporting Yuv Files Within Thumbsplus
AJA XenaHS User Manual — Using Xena With Application Software ThumbsPlus Default Action (for Double-click) - Edit image Supporting YUV Files within ThumbsPlus ThumbsPlus can support YUV format files, when properly configured. Adding a File Type Configuration. First we must Add a File Type Configuration for YUV files:... - Page 24 ThumbsPlus File Types property page after “yuv” type is added Showing YUV Thumbnails. To set YUV as one of the File types to show in the thumbnail view: 1. Go to the “File Types” property-page in the ThumbsPlus “Preferences” dialog. 2.
-
Page 25: Using The Photoshop Plug-In To Load Yuv Files
Files\AJA\ (or another specified installation directory) as part of the ThumbsPlus “Xena Tools and Manuals” installation on the AJA installation CD-ROM. The YUVFormat.8bi file is installed by manually copying it from the “Photoshop Plug-ins” folder on the AJA installation CD. -
Page 26: Using "Copyname" As The Default Action
Configuration” dialog. 4. Select “Command” under “Edit file using:”, and to the right of the “>>”, specify which command to use, type “c:\Program Files\AJA\copyname.exe” (or other installation directory) as the command line. Reconciling Standard File Types With The “Edit” Default Action Since you have set the default action (under the General tab of ThumbsPlus Preferences) to “Edit image”... -
Page 27: Windows Media Audio Configuration
AJA XenaHS User Manual — Using Xena With Application Software Windows Media Xena provides 3 audio devices that can be selected by Windows Media applications. It can also be configured as the default system sound device for the computer. To select Xena as the... -
Page 28: Sound Playback Controls
Sound Playback controls These instructions discuss setting volume and mix levels for Xena. 1. Go to Start Menu > Control Panel > Sounds and Audio Devices> Audio. 2. Select the “Volume...” button for Sound Playback. This should bring up a Mixer dialog. -
Page 29: Sound Recording Controls
If you want to be able to select between AES audio and Embedded audio, you should check all the check-boxes. 4. If an “Analog In” control is displayed, you may leave it unchecked since XenaHS has no analog audio. - Page 30 Mixer Device Properties Dialog 5. After pressing “OK” in the Properties dialog, you should see a full mixer dialog: Mixer Dialog, Wave In To record from the AES audio inputs (connected to the D-connector on the Xena board), select “AES in Ch. 1-2.” Note that “AES In CH 3-4” and “AES In Ch 5-6” can be accessed via “Xena-HD Audio Device (2)”...
-
Page 31: Enabling/Disabling Xena As A System Audio Device
Video Device. Select “Xena Audio Device (1)” as the Audio Device. When using XenaHS to encode SD video, you can use the SD encode shortcuts supplied in the Windows “Start” menu; however, it will be necessary to modify the Properties settings within Windows Media Encoder. -
Page 32: For Best Encoder Performance
For Best Encoder Performance For best performance, dismiss the Preview window while encoding. Note that the Preview window launches automatically when encoding starts, unless “Automatically show panels needed for the current session” is turned off in the “Tools > Options” dialog. Note: trying to preview while Windows Media Player is configured for Xena output will cause the encoding session to fail to start. -
Page 33: Using Xena With Windows Media Player 9
AJA XenaHS User Manual — Using Xena With Application Software Using Xena with Windows Media Player 9 Windows Media Player can be configured to output video through the Xena board instead of playing to its own window on the PC monitor. In this configuration, Windows Media files can be played out to any device with an SDI input, such as a VTR or television monitor. -
Page 34: Using Xena With Wmcap
For SD sizes (720x480, 720x486, and 720x576), SD Firmware must be loaded into the XenaHS card. For HD sizes (1920x1080, 1280x720, and 640x360), HD Firmware must be loaded. Load the correct Firmware by selecting the appropriate video format in the... -
Page 35: Using Xena With Third-Party Applications
Xena also supports the common 720x480 format at 59.94 Hz—however when operating in this format, the six bottom lines are dropped. For HD video, XenaHS supports 1920x1080 at 30 fps, 29.97 fps, 25 fps, 24 fps, 23.98 fps, and 1280x720 at 59.94 fps and 60 fps. -
Page 36: Video Specifications
Outputs—SDI video output: SMPTE 259M (SD) or SMPTE 292M (HD) SDI Standard Definition converters To work with an analog video source, use an analog-to-digital converter such as the AJA D10AD. To convert the digital output to analog, consider an AJA converter such as the D10CE. -
Page 37: Analog Converters
Control Panel Installation. If you’ve lost the CD or want the latest AJA software, you can also install software by downloading a .ZIP archive file from the AJA website. This is discussed later in “Downloading and Installing Software From The AJA Website.”... - Page 38 Driver Installation - Found New Hardware Wizard 1. When the board is detected the Found New Hardware dialog (shown) will be displayed. Click the Next button. Driver Installation - Please choose you search and installation option...
- Page 39 2. In the “...search and installation options” dialog, select “Don’t search. I will choose the driver to install”. Driver Installation - Hardware Type 3. In the “Hardware Type” dialog, select “Sound, video and game controllers”. Driver Installation - Select the Xena-HD device driver for use with XenaHS...
- Page 40 The warning indicates that the wrong driver is being installed for the Xena board currently installed. Use the Xena-HD driver for XenaHS. Driver Update Warning—Showing Board and Driver Are Not Compatible 7.
-
Page 41: Driver Upgrade Only
AJA XenaHS User Manual — Installation Driver Installation - Windows Logo testing Driver Upgrade Only If you are not installing a Xena card, but merely upgrading software, you can use the “Update Device Driver Wizard”, following the same instructions as the Found New Hardware Wizard. - Page 42 Driver Update - System Properties 2. In the Device Manager, double-click the “AJA Xena Serial Digital Framestore” icon, or select the “AJA Xena Serial Digital Framestore” icon and choose “Properties” from the “Action” menu.
- Page 43 AJA XenaHS User Manual — Installation Driver Update - Device Manager 3. In the “AJA Xena Serial Digital Framestore Properties” dialog, select the “Driver” tab and click “Update Driver...”. From there, follow the same instructions given in the Windows Plug-and-Play Driver Installation topic presented earlier.
-
Page 44: Xena Control Panel Installation
Xena software because it initializes the board. After installing the driver, install the Xena Control Panel by inserting the AJA Xena Installation CD into the PC’s CD-ROM drive. A Xena installation screen will be displayed... - Page 45 AJA XenaHS User Manual — Installation Installs XenaHD Control Panel For use with XenaHS Install Manuals, Utilities, and Media Encoder Configuration Files to Your Local Hard Disk. Click to View an Online Help Text File AJA Xena Installer Screen To begin Control Panel installation, follow these steps: 1.
- Page 46 3. Click the “Finish” button to conclude Xena Control Panel Installation. After installation, the Control Panel.exe file will be in the Startup folder (as seen in Start menu / Programs / Startup). If the install procedure was done by a user with Administrator privileges on the PC, the Control Panel will be placed in the “All Users”...
-
Page 47: Xena Tools Installation
AJA XenaHS User Manual — Installation Xena Tools Installation The AJA Xena Installer that you just used to the install the Control Panel also allows you to install Xena documentation and a Windows Media Files folder that contains Windows Media Encoder configuration files. -
Page 48: Downloading And Installing Software From The Aja Website
On the web page you’ll see a list of software archives. Find the one that matches XenaHS and click on the link. The XenaHS uses the XenaHD driver, so at the time this manual was written, the link was: http://www.aja.com/ajashare/xenahd_5_2_b5.zip... -
Page 49: Page Table Entries
HKEY_LOCAL_MACHINE\SYSTEM\CurrentControlSet\Control\Session Manager\Memory Management\SystemPages It is usually 0 (which signifies that a default value is used). For XenaHS boards, you may need 85000 pages. Reboot after changing this setting. Note: You will need about 20000 pages for general system use, plus the number of pages needed for each AJA board installed. -
Page 50: When To Use The Reference Source Input
Preview while Windows Media Player is configured for output to Xena. (Please note that if you have both XenaSD and XenaHS and the Windows Media Player is configured for output to either board, then neither will be able to Preview to the PC monitor.) -
Page 51: Specifications
AJA XenaHS User Manual — Specifications Specifications Item XenaHS Specification Video I/O SDI in/out or HD-SDI in/out, 2 x BNC Format: 10-bit or 8-bit SMPTE-259 and SMPTE-292 Video Files: Uncompressed 10-bit, 525/59.94, 625/50 Uncompressed 10-bit, 1080i 50/59.94/60 1080p/psf 23.967/24/25/29.97/30 Audio I/O:... - Page 53 AJA XenaHS User Manual — Symbols .wmv files 29 Features 1 Numerics Format 6 15-pin D-connector 5 3rd-party software 6 GenLock 6 GraphEdit 29 A/V Synchronization 10 AES Audio 32 Hardware 3 AfterEffects Plug-ins 43 High Definition 32 Application Requirements 2...
- Page 54 SCSI 4 Vid Proc Mode 13 SDI 1 Video Delay 10 SDI Input and Output 6 Video Processing Settings 12 SMPTE 259M 1 Video Settings 6 SMPTE 292M 1 Software 2 Software Installation 33 WDM Streaming driver 1 Sound Playback 24 Windows 2000 2 Sound Recorder 1 Windows Media applications 6...
Need help?
Do you have a question about the XenaHS and is the answer not in the manual?
Questions and answers