
Subscribe to Our Youtube Channel
Related Manuals for EasyPet EP-380R


Summary of Contents for EasyPet EP-380R
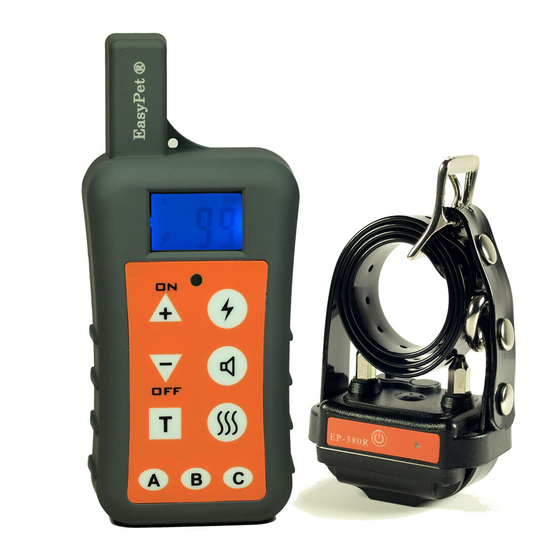
- Page 1 ® EasyPet EP-380R User’s Manual Rechargeable Multi-Dog Remote Training System Advanced Model of 1200 Meter Remote Range Fully Waterproof & Submersible Collar Receiver Compact, Lightweight, and Convenient!
- Page 2 Compact, Lightweight, and Convenient! Please read this manual thoroughly and carefully before operating. Thank you for purchasing our EasyPet® EP-380R remote dog training system. This is an effective multi-dog training system (extra receivers required), which provides all of the features for reliable, safe and humane training you want in a companion dog trainer.
- Page 3 How the System Works Consistent and correct use of this remote dog trainer allows you to reinforce commands and correct misbehaviour from up to 1200 meters (in open area). There are 50 groups of warning tones that can be used for praise, warning or silent recall. Or use the remote transmitter to send a signal, activating the collar receiver to deliver a vibration correction or a harmless stimulation.
-
Page 4: Quick Start Guide
From Level 90 to Level 99, it has the strongest static pulse stimulation intensity again with different correction durations (from 200ms/0.2 second to 2 seconds). Quick Start Guide Step 1: Prepare the Remote Transmitter Handset Press and hold down the ON button for 3 seconds to turn on the transmitter ... - Page 5 Caution! Always use the supplied power adaptor to charge the transmitter. Do NOT charge the transmitter in an especially hot area. Do NOT leave charging unattended or charge overnight! If the battery status bar shows full bars ( i.e. 3 bars) and the transmitter is put on charge, the background light will come up shortly when the charger pin is inserted, but the battery status bar will not flash--this is normal as the battery is full and transmitter will not take charge in this case.
- Page 6 (sometimes accidentally), the collar receiver will not receive the command sent out from the transmitter handset. Correction Level Indicator: This indicates the level settings of the current correction mode. If it displays "– –" on the Correction Level Indicator (with no numbers), it means the transmit function on the transmitter is disabled temporally: When in this "No Transmit"...
- Page 7 A, B, C (Dog Channel) Buttons: Short press on A, B or C button will allow you to choose the dog channel. Step 2: Charge the Collar Receiver Normal charging time for collar receiver: around 2 to 3 hours ...
- Page 8 Please cover the charging port with the rubber bung tightly after charging. To insert the rubber bung smoothly back into the charging port, please lift up the bung and make sure the rubber bung is in vertical position (as shown in the following picture). When the battery is low, the LED light on the receiver will flash red.
- Page 9 To turn on the collar receiver , short press the power button three times repeatedly within 3 seconds, a RED light will come up each time when the button is pressed down and go off when the button is released. The collar receiver will short bleep once.
- Page 10 Step 4: Match the Receiver with the Transmitter Turn on both transmitter handset and collar receiver On the handset, choose a dog channel (A,B or C) for the collar receiver and select a correction mode and level setting ...
- Page 11 long as correction level indicator is not shown as "– –" on the LCD screen (which is the "No Transmit" mode for the transmitter). Make sure the collar receiver is turned ON. (The collar receiver will be turned on automatically after the charging or please refer to Step 3: Turn ON/OFF the Collar Receiver) .
- Page 12 * If the battery inside the collar receiver has been left flat for a long period of time, the collar receiver might lose the matching code memory. Please charge the collar receiver and perform the matching-up procedure again. Caution! Never perform the matching-up procedures while the collar receiver is on your dog! Step 5: Test the Collar Receiver Important: We would recommend you to use warning tone or vibration correction...
- Page 13 Send warning tone correction command to collar receiver:- Short press warning tone button and select a valid correction level setting Short press T button and a warning tone command will be sent out to the collar receiver when T button is released ...
- Page 14 stimulation. When trying this on your dog, please always start from the LOWEST level and increase the level gradually to find out the recognition level for the dog. Short press button to send out command to Dog A collar receiver. Dog A collar will start giving a static pulse stimulation at the selected level.
-
Page 15: Care And Cleaning
Important: 1. The proper fit and placement of the collar receiver is important for effective training. The contact points must have direct contact with your dog’s skin. Trim the fur if necessary. 2. Please note that the collar receivers are not designed to be worn continuously by a dog. -
Page 16: General Training Tips
5. If you have progressed to Level 99 while searching for your dog’s Recognition Level and your dog continues to show no response, check to see if collar receiver is snug against your dog’s neck. Then go back to Intensity Level 1 (button 1) and repeat the process. -
Page 17: Troubleshooting
Q2: How old does a dog have to be before using the remote training system? A: Your dog should be at least 6 months old and in healthy conditions. Your dog should be able to learn basic obedience commands such as “Sit” or “Stay”. Q3: Once my dog is trained and has been obeying my commands, will my dog have to continue to wear the collar receiver? A: Your dog may need to wear the collar receiver from time to time for... - Page 18 Use a stronger stimulation level. Please note that in very cold weather, you may need to use a slightly higher setting to achieve the same level of intensity. Problem No. 2: The collar receiver cannot be matched up with the transmitter. ...
Need help?
Do you have a question about the EP-380R and is the answer not in the manual?
Questions and answers