Table of Contents
Advertisement
Instruction Manual & User Guide
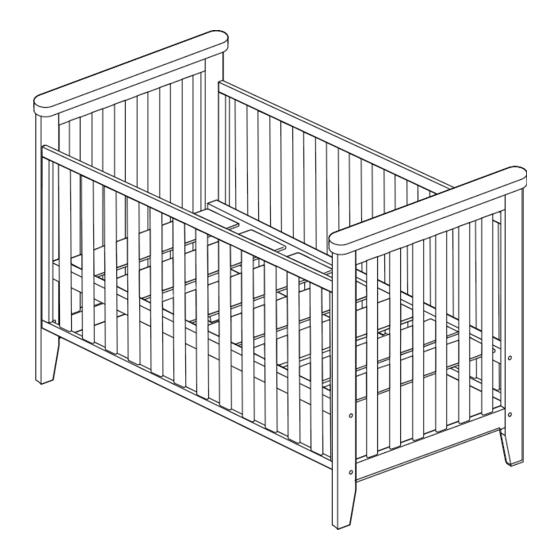
Orlando 2 in 1 Cot Bed
IMPORTANT: RETAIN FOR FUTURE REFERENCE.
Please read this manual in its entirety before assembling
the product and follow all instructions contained herein.
Do not use this cot if any part is Broken,Torn or Missing.
Please retain instruction manual for future reference.
Illustrations are representative only.
Design and style may vary.
An IGC Dorel brand
Advertisement
Table of Contents

Summary of Contents for Mother Choice Orlando 2 in 1 Cot Bed
- Page 1 Instruction Manual & User Guide Orlando 2 in 1 Cot Bed IMPORTANT: RETAIN FOR FUTURE REFERENCE. Please read this manual in its entirety before assembling the product and follow all instructions contained herein. Do not use this cot if any part is Broken,Torn or Missing.
-
Page 2: Table Of Contents
Customer service page 12 This Instruction Manual applies to the following Model Numbers: #13965 - Orlando 2 in 1 Cot Bed (White). #13966 - Orlando 2 in 1 Cot Bed (Honey). #13967 - Orlando 2 in 1 Cot Bed (Cappuccino). -
Page 3: Warnings
• Latch the dropside in the raised position whenever a child is in the cot. • Once a child can stand, do not leave anything in the cot such as toys that provide a foothold to enable the child to climb out. • Do not try and move the cot when a child is in it. • This product is not intended for commercial use. ADDITIONAL WARNING FOR THE FOLLOWING OPTION Cots with castors. Keep castors locked unless the cot is being moved. #13965-7-MC Orlando 2 in 1 Cot Bed 10-12... -
Page 4: Components List
32 mm x 4 (to fill side panel holes (to fasten end panels (to fasten end panels in end panels) to side panels) to mattress base) Cot with mattress base Day bed in upper position #13965-7-MC Orlando 2 in 1 Cot Bed 10-12... -
Page 5: Assembly With Base In Upper Position
Assembling: Orlando 2 in 1 Cot Bed ASSEMBLY WITH MATTRESS BASE IN UPPER POSITION Suits from Newborn until Infant can sit up. It is recomended that two (2) people are needed to safely assemble this product. #13965-7-MC Orlando 2 in 1 Cot Bed 10-12... -
Page 6: Step 1. Fitting Hardware To Cot End Panels
Instruction Manual & User Guide Assembling: Orlando 2 in 1 Cot Bed (cont) STEP 1 - FITTING HARDWARE TO COT END PANELS Tools/Hardware • Lay each end panel on a carpeted floor. required: • Fit 2 sets of blanking bolts and caps to each end panel, with the mattress in ther upper positopn, as per Figure 1. -
Page 7: Step 2. Attaching Mattress Base To Cot Ends
Instruction Manual & User Guide Assembling: Orlando 2 in 1 Cot Bed (cont) STEP 2 - ATTACHING MATTRESS BASE TO COT ENDS Tools/Hardware • Lay the cot headboard on its side and position the mattress required: base, as per Figure 2A. -
Page 8: Step 3. Attaching Side Panels
Instruction Manual & User Guide Assembling: Orlando 2 in 1 Cot Bed (cont) STEP 3 - ATTACHING SIDE PANELS Tools/Hardware required: If it is difficult to fit the side panel between the cot ends, loosen the mattress base bolts slightly. • Stand the cot upright. • Eight (8) 52mm allen head bolts are required for the assembly of the side panels,as per Figure 5. •... -
Page 9: Step 1. Lowering The Mattress Base
Instruction Manual & User Guide Assembling: Orlando 2 in 1 Cot Bed (cont) STEP 1 - LOWERING THE MATTRESS BASE Tools/Hardware required: • Lay the cot its side. • Remove two (2) 15mm blanking bolts and caps (A) from the lower position mattress base mounting holes in each of the end panels, as per Figure 8. -
Page 10: Step 2. Lowering The Mattress Base (Cont)
Instruction Manual & User Guide Assembling: Orlando 2 in 1 Cot Bed (cont) STEP 2 - LOWERING THE MATTRESS BASE (cont) Tools/Hardware required: • Remove the four (4) 32mm allen head bolts (A) securing the mattress base to each end panel and carefully shift the mattress base (B) to the lower position, as per Figure 10. -
Page 11: Step 1. Converting To A Day Bed
Instruction Manual & User Guide Assembling: Orlando 2 in 1 Cot Bed (cont) STEP 1 - CONVERSION TO A DAY BED Tools/Hardware required: • Remove four (4) 52mm allen head bolts (A) from the side of the cot you would like to have as a day bed, as per Figure 13. • Ease the side panel away from the cot and store in a safe place, as per Figure 14. -
Page 12: Product Care And Maintenance
IGC Dorel New Zealand Ltd Postal P.O. Box 1260 P.O. Box 82377 Highland Park Sunshine West, Victoria, 3020 Mt Wellington Australia New Zealand Specifications are subject to change without notice. Copy or reproduction without permission is prohibited. © 2012 IGC Dorel Pty Ltd. All Rights Reserved. www.igcdorel.com.au #13965-7-MC Orlando 2 in 1 Cot Bed 10-12...
Need help?
Do you have a question about the Orlando 2 in 1 Cot Bed and is the answer not in the manual?
Questions and answers