Advertisement
Table of Contents
- 1 Technical Specifications
- 2 Table of Contents
- 3 Before Installation
- 4 Transport and Assembly
- 5 Processor Functions
- 6 Infrared Sensorbar
- 7 Replenishment System
- 8 Heating / Cooling / Circulation
- 9 Test Run and Tank Fill
- 10 Working with the Processor
- 11 Control Panel
- 12 Error Messages
- 13 Maintenance
- 14 Safety Instructions
- Download this manual
Advertisement
Table of Contents

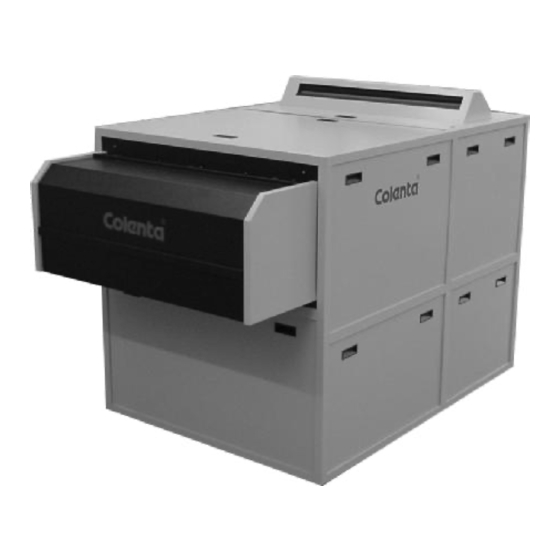
Summary of Contents for COLENTA PrintlineProcessor 56 RA
- Page 1 Instruction Manual for COLENTA PrintlineProcessor 56/66/80 RA MP700 V5.2r04/05/06 06/2003 AN...
-
Page 2: Technical Specifications
PrintlineProcessor 56/66/80 RA 70/95/120 - 5T Technical Specifications: Processing applications: RA Photopaper for digital applications incl. Duratrans Paper width: max. 80 cm (31 inch) Microprocessor Control: - with 9 preprogrammable processing cycles Transport Speed (at 45 sec DEV-Time): - 70 cm/min (42 inch/min) - 95 cm/min (42 inch/min) - 120 cm/min (42 inch/min) (preprogrammable 20 to 116 sec.) - Page 3 COLENTA 56/66/80 RA-xx 5T RA xx 5T SST DIMENSIONS: Y for RA 56 860 mm Y for RA 66 960 mm Y for RA 80 1100 mm AN 06/2003...
-
Page 4: Table Of Contents
INDEX 1. INTRODUCTION / SAFETY INSTRUCTIONS 2. BEFORE INSTALLATION 3. TRANSPORT AND ASSEMBLY 8 - 10 4. PROCESSOR FUNCTIONS 5. INFRARED SENSORBAR 6. REPLENISHMENT SYSTEM 13,14 7. HEATING / COOLING / CIRCULATION 15-17 8. TEST RUN AND TANK FILL 9. WORKING WITH THE CHEMISTRY 10. - Page 5 1. INTRODUCTION Congratulations upon your decision to buy a COLENTA RA-Processor. Your purchase has been designed to meet the highest technical standards. Some outstanding design features include: compact, space-saving design full automatic processing cycle smooth roller transport system low tank volumes...
- Page 6 The installation, service, repair as well as the initial operation of the machine may be carried out by qualified and trained service personnel only. Built-in safety devices may not be eluded or made inoperative. Use only original COLENTA spare parts when exchanging failed electrical components.
- Page 7 3).Label storage containers properly.Avoid storing hazardous chemicals on high The „Service Manual for Colenta Printline shelves or in unprotected glass containers. Keep chemicals away from children.Do Processor" is for the use of qualified service personnel only.
- Page 8 Chemical Disposal · High voltage may cause electric shocks, Waste from photographic processing normally burns or even death. contains diluted chemicals. These chemicals should be collected and disposed in accordance · Hands or fingers may be pinched or with local environmental codes.Dumping injured by moving parts or when handling chemicals into a drain system could lead to a heavy parts.
- Page 9 Burn Hazard Carry out the following steps prior removal of the top cover: DRYER COMPARTMENT PRODUCES HEAT -DRYER PANELS AND GUARDS GET HOT · Therefore do not touch dryer panels or guards 1.Train operators of the processor. when dryer in operation 2.Switch off the main power switch Corrosive Liquids („0“-position) and secure against...
- Page 10 EYES,LUNGS AND SKIN IF ALLOWED TO to correct the problem with the drain. ACCUMULATE IN WORK AREA Colenta assume any responsibility or liability whatsoever for the service ability of any drain connected to the processor. Assure an adequate supply of fresh...
-
Page 11: Before Installation
2. BEFORE INSTALLATION Site preparation should be completed before delivery and installation. 2.1 LOCATION Location. All dimensions for the processor are detailed in the technical data sheet. It is important that the processor location is well ventilated and with the required air changes per hour –... -
Page 12: Transport And Assembly
3. TRANSPORT AND ASSEMBLY To carry the processor to the working area, take care to the points below: Processor take out the racks and the dryer during carry the processor take off all kind of panels and covers move the Chiller unit separately (optional) After re-assembly and with the maschine in position - level the unit for the optimum performance - use a good quality leveling device. - Page 13 3.1 INSTALLATION OF THE TRANSPORT RACKS The processor is deliverd completely assembled. Exept the transport racks, the dryer unit and the external chiller unit has to be installed. Follow the illustrations below to do that: Take care that all transport fixings are removed Remove all packing materials Insert the racks according the reference number or label Avoid any splashes of chemistry...
- Page 14 3.2 INSTALLATION OF THE DRYER Follow the illustrations below to install the dryer: 1. Open the dryerlid. 2. Put the dryer in and close the dryerlid. 3. Check the position of the drive gear. 1...Drive gear / Chain 2...Drive gear / Dryer page AN 06/2003...
-
Page 15: Processor Functions
4. PROCESSOR FUNKTIONS: 4.1 PROCESSOR FUNCTIONS PROGRAMMING: Automatic processing parameters, e.g., temperature, speed and replenishment rates, can be stored in 9 different programmes. WARMING-UP: Once programmed, temperature settings are accurately controlled. Heating commences with switching on at the mains. Constant solution temperatures are maintained in the processing tanks. -
Page 16: Infrared Sensorbar
5. INFEED - SENSOR BAR An infra red sensor bar assembly is located at the entrance to the processor. As soon as media passes across the sensor bar a process cycle is initiated which in turn starts the transport motor and triggers timing circuits for the control of ”timed” processing sequences – wash off, standby, dryer on. -
Page 17: Replenishment System
6. CHEMICAL REPLENISHMENT SYSTEM When operating a processor which uses chemicals for the continuous production of paper it is very important that the chemicals within the machine are keep in good working order so as to provide consistent processing quality. To achieve this consistency we use replenishment solutions, which are formulated by the chemical manufacturer and injected into the processor precisely for the area of material being produced. - Page 18 6.1 DRAIN CONNECTION It is not necessary to connect the processor to an external drain facility – the processor is supplied with 3 x 10 litre container which are used to collect the waste Developer, Bleachfix and Superstabi solutions. The containers are fitted with a high-level alarm device, when full they have to be emptied.
-
Page 19: Heating / Cooling / Circulation
7. HEATING / COOLING / CIRCULATION The working temperature of all solutions is accurately monitored and electronically controlled to the precise pre-programmed specifications. Each solution is heated by a dedicated heat exchange ”flow heater” unit located in the circulation lines, which provides an efficient heating system with low maintenance requirements. - Page 20 To adjust the temp. for the SuberStabi1,2 and3, use the external thermostats pointed below: Superstabi External thermostat Superstabi 3 External thermostat Superstabi 2 External thermostat Superstabi 1 7.1 HOW TO DRAIN THE PROCESSOR To drain the tanks, remove the side panel, open the stop cock of the corresponding tank.
- Page 21 7.2 TEMPERATURE CONTROL Probes positioned under solution levels precisely monitor all solution tank temperatures. These temperature probes are continuously supplying information to the microprocessor on actual solution temperatures within the tanks. The microprocessor then compares these actual temperatures to the required programmed ”set” temperatures and controls the rele- vant heaters/cooling systems accordingly.
-
Page 22: Test Run And Tank Fill
8. TEST RUN AND TANK FILL ( RECOMMENDED) IMPORTANT: Although all processors are thoroughly water tested before delivery, we would always recommend to check all hose and tank connections in case a fitting becomes loose or is broken during transportation. In the case of transport damage - this should be recorded on film and reported to the shipping company. -
Page 23: Working With The Processor
9. WORKING WITH THE PROCESSOR in the morning: - Check all chemical levels - processor tanks and Replenishment storage tanks - top up if necessary. If the process controller detects a „low level“ in the Developer and Bleach processor tanks then add small amounts of warm water. -
Page 24: Control Panel
11. USING THE CONTROL PANEL Generally, all settings which are necessary for high qualitiy processing results, are already programmed. Re-programming should only be undertaken by approved authorized personnel. The control panel is used by: - operator: to monitor the processor, and to select special function (Manual function mode) - technician: to set/or to change the processing parameters Specifications... - Page 25 11.1 AFTER SWITCHING ON After the processor is installed and with all the components and service in place, switch the processor on. The controller display will illuminate and confirm the software revision monentarily. version of program MF 700 5.1r04 After the initialization-cycle is complete (it takes 2-3 sec.) the processor will start in program1 (P1) P1/Er Ready T1=19,1°C (22,0)
- Page 26 11.2 POSSIBLE ERROR CODES AFTER SWITCHING ON Cover open Cloes the cover of the Processor (Cover switch) Close the cover of the processor. In case the processor is switched on with no chemistry in the tanks, you will get the following messages: Level switch for tanks Tank1 LowLevel(DEV) Tank2 LowLevel(BF)
- Page 27 11.3 HOW TO CHANGE A PROGRAMME To change the programme, use the following steps: Press one time, you will get: Start P1 Rep Monitor NOTE: In case there is a media inside the processor, the display will show you "Busy processing" - now you need to wait until the current cycle is finished. To change the program, use to move the cursor to P1.
- Page 28 11.4 AUTOMATIC FUNCTION P1 xy % done All functions of the processor are totally automatic That means, T1: 35.0°C during processing, there is no need for the user to change or to activate something on the display. The display is used only for to inform and warn the operator on all functions and working parameters.
- Page 29 xy% Done is the progress indicator. It means xy% of the developing process is complete. When it reached 100%, the unit will stop the processing mode and will go to standby. T1=35.0ºC confirms about the actual measured temperature in tank1. The value in the brackets is the programed temperature.
- Page 30 11.6 MANUAL START/STOP The manual start/stop is only possible when no media is in process. During processing the corresponding menu items cannot be selected. To run the motor manually: Press move the cursor under Start and confirm with This will start the motor, pumps and dryer unit. The menu item Start will change to Stop.
-
Page 31: Error Messages
11.9 ERROR MESSAGES If an error occurs, the indication P1 (or M1) will alternate with Er. If this happens press the button. ERROR This will stop the beeper and bring you to the error menu, so you will be able to check what’s wrong. If more than one error occurred, press to scan the rest of them. - Page 32 11.10 FILTER CONTROL The software is equipped with a sub-program to contol the filter - when required. That means after xxm² processed material, the controller will supply the message "CHANGE FILTER" - now the filters has to be cleaned / or replaced. After the filter are new, the counter must be set to zero.
- Page 33 11.11 DISTANCE BETWEEN THE PLATES To prevent possible transport problems, a minimum distance between the sheets is required. After the end of the films passes the input section, the display will show: As long as “Don’t feed” is present , no media should be loaded . After a moment “Don’t feed”...
- Page 34 S-bar: --------- This feature is used to check each sensor of ----------- the sensor-bar. The COLENTA 56 RA-7MW is equipped with 6 sensors. To check the sensors, use the following instructions: -put a small film under the sensorbar (don’t feed into the...
- Page 35 ..as described before: piece of material sensorbar sensor: input table H1=0 H2=0 H3=1 H1=1 or 0 Heating Developer On or OFF Fan=0 S1=0 S2=0 H2=1 or 0 Heating BF On or OFF H3=1 or 0 Heating DRY On or OFF Fan=1 or 0 Fan for the Dryer On or OFF...
-
Page 36: Maintenance
12. MAINTENANCE The processor is designed to produce consistent high quality production with the minimum of maintenance. Regular maintenance minimizes the chances for equipment failure and loss of processing quality. A well trained person has to be responsible for performing the maintenance of the processor and must be familiar with the operation and function of it as well. - Page 37 13. RECOMMENDED MAINTENANCE EVERY 3-6 MONTHS. (Period is subject to processor useage.) Good processing quality and the reliable operation of a processor is dependent upon regular and careful cleaning. Every 3-6 months, the chemicals in the tanks should be drained. A chemical cleaning of the processing tanks and wash tank is recommended.
-
Page 38: Safety Instructions
14. SAFETY INSTRUCTIONS 13.1 PERFORMING AN EMERGENCY STOP You may need to stop processing immediately because: there is risk of personal injury. material is jammed or is loaded incorrectly No special emergency stop button has been provided. Therefore, the main switch also functions as an emergency stop You have two ways of performing an emergency stop: simply switch off the processor using the main switch (See below) - Page 39 3 - How to obtain SDS Your local Chemistry sales company will on request send you Safety Data Sheets. Read them very carefully and keep with this Manual. 4 - SDS contents Emergency telephone No. Exposure control and personal protection Composition of Chemicals Physical and chemical properties Hazards identification...
Need help?
Do you have a question about the PrintlineProcessor 56 RA and is the answer not in the manual?
Questions and answers