
Summary of Contents for rEvo Rebreathers rEvo III micro FT
- Page 1 Manual rEvo III MANUFACTURER’S MANUAL FOR ASSEMBLY, USE AND MAINTENANCE rEvo III mCCR (rEvo III standard, mini, micro FT) (*optional rEvo III hCCR, rMS) CE version Version 0.4.en Paul Raymaekers changes in italic...
- Page 2 Manual rEvo III Warning! Diving without training is both dangerous and life threatening! Diving a rebreather without training by a recognised agency is not only stupid but equates to suicide! A rebreather is a machine and machines break! Don’t ask yourself WHETHER a problem will occur as it is inevitable, ask yourself WHEN it will occur! Be alert to signs of subtle changes in your rebreather as they are often a sign of pending problems!
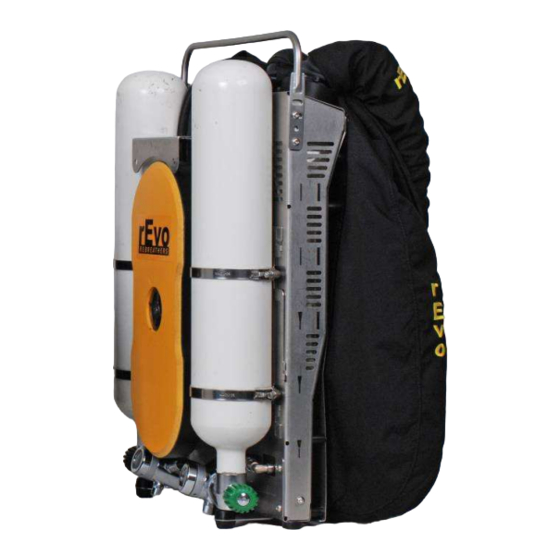
- Page 3 Manual rEvo III left: rEvo III standard right: rEvo III mini rEvo III micro FT rEvo III mini rEvo III standard...
-
Page 4: Table Of Contents
Manual rEvo III Chapter 1: Technical Specifications . Overview of the rEvo III Chapter 2: rEvo components 2.1 The breathing hoses. 2.2 Counterlungs. 2.3 ADV. 2.4 Orifice. 2.5 The scrubbers. 2.6 Backplate, Wing & Harness. 2.7 Manual addition of oxygen and diluent. 2.8 Cylinders with quick release. -
Page 5: Technical Specifications
Manual rEvo III Chapter 1: Technical Specifications 1.1 Limitations of use: → This unit is intended to be used by trained people only. → The use of the unit is only allowed when an independent alternative gas source is carried at all time by the diver, that can be used at any time during the dive, and that has enough capacity to safely end the dive in case of malfunctioning of the unit. -
Page 6: Overview Of The Revo Iii
Manual rEvo III Overview of the rEvo III. 1. Inflator connection. 2. Manual diluent addition valve. 3. Manual oxygen addition valve. 4. Absolute pressure oxygen regulator (APR). 5. Auto diluent valve (ADV). 6. Orifice + one-way valve. 7. Oxygen cells. 8. - Page 7 Manual rEvo III The rEvo III mCCR is a manually operated closed circuit rebreather based on the CMF principle: (constant mass flow). During diving a constant flow of oxygen bleeds into the breathing loop of the rebreather. The flow rate is high enough to provide a diver in rest with a life sustaining breathable oxygen flow.
-
Page 8: The Breathing Hoses
Manual rEvo III Chapter 2: the rEvo component parts: general description 2.1 The breathing hoses: The breathing hose assembly has been made in such a way that the mouthpiece can be opened and closed in all conditions (very cold and very warm water). A safety attachment strap, a ‘gag’, has been added to the mouthpiece. -
Page 9: Counterlungs
Manual rEvo III 2.2 Counterlungs: The rEvo counterlungs are made of food-compatible PU, sealed with high frequency welding technology and are permanently elastic. Both counter lungs (inhale and exhale) are backmounted. Both lungs are protected by a liner and are fitted in a stainless steel case. -
Page 10: The Scrubbers
Manual rEvo III The output pressure of the regulator is depth independent (“Absolute Pressure Regulator” (APR)). The orifice is situated in the exhale lung and is easily accessible for maintenance. On the outside of the orifice a non-return-valve (one-way-valve) is mounted to avoid dirt, moisture or dust, coming from the exhale lung, and which could possibly enter the orifice. -
Page 11: Manual Addition Of Oxygen And Diluent
Manual rEvo III The harness, with rotation fittings, is mounted on the split backplate. The shoulder piece is rounded on top of the rebreather, following the curve of the shoulders. The straps of the harness are attached to this shoulder piece. The lower back piece can be adjusted in height by the user, in order to customize the backplate to the diver’s length. -
Page 12: Cylinders With Quick Release
Manual rEvo III The buttons for manual addition of diluent and oxygen are situated at the bottom of the stainless steel case allowing them to be found very easily (they cannot be moved, because they are not attached to a separate hose). This concept prevents extra hoses running over the chest and shoulders of the diver. -
Page 13: Stainless Steel Carrying Handle / (Soft) Weight Fixation
Manual rEvo III The cylinders are attached to the stainless steel housing by means of a “quick release” system. This offers a very quick and easy mounting and demounting of the cylinders. This method allow the valves to be immediately and correctly positioned towards the first stages. -
Page 14: Upright Position
Manual rEvo III 2.10 Upright position: The rEvo has been designed in such a way that it can easily stand upright in a detached position, even without cylinders. Rubber ‘feet’ are mounted to avoid possible damage to the case. 2.11 OPV: The ‘Over-Pressure Valve’... -
Page 15: Moisture Absorber
Manual rEvo III below the green LED) or red (over, above the green LED), together with the constant green LED. This is a small deviation of the optimal zone, but still safe (green is ON!). When the deviation increases, more orange or red pulses will appear. But as long as the green LED is permanently on, it is still safe to breathe the gas. -
Page 16: Set-Point Controller (Optional)
Manual rEvo III New pictures with new sensor tray 2.14 Set-point controller (optional) Set-point controller (optional) (type: shearwater pursuit set-point controller) The rEvo can be supplied with set-point controller that automatically maintains a pre-defined PPO2. this case automatic valve is mounted in parallel in the orifice on the oxygen pressure line, which is piloted by the wrist-... -
Page 17: Chapter 3: Using The Revo For The First Time
Manual rEvo III Chapter 3: Using the rEvo the first time! 3.1 Mounting the harness and wing: When shipped the rEvo is completely assembled. The unit (harness and backplate) needs to be adjusted to the body of the diver. When adjusting the harness the dive suit has to be taken into account. - Page 18 Manual rEvo III !!!! new pictures !!!!!!!!!!!!!!!!!!!!!!!!!!! Secure the cell with the black holding screw and connect the right Molex connector to the cell. Be sure that the connector is fitted in the right position (see picture). Do not use force as this may damage the pins on the cell. Make it a habit to position the cells in the same place and order: position one and two for the first rEvodream and position number three for the second rEvodream (which is using only one cell).
- Page 19 Manual rEvo III The recommended oxygen sensors are R22D-rEvo.
-
Page 20: Assembly And Greasing Of The O-Rings
Manual rEvo III 3.3 Assembly and greasing of the O-rings: If the O-rings of the cover have not been greased yet, or when the grease is contaminated or the rings are damaged and need to be replaced: remove the four O- rings from their seats, clean them with a lint-free cloth, or use a neutral soap. - Page 21 Manual rEvo III Gently tap on the side of the canister with one hand, whilst turning it around with the other hand. When the absorbent has filled up the canister freeing the central screw, put the mesh, grid, spring and handle back in place and turn the screw until the spring is completely compressed (but not over-tightened).
-
Page 22: Calibration Of The Oxygen Cells
Manual rEvo III 3.5 Calibration of the oxygen cells: For proper using the rEvodreams please read the appropriate manual. When calibrating the rEvo-cells only pure oxygen should be used. The calibration should be done at 1 atm. Assemble the rEvo completely, be sure that both canisters are placed in the rebreather, packed, and that the breathing hoses are connected. - Page 23 Manual rEvo III time you have doubts if the orifice is properly functioning (and you do not have access to a flow meter). In case of an obstructed orifice the time-interval needed to drop down the pressure would be much longer. If the flow rate is too high, that time- interval would be much shorter! The orifice can easily be changed: it simply unscrews.
-
Page 24: Chapter 4: Diving With The Revo
Manual rEvo III Chapter 4: Diving with the rEvo 4.1: Considerations prior to each dive: * Check the remaining scrubber time: if the time the scrubber has been used and the planned dive time added up exceeds 160 minutes, refill both scrubbers with fresh material. -
Page 25: Immediate Pre-Dive: Wearing The Rebreather, Immediately Before Entering The Water
Manual rEvo III pressure to drop from 100 to 50 bar. Check if there is a gentle flow noticeable at the mouthpiece (when slightly opened). * Open the diluent valve and check that there is no leak there where the diluent regulator first stage screws into the cylinder valve. -
Page 26: Entering The Water, Bubble-Check, During Diving, Exiting The Water
Manual rEvo III 4.4: Entering the water, bubble-check, during diving, exiting the water: * "ALWAYS DIVE IN GREEN" When entering the water, during diving and leaving the water, both HUD's must ALWAYS show the green LED burning, if not, correct immediately! * Perform a bubble-check at 3/5 meters: is the rebreather well attached? No... -
Page 27: Maintenance Between Several Dives On The Same Day
Manual rEvo III * At the end of the dive: always keep the mouthpiece in your mouth and your diving mask on, until you are entirely on dry land: always pay attention that the HUD's green LED's are burning! If you have to remove the mouthpiece at the surface, take care that the mouthpiece is ALWAYS closed before it is removed! If the mouthpiece is removed in the water at the surface and it is left open, the water pressure will immediately force all the gas from the counterlungs out, as a result of which the diver... -
Page 28: General Maintenance
Manual rEvo III your location (ask your instructor about this). After disinfecting, rinse the rebreather again with fresh water and allow it to dry. Unless your instructor advises differently, the recommended disinfectant material is a 1% solution of Virkon S. (DuPont). Make a 1% solution, using cold water, and spray, or pour it into both counterlungs of the rebreather, and both sides of the breathing hoses and in the mouthpiece. - Page 29 Manual rEvo III All connections with cable ties (the mouthpiece to the DSV and the breathing hoses to the ‘screw connections’) should be inspected for not having weakened: if so they must be replaced. If there is any doubt, the cable ties must be replaced. Regulators (first stages) should be serviced each year by a competent service technician.
-
Page 30: Appendix A: Drills
Manual rEvo III Appendix A: Drills: The following scenarios must be practiced during any rEvo training. Your instructor will teach how to react to. • High PPO2. • Low PPO2. • PPO2 low / empty oxygen cylinder. • PPO2 high / empty diluent cylinder. •... -
Page 31: Appendix B: Always-Never
Manual rEvo III Appendix B: Always–Never ALWAYS dive with rEvodreams in good shape. Be careful to check them on a regular basis. ALWAYS read the manual before diving the rEvo for the first time. ALWAYS get proper rEvo training before diving a rEvo. ALWAYS do the pre-dive checks. - Page 32 Manual rEvo III Addendum 1 ‘TOP marker’ To assure that divers don’t make errors when exchanging scrubbers, a marker is added on top of the canister on the exhale lung, indicating that that canister is placed on ‘TOP’ position in the rebreather When after a dive, you want to exchange one scrubber, (cycle), follow exactly this procedure: If you make it a habit to immediately empty a canister when you have removed the...
- Page 33 Manual rEvo III Addendum 2 Use of the check-list The rEvo checklist: the use of a check lists during rEvo courses, was already compulsory for some time. To make this easier, we produced a double sided laser engraved checklist, one side containing the ‘closed check’ and the other side the ‘pre- jump check’...
Need help?
Do you have a question about the rEvo III micro FT and is the answer not in the manual?
Questions and answers
Bonjour, quelle doit-être le millivolt d’une cellule neuve et usagée