Table of Contents
Advertisement
Advertisement
Table of Contents

Related Manuals for Morgana CT620Exa


Summary of Contents for Morgana CT620Exa
- Page 2 1. Reproduction of any of the contents of this manual in whole or in part is expressly prohibited. 2. We reserve the right to make changes to the contents of this manual without prior notice. 3. Every effort was made to ensure that the contents of this manual are accurate.
-
Page 3: Table Of Contents
CONTENTS Introduction 1. Observe these precautions 2. Specifi cations 3. Opening the package and installation ■ Opening the package ■ Installation ■ Cautions during use 1. Autocutter paper 2. Long blades and rotary blades 3. Part names 4. Control panel names & descriptions ■... - Page 4 7. Cutting the paper ■ Before you start cutting ■ Starting the cutting ■ Paper jams and how to handle them ■ Handling the cutting waste paper 8. Error message list and action to take 9. Daily care of the machine ■...
-
Page 5: Introduction
INTRODUCTION Our thanks for your purchase of this Autocutter CT620Exa. The unique feature of this autocutter is that material you print on A4, B4, A3, A3 wide or A4 wide sheets such as business cards, postcards or tickets can be loaded in this cutter to produce the ex- act amount of items you need. -
Page 6: Observe These Precautions
Sec 1 Overview 1. Observe these precautions This symbol indicates information that if ignored may cause death or seri- Warning ous injury to the machine operator and others. This symbol indicates information that if ignored may cause damage to the Caution machine or injury to machine operator and others. - Page 7 Warning 6. Handle the power cable carefully. Do not place heavy objects on the power cable. Do not install the power cable near heaters. A damaged cable may cause machine failures and become a fi re or electrical shock hazard. Using excess force when bending or pulling on the power cable or attempting to modify the power cable will create fi...
- Page 8 Caution 1. Do not install the machine in areas with high temperatures and humidity or low temperatures and humidity. Do not install in locations subject to direct air fl ow from an air con- ditioner. Caution 2. Do not install the machine in areas where volatile gases such as ammonia might be generated.
- Page 9 Caution Check! 8. Keep the power plug clean. Check for any damage or dirt on the power plug by disconnecting it from the socket at periodic intervals. Damaged cables or accumulated dirt or grime on the cable might cause fi res or electrical shocks.
-
Page 10: Specifi Cations
2. SPECIFICATIONS Model Floor installation type (console, casters) Cutting Method Feed direction : fi xed long blade Width direction: Replaceable rotary blade unit Paper Size A4, A4 Wide, B4, A3, A3 Wide Dimension tolerance : ± 1mm (Maximum paper width : 318mm, Maximum paper length : 469.5mm (636x939mm/4) 0.12 to 0.40mm, 788x1091mm 90 to 280kilograms Paper Thickness... -
Page 11: Opening The Package And Installation
3. OPENING THE PACKAGE & INSTALLATION Opening the package Make a check of the contents after opening the package. In the unlikely event a component is missing or the outer case is scratched, please contact the store where you purchased it or your dealer. -
Page 12: Installation
INSTALLATION ■ Installation space Make sure you have enough space as shown in the drawing for operating the machine and other jobs like replacing the rotary blades or maintenance inspections. ■ Installation location Observe the following precautions when installing the machine. Avoid installing the machine in the following locations which may cause equipment breakdowns or endanger safety. -
Page 13: Cautions During Use
Setup before operation Always make the following setup before attempting to operate the device. Take the accessories out of the waste cutting paper hopper and connect the accessories according to the instructions in this manual. Open up the waste cutting paper hopper bag and set it in the cutting waste hopper. Place the cutting waste hopper inside the machine and close the top cover. -
Page 14: Autocutter Paper
1. AUTOCUTTER PAPER Paper types and weights (thickness) Use the following table as a guide when selecting paper types and weights (thickness) that can be used for paper cutting. Using other types of paper than in the table below may cause paper feed errors or paper jams or defective cutting so check that the paper is compatible with the autocutter before using. -
Page 15: Long Blades And Rotary Blades
2. LONG BLADES & ROTARY BLADES The cutting blade in this machine automatically cuts to a specifi ed fi nish paper sized using 2 types of blades: a long blade (fi xed type: long-life) and rotary blade (unit replaceable type). The long blade makes a vertical cut (height cut) along the paper feed direction as seen from the front of the machine. -
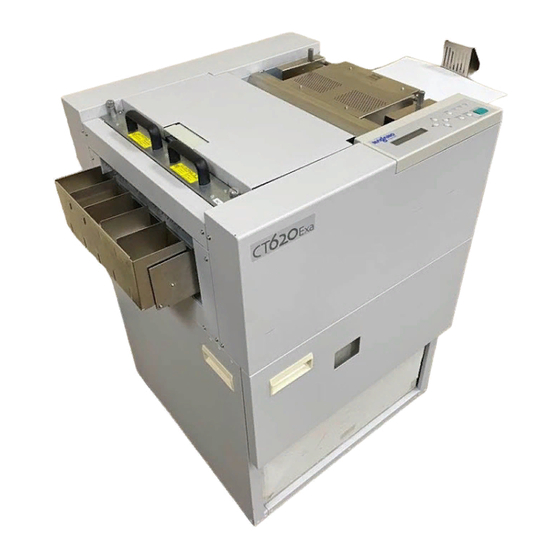
Page 16: Part Names
3. PART NAMES Top cover release bar AC power connector Top cover Carrying grip (4 locations including eject side) Paper guide Front cover Paper guide set screw (cutting waste hopper storage door) Paper feed tray release bar Cutting waste hopper Paper feed tray Front cover door grip Paper feed tray rear edge clamp... -
Page 17: Control Panel Names & Descriptions
4. CONTROL PANEL NAMES & DESCRIPTIONS Control panel part names START/STOP switch LEFT switch ENTER switch RIGHT switch MENU switch POWER LED lamp CLEAR switch READY LED lamp DOWN switch ERROR LED lamp UP switch LCD (20 digits x 2 lines) Control panel part names NAME FUNCTION DESCRIPTION... - Page 18 Buzzer sounds Different buzzer sounds indicate the machine operating status. Buzzer Sound Status Beep Valid button was pressed. Beep-beep Operating an invalid button was attempted Beep-beep-beep Error occurred Beep-beep-beep-beep Cover is open: Immediately turn off power or close the cover (continuous) Buzzer can be turned ON or OFF as needed.
-
Page 19: Cutting Sequence
5. CUTTING SEQUENCE Flow of the cutting operation To make full use of machine performance, carry out the cutting job as shown in the sequence fl ow below. -
Page 20: Setup For Operation
6. SETUP FOR OPERATION How to set the paper feed tray Insert the edge of the feed tray guide at an angle below the inner locator pin at the inser- tion slot so that the green label of the feed tray guide lines up with the green label on the insertion slot (see drawing). -
Page 21: How To Set The Eject Tray
How to set the eject tray Install or replace the eject tray as shown next to match the cutting job. Cutting job & eject tray combination Installation Eject tray (standard accessory) + business card divider • Use when cutting to a business card sizes with trim margin. Eject tray (standard accessory) + business card divider + business card guide plate •... -
Page 22: How To Replace The Eject Tray
How to replace the eject tray Remove or install the eject tray as shown next to match the cutting job. Insert the upper hooks on the eject tray into the insertion slot and then press the lower prongs on the tray downward as shown. Eject tray for standard items is shown at right. -
Page 23: Installing & Removing The Rotary Blade
Installing & removing the rotary blade ■ How to install Set the rotary holding pin (2 locations) into the rotary blade unit locator hole. Securely tighten the 2 clamping pins (2 loca- tions) to clamp the rotary blade unit. Caution If the rotary blade 2 clamping pins (2 locations) are not securely tightened, paper jams and cutting defects might occur. -
Page 24: How To Set The Paper
Grip the rotary blade unit with both hands as shown and slowly raise it upwards. Caution When storing the rotary blade unit, make sure the storage location is free of sand, dust, grit and moisture that might attach to the unit. These particles can cause cutting performance to deterio- rate and shorten the service life of the rotary blade unit. - Page 25 Loosen the right and left paper guide clamp screws and move them outwards. Set the paper in the machine center as shown while watching the Paper set position adjust scale. Align the paper guides on both sides with the width of the paper and then tighten the paper guide clamp screws.
-
Page 26: Cutting The Paper
7. Cutting the paper Before you start cutting Before you start the actual cutting job, make a test cut to fi nd if there is any deviation between the cutting position (up/down direction) and printed surface. If the printed surface and cutting position don’t match then you must align the paper feed unit position. - Page 27 Turn the Paper Position Fine Adjust knob & scale and move the feed unit forwards or rearwards as needed. If the cut position has deviated upwards, then turn the knob upwards. Likewise if the cut position has deviated down- wards, then turn the knob downwards. Adjust for the deviation while using the cut po- sition scale as a guide.
-
Page 28: Before You Start Cutting
Starting the cutting Start cutting using the following sequence. Press the START/STOP switch on the con- trol panel. Pressing this switch automatically raises the paper to the paper feed position and cutting of the paper set in the feed tray can start. -
Page 29: Paper Jams And How To Handle Them
[Please!] Dispose of waste cutting paper in the hopper below the main unit are regular intervals at least once a day. (See P.27 for more information.) Warning Do not touch the feed section or put hands or fi ngers in the paper feed section while the feed tray is rising. - Page 30 If paper is jammed up on the outer side (right side of long blade) of the long blade. Remove the paper on the outer side (long blade - right side) of the long blade. If paper jam has progressed beyond the long blade (left side of long blade) If a paper jam has occurred during long blade operation and the paper has stopped...
-
Page 31: Handling The Cutting Waste Paper
Handling the cutting waste paper Always dispose of the cutting paper waste once a day after work is fi nished by using the following procedure. On days with a lot of paper cutting work, check the level of cutting waste in side the cutting waste hopper by looking in the inspection window and dispose of the cutting waste as required. -
Page 32: Error Message List And Action To Take
8. ERROR MESSAGE LIST & ACTION TO TAKE When an error occurs in this machine, the error LED lights up and an error tone sounds at the same time. An error code and error message or troubleshooting advice appear on the LCD display. After checking the error message, turn off the power switch and take measures to cancel the error. -
Page 33: Daily Care Of The Machine
9. DAILY CARE OF THE MACHINE Service the machine daily to ensure satisfactory machine operation. In particular clean the “Retard pads - Paper feed roller - Sensor” at the following intervals to maintain performance. Cleaning Location Cleaning Cycle Retard pads Once every 500 sheets Paper feed rollers Once every 1,000 sheets... -
Page 34: Cleaning The Paper Conveyor Retard Pads - Paper Feed Roller - Sensor
Cleaning the “Paper conveyor retard pads - Paper feed roller - Sensors” in the paper conveyor Always turn the power switch off when cleaning these components. ■ Cleaning the paper feed roller (Clean once every 1,000 sheets) Raise the top cover release lever and open the top cover. -
Page 35: Cutting Conditions And Making Settings
1. CUTTING CONDITIONS AND MAK ING SET TINGS This manual explains in detail how to set rotary blade cutting conditions. All operation is performed with switches on the control panel. STANDBY MODE DISPLAY for rotary blade & CUTTING CON DI TIONS (set- ting information) Standby mode All cutting/Sheet cut counter... -
Page 36: Display Mode & Setting Entry Mode Items
DISPLAY MODE & SETTING ENTRY MODE ITEMS... -
Page 37: How To Change The Cutting Format Items
How to change the cutting format items... -
Page 38: Using The Setting Entry Mode
Using the setting entry mode Setting the Cut Sheet Counter Information shown on LCD display of the Cut Sheet Counter LED display Power LED : ON , READY : OFF, ERROR: OFF Display information Display Changes Shows the status set on the Cut Sheet Counter. INOP (fi... - Page 39 SELECT CUTTING FORMAT Explains the LCD display information for selecting the cutting format. CHANGE IN DIS- DISPLAY DESCRIPTION PLAY INFO Shows the cutting format selection status. NO/YES Select the cutting format. Number changes each time you press up/down switch. Select F1 to F8 for a fi xed format, fF1 to fF8 for a free format, or sF1 to sF8 for a format without long blade cut..
- Page 40 Resetting the cutting format This screen is used to return each setting of a specifi ed format No. to its default (factory setting). LCD display for the cutting format reset screen LED display Power LED: ON , READY : OFF, ERROR: OFF Display information Display Changes Shows that this is the cutting format reset screen.
- Page 41 Selecting buzzer ON/OFF Use this screen to select whether to turn the buzzer on or off. The buzzer will then be on or off in all states regardless of the format No. LCD display for Buzzer ON/OFF screen LED display Power LED: ON , READY : OFF, ERROR: OFF Display information Display Changes...
- Page 42 Setting the mark position offset Use this screen to make the mark position offset. Correct so that the cut start position is 12 mm away from the mark position. LCD display for mark position offset LED display Power LED: ON , READY : OFF, ERROR: OFF Display information Display Changes Shows the screen for making the mark position offset setting...
-
Page 43: How To Change The Cutting Format Items
How to change the cutting format items Use this information to change the contents and settings of the currently selected format No. Requiring caution for the setting format are listed in "Cutting Format" in the appendix. Always be sure to read this before making changes. Select the paper size The paper size selection is valid when F1-F8 for fi... - Page 44 Setting the cutting length The cut length setting is valid when a fi xed format or a free format was selected. LCD display for setting the cutting length LED display Power LED: ON , READY : OFF, ERROR: OFF Display information Display Changes Shows that this is for setting the cut length (single card length) INOP (Fixed screen) Cursor is movable in the...
- Page 45 Setting the paper length The paper length setting is valid when a format without the long blade cut was selected. LCD display for paper length setting 2. Length LED display Power LED: ON , READY : OFF, ERROR: OFF Display information Display Changes Shows that this is for setting the cut length (single card length) INOP (Fixed screen) Cursor is movable in the...
- Page 46 Setting the trim length The trim length setting is valid when a cutting format having a trim length was selected. LCD display for setting the trim length LED display Power LED: ON , READY : OFF, ERROR: OFF Display information Display Changes Shows that this is the setting for the trim length.
- Page 47 Selecting the cutting reference position This setting is valid when the cutting format has a cutting reference position selectable by a mark. LCD display for selecting the cutting reference position LED display Power LED: ON , READY : OFF, ERROR: OFF Display information Display Changes Shows that this is for selecting the cutting reference position...
- Page 48 Setting the lead edge margin This setting is valid when "lead edge" was selected for the cutting reference position. LCD display for setting the margin 5. Top Space LED display Power LED: ON , READY : OFF, ERROR: OFF Display information Display Changes Shows that this is the setting for the paper edge margins.
- Page 49 Selecting the sheet (paper) thickness LCD display for selecting the sheet (paper) thickness LED display Power LED: ON , READY : OFF, ERROR: OFF Display information Display Changes Shows that this is for selecting sheet (paper) thickness INOP (Fixed screen) Shows the sheet (paper) thickness selection state.
- Page 50 Selecting the paper skew offset LCD display for paper skew offset ON/OFF LED display Power LED: ON , READY : OFF, ERROR: OFF Display information Display Changes Shows the paper skew offset select status. INOP (Fixed screen) Shows the paper skew offset ON/OFF status. Press the UP/ DOWN switch to change the display.
- Page 51 Setting the number of prints per sheet with the long blade cut This setting is valid when a free format was selected. LCD display for the setting of the number of prints per sheet with the long blade cut 8. Cutter-H Mapping LED display Power LED: ON , READY : OFF, ERROR: OFF Display information...
- Page 52 Selecting the rear edge margin cut This selection is valid when a free format was selected. LCD display for rear edge margin cut selection 9. Bottom Space LED display Power LED: ON , READY : OFF, ERROR: OFF Display information Display Changes Shows the rear edge margin cut selection INOP (Fixed screen)
-
Page 53: Key Operation Table For Each Mode
2. KEY OPERATION TABLE FOR EACH MODE... -
Page 54: Cut Marks (Cutting Reference Positions)
3. CUT MARKS (CUTTING REFERENCE POSITIONS) Cut mark specifi cations This machine can detect the cut start position (cutting reference position) on the paper by one of 2 methods. One method is the "(paper) Edge" and the other is the "Mark". Compared to detecting the edge of the paper as the cutting position reference, higher accuracy cutting can be obtained by printing cut marks in advance based on the following specifi... -
Page 55: Troubleshooting (Problem And Solution)
4. TROUBLESHOOTING (PROBLEM & SOLUTION Troubleshooting (Problems & Solutions) This section describes what to do when machine operation is incorrect or cutter quality is poor. When a possible problem occurs, fi rst check the items listed here. If checking the following points still does not fi... - Page 56 PROBLEM CHECKPOINT ACTION PAGE Jams keep occur- Is the paper set correctly? Set the paper correctly ring Are the paper guides aligned If too narrow the paper is hard to feed and if too with the paper width? wide the paper bends or twists. Set the guides too match the paper width.
-
Page 57: Static Charges On Paper
STATIC CHARGES ON PAPER Depending on the quality of paper being used, paper coming right out of a printer or printing device might sometimes carry an extremely high electrostatic charge. Using this kind of paper may cause the following types of problems. •... -
Page 58: Aftercare
5. AFTERCARE Warranty • Machine (main unit) : Guaranteed for 6 months after purchase or cutting of 500,000 (which- ever comes fi rst) sheets equivalent to fi ne A3 Wide paper as designated by our company. • Rotary blade : Guaranteed for 6 months after purchase or cutting of 100,000 sheets (which- ever comes fi... -
Page 59: Conclusion
CONCLUSION Once you fully understand the contents of this manual, we ask that you take responsibility for daily management of the machine. • Daily machine care (Periodic cleaning of the retard pads, paper feed roller, and sensors, and disposal of the paper waste inside the cutting waste hopper) •...
Need help?
Do you have a question about the CT620Exa and is the answer not in the manual?
Questions and answers