Table of Contents
Advertisement
Quick Links
Advertisement
Table of Contents

Subscribe to Our Youtube Channel
Summary of Contents for Probox PBR-500
- Page 1 ANUAL Probox PBR-500...
-
Page 2: Table Of Contents
Contents Introduction................ 3 Usage Precautions ....................... 3 Specifications ........................ 4 Recording Function ...................... 5 MultiMedia Player Function ..................6 Package Contents ......................7 Product Descriptions of Each Part ................8 1. Use as External USB HDD ..........11 1.1 Insert Hard Disk..................11 1.2 Format Built-in HDD ................ - Page 3 9.1.3. Record List ......................71 9.1.4. History List......................75 9.1.5. Torrent Download .....................76 10. FTP Server ..............79 10.1.1. Access to the PBR-500(FTP Server) by using the web-browser....80 10.1.2. Access to the PBR-500(FTP Server) by using FTP Client Program..81 11. Firmware Upgrade............83...
-
Page 4: Introduction
The party or parties who record or distribute the contents bear all the responsibilities (Civil or Criminal) direct or indirect.. * The Probox PBR-500 may not play some media files. Please check the codec types. Also it may not play or Supported codec run improperly depending on file characters or circumstance. -
Page 5: Specifications
Specifications Product Name Probox PBR-500 Main CPU RealTek RTD 1282 200Mhz processor Power 12V 3A Weight Approx. 450g (without HDD inside) Dimension & Weight 185(L) x 158(W) x 57(H) mm & Weight (g) 450 Front VFD Display Colorful VFD Display Available OS USB Device Compatible: Windows 98SE/ME/2000/XP, Mac OS 9.0 higher, Linux 2.4 higher... -
Page 6: Recording Function
Set-Top-Box, Satellite Set-Top-Box, etc which has AV-Out. Probox PBR-500 supports Composite / Component AV-IN. * The Probox PBR-500 will detect a new HDD you insert and will give you a question whether you want to do HDD format or not. -
Page 7: Multimedia Player Function
MultiMedia Player Function The Probox PBR-500 is a stand-alone, multimedia HDD (Hard Disk Drive) player that plays digital videos, music, photos and DVD files on TV and home entertainment system. You can enjoy the digital contents at home without having to burn discs or having to play it back on a DVD or CD player. -
Page 8: Package Contents
Package Contents The Probox PBR-500 package includes the below items and it may be different from the actual contents. PBR-500 Remote Controller USB Cable Manual CD AV Cable Power Adapter WiFi USB Dongle (Option) -
Page 9: Product Descriptions Of Each Part
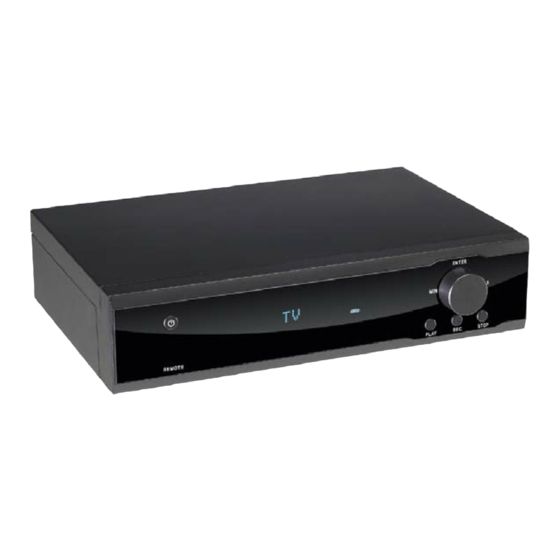
Product Descriptions of Each Part The PBR-500 has its own button at the front panel as well as with the remote controller. < Front View > ③ ④ ① ② ⑦ ⑤ ⑥ ① POWER Power ON / OFF button ②... - Page 10 Back View ⑦ USB Host Connect to an external WiFi USB dongle or storage. ⑧ USB Device Connect Probox PBR-500 to a PC by USB cable. ⑨ Cooling Fan Extract the heat air to outside ⑩ HDMI Connect HDMI Cable to TV ⑪...
- Page 11 Use as External USB HDD...
-
Page 12: Use As External Usb Hdd
1. Use as External USB HDD 1.1 Insert Hard Disk Use 3.5” SATA Hard Disk for Desktop. ① Unscrew 2-spot and open the top cover ② Connect Power and SATA connector to with pulling up the arrow direction Hard Disk. ③... -
Page 13: Format Built-In Hdd
500 will have some partitions. Insert a HDD into PBR-500 and connect it to TV and then turn on PBR-500 & TV (select AV mode). After turn the both devices, then you will have a question window on TV whether you want to do a HDD format or not. -
Page 14: Copy & Paste The Files Through Usb
1.3 Copy & Paste the files through USB PBR-500 can be an external hard disk drive in case when you connect it to a PC through USB connection and you can copy & paste the files from / to your PC to / from built-in HDD in PBR-500. -
Page 15: Windows Me
1.3.2 Windows ME 1) After connecting PBR-500 and plug power 3) After file transfer, remove PBR-500 by using cable, Windows itself will install driver remove icon at Windows right-down corner. automatically. If you don’t follow this procedure, the transferred And then, check the driver installation at files and PBR-500 may be damaged. -
Page 16: Windows 2000, Xp
1.3.3 Windows 2000, XP 3) After file transfer, remove PBR-500 by using 1) After connecting PBR-500 and plug power remove icon at Windows right-down corner. cable, Windows itself will install driver If you don’t follow this procedure, the transferred automatically. -
Page 17: Linux
(in case of NTFS HDD) Do Log-in again. above example “sda” is assumed that the PBR-500 will be detected as “sda” on your system. If not, you have to write the drive name which is detected as “USB Mass Storage”, not “sda”. -
Page 18: Mac
It can be available on Mac 9.0 higher. No need to install the installation driver at Mac OS 9.x version and the PBR-500 will be detected automatically. If the PBR-500 is detected correctly, an icon is appeared at a monitor. - Page 19 Connect to PC via Network...
-
Page 20: Connect To A Pc(S) Through Network Connection
2. Connect to a PC(s) through Network connection 2.1 Wired LAN Connection You can connect PBR-500 to a PC (PCs) for a file streaming by LAN or wireless and for using ‘Real-Time- Transcoding’ streaming. 2.1.1 Direct connection between PBR-500 & a PC. - Page 21 IP address) and press [OK] to save the configuration. ⑤ Go to the main page and select [Multimedia] icon to ⑥ Select [LAN] icon. find the connected to PBR-500 by network. ⑦ You can find the connected a PC(s) by network. ⑧ You can find the shared folder.
- Page 22 ② Select [Wired Lan Setup] => [DHCP IP (AUT)] ① At the main page, select [Setup] icon or press [Setup] button on the remote. ③ Press [OK]. ④ Now, PBR-500 get a dynamic IP address. * You can assign a specific DNS server IP address.
- Page 23 ⑤ Go to the main page and select [Multimedia] icon to ⑥ Select [LAN] icon. find the connected to PBR-500 by network. ⑦ You can find the connected a PC(s) by network. ⑧ You can find the shared folder. For more information how to make a folder shared, go to [Shared File Playback (Stream)].
-
Page 24: Wireless Connection
2.2 Wireless Connection PBR-500 supports two types of wireless structure; 1) Ad-Hoc mode & 2) Infrastructure mode. 1) Ad-Hoc Mode Direct 1:1 wireless LAN connection between a wireless PC and PBR- 2) Infrastructure Mode without having wireless Wireless LAN connection type with Access Point. - Page 25 ③ Press [OK] to modify the connection Select [▷] ④ Select Infrastructure (AP) button on the remote. ⑥ You can find the wireless Access Points and select ⑤ Select [Auto] and ress [▷] button one AP. ⑦ Double-check the selected Wireless SSID and ⑧...
- Page 26 AP. ⑪ You can see all configurations you did. ⑫ Now PBR-500 is connected to the selected AP and get the wireless signal & a dynamic IP address. ⑬ Go to the main page and select [Multimedia] icon to ⑭...
- Page 27 ⑮ You can find the connected a PC(s) by network and you can find the shared folder. Note Wireless AP (Infrastructure Mode) or Wireless Adapter (Ad-Hoc Mode) is needed for wireless connection. IEEE 802.11g wireless standard is recommended for better wireless environment. PBR-500 is compatible with IEEE 802.11g & b standard.
- Page 28 Shared File Playback (Stream)
-
Page 29: Shared File Playback (Stream)
3. Shared File Playback (Stream) After you connect PBR-500 and a PC (PCs) by LAN or Wireless, you have to set up network configurations of both a PC (PCs) and PBR-500 as well. Here, there is the information how to make a folder shared and network configuration.. - Page 30 If select ‘Obtained address automatically’, you don’t need to write a specific IP address.
-
Page 31: Windows 2000
3.2 Windows 2000 1) Select a folder which you want to share. Recommend only to use ‘Read>Allow’ at Right-click the folder and click ‘Sharing’ in pop Permissions. menu. 2) Check ‘Share this folder’ and write ‘share name’. For example, “My Movie” Make sure not to write a long ‘share name’... - Page 32 6) Check ‘User cannot change password’ and ‘Password never expires’. 9) Check ‘Use the following IP address’, and write ‘IP address’ & ‘Subnet mask’ that you want 7) Move to [Control Panel>Network and Dial-up to use. Connections], and select Properties of ‘Local For example, Area Connections’...
-
Page 33: Windows Xp
3.3 Windows XP 1) Select a folder which you want to share. 3) After that, the shared folder will be displayed Right-click the folder and click ‘Sharing and as following picture. Security’ in pop menu. 4) Move to [Settings>Control Panel> Administrative Tools>... - Page 34 7) Double click ‘Internet Protocol(TCP/IP)’ that you want to use on your computer. Move [Control Panel>Network connections], select ‘Local area 8) Check ‘Use the following IP address’, and connections’ properties by right click of mouse. write ‘IP address’ & ‘Subnet mask’ that you want to use.
- Page 35 9) At above number 8) figure, click ‘Advanced’ Check ‘Off’ and click ‘OK’ Tab. Disable ‘Internet Connection Firewall’. If you use service pack 2, refer to the following figures. Click ‘Settings’ at ‘Windows Firewall’...
-
Page 36: Windows Vista
3.4 Windows Vista Before you start “folder sharing”, you need to set up 3 items for correct Network sharing. 3.4.1 Setup of User Accounts and Family safety 2) Make sure the account is “Guest”. 1) Click Start > Settings > Control Panel > Users Accounts and Family safety 3) If the “Guest”... - Page 37 3.4.2. Disable the “Firewall” 1) Click Start > Setting > Control Panel > 2) Click at ‘Off (not recommended) Security > Windows Firewall on / off 3.4.3 Setup of Network and Sharing Center 1) . Click Start > Setting > Control Panel > 2) Select “Password Protected sharing”...
- Page 38 3) Make a folder you want to share. 4) You will get a popup “Choose people to share with” then select “Everyone (All users in this list) and press “Add” button. 5) After you register the user account, then click “Share” button.
- Page 39 Use USB Host...
-
Page 40: Use Usb Host
4. Use USB Host Note PBR-500 is not compatible with all external USB devices. With so many external USB devices available, we can not guarantee compatibility with all external devices. We do not guarantee all kinds of external USB devices. - Page 41 Connect to External AV Device...
-
Page 42: Connect To Tv Or An External Av Device
5. Connect to TV or an External AV Device 5.1 Connect Video Cable The PBR-500 supports three types of video output; “Composite, Component and HDMI” and you can connect one of these connections. ① ② ③ ① HDMI : HDMI Cable (not supplied) -
Page 43: Connect Audio Cable
5.2 Connect Audio Cable The PBR-500 supports three types of audio output; “Stereo, Coaxial, Optical”. Use audio connection that your TV or Audio set supports. Normally, TV supports stereo audio connection, and this package supplies stereo audio cable. ③ ①... - Page 44 How to Use the Remote Control?
-
Page 45: How To Use The Remote Control
6. How to use the Remote Control? 6.1 Explanations of the remote buttons. This is the explanations of the remote buttons. Record EPG program INFO Show the information of the content T.B.D (Add a function later) T.B.D (Add a function later) POWER Power On / Off the unit SETUP... - Page 46 Watch & Record TV channels AV-IN Select AV-IN source (Composite or Component) AV-OUT Select AV-OUT (TV-OUT) ZOOM Zoom video / image playback REC. LIST Go to REC. List menu and show the recorded TV channel lists AUDIO Select an audio track SUBTITLE Select a subtitle MEDIA TYPE...
-
Page 47: Initial Set-Up
7. Initial Set-up 7.1 Format HDD After you insert a used or new HDD into PBR-500 and then turn on PBR-500 for the first time, then you have the HDD format page. You should do the HDD format at PBR-500, otherwise, you can not record TV programs or AV-In. - Page 48 ⑤ Now, the HDD is formatting. Any key on the remote ⑥ Now, the HDD format is running. or front panel is not working at this moment. ⑥ Now, the HDD format is completed and has four partitions. -. Time-Shift partition / -. Record partition -.
-
Page 49: Initial Basic Setup
7.2 Initial basic setup ② [DTV Region] : Select a country name that you ① [TV Input] : Select TV-Input type want to watch Digital TV. -. Antenna : Connect antenna cable -. CATV : Connect cable TV cable. ④ [Channel Set] : Select analogue or digital TV signal. ③... -
Page 50: The Main Menu Explanations Of Probox Pbr-500
8. The Main Menu Explanations of Probox PBR-500 8.1 Record Analogue & Digital TV Channels Thanks to having a Hybrid Tuner with the PBR-500, you can watch and record TV (Analogue & Digital) channels with this menu. Direct Record / Time-Shift / EPG Record,/Time-Scheduling Record / AV-IN Record functions are available at this menu. - Page 51 ⑥ You can find the recorded lists here and play the lists. ⑤ If you want to watch the recorded TV channels then go to [REC. List] menu and select [Digital] or [Analog] menu. 8.1.2. Time-Shift Record. ② Press [Time-Shift] key on the remote then the time- ①...
- Page 52 8.1.3. EPG Record. ① At the main page, select [ TV] icon. ② Press [EPG] button on the remote and then you will have the EPG program page as the above. ③ Select a day & a program that you want to record by ④...
- Page 53 8.1.4. Time-Scheduling Record. ① At the main page, select [ TV] icon. ② Press [REC. Schedule] button on the remote and then you will have the Time-Scheduling-Record page as the above. ③ You have the time-scheduling-reocrd page as the ④ After set up the configuration, press [OK] key on the above and select &...
- Page 54 ⑦ Select one of the three menu to cancel the time- ⑧ If you want to check the status of the selected record scheduling-record. list then go to [Status] menu and then you can see the status detail. ⑧ When the time-scheduling-record is coming then it ⑨...
- Page 55 PBR-500 with a external analogue AV device. ③ Press [Record] button on the remote then it starts ④ If you want to stop the recording then press [Stop] the recording the analogue contents into the digital button on the remote.
-
Page 56: Rec. List
8.2 REC. LIST You can see the recorded lists of the analogue & digital TV channels here and playback or move, delete, rename, etc the lists. 8.2.1. Digital Recorded Lists ① At the main page, select [REC. List] icon or press ②... - Page 57 8.2.2. Analogue Recorded Lists ① At the main page, select [REC. List] icon or press ② Select [Analog] [REC. List] button on the remote. ③ You can play, delete, rename, sort, title edit, tools the ④ You can delete the selected files. files.
- Page 58 ⑦ [Set Thumbnail] : ⑧ [AB Erase] : Remove from SETA to SETB area. ⑨ [Split Title] : Divide on title into two titles. ⑨-ⓐ Now, there is a new title (TITLE4) which was divided from Title 3. ⑩ [Merge Title] : Merge two titles into one title. ⑪...
- Page 59 ⑫ [Remove Chapter Mark] : Remove the marked ⑬ [Copy to FAT32 partition] : Copy & Paste the selected chapter. file to FAT32 partition and then you can see the files at a At a PC, you can not access the partition for Recording but only can access to FAT &...
-
Page 60: Multimedia
① At the main page, select [Multimedia] icon or press sub-icons (HDD, LAN, USB) [M.MEIDA] button on the remote. If you press [Media Type] button on the remote then PBR-500 sort the file types as the below; [All Media] [Music]... -
Page 61: Setup
③ If you play a movie or photo, it provides ‘Preview’ function as the above. 8.4 Setup Set up the various configurations of Probox PBR-500. 8.4.1. TV ② [TV Input] : Select TV-Input type ① At the main page, select [Setup] icon or press Antenna : Connect antenna cable [SETUP] button on the remote. - Page 62 ⑤ [AUTO SCAN] : The Probox PBR-500 is ⑥ [MANUAL SCAN] : You can scan a channel scanning the channels automatically. manually. ⑦ [Channel Set] : You can make book-mark for the favorite channels of analogue & digital channels. 8.4.2. Audio ①...
- Page 63 8.4.3. Video ① [Aspect Ratio] : Select a proper ratio. ② [Brightness] : Adjust the brightness ③ [Contrast] : Adjust the contrast ④ [TV System] : Select a proper TV-Out 8.4.4. RECORD ① [Quality] : Select a recording quality that you want. ②...
- Page 64 ③ [Permanent Timeshift] : If [On] then the timeshift ④ [REC Device] : Select a storage method that function will be running automatically if you press [Pause] you want to save the recorded channels into. button on the remote while you are watching a TV channel.
- Page 65 ★ Very Important ★ If you want to use PVR function (Direct Record TV channels, Time-Shift, EPG), you have to do a HDD format in the Probox PBR-500 (Not at a PC). ③ [HDD Format] : Do a HDD format for using PVR ④...
- Page 66 ⑦ Multimedia has tow partitions; FAT / NTFS. ⑧ Now, the HDD is formatting. Any key on the remote -. FAT : Read & Write or front panel is not working at this moment. -. NTFS : Read only. If you want to move files from a folder to Multimedia folder or use [Remote Web-Access], then you can only move or copy &...
- Page 67 8.4.7. MISC ① [Slide Show Timing] : Set the slide time interval. ② [Transition Effect] : Give the slide-show effect. ③ [Background Music] : Select the background music playback path.
- Page 68 Remote Web-Access & Torrent Downloading...
-
Page 69: Remote Web-Access & Torrent Download
Download the Torrent files to the PBR-500 directly. In order to use this function, you need to connect PBR-500 to a router and do [Port Forwarding / Port number : 80] or [DMZ Server] at the router. For more information how to setup the [Port Forwarding], refer to the manual of the router you are using. -
Page 70: System Info
-. This Computer : the current time information of the PC you are using now. -. User Input : if you want to change the current time of the PBR-500, then click this and set up of the time and press [Apply]... -
Page 71: File List
9.1.2. File List [File List] : Access to the HDD inside of the Probox PBR-500 and get the files from PBR-500 to the local PC you are using. For example, if you click [HDD1] folder then you can access to the HDD1 folder as below;... -
Page 72: Record List
9.1.3. Record List You can do the time-scheduling recording at this menu from Analogue or DTV or AV-IN. [New] : Add a new time-scheduling recording list [Delete] : delete the scheduled list. If you press [New] button then you will have the below mene. - Page 73 Source : the first [Source] is to select AV-IN or Analogue or DTV. Source : If you select [TV] which means the analogue TV then you will have the analogue channels as the above.
- Page 74 Source : If you select [DTV] which means the digital TV then you will have the analogue channels as the above. -. Start Time : Set up the recording time year / month / date / hour / minutes -. Length : set up the recording time length hour / minutes...
- Page 75 -. Repeat : set up the repeat period such as once, everyday, every-Fri, etc as the above. -. Device : Select a device to record the channels. The default is HDD inside. -. Quality : Select a quality of the recording. After you set up the all configurations for the recording, then press [Submit] button.
-
Page 76: History List
Then now, you have a new requested recording list as the below; 9.1.4. History List Check the recording result at this menu. The below status says, the recording was succeed.(OK). -
Page 77: Torrent Download
9.1.5. Torrent Download [Notice] : In order to download the Torrent files into the PBR-500, you should turn off the PBR-500 by [Stand-By Mode] power off. If you power off the PBR-500 by [Normal Power Off] then Torrent downloading is not running. - Page 78 [Step 4] : Click the [Browse] button at the Web-Access page as below and add the Torrent file And the press [Start] button. [Step 4] : After you turn off the PBR-500 by [Stand-By Mode], the PBR-500 will start the Torrent file downloading.
- Page 79 FTP Server...
-
Page 80: Ftp Server
You can use the PBR-500 as a FTP server and can upload / download the files. In order to use this function, you need to connect the PBR-500 to a router and set up [Port Forwarding / Port number : 21] or [DMZ Server] at the router. For more information how to setup the [Port Forwarding], refer to the manual of the router you are using. -
Page 81: Access To The Pbr-500(Ftp Server) By Using The Web-Browser
10.1.1. Access to the PBR-500(FTP Server) by using the web-browser. [Step 1] : Open the Web-Browser [Step 2] : type [ftp://id:password@FTP server IP address]. i.g ftp://admin:admin@123.345.567.123 [Step 3] : Then you can access to the PBR-500 folders and download or upload the files. -
Page 82: Access To The Pbr-500(Ftp Server) By Using Ftp Client Program
[Step 3] : Put the request date / Host : FTP Server IP address / Username / Password (The default port is “21”, so no need to put if you did not indicate a special port number) [Step 4] : Now, your computer has been successfully accessed to the PBR-500 (FTP Server). - Page 83 Firmware Upgrade...
-
Page 84: Firmware Upgrade
[Step 2] Save the new firmware at the Root Directory of the HDD inside or the external USB storage. [Step 3] : While you are pressing [Stop] button at the front panel of the PBR-500, unplug & plug the power cable.
Need help?
Do you have a question about the PBR-500 and is the answer not in the manual?
Questions and answers