Table of Contents
Advertisement
Quick Links
Advertisement
Table of Contents

Related Manuals for BYO Guitar Strat

Summary of Contents for BYO Guitar Strat
- Page 1 Strat Guitar Kit Assembly Instructions WWW.byoguitar.com...
- Page 2 Strat Guitar Instructions California requires the following notice: WARNING Some dust created by power sanding, sawing, grinding, drilling, and other construction activities contains chemicals known to the State of California to cause cancer, birth defects or other reproductive harm. Some examples of these chemicals are: •...
- Page 3 Strat Guitar Instructions Warning Always wear safety glasses or goggles when operating equipment. Everyday glasses or reading glasses are not safety glasses. Be certain the safety glasses you wear meet the appropriate standards of the American National Standards Institute (ANSI). Because there are various ways to cut and join wood, you can make substitutions for the methods stated in this manual.
-
Page 4: Table Of Contents
Strat Guitar Instructions Contents Contents ..............................- 3 - Introduction ............................- 4 - Material Check List ........................- 6 - Additional tools/materials required: ..................- 8 - Mockup and Fit Check ........................- 10 - Check Guitar Body & Neck mounting holes ................- 10 - 2.1.1... -
Page 5: Introduction
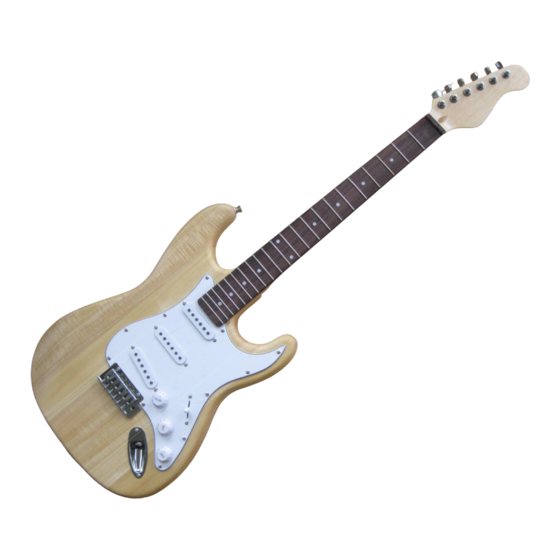
– natural, solid color and possibly a design that will make your guitar unique. We suggest you do some research to determine your finish preferences. Procuring the required finishing materials, TIP: Get some finishing ideas by visiting BYOGuitar.com and BYO Guitar on Facebook (http://www.byoguitar.com/gallery/index.html) especially if they have to be ordered, will allow expedite your guitar project. - Page 6 These instructions assume you are familiar with the anatomy of a guitar. Refer to Figure 1 for many of the terms used in the assembly of your guitar. Fig 1 Major Components in Your Strat Guitar Kit - 5 -...
-
Page 7: Material Check List
Strat Guitar Instructions 1.1 Material Check List In preparation for the building of your guitar, all required material should be checked both for type and quantity. Use the following check list to ensure all piece parts are included. If you customized your order (ex. - Page 8 Strat Guitar Instructions Tremolo 6 mounting screws, 1” Tremlo Claw Tremelo parts Springs, 3 Screws, 2 Tremolo arm Neck 1 Plate Plate/mounting 1 plastic base materials 4 screws, 1 ” 6 Tuning Pegs Tuning Pegs 6 Washers 6 Nuts 6 screws, 3/8”...
-
Page 9: Additional Tools/Materials Required
Strat Guitar Instructions 2 Holders 2 plastic Strap Pins washers 2 screws, 1” 1 String String Tees “Nut”/guide and Nut 2 Tees 2 sleeves 2 screws, ½” 1 pick Strings 6 strings Output Cable Other 2 Allen wrenches 1.2 Additional tools/materials required: Drill &... - Page 10 Section 5 – Setup: in this section, adjustments are made to your guitar such as the height of the pickups. Again, we thank you for your purchase of a BYO Guitar and we look forward to seeing pictures of your unique guitar! We also look forward to providing you with the guitar for your next project from our Custom Shop where you can select the wood for the body and neck as well as customizing all of the other components.
-
Page 11: Mockup And Fit Check
Strat Guitar Instructions Mockup and Fit Check The following steps will ensure that the body, neck, tuners, pickups, etc. are properly aligned and that all screw holes have been drilled. 2.1 Check Guitar Body & Neck mounting holes 1. Check Neck pocket on the Body for pre-drilled (4) mounting holes (Figure 2.1). -
Page 12: Mount The Neck On The Body
Strat Guitar Instructions Measure the amount of the mounting screw that extends up into the neck pocket, and mark your drill bit. c. Double check the depth by holding the marked drill bit to the side of the neck and be certain the drill won’t go through the fingerboard. -
Page 13: Fit Check & Alignment Of The Pick Guard (With Controls Mounted) And Bridge (Items 2 & 4 On Materials List)
Strat Guitar Instructions Figure 2.3.2 Nut to Bridge mounting holes Now you must locate the bridge laterally (side-to-side). 1. Place the bridge on the instrument and align it with the Bridge cavity and your length mark for the mounting screws. -
Page 14: Check Tremolo Claw Alignment And Fit Check (Item #5 On Material List)
Strat Guitar Instructions b. Align the mounting holes in the neck and body. c. Fasten the Neck & Body with 4 #7 x 1 ” screws (…see TIP above: use soap or wax on threads), ensuring alignment of the Body, Pick Guard and Neck. -
Page 15: Check Tuner Alignment
Strat Guitar Instructions TIP… holes may need to be widened with a peghead reamer or a round file. DO NOT widen the holes too much—the tuners should fit snug 2. If the holes are pre-drilled, skip to 2.10. a. Mark the rear Strap Pin hole so that it is centered on the Neck/Bridge and the forward Pin on the most forward point on the top of the Body (see Figure 1.0). -
Page 16: Finish
Strat Guitar Instructions Finish Before starting the finish make sure all holes are drilled for any remaining hardware (pickguard, jack plate, strap pins etc). 3.1 The Body Sand the body and neck with #220 dry sandpaper, followed by #320. If you are applying a finish other than natural, you should consider using a grain filler on the body. -
Page 17: Assembly
Strat Guitar Instructions 4 Assembly After your finish has been applied and thoroughly dried, we can now assemble your guitar. In this section we will permanently install all of the components and solder the wiring for the bridge and pick guard pickup. -
Page 18: Neck Installation
Strat Guitar Instructions 3. Seat the Pick Guard around the Bridge – gently pulling the wires to ensure they are through the tunnels. 4. As done in the Mock up (Section 2.4), carefully move the Pick Guard so that it is aligned with the Neck Pocket, the contours of the body and the Bridge –... -
Page 19: Tremolo Claw, Spring And Ground Installation
Strat Guitar Instructions 4.1.5 Tremolo Claw, spring and ground installation The tremolo claw, spring and grounding wire are installed in the back of the Body: 1. Install the claw in the front of the tremolo cavity; screw in only about a ¼ of the way (Figure 4.1.5). -
Page 20: Installing The Tuners
Strat Guitar Instructions 4.3 Installing the tuners Each tuner consists of the tuner, washer, and a threaded bushing. The tuners are attached to the 3/8” headstock with wood screws (refer to Section 2.8). 1. Place the six tuners into the holes on the back of the headstock. -
Page 21: Tremolo Claw Adjustment
Strat Guitar Instructions 8. Install the Tremolo arm (item #6 on the material list) in the Bridge. 4.5 Tremolo Claw Adjustment After the tremolo and strings are installed, you can get your guitar close to in tune. As the strings tighten, the rear of the bridge will lift off the guitar body. -
Page 22: Setup
Strat Guitar Instructions 5 Setup In this section, we will address the initial setup for: 1. Adjusting the Neck (Truss Rod); 2. Adjusting the String Action (string height); 3. Adjusting the Pickup heights; 4. Adjusting the Intonation. These adjustments will provide preliminary settings from which you can fine tune the sounds to your individual playing style. -
Page 23: String Lubrication
Strat Guitar Instructions more relief.) First, check your tuning. Put a capo at the first fret and press the sixth string at the last fret. With a feeler gauge, check the gap between the bottom of the string and the top of the 8th fret—you should have ”... -
Page 24: Bridge Saddle Adjustment
Strat Guitar Instructions Repeat the procedure for the remaining 5 strings. 5.4 Bridge Saddle Adjustment This will adjust the height of the strings over the 12 fret. Minor adjustments are made by raising or lowering the bridge. This adjustment is a matter of personal preference. There should be a gradual increase in height from the first string to the sixth string. -
Page 25: Other Hints
Strat Guitar Instructions 2. Turn the volume & tone controls to maximum. 3. Check tuning. Check each string at the 12th fret, harmonic to fretted note (make sure you are depressing the string evenly to the fret, not the fingerboard). - Page 26 Strat Guitar Instructions Custom Shop Products: Custom Shop Products: Custom Shop Products: Custom Shop Products: Made in the U.S.A. Made in the U.S.A. Made in the U.S.A. Made in the U.S.A. - 25 -...
Need help?
Do you have a question about the Strat and is the answer not in the manual?
Questions and answers